8 tips for Adobe Illustrator help you design faster
Adobe Illustrator is the best graphic design program for both professionals and amateurs. The good news for newbies is that Illustrator has many ways to simplify even automating complex tasks. Here are some Adobe Illustrator tips and tricks that make design faster than ever.
Adobe Illustrator is the best graphic design program for both professionals and amateurs. But as a powerful tool, new users may feel overwhelmed and don't know where to start. The good news for newbies is that Illustrator has many ways to simplify even automating complex tasks. Here are some Adobe Illustrator tips and tricks that make design faster than ever.
1. Use multiple strokes for an object
Adobe Illustrator is a program built from vector objects with strokes (borders) and colors (center color). If you're new to Illustrator, you may not notice that objects have a lot of stoke and color.
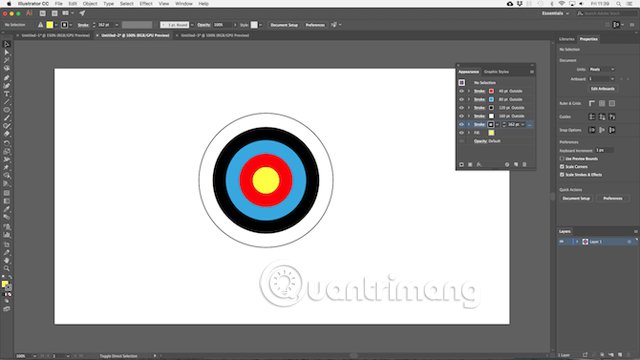
The image of the target table seems to be drawn from many different objects combined, but in fact it is just an object. A circle with yellow and strokes red, blue, black, white and black.
Here's how to do it:

Draw a circle diameter of 80px, fill it with yellow and draw a red stroke with a width of 40pt. Then, click on the line with the dot below the Stroke option and set Aligin Stroke to Aligin Stroke to Outside .
Now open the Appearance panel on the Window menu, or press Shift + F6 , select the stroke and click on Duplicate Selected Item . This will create a copy of the existing stroke. Select the newly created stroke and fill in blue (note, the original stroke above) and size it to 80pt.

Then repeat the process, change the color and add 40pt to the size of the following stroke each time. For the final stroke, just add 2pt.
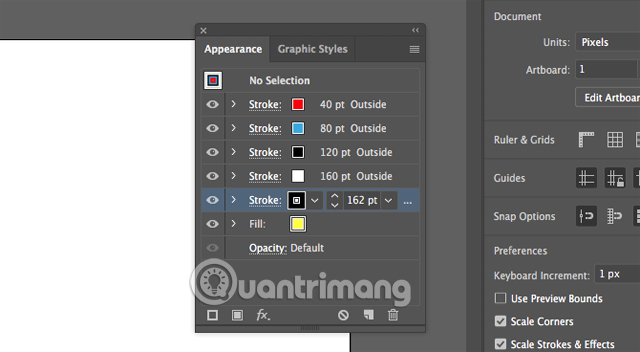
There are many options such as combining gradient and texture colors, adding effects, changing opacity of elements and many other options. Alternatively, you can change the location of these strokes and see the effect it creates by dragging and dropping it into place.
Once you get used to this feature, you will find this way much easier than combining multiple components to create relatively simple objects.
2. Easily create patterns and textures
Creating patterns and textures can be time consuming if you do them manually. However, you can accomplish the same job in a few seconds if you know how to use the Blend Tool .
With the Blend Tool , you can repeat objects at an arbitrary number of times, transform them into other shapes or create smooth gradients between different colors.

To get started, draw two objects on the canvas, then double-click the Blend Blend l to open the options dialog. Set Spacing to Specified Steps and enter the number of repetitions.
Some other options are Specified Distance , set the distance between the object to repeat in pixels and Smooth Color to be used to smooth the blending between the two colors.
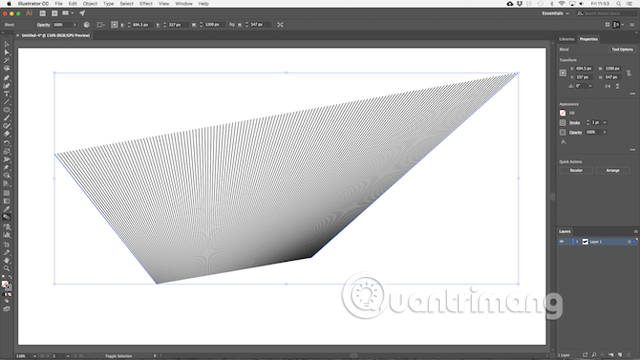
Then click on OK , when selecting Blend Tool , click on the first object on the canvas, followed by the second object. The spaces are automatically filled.
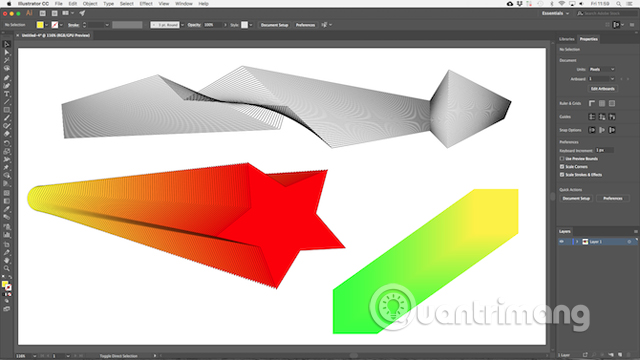
Blend Tool works with most objects, including text and only a few exceptions.
3. Hide the parts of the object with the mask
Learning to use masks will save you a lot of time. Clipping mask is a 'masked' shape for the object below, only content that is directly placed under the new mask is displayed, everything is hidden. The mask allows you to quickly combine patterns, textures, and gradients with shapes and text very quickly and in a non-destructive way.
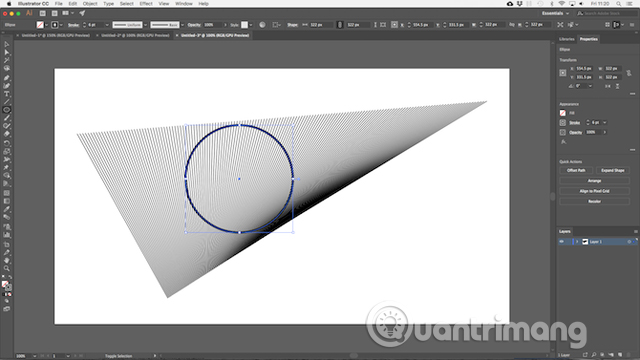
To do this, open the object you want to mask with the canvas. Now drag the new image to the top of it, making sure it stays in the same layer.
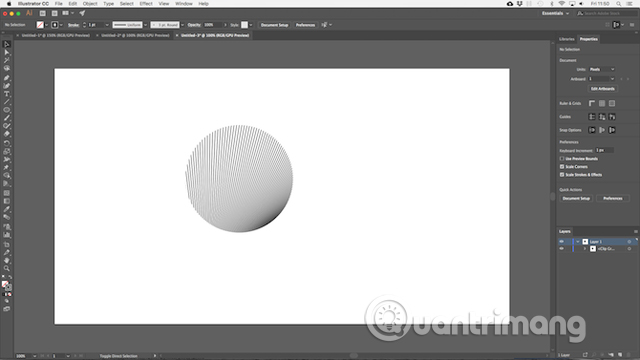
Use the Selection Tool to select both objects. In the Quick Actions panel on the right, click Make Clipping Mask . You can reposition the mask or the masked object at any time.
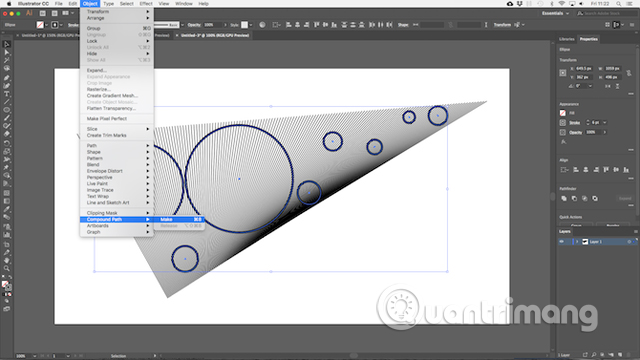
To create a mask for multiple objects, you need to combine them first. Select all the objects you want to mask, then go to Object> Compound Path> Make to turn them into a single shape.
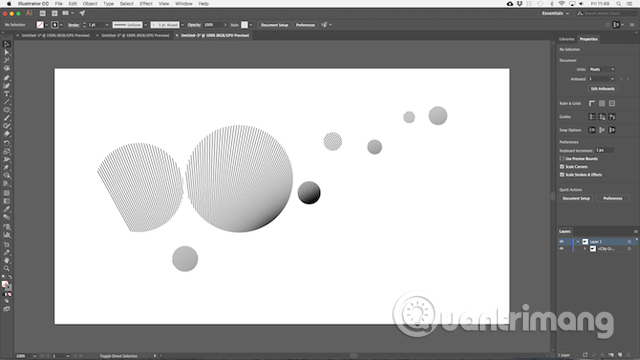
Select the new compound path plus the object below it and select the Quick Actions panel, choose Make Clipping Mask.
4. How to create complex shapes
Shaping is an integral part of the Illustrator experience, but creating complex shapes always requires a lot of technology. However, this problem has been solved with a recently added tool called the Shape Builder Tool .
The Shape Builder Tool will split a group of selected objects into sections. You just need to select the parts you want to have in your image and the part you want to leave.
Here is a simple example that makes it easier to imagine.
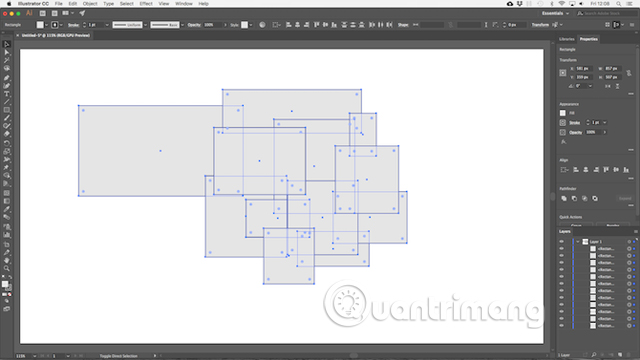
Draw some shapes, then use the Selection Tool to select all of them, then click on the Shape Builder Tool .
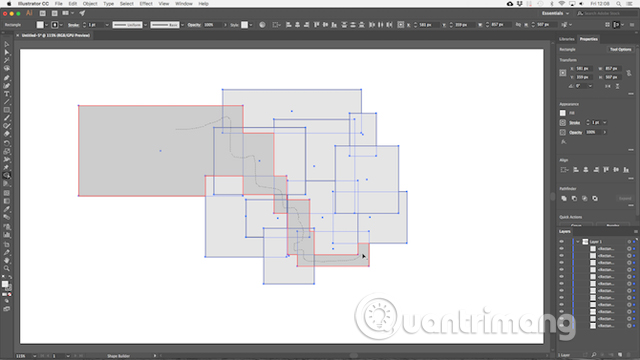
As you move the mouse pointer over the selected object, you will see individual parts with ghosting. Then just click and drag the part you want to add to your shape. You can create complex shapes from any group by clicking and dragging the image to use.
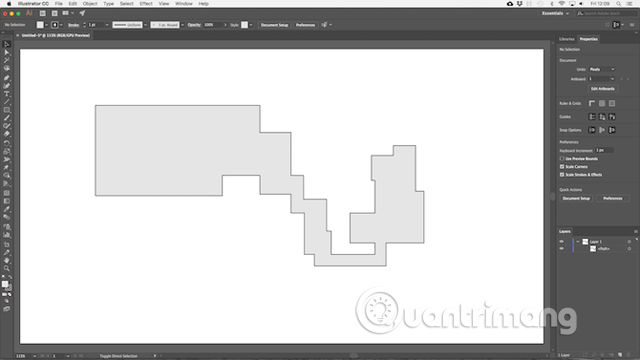
To cancel unused sections, hold Alt and click inside them.
5. Draw free shapes
A way to draw shapes or objects faster is to draw them freely.
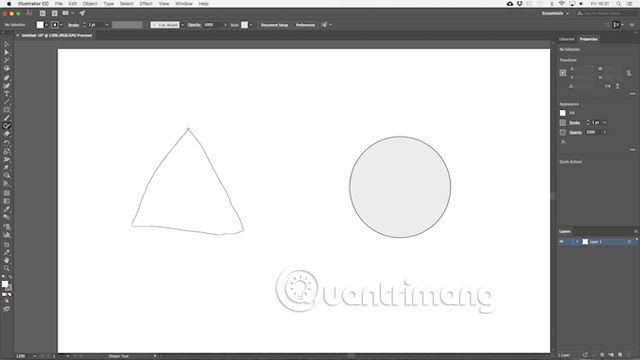
The Shaper Tool will identify specific brush strokes. So you only need to draw a rough shape of a circle, rectangle, triangle, etc. with a mouse or pen and Illustator will convert them into perfect shapes.
Not only that, the Shaper Tool is also used to combine shapes together using doodles:
- You can doodle inside a shape to remove its background.
- Draw the doodles inside, then drag over the stroke to completely remove that shape.
- Or doodle inside, then draw a continuous line through connected shapes to combine them into a single shape.
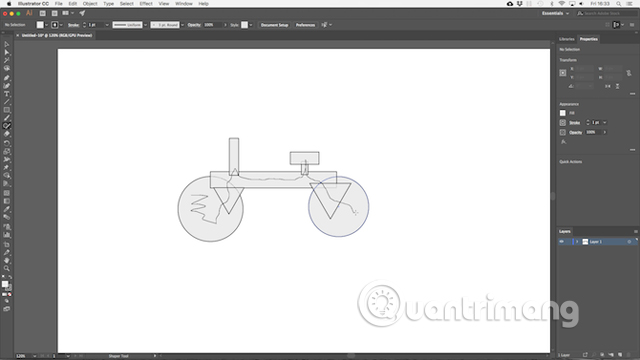
Although the Shaper Tool is less accurate than other options, it is an effective tool for creating fast and quality sketches, especially when used with graphics tablets.
6. Draw inside the shape
Illustrator has three Draw modes consisting of tools used to draw on canvas space. You can see these tools by pressing the small button below the toolbar on the left side of the screen.
The default setting is Draw Normal , which is used to draw anywhere in the canvas.
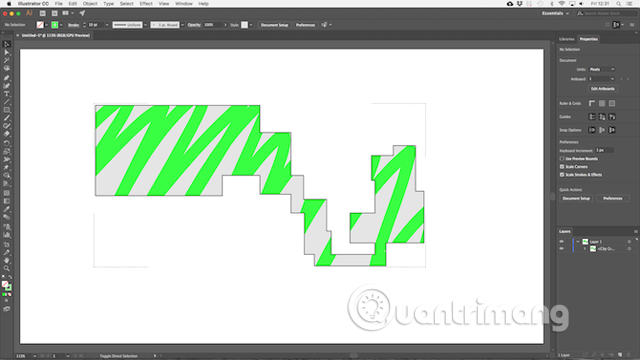
Select an object and set Draw mode to Draw Inside to draw inside of the object. This is an effective and useful mask shortcut when working with small icons, buttons and details.
The Draw Outside option offers the opposite effect and allows users to split and protect certain parts of the image without worrying about reordering layers.
7. Select the object with the same attribute
If you want to reduce half of the stroke point of a specific object or change the color to a lighter color, you'll use the Selection tool to select all the objects you want to edit and change them.
However, for large or complex documents, finding all objects with the same color, stroke size, etc. is not easy and you may miss something.
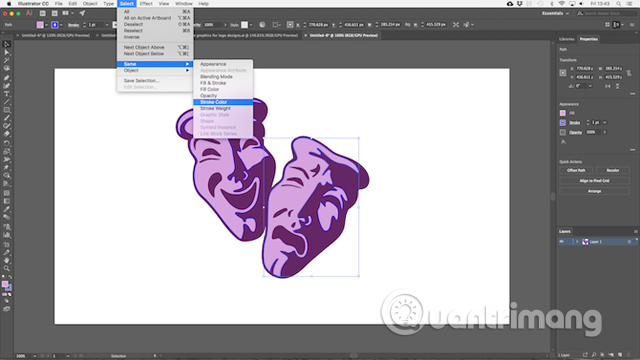
Thankfully, you don't have to do this manually, just select the Same option, it will do the job for you.
Select a search object, then go to Select > Same and select the search property like Fill Color , Stroke Weight , Blending Mode or some other options. Then all objects with the same attribute will be selected.
8. Quick color conversion
When you want to change the colors of all objects in one image with a single color, you can do it quickly with the Recolor Artwork tool.
First, select the object you want to change the color to as a single object or use the Same option above to select multiple objects with the same background and stroke colors. Alternatively, you can press Ctrl + A or Cmd + A to select all.
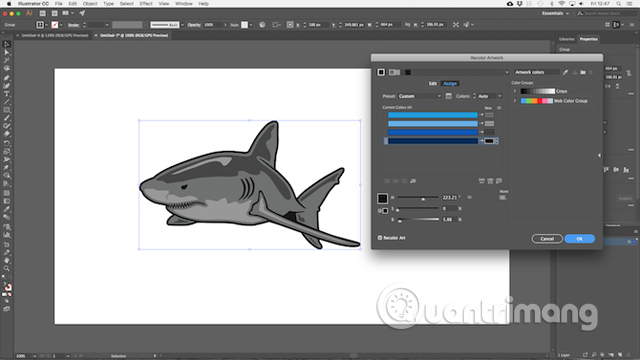
Next, click the Recolor Artwork button in the Options Bar bar at the top of the screen. The colors of the selected objects will be displayed in Current Colors . Double-click the box below New to select a new color.
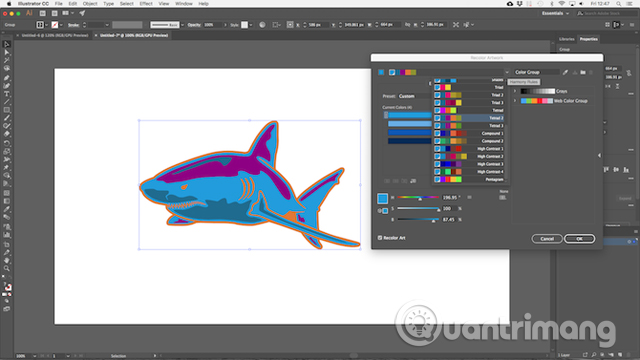
If you are creating a logo, web artwork or similar, click on the Harmony Rules drop-down menu at the top of the window to see a set of color schemes that are pre-ordered based on your current choices. The color will be updated in real time, so keep pressing until you find the right color.
Hopefully these tips and tricks will help you work more efficiently and start using for all design projects such as creating logos for business card designs, etc.
See more:
- Common Adobe Illustrator shortcuts
- How to open AI file without Adobe Illustrator
- Alternative graphic editing software for Illustrator
Discover more
Adobe Illustrator Adobe Illustrator tips graphic design faster design tipsShare by
Marvin FryYou should read it
- What is Adobe Illustrator? Learn Adobe Illustrator for what
- Common Adobe Illustrator shortcuts
- Align in Adobe Illustrator
- Getting to know Adobe Illustrator
- How to draw basic shapes in Adobe Illustrator
- The Quiet Details That Make a Sports Betting Platform Feel Reliable
- Instructions on creating toy set images with ChatGPT AI
- How are AI agents changing the journalism industry?
- Professional logo design software
- 10 tools to help you promote your creative ability effectively
- 9 tools to create professional Visual Content