Do not allow copying, editing in Word
Do not allow copying, editing in Word - You want to share your documents and Word documents for everyone to refer but do not want people to copy or edit documents..
You want to share your Word documents and documents for everyone to refer to but do not want people to copy or edit those Word documents and documents. To prevent Word documents from being copied or edited and still able to view the content in Word, you can set a password to protect Word documents.
Article instructions on how to set up for copying, editing content in Word.
Word 2007
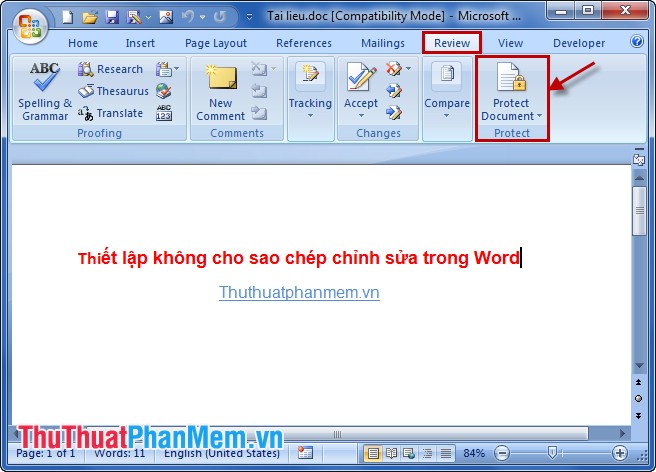
Step 1: Open the Word file you want to set not to be copied or edited. In Word interface, select Review -> Protect Document -> Restrict Formatting and Editing .
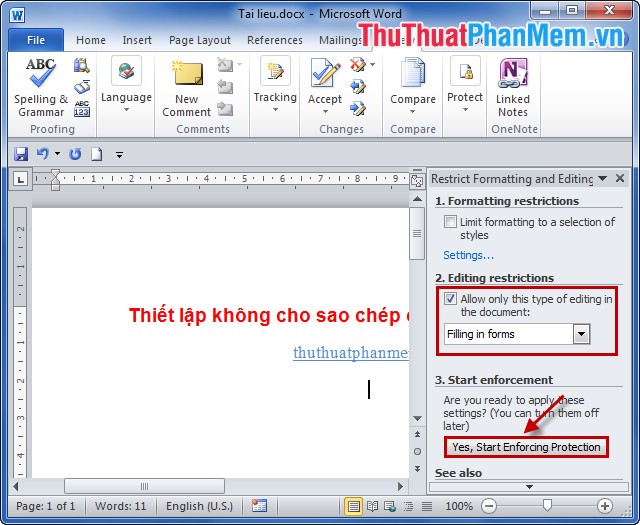
Step 2: Appear Restrict Formatting and Editing the right Word, you tick the Allow only this type of editting in the document and select Filling in forms in the selection box below then click Yes, Start Enforcing Protection .

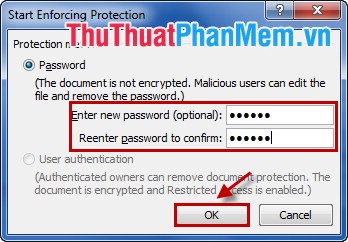
Step 3: The Start Enforcing Protection dialog box appears, enter the password in the Enter new password and retype the password in the Reenter password to confirm . Then click OK . So your Word file cannot be edited or copied.

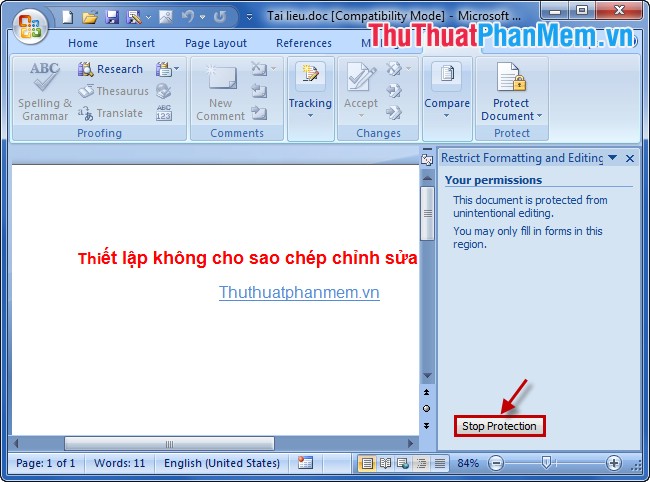
Note: To remove the password, follow these steps:
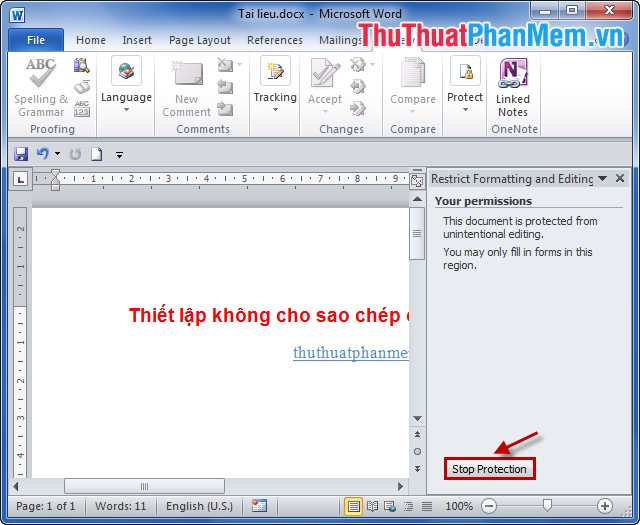
1. Open the document to remove and select Review -> Protect Document -> Restrict Formatting and Editing .
2. In Restrict Formatting and Editing on the right side of Word, select Stop Protection and re-enter the password you have set.
Word 2010
Step 1: Open the Word file you want to set not to be copied or edited. In Word interface, select Review -> Restrict Editing .

Step 2: Appear Restrict Formatting and Editing the right Word, you tick the Allow only this type of editting in the document and select Filling in forms in the selection box below then click Yes, Start Enforcing Protection .
Step 3: The Start Enforcing Protection dialog box appears, enter the password in the Enter new password and retype the password in the Reenter password to confirm . Then click OK . So your Word file cannot be edited or copied.
Note: To remove the password, follow these steps:
1. Open the document to remove and select Review -> Protect Document -> Restrict Formatting and Editing .
2. In Restrict Formatting and Editing on the right side of Word, select Stop Protection and re-enter the password you have set.
From now on, you know how to set a password to protect word documents from being copied or edited. Good luck!