How to use the Clipboard copying tool in Microsoft Word?
Instructions on how to use the Clipboard copying tool in Microsof Word in the most specific way
Table of Contents
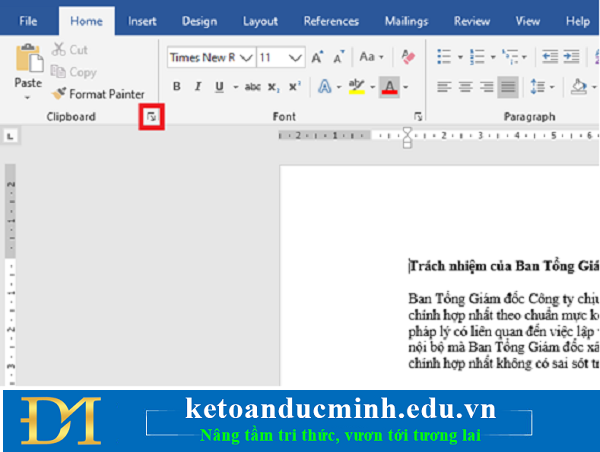
Step 1:
In your Word file, select the Home tab on the ribbon toolbar. Then click the arrow key in the lower right corner of the Clipboard item.
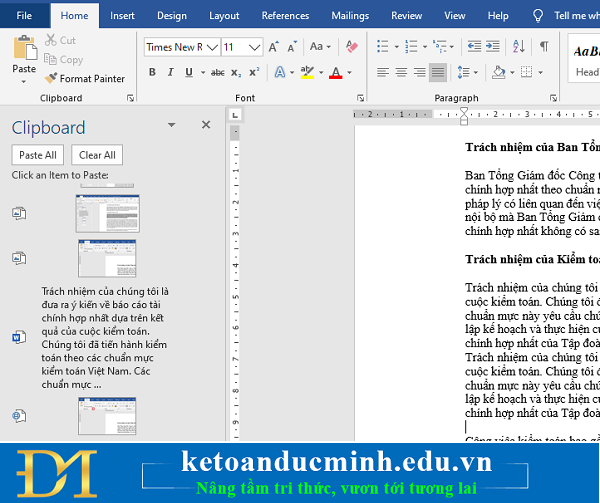
Step 2:
At this time, the Clipboard window appears. Each time a user copies content in a Word document, including text, images, charts, diagrams, etc., it will appear in the Clipboard list.
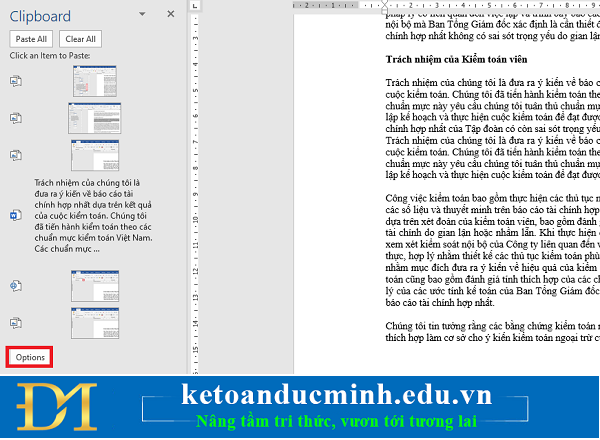
Step 3:
To paste the content into the editor interface, we just need to select the location to insert and then click the corresponding content on the Clipboard list. Or you can click the location you want to insert, then right-click the content and select Paste. Here you can also press Delete to delete content from the Clipboard list.

Step 4:
If you want to customize the Clipboard tool, click the Options button at the bottom of this window. The scroll bar shows editing options including:
Show Office Clipboard Automatically: Display Clipboard automatically when copying.
Show Office Clipboard When Ctrl + C Pressed Twice: automatically displays Clipboard when pressing Ctrl + C.
Collect Without Showing Office Clipboard: automatically copy to Clipboard without displaying Clipboard list.
Show Office Clipboard Icon on Taskbar: Display the Clipboard icon on the Clipboard system tray is enabled. By default this option is enabled.
Show Status Near Taskbar When Copying: displays a notification when copying text to the Clipboard. Options are also enabled by default.
Thus, this article has guided you how to use Clipboard copying tool in Microsoft Word. Hope the article will be helpful to you in the process of working.
Was this article helpful?
Your feedback helps us improve.
Related Articles
 How to use the Clipboard Master to save files and documents to the Clipboard5 minutes read
 How to use Office Clipboard speeds up copying on Word4 minutes read
 Clipboard History: An extremely useful but often 'forgotten' feature on Windows4 minutes read
 How to pin text and images to the Windows 10 Clipboard History3 minutes read
 This is the new borderless Clipboard of Windows 103 minutes read
 How to fix font errors when copying from PDF to Word4 minutes read
Reader Comments 0
Sign in with email or Google to join the discussion.