Detailed instructions for mail merge in Word 2010, 2013, 2016

Mail merge in Word helps users create a series of invitations, announcements, or personalized documents without having to enter each information manually. This feature is especially useful when drafting administrative documents, surveys, or contracts.

In this article, TipsMake will guide you how to do it on popular versions of Word.

Table of contents:
1. How to do it on Word 2007 - 2019
2. How to do it on Word 2003

How to Mail Merge in Microsoft Word

First, you need to have an available original word file to insert information into.

For Word 2007 - 2019

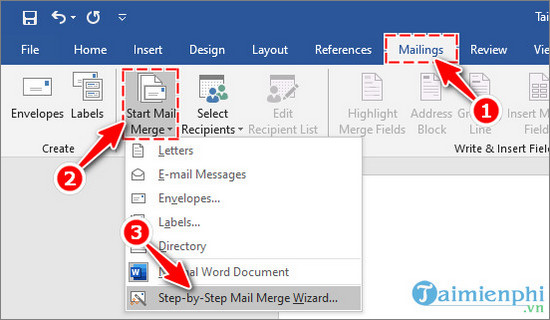
Step 1: Click on the  Mailings tab , select  Start Mail Merge  then select the Step by Step Mail Merge Wizard function 

images 1 of Detailed instructions for mail merge in Word 2010, 2013, 2016
Images 1 of Detailed instructions for mail merge in Word 2010, 2013, 2016

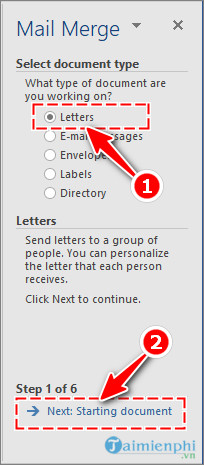
Step 2: Select  Letters  and click  Next .

images 2 of Detailed instructions for mail merge in Word 2010, 2013, 2016
Images 2 of Detailed instructions for mail merge in Word 2010, 2013, 2016

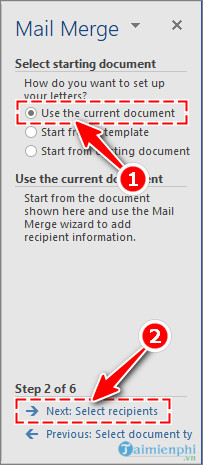
Step 3: Select Use the current document then click Next .

images 3 of Detailed instructions for mail merge in Word 2010, 2013, 2016
Images 3 of Detailed instructions for mail merge in Word 2010, 2013, 2016

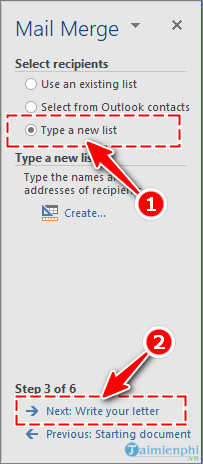
Step 4: Select  Type a new list  to create a new list, then click  Next .

images 4 of Detailed instructions for mail merge in Word 2010, 2013, 2016
Images 4 of Detailed instructions for mail merge in Word 2010, 2013, 2016

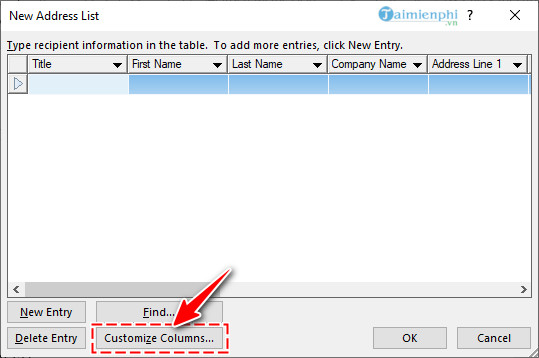
Step 5: The dialog box to create list fields appears, click the  Customize Columns… button  to delete, add or edit the names of available fields as you like.

images 5 of Detailed instructions for mail merge in Word 2010, 2013, 2016
Images 5 of Detailed instructions for mail merge in Word 2010, 2013, 2016

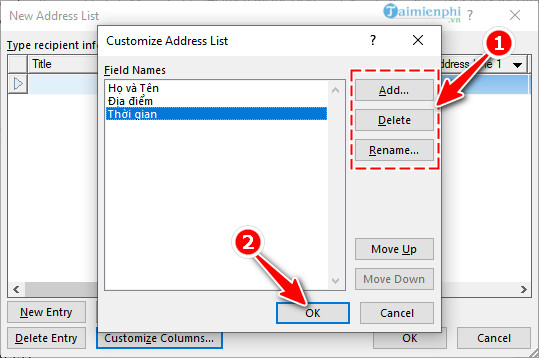
Step 6: Select the field to delete and click the  Delete button  to delete it (click Yes to confirm), click  Rename … to change the field name as you like.

images 6 of Detailed instructions for mail merge in Word 2010, 2013, 2016
Images 6 of Detailed instructions for mail merge in Word 2010, 2013, 2016

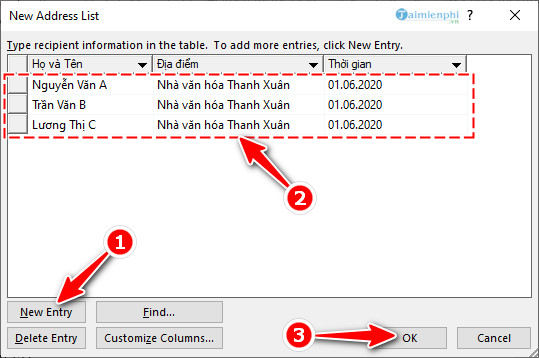
Step 7: After completing the field names, you proceed to enter the corresponding data. Click  New Entry  to add a new line. When finished entering, click  OK  to finish.

images 7 of Detailed instructions for mail merge in Word 2010, 2013, 2016
Images 7 of Detailed instructions for mail merge in Word 2010, 2013, 2016

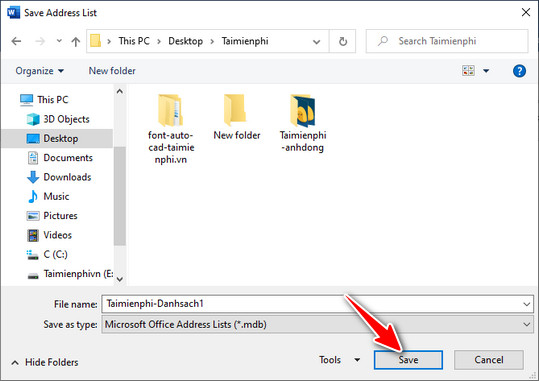
Step 8: Select where to save the list file and name it, then click  Save .

images 8 of Detailed instructions for mail merge in Word 2010, 2013, 2016
Images 8 of Detailed instructions for mail merge in Word 2010, 2013, 2016

Step 9: Click  OK

images 9 of Detailed instructions for mail merge in Word 2010, 2013, 2016
Images 9 of Detailed instructions for mail merge in Word 2010, 2013, 2016

Step 10: Click  Next  to continue

images 10 of Detailed instructions for mail merge in Word 2010, 2013, 2016
Images 10 of Detailed instructions for mail merge in Word 2010, 2013, 2016

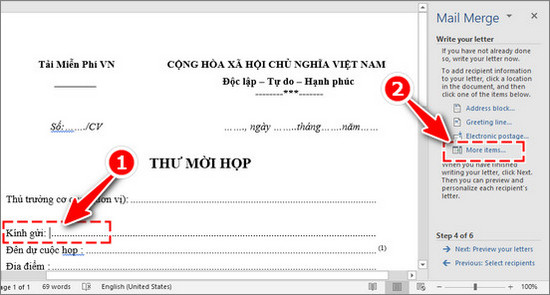
Step 11: Place the mouse cursor where you need to insert the information and click  More items…

images 11 of Detailed instructions for mail merge in Word 2010, 2013, 2016
Images 11 of Detailed instructions for mail merge in Word 2010, 2013, 2016

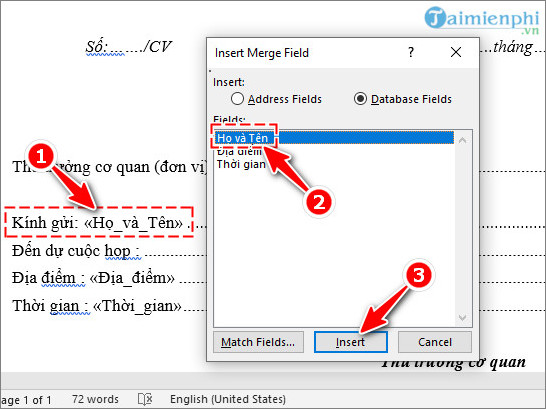
Step 12: Select the corresponding field, then press  Insert . Repeat this step until all fields in the list have been inserted.

images 12 of Detailed instructions for mail merge in Word 2010, 2013, 2016
Images 12 of Detailed instructions for mail merge in Word 2010, 2013, 2016

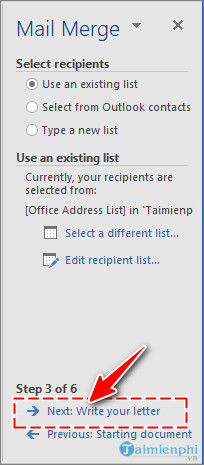
Step 13: Click  Next  to see the results

images 13 of Detailed instructions for mail merge in Word 2010, 2013, 2016
Images 13 of Detailed instructions for mail merge in Word 2010, 2013, 2016

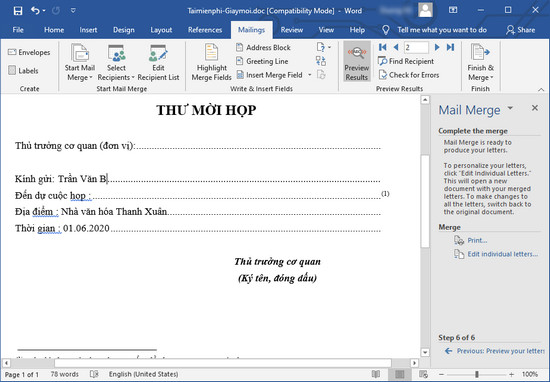
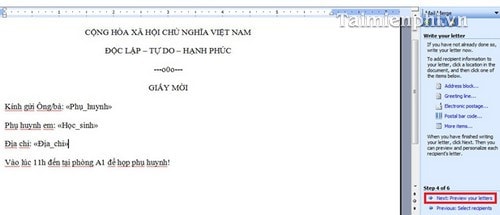
And here is the result:

images 14 of Detailed instructions for mail merge in Word 2010, 2013, 2016
Images 14 of Detailed instructions for mail merge in Word 2010, 2013, 2016

For Word 2003

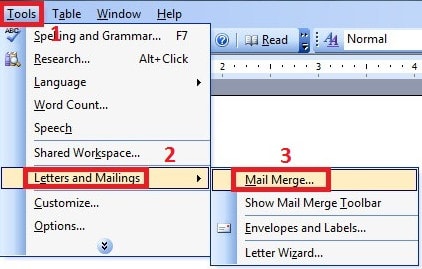
Step 1: Open the word file that needs mail merging, then go to Tools , select Letters and Mailings and then select Mail Merge…

images 15 of Detailed instructions for mail merge in Word 2010, 2013, 2016
Images 15 of Detailed instructions for mail merge in Word 2010, 2013, 2016

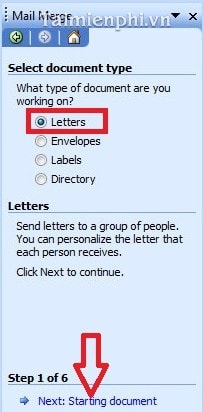
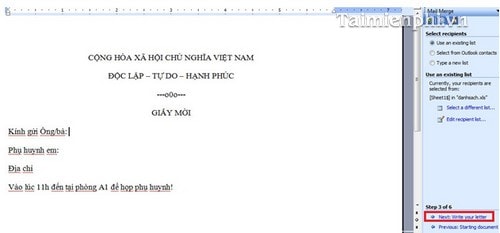
Step 2: In the Mail Merge frame that appears on the right side of the word page, select Letters and click Next .

images 16 of Detailed instructions for mail merge in Word 2010, 2013, 2016
Images 16 of Detailed instructions for mail merge in Word 2010, 2013, 2016

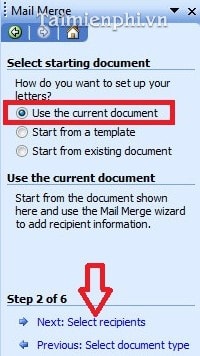
Step 3: Select Use the current document and continue to click Next .

images 17 of Detailed instructions for mail merge in Word 2010, 2013, 2016
Images 17 of Detailed instructions for mail merge in Word 2010, 2013, 2016

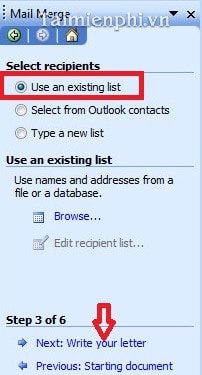
Step 4: Select Use an existing list and click Next . You can also create a new list by clicking the Type a new list option .

images 18 of Detailed instructions for mail merge in Word 2010, 2013, 2016
Images 18 of Detailed instructions for mail merge in Word 2010, 2013, 2016

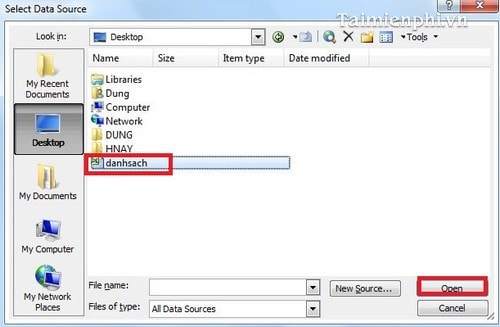
Step 5: Select the path to the Excel file to insert, click to select the file and then click Open.

images 19 of Detailed instructions for mail merge in Word 2010, 2013, 2016
Images 19 of Detailed instructions for mail merge in Word 2010, 2013, 2016

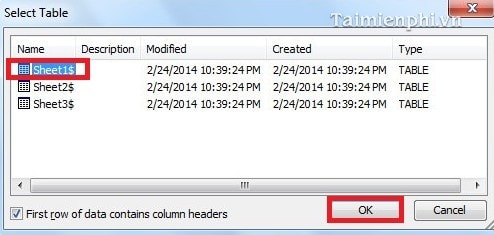
Step 6: Select the correct sheet containing the data and click OK.

images 20 of Detailed instructions for mail merge in Word 2010, 2013, 2016
Images 20 of Detailed instructions for mail merge in Word 2010, 2013, 2016

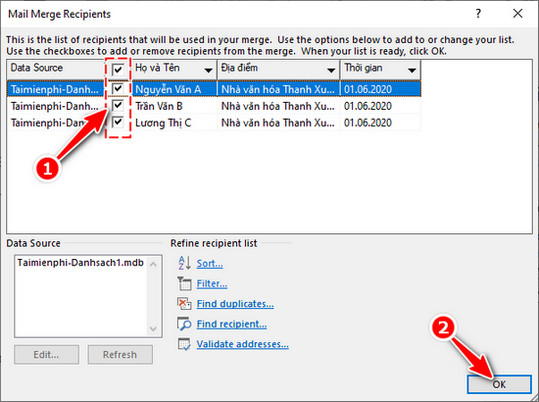
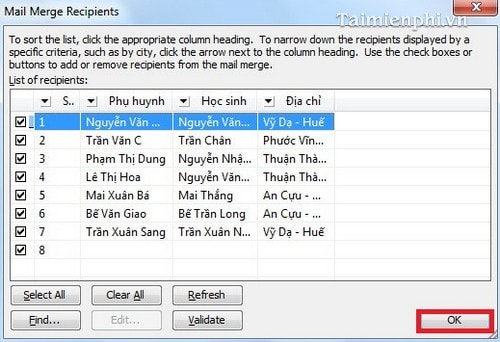
Step 7: If you want to insert all rows, click Select All . If you want to insert selectively, uncheck the rows of data you don't want to insert, then click OK .

images 21 of Detailed instructions for mail merge in Word 2010, 2013, 2016
Images 21 of Detailed instructions for mail merge in Word 2010, 2013, 2016

Step 8: Continue clicking Next

images 22 of Detailed instructions for mail merge in Word 2010, 2013, 2016
Images 22 of Detailed instructions for mail merge in Word 2010, 2013, 2016

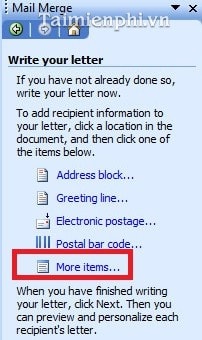
Step 9: Place the mouse cursor at the position where you want to insert data, then click More Items…

images 23 of Detailed instructions for mail merge in Word 2010, 2013, 2016
Images 23 of Detailed instructions for mail merge in Word 2010, 2013, 2016

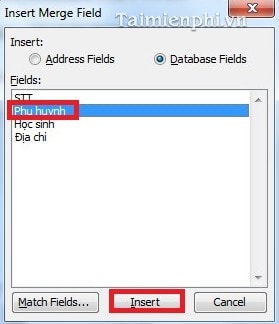
Step 10: The Insert Merge Field window appears , select the correct data field to insert and click Insert to insert. Click Close to close the window.

images 24 of Detailed instructions for mail merge in Word 2010, 2013, 2016
Images 24 of Detailed instructions for mail merge in Word 2010, 2013, 2016

Step 11: Repeat the above step until you have inserted all the desired data fields. Then click Next to see the results.

images 25 of Detailed instructions for mail merge in Word 2010, 2013, 2016
Images 25 of Detailed instructions for mail merge in Word 2010, 2013, 2016

Step 12: Click Next .

images 26 of Detailed instructions for mail merge in Word 2010, 2013, 2016
Images 26 of Detailed instructions for mail merge in Word 2010, 2013, 2016

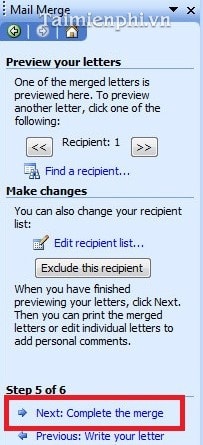
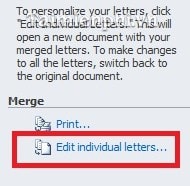
Step 13: Click Edit individual letters… to see the entire list after merging.
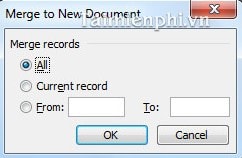
images 27 of Detailed instructions for mail merge in Word 2010, 2013, 2016
Images 27 of Detailed instructions for mail merge in Word 2010, 2013, 2016

Step 14: Select All

images 28 of Detailed instructions for mail merge in Word 2010, 2013, 2016
Images 28 of Detailed instructions for mail merge in Word 2010, 2013, 2016

Step 15: You can also save this list by pressing Ctrl + S , then choose where to save, enter a file name and press Save to save.

images 29 of Detailed instructions for mail merge in Word 2010, 2013, 2016
Images 29 of Detailed instructions for mail merge in Word 2010, 2013, 2016

In this article, we have guided you in detail how to mail merge in Word 2010, 2013, 2016, helping you quickly create invitations, thank you letters, contracts with just a few simple steps. Thanks to that, you can save time when working with many recipients without having to enter each information manually.

Also, if you have problems when editing, you can refer to useful tips such as how to fix font errors when mail merging in Word or edit data lists in Excel to make mail merging more effective. These tricks will help you work faster and more accurately in Word.

4 | 1 Vote
« PREV : PRODUCT function in...
MATCH function in... : NEXT »