Connect Windows 7 to the iSCSI SAN server
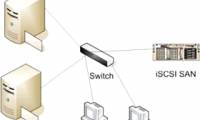
iSCSI (Small Computer System Interface Internet) is an IP-based network storage standard used to connect data storage devices.
ISCSI (Small Computer System Interface Internet) is an IP-based network storage standard used to connect data storage devices. By containing the SCSI command on the IP network, iSCSI is used to store data transmitted over the network and manage remote data.
If you have created and operated an iSCSI SAN server and created an iSCSI shared drive on the SAN server (that iSCSI drive has not been formatted with any operating system), please do the following to connect Connect Windows 7 system to iSCSI SAN server.
If you have created and operated an iSCSI SAN server and created an iSCSI shared drive on the SAN server (that iSCSI drive has not been formatted with any operating system), please do the following to connect Connect Windows 7 system to iSCSI SAN server.

If you haven't created an iSCSI SAN server, look here.
ISCSI configuration in Windows 7
First you need to start the iSCSI Initiator service installed by default on Windows 7. You can access this service in two ways:
Method 1: Access via Control Panel.
Open the Control Panel window, in the address bar, click on All Control Panel Items , then click on Administrative Tools (Figure 1).
Start the iSCSI Initiator service here.
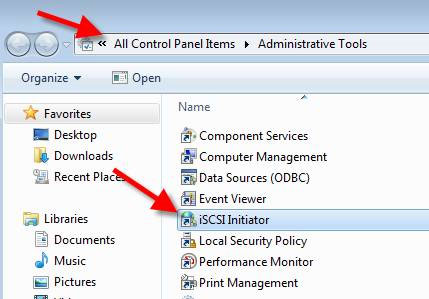
Figure 1: Launch iSCSI Initiator from Control Panel or Administrative Tools
of Windows 7.
of Windows 7.
Method 2: Launch iSCSI via the path.
All you need to do is go to the Start menu, then enter iscsicpl.exe in the search box and press Enter .
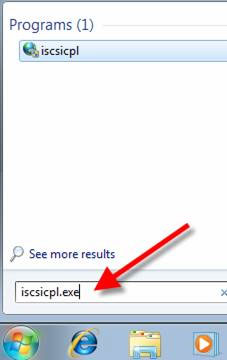
Figure 2: Launch the iSCSI control version from the command line.
You will then see a message like the one shown in Figure 3 (indicating that the Microsoft iSCSI service has not been started yet. This service needs to be started to correctly perform iSCSI functions), when you see this message, click Go to the Yes button to launch this service now (and the service will also launch every time you boot the system in the next time), then you will see the iSCSI Initiator Properties dialog box as shown in Figure 4.
Note: If this is the first time you launch an iSCSI-related application, the message in Figure 3 will appear.
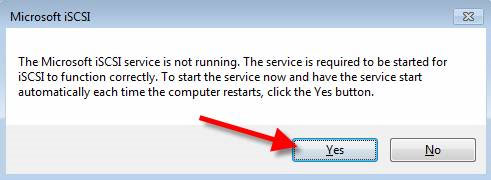
Figure 3: Launching the iSCSI Initiator service.
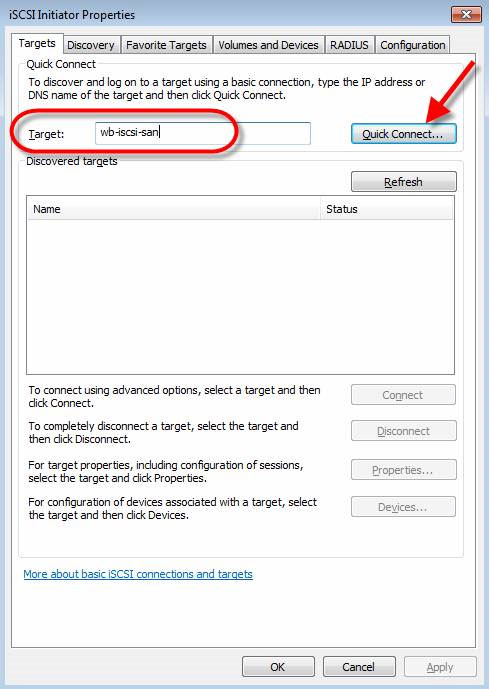
Figure 4: The iSCSI Initiator configuration window.
Now what to do is connect the iSCSI Initiator service to the target iSCSI server. In this example, the destination server is the OpenFiler virtual machine that uses the virtual structure vPhere .
Enter the domain name or destination iSCSI server IP address. In this example we will enter wb-iscsi-san .
Next you will be asked to choose a destination server among the target servers found to make the connection. Suppose the destination server is WB-iSCSI-WINDOWS ( Windows only).
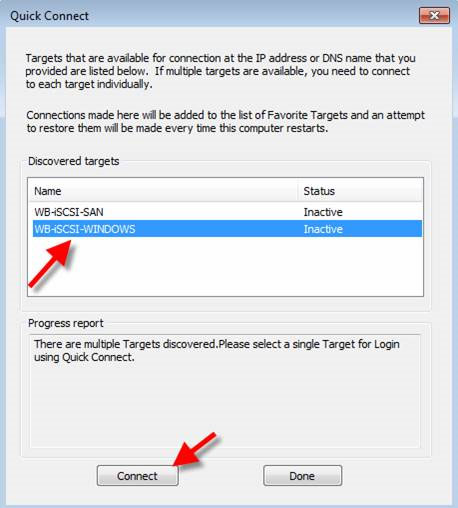
Figure 5: Connecting to iSCSI Target.
Once selected and click Connect , the iSCSI SAN drive will be added to Windows. Then click Done . You need to check the connections required in the iSCSI Initiator (Figure 6).
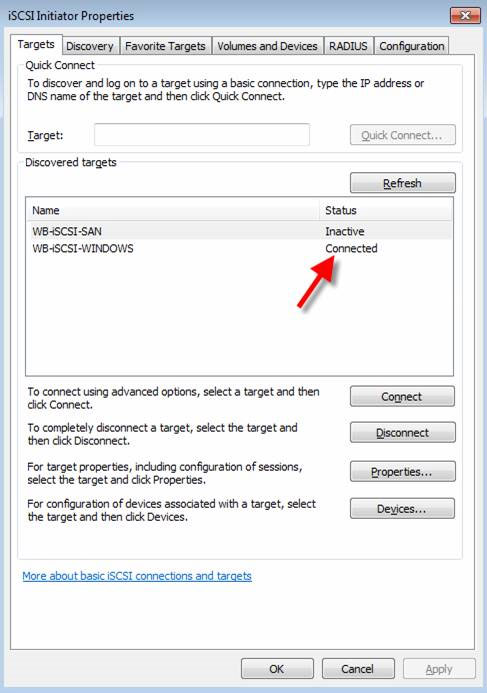
Figure 6: Performing successful connection to Windows iSCSI SAN.
To ensure that the iSCSI SAN drive has been added, go to the Volumes and Devices tab and click the Auto Configure button. This will help the iSCSI drive become more interactive.
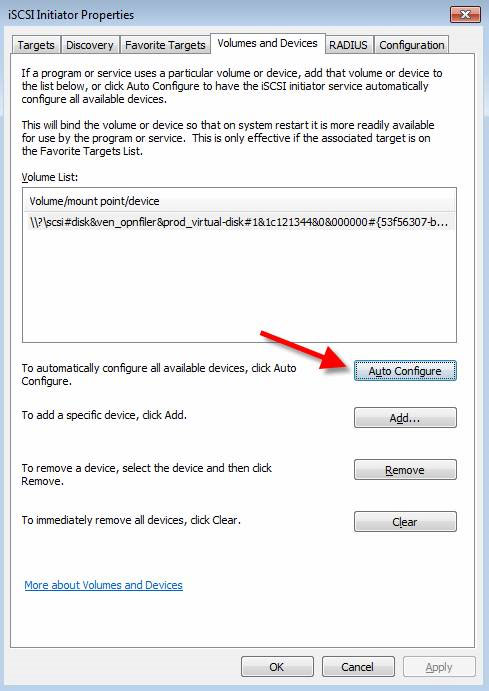
Figure 7: Connecting the iSCSI device to the server.
Done click OK to close the iSCSI Initiator Properties dialog box.
Next go to Computer Management and select Disk Management .
If this is the first time running the iSCSI Initiator service (of the Windows system), you will see a new disk. You will be asked to activate the drive before you can use it (Figure 8).
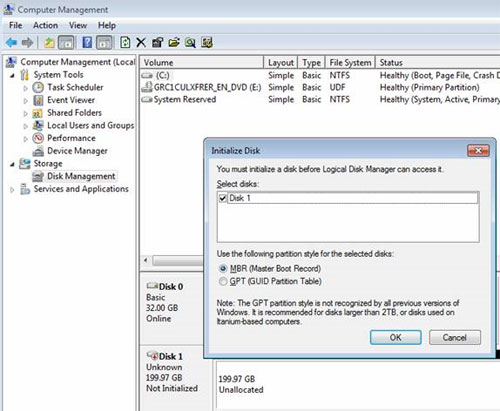
Figure 8: Click OK to activate the newly found drive.
Now, after accessing Storage Manager, you will see the newly created drive (in this article named Disk 1).
In Figure 9 you can see that the drive is now online ( Online ) but it is still in the Unallocated state.
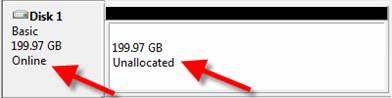
Figure 9: New drive has not been split.
Next, what you need to do is right-click the Unallocated area and select New Simple Volume .
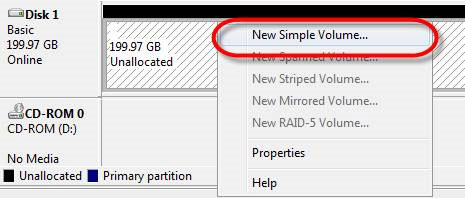
Figure 10: Create a new Simple Volume.
You will then see the New Simple Volume Wizard appear as shown in Figure 11.
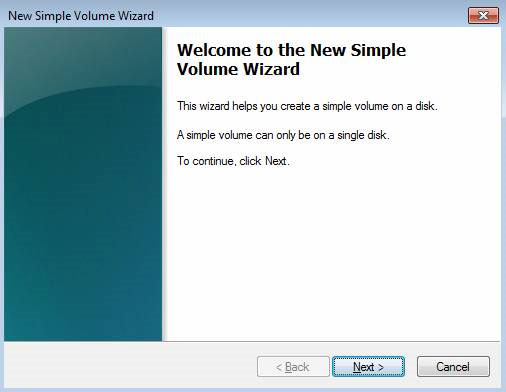
Figure 11: New Simple Volume Wizard.
In this Wizard, you must specify the size and enter a name for Simple Volume.
If you only create a Simple Disk drive, use up the available space for this drive. As in this example is 200GB.
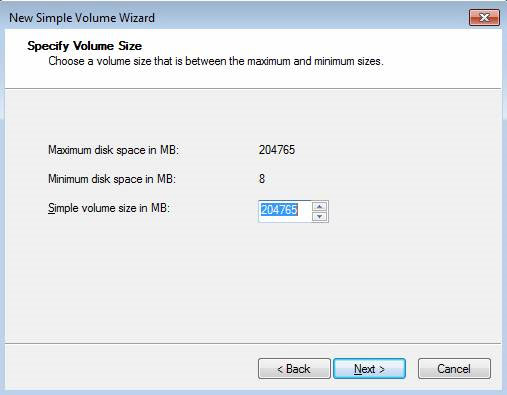
Figure 12: Determine the size of the new Simple Volume.
Next enter the name and choose the format for this drive (Figures 13 and 14).
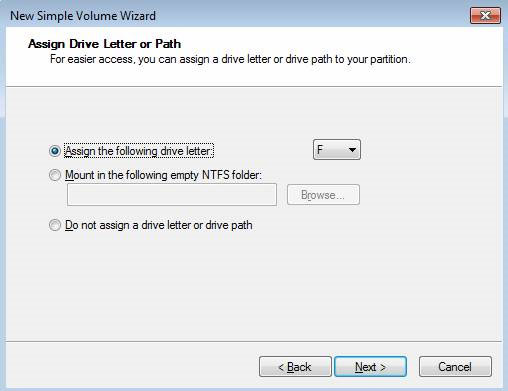
Figure 13: Enter the label for the drive.
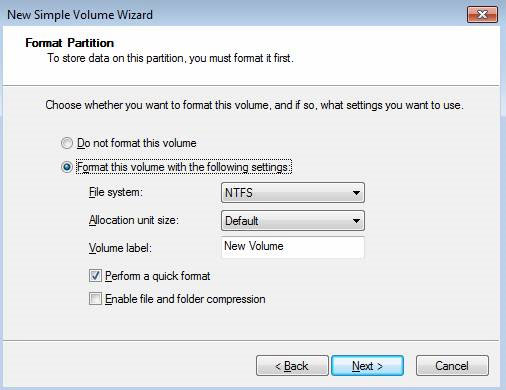
Figure 14: Select the format.
You will then see the completion screen asking you to confirm the task you want to perform. If you have made the correct configuration, click on the Finish button.
Now the previous Unallocated drive has been formatted and you will see its status changed to Healthy in NTFS format.
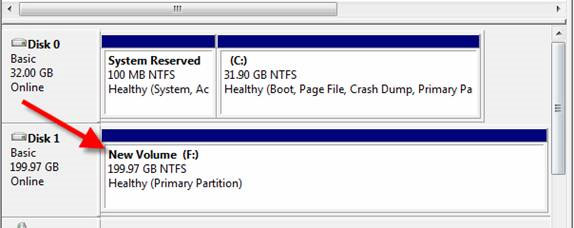
Figure 15: The new Simple Volume drive has been created.
Then this new drive will be displayed in My Computer.
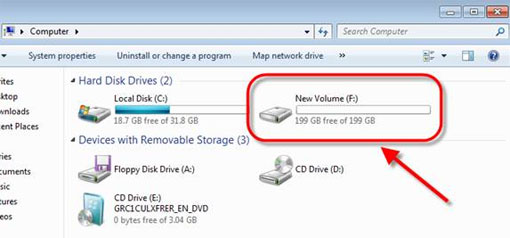
Figure 16: The new drive is displayed in the My Computer window.
If the newly created drive appears in the My Computer window, it means that the new drive creation process was successful, which also means that Windows 7 has connected to the iSCSI server. In particular, we have connected the system to a completely free OpenFiler SAN. With features integrated on the SAN, Windows (and many other Windows devices connected to the SAN), you'll now get a lot of support at work.
Was this article helpful?
Your feedback helps us improve.
Related Articles
 What is Windows iSCSI Initiator? How to access this tool?8 minutes read
 How to connect Windows Server 2008 and Windows Vista to iSCSI server (Part 1)10 minutes read
 How to install iSCSI Target on Windows Server 20193 minutes read
 Instructions for installing iSCSI SAN server in Hyper-V7 minutes read
 Use Web browser to connect FTP Server3 minutes read
 How to connect to an FTP Server from Windows Explorer?3 minutes read
Reader Comments 0
Sign in with email or Google to join the discussion.