How do Private Network and Public Network on Windows differ?
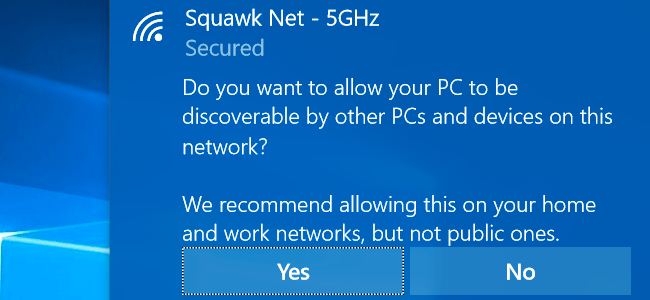
Windows allows users to set up each network to connect to, either Private or Public. When accessing a new network connection, Windows will ask if you want your computer to be found by other devices that have the same Wi-Fi connection as you based on setting up Public Network and Private Network.
This option helps Windows know the type of network connection you are using, thereby giving the correct settings and one of the most important settings is security.
1. Public and Private networks
On Private network systems, Windows allows network detection features. Other devices can see your Windows computer on the network, so you can share files easily and some other features. Also Windows' Homegroup feature for sharing files, . among computers is also enabled.
Public network system, maybe a network of a certain cafe. Windows will not allow computers or other devices to find your device. Even if you have enabled HomeGroup, this feature will also not work on a public network to ensure the privacy and security of users' data.
Understandably, Windows "assumes" that Private Network is a reliable connection to share files or allow computers with the same network to work together, and Public Network (public network). plus) only for network access, not for any other shared purpose.
2. How to convert from Public to Private or Private to Public?
Usually the first time you connect to a network, Windows will ask if you want your computer to be detected by other computers on the same network. If you select Yes, Windows will set up the network as Private. If you select No, Windows will set up your network as Public. You can check whether your network is Public or Private in the Network and Sharing Center window on the Control Panel.
On Windows 7, you can click on the link under the network name in the right pane and set up the network as Home Network, Work Network or Public Network .
Home Network is a private network (Private network), Work Network is also a private network (Private network) but on Work Network only the detection feature is enabled and Homegroup sharing feature is not.

On Windows 10, to switch networks to Public or Private you use the Settings menu.
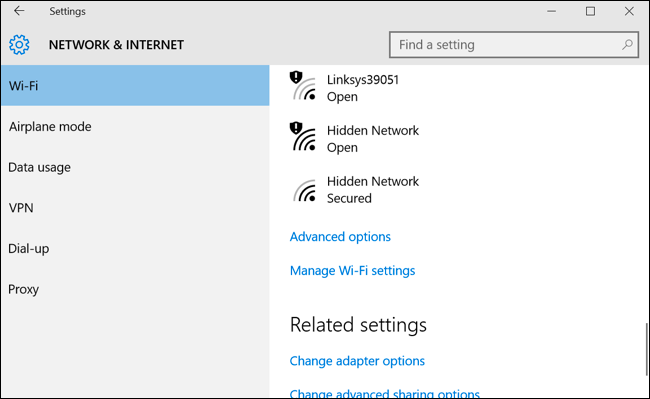
If you are using a Wifi connection, first connect to the Wifi network you want to change. Then open the Settings menu, select Network & Internet , select Wifi , scroll down and click Advanced options.
If you are using an Ethernet network connection, first connect to the network. Next open the Settings menu, then select Network & Internet , then select Ethernet and click on the Ethernet network name you connect.
The settings window that appears for both Wi-Fi and wired networks is the same, select ON in Make this PC discoverable to set to Private network, and switch to OFF to set up Public network (network public ).
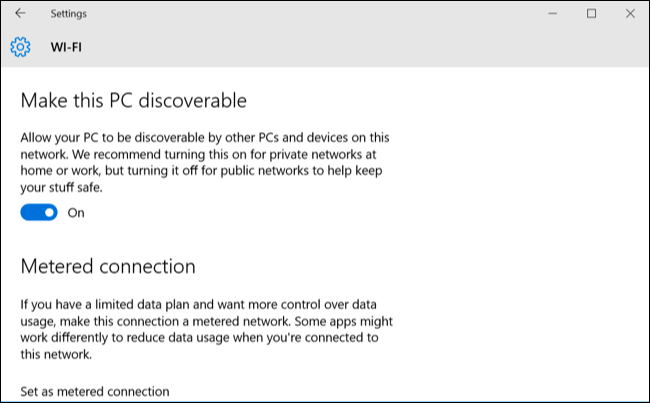
If you are familiar with Control Panel, you will be a bit confused when using the Settings menu. Instead of displaying Private network or Public network , on Settings, it is displayed as " discoverable" . However, although the display name is different, they are exactly the same. Settings after being applied on Settings will also be changed on the Control Panel.
3. How to customize the Discovery setting and Firewall (firewall)?
Windows 10 simplifies much more options on the Settings menu. However, more advanced options in the Control Panel will still help you in certain situations.
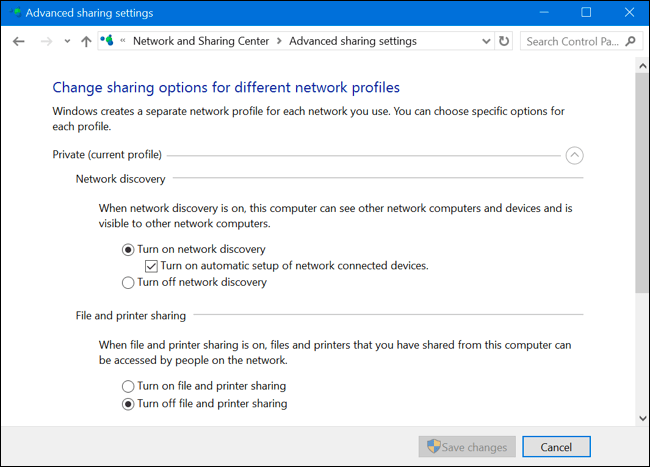
To adjust Discovery settings (first detected), first open Control Panel , then under Network and Internet section, select View network status and tasks and then click Change advanced sharing settings . Here you can adjust network detection, file sharing and Homegroup settings for Public Network and Private Network.
You can even enable Discovery on Public Network, or disable the Discovery feature on Private Network.
By default, the File and Printer Sharing option is disabled on Public and Private Network, but you can enable this feature on Public Network or Private Network or both.
Windows Firewall also has some settings for Private and Public Network. On the Control Panel, click System and Security, and then click Windows Firewall to configure the options built into the Firewall.
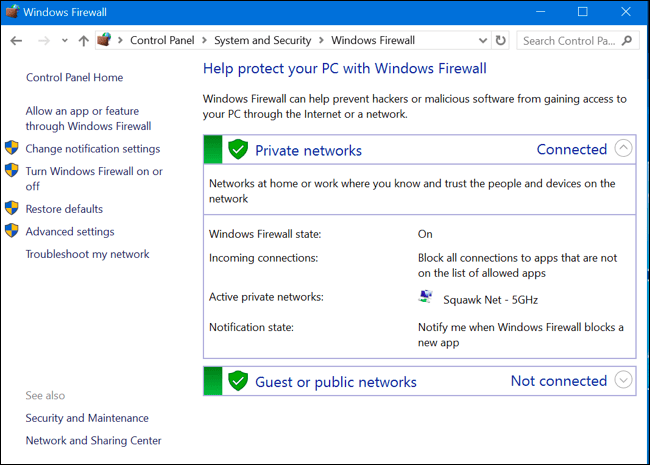
Click to select Allow an app or feature through Windows Firewall to adjust the Rules Firewall on Public Network or Private Network.
Refer to some of the following articles:
- Instructions for setting up and managing FTP Server on Windows 10
- Instructions for setting up and managing Network Bridge on Windows 10
- How to delete Wifi saved on Windows 10?
Wish you have moments of fun!