Instructions for installing iSCSI SAN server in Hyper-V
In this article, we will show you how to install an open source iSCSI SAN application inside Microsoft's Hyper-V virtual machine..
In this article, we will show you how to install an open source iSCSI SAN application inside Microsoft's Hyper-V virtual machine.
Some virtual infrastructure features require a storage network (SAN). As you know, a real iSCSI SAN device or a Fiber Channel (FC) SAN has a very high cost. While iSCSI is becoming more suitable for small and medium businesses (SMBs), iSCSI SAN devices for testing and for Internet professionals' home networks are still out of reach for most of them. In this article, we will show you how to install an open-source iSCSI SAN application inside Microsoft's Hyper-V virtual machine, besides you don't have to spend an entire computer performing the task. this case. Once the application is installed, you can use it to store your Windows files with the iSCSI initiator, or even more interestingly, and you can use it as a centralized SAN storage for VMware infrastructure testing systems for advanced features like VMotion, Distributed Resource Scheduler (DRS) and VMware High Availability (VMHA).
What is Openfiler?
Openfiler is an open source SAN device and network attached storage (NAS). It not only provides file sharing options with iSCSI, but also offers FTP, NFS, HTTP, SMB, and so on. You can also download ISO 332 MB installation file or even built VMware images. before.
Once installed and running, you can create disk partitions, apply security features and share your data between NAS or SAN - whatever you choose.
How to run Openfiler inside in Hyper-V?
Before installing Openfiler, you need to download it. You can download Openfiler here. There are many versions of Openfiler available: 32-bit, 64-bit, ISO, VMware ESX Server and Xen virtual devices. Make sure you download the latest version. While VMware ESX Server and Xen virtual devices are provided, no Hyper-V devices are listed.
To install Openfiler inside Hyper-V, download the 64-bit image file because Hyper-V requires a 64-bit CPU.
Next, launch Hyper-V MMC and create a new virtual machine like the one below:
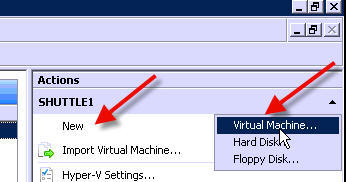
Figure 1: Creating a new virtual machine in Hyper-V
Name the new virtual machine and specify its location.
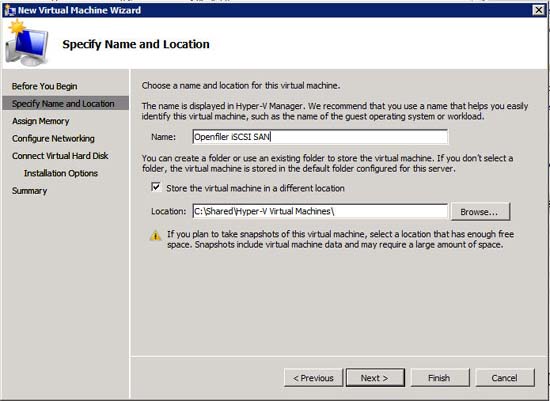
Figure 2: Specify the name and location of the virtual machine
Assign RAM to the virtual machine.
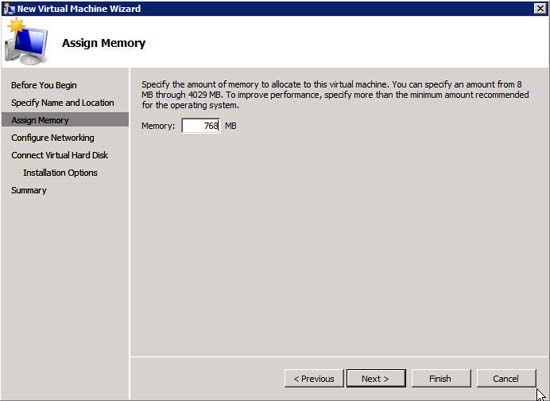
Figure 3: Assign RAM to the virtual machine
When asked about adding a network interface, you don't need to add an integrated network interface because the Linux virtual machine (VM) won't recognize it. Now, don't connect and we'll add the legacy network adapter later.
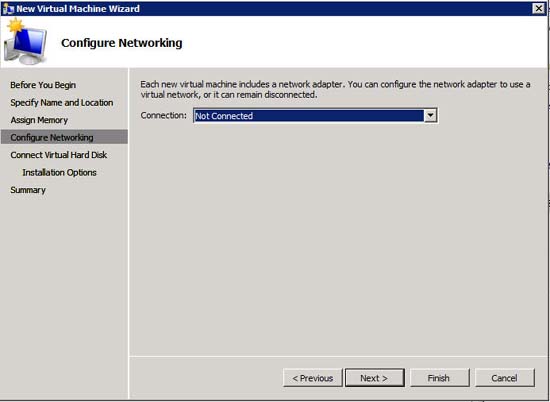
Figure 4: Network configuration
Add a new virtual IDE disk to be used by virtual machines like the Openfiler operating system disk. However, this is not a shared iSCSI disk to place the VMFS (we'll create this disk later).
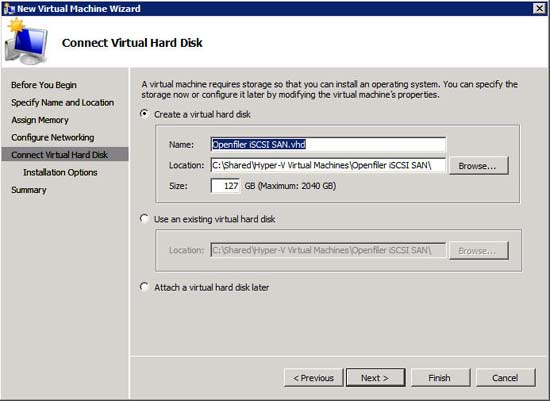
Figure 5: Create a new network drive
Map the virtual DVD drive with the ISO image file you downloaded.
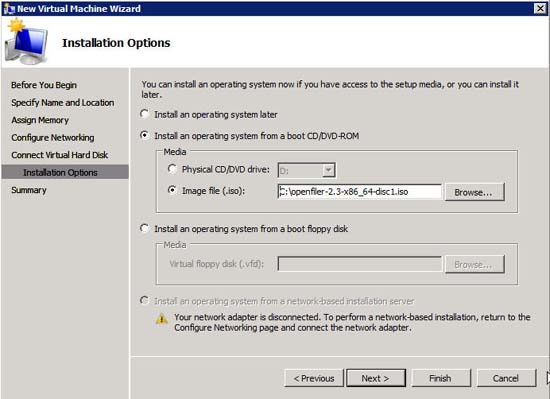
Figure 6: Map the virtual DVD drive
Finally, approve the summary configuration.
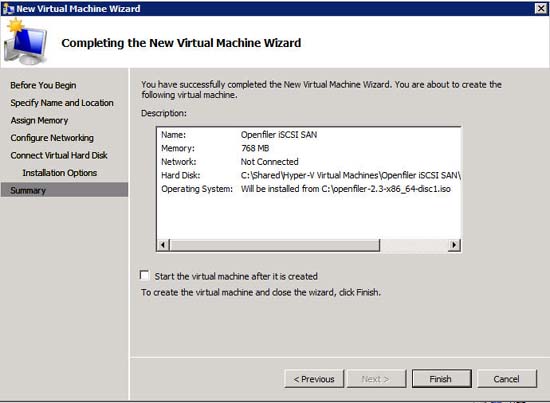
Figure 7: Use summary configuration
If you want to edit the configuration for the virtual machine, click Settings .
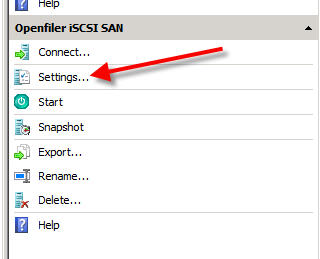
Figure 8: Change the settings for the new Openfiler virtual machine
You can add two new hardware below:
- Legacy network adapter
- Second IDE virtual hard drive
We start with the legacy network adapter. Click Add Hardware then Legacy Network Adapter .
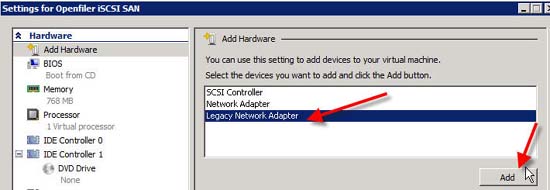
Figure 9: Adding a virtual network adapter
Connect the legacy network adapter to your physical network adapter.
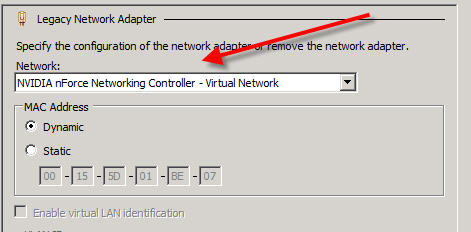
Figure 10: Connecting legacy NICs to physical NICs
Next, you need to add a new IDE disk to the existing IDE controller.
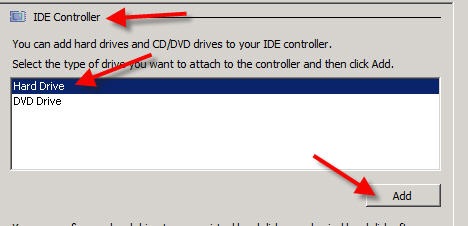
Figure 11: Adding a new virtual IDE hard drive
You will have to click New and go to the hard disk wizard . You should place a new virtual hard drive with the same location as other virtual drives for this virtual machine. You can create a dynamic or static virtual hard drive of any size to make iSCSI shared partition. When done, your configuration will look like the one shown below:
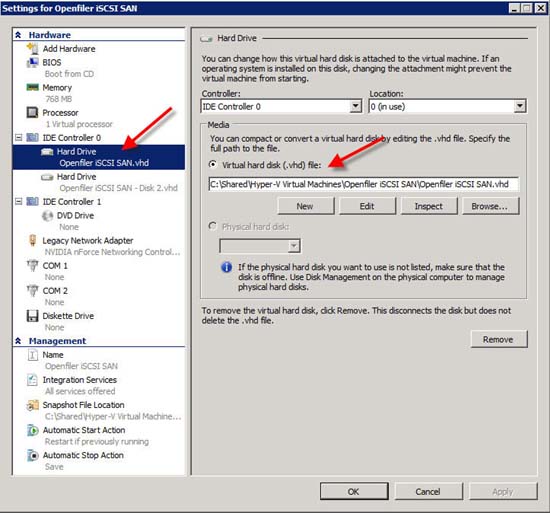
Figure 12: Results after creating the virtual hard drive
At this time, the VM configuration for Openfiler has been completed.
Install Openfiler inside Hyper-V
Now that the VM is installed, you can start the VM and go to the console. Since the graphical installation does not work, you need to perform a text installation using the linux text command (see Figure 13 below).
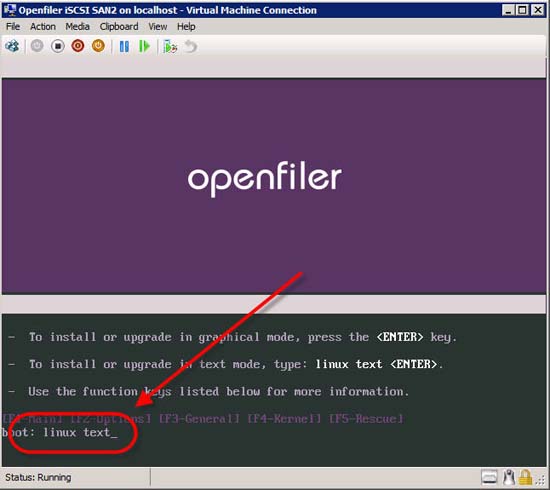
Figure 13: Installing openfiler in text mode
From here, go to Openfiler installation. You should use all the default settings. Also use a static IP address on the Openfiler server.
Once installed and restarted, you need to configure Openfiler to share the second IDE edition we created with iSCSI.
To do that, follow the steps below:
- Set the time zone and configure the Network Time Protocol Server ;
- Authenticated network configuration;
- Create a partition group and add / dev / hdb ;
- Configure iSCSI target by:
- Name IQN
- Map logical block numbers for partitions
- configure network ACL by allowing access to the network we created;
- Configure CHAP if you like.
Before connecting your VMware ESX Server or another server, you should test the configuration by connecting the Windows Server or Windows workstation to the new iSCSI server. If the Windows workstation cannot connect to the iSCSI server, VMware ESX Server will never be able to connect to it.
As you can see in Figure 14 below, the example in the article can connect the Windows 2008 Server server to the Openfiler iSCSI server.
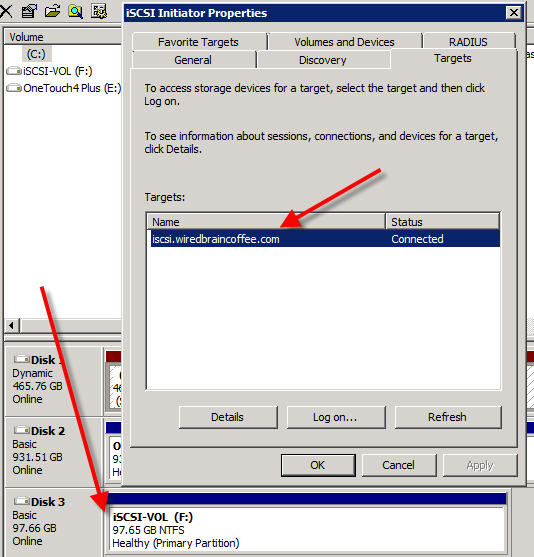
Figure 14: Connected Windows 2008 Server with Openfiler iSCSI SAN Server
Figure 15 below instructs VMware ESX Server in the article to connect to the Openfiler partition.
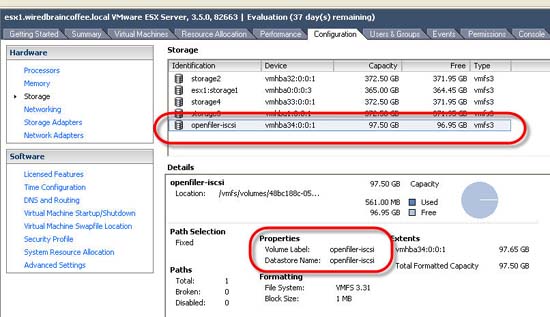
Figure 15: VMware ESX Server connected to Openfiler iSCSI SAN Server
Conclude
A true iSCSI SAN device or Fiber Channel SAN can be quite expensive, but installing an alternative to iSCSI SAN open source, such as Openfiler, inside Hyper-V virtual machine is a great solution. great Openfiler works very well, offers a number of file sharing and storage features, and you don't need to spend an entire physical computer on a real SAN application.