Configure, set Incoming and Outgoing Email on SharePoint 2010 - Part 1
In the tutorial article below, we will introduce you to some basic steps to set up the rules applicable to Incoming and Outgoing emails via Microsoft SharePoint 2010. Application, for example, when enabling Incoming feature SharePoint email, system members can automatically store emails and attachments that they send to addresses
Table of Contents
TipsMake.com - In the tutorial article below, we will introduce you to some basic steps to set up the rules applicable to Incoming and Outgoing emails via Microsoft SharePoint 2010. Application, for example, when clicked Incoming Email functionality in SharePoint, system members can automatically store emails and attachments that they send to other addresses to lists or libraries without having to open SharePoint and configure, set up set up manually . Obviously, this approach will help people save time, increase productivity and eliminate some unnecessary steps. On the other hand, with Outgoing Email enabled, users can fully set the warning rules and apply them on relevant components in the system such as lists, libraries, documents, and documents. whether . any changes are made immediately, the system will notify the user. At the same time, the system still allows email department administrators to receive messages even though there are many serious problems.
Some points to note before configuring the email system:
Before starting to work, you need to pay attention to some points:
- SharePoint 2010 with the corresponding version we are talking about in this article, has the main operating mechanism based on SMTP services in Windows 2008 or Windows 2008 R2 for Incoming Emails . Therefore, the corresponding service must be activated within SharePoint before doing other tasks.
- SharePoint 2010 supports any configuration and settings from the SMTP service to send out Outgoing Emails.
Enable SMTP in SharePoint:
First, on the SharePoint server, open the Server Manager application. Next, select Features> Add Features as shown below:

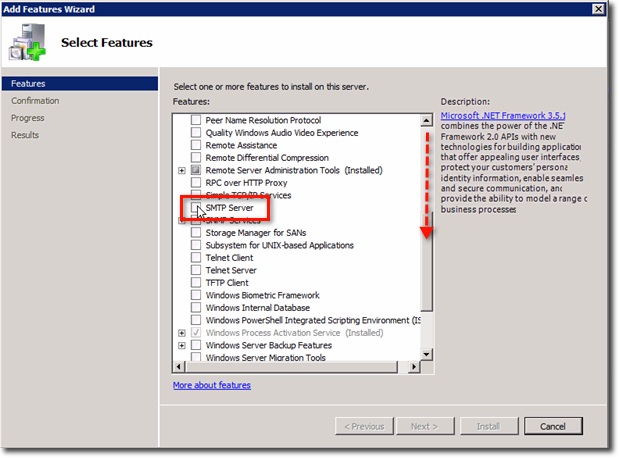
The Add Features Wizard starts, in the Features list, scroll down until you see the SMTP Server component :
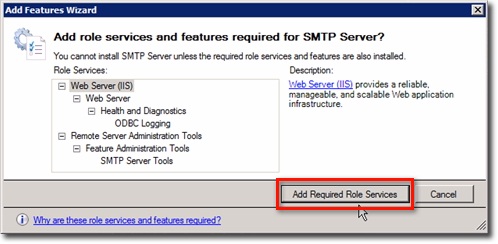
A dialog box continues to appear, asking the user if they want to assign additional role services and features required to install the SMTP server, click the Add Required Role Services button :
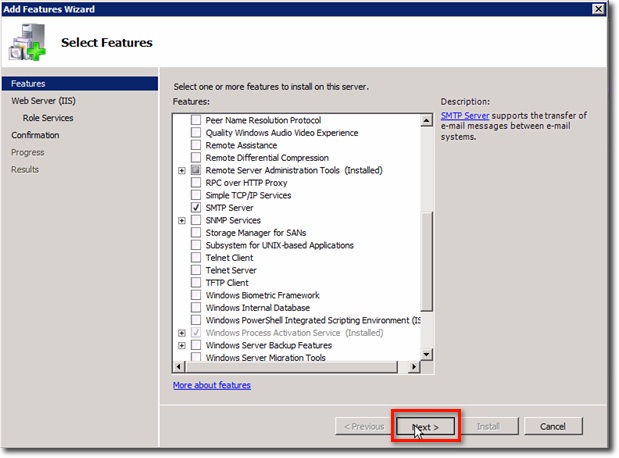
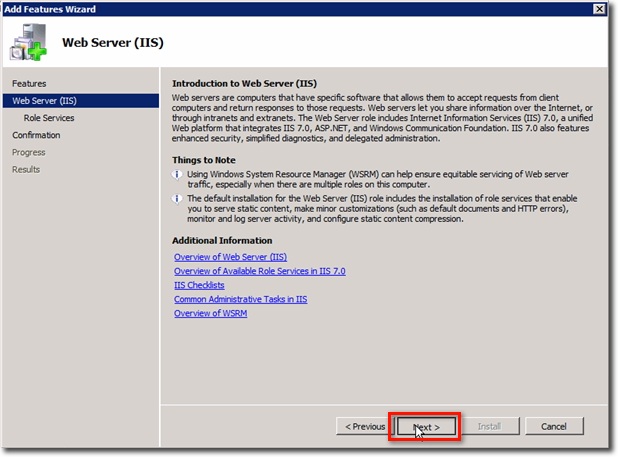
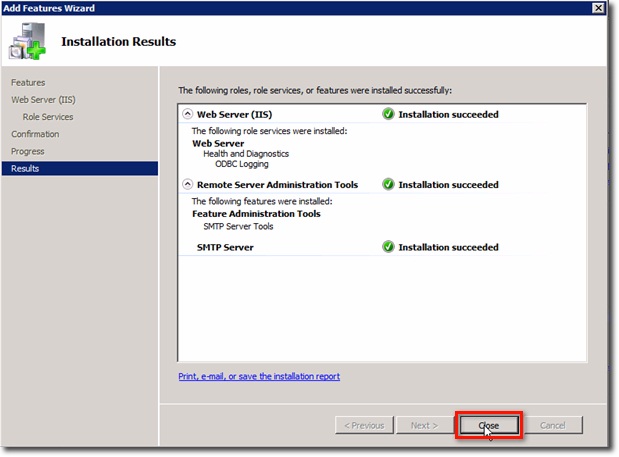
The next screen is displayed, click Next until the last part with the message: Confirm Installation Selections . Click Install :


Then, click the Close button to end this process:
SMTP configuration using IIS 6.0 Manager:
In order to be able to set up the SMTP service, you need to install Information Services (IIS) 6.0 Management Tools (also known as IIS 6.0 Manager ) for your Windows 2008 R2 Server. If you want to check the existence of this service, open Start> All Programs> Administrative Tools:

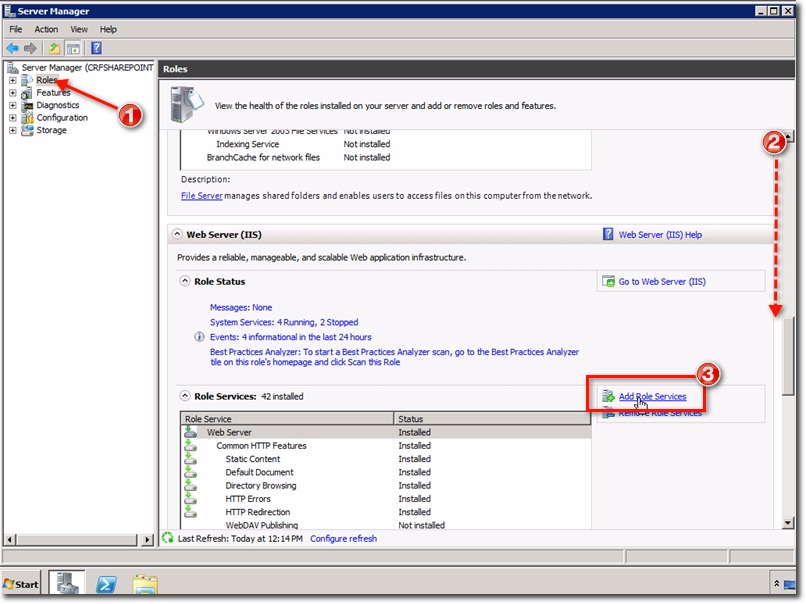
If not already installed, just open Server Manager, select Roles , scroll down to the bottom of the list until you see the Add Role Services link , click here:
In the Add Role Services window, continue down to the Role services list until you see IIS 6 Management Compatibility . Select the relevant components to continue the installation, noting that at this point all those components are blurred. Because in our system IIS 6.0 Management is preinstalled:

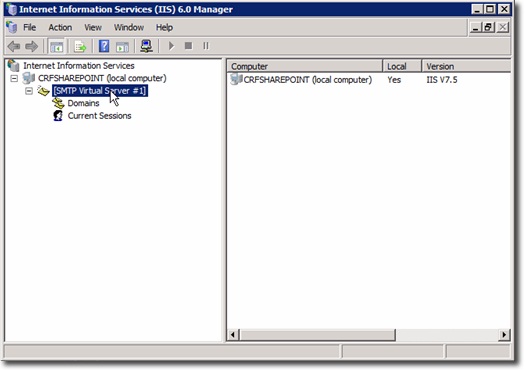
Then, we are ready to set up SMTP service. Start IIS 6.0 Manager and open SMTP Virtual Server # 1:
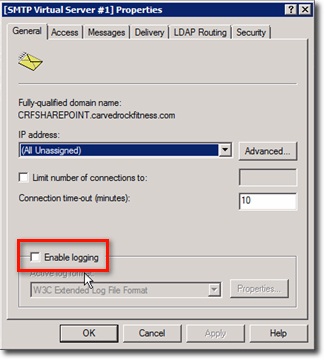
Right-click SMPT Virtual Server # 1 and select Properties from the menu displayed. Next is the SMTP window Virtual Server # 1 Properties will continue to display as shown below. Most of the settings here can be stored according to the user's needs and purposes. For example, in the General tab, check the Enable logging box if you want to resolve the problem when a problem occurs:
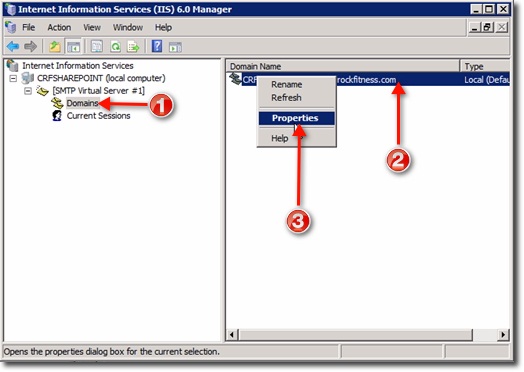
After closing the SMTP window Virtual Server # 1 Properties , select Next Domains under SMTP Virtual Server # 1 . Next, right-click on the domain of the SMTP virtual server displayed in the right window and select Properties :
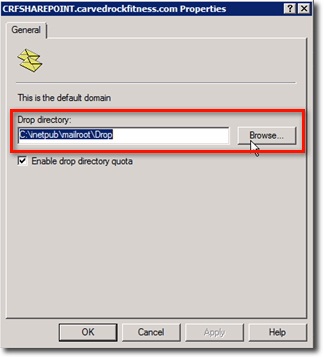
Select the appropriate path to do Drop directory (you can use the default option). Click OK :
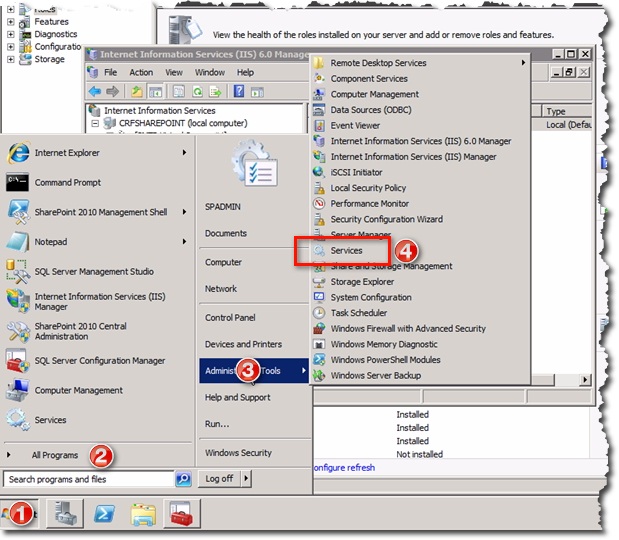
By this step, we have completed the process of setting up the SMTP service, the next thing to do is to ensure that the service will start automatically with the system. To do so, open the Start menu> All Programs> Administrative Tools> Services:
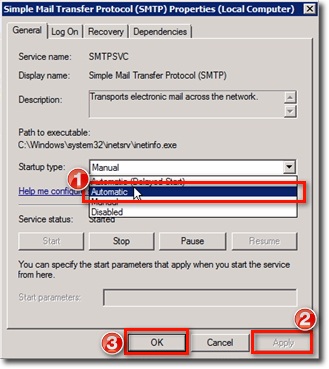
The Services window appears, scroll down to the bottom of the list until you see the Simple Male Transfer Protocol (SMTP) list, and the option in the default Startup Type will be Manual :
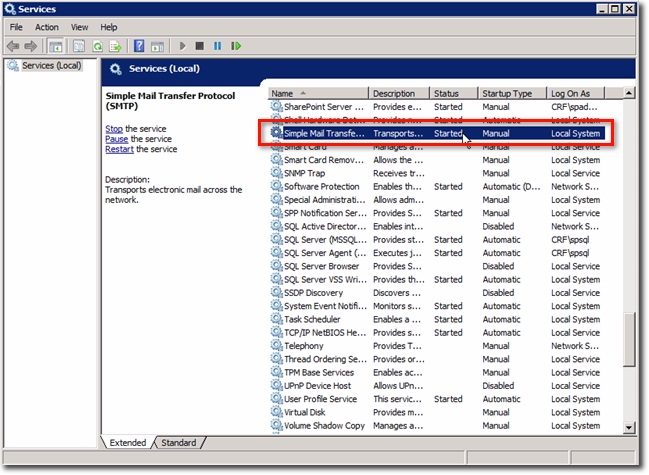
If you want to change it to auto, change Manual to Automatic . Then click Apply and OK :
In the next part of the article, we will discuss some SMTP setup modes on Exchange Server.
Configure, set up SMTP on Exchange Server:
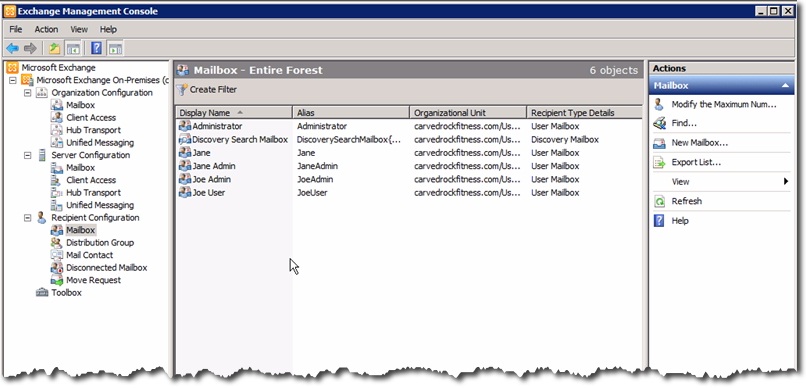
Similarly, open the Exchange Management Console at Exchange Server . For example, in the screenshot below, we have created mailboxes for all user accounts in the system:
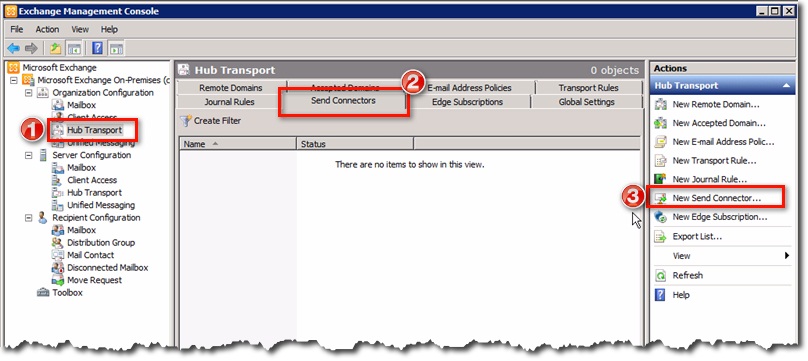
The first thing to do here is to create a new Send Connector component . Open Organization Configuration on the left, then select Hub Transport> Send Connectors tab. Next, select Actions and New Send Connector:
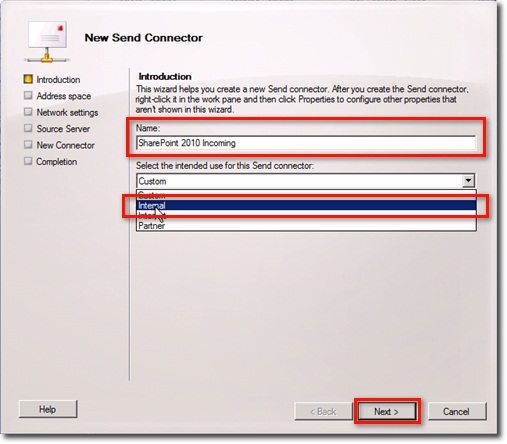
The New Send Connector Introduction screen is displayed, please name any here, for example SharePoint 2010 Incoming . and explicitly specify the function of this component, for example, Internal . Then click Next :
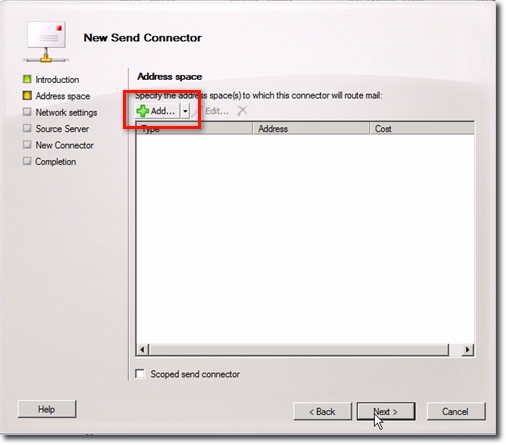
In the Address Space window, the system will ask the user about the email address that the Connector department will forward the email to. Click the Add button:
Next, enter the email address of the server that is processing the SMTP service into the Address field . For example, in this case, SharePoint server. Click OK after declaring the address:
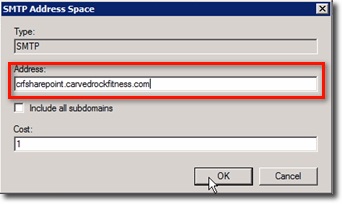
This will assign additional email address fields in the Address Space list, click Next :

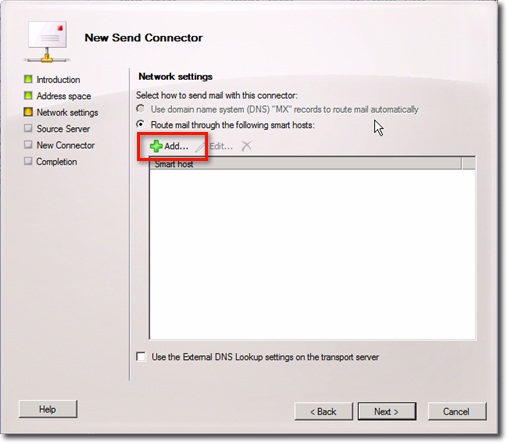
When in the Network Settings window, you'll see that the option to 'Use domain name system .' is blurred and unusable, that's because we have set up email delivery mode to Internally . Therefore, all emails will be forwarded through a combination of other smart hosts.
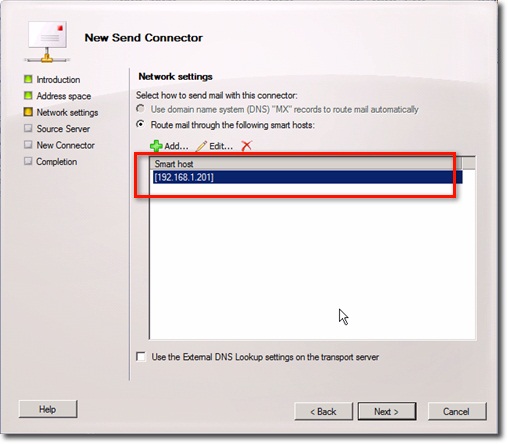
To add more smart hosts, click the Add button:
The system then asks the user to enter the IP address of the server managing the SMTP service - in this case, the SharePoint server. But instead of entering the FQDN as above, please enter the corresponding IP address. The benefit of doing this is to make the system more stable in the process of connecting and working in the future:
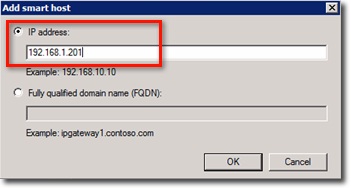
After clicking OK, you will see the IP address assigned to the smart host list. Click Next Next:
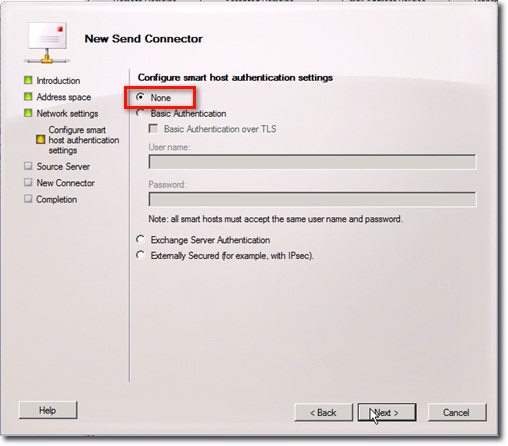
In the Configure smart host authentication settings window next, select None as shown below and click Next :
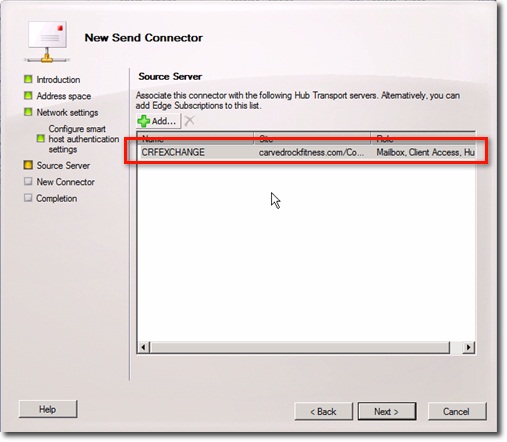
Then, back to the Source Server window, make sure the Hub Transport server is available in the list. For Exchange Typical installation systems, the only Exchange server will be set up to monitor and handle all roles ( Mailbox, Client Access, and Hub Transport ). Then click Next :
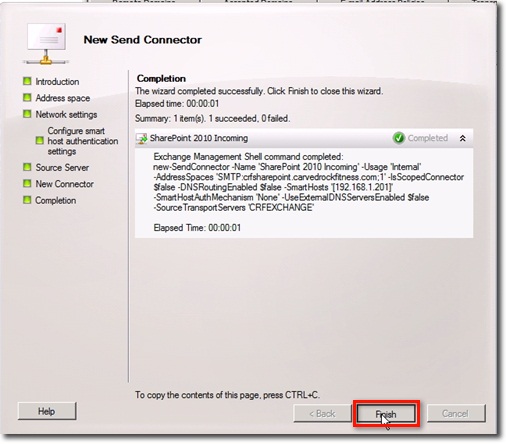
Finally, the system will display the general information of the Send Connector setup process . Click New :
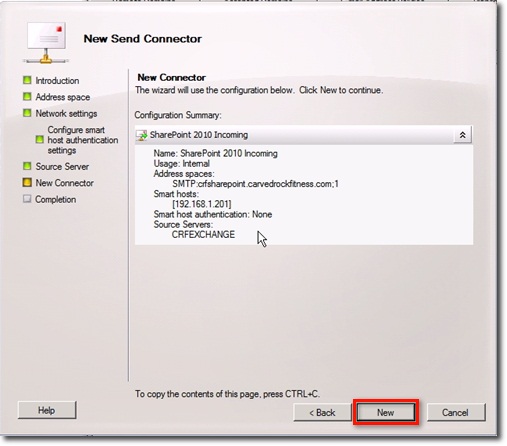
Then, the new Send Connector will be initialized. Click Finish then:

Good luck!
Was this article helpful?
Your feedback helps us improve.
Related Articles
 Configure, set Incoming and Outgoing Email on SharePoint 2010 - Part 36 minutes read
 Configure, set Incoming and Outgoing Email on SharePoint 2010 - Part 210 minutes read
 How to Configure Firewall on Debian Using UFW4 minutes read
 Troubleshoot problems with Kerberos in SharePoint - Part 211 minutes read
 Troubleshoot problems with Kerberos in SharePoint - Part 313 minutes read
 Spyware first appeared on mobile phones2 minutes read
Reader Comments 0
Sign in with email or Google to join the discussion.