Configure, set Incoming and Outgoing Email on SharePoint 2010 - Part 2
In the previous section of the article, we have introduced you to some of the basics of configuring and setting up SharePoint 2010 with the Incoming and Outgoing Email features. And this time, we'll continue with some of the rest to complete this process, such as setting up Active Directory to display Contact in Outlook Address Book ...
Table of Contents
TipsMake.com - In the previous section of the article, we introduced you to some basic points in configuring and setting up SharePoint 2010 with Incoming and Outgoing Email features. And this time, we'll continue with some of the rest to complete this process, such as setting up Active Directory to display Contact in Outlook Address Book , configuring Incoming Email in the Central Administration .
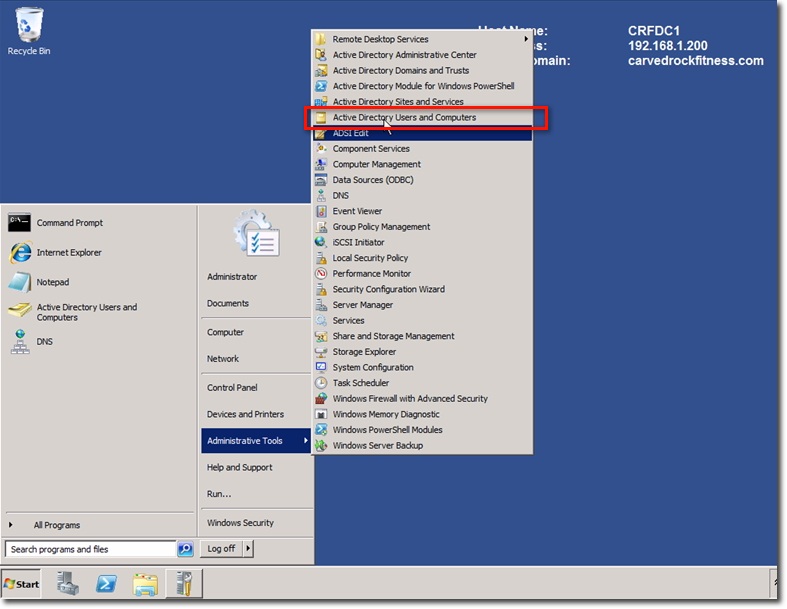
At this point, we will need to use the Domain Controller and make some changes in Active Directory to allow Contact to be allowed to initialize within the system model, besides full visibility. and correct in Outlook Address Book after initialization.
To do this, open the Domain Controller and Active Directory Users and Computers as shown below:
Create a new Organizational Unit component as follows:

Name the Organizational Unit , for example: Sp Contacts . Then click OK :

Continue, change the Permission mode of the Organizational Unit by right-clicking and selecting Delegate Control:

The Delegation of Control Wizard screen displays, and click Next :

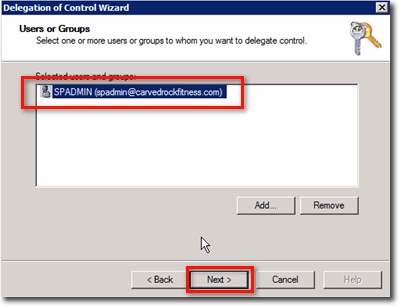
The main function here is to assign control to accounts that can control SharePoint Central services, in this case, SP Admin . Click the Add button:

Enter spadmin in the section ' Enter the object names to select ' and then click OK :

On the next screen, select the correct component and click Next :
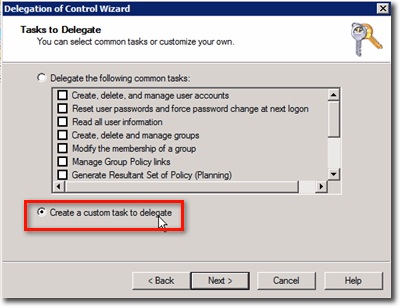
The system will continue to ask if you want to set permissions or tasks depending on the needs of the administrator for those accounts. Here, we choose Create a custom task to delegate and click Next :
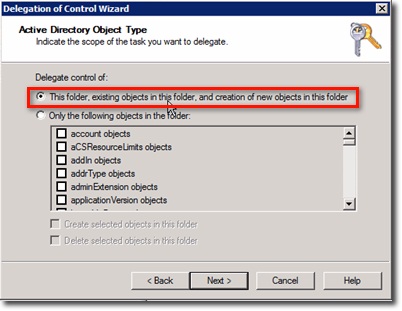
When asked about the task to be assigned, select ' This folder, existing objects in this folder, and creation of new objects in this folder '. Click Next to continue:
In the right level selection section, select General and Creation / deletion of specific child objects . Then, in the list of Permissions we marked the Create All Child Objects section and Delete All Child Objects . Click Next :

When you complete the entire Delegation of Control wizard process without any problems, the system will display a notification screen as shown below. Click Finish :

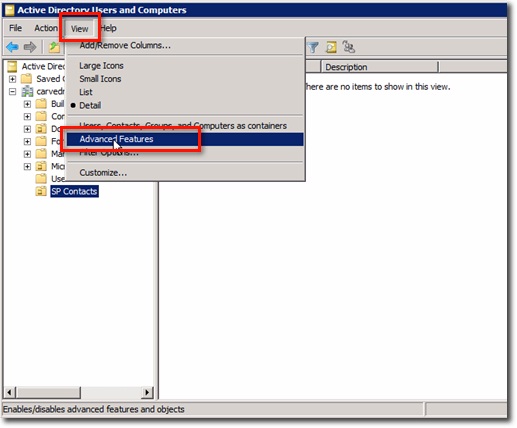
Finally, for the system to work properly, we need to enable the SP Admin account in Active Directory with the Delete Subtree permission level. Choose menu View> Advanced Features:
At this point, the system will display more components on the right, right-click on the newly created SharePoint account above and select Properties :

The Properties window displays, we select the Security tab, click the Advanced button:
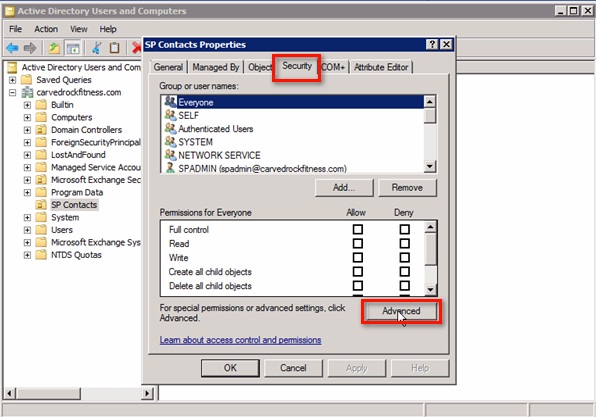
Here, you choose to continue SPADMIN account:

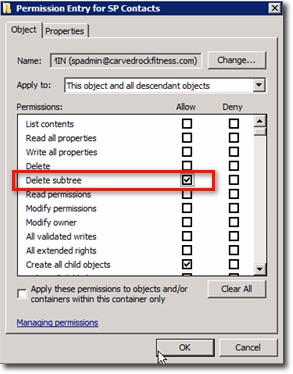
We will see the Delete subtree section here, check the Allow column to enable this feature:
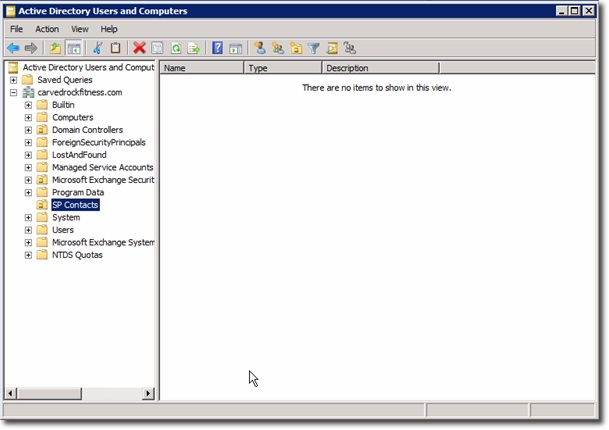
Click OK to close this window, then click OK until you return to the main Active Directory Users and Computers window:
At this point, we have completed the necessary setup in Active Directory so that Contact accounts are fully displayed in Outlook Address Book . And the last thing to do here is to restart IIS on the SharePoint server.
Return to SharePoint server, right-click on the PowerShell icon and select Run as Administrator:

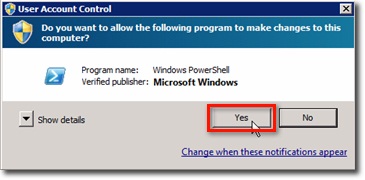
Click Yes at the next screen:
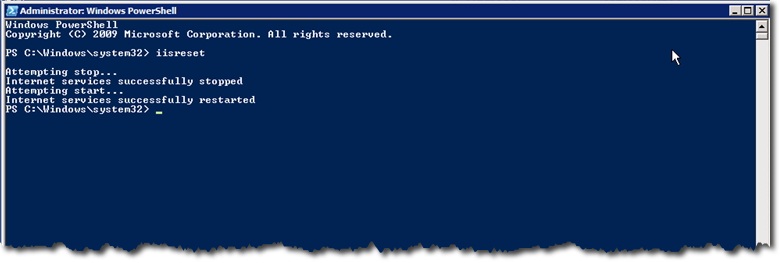
At the PowerShell main monitor, type the iisreset command to restart the entire process. Close this window when done:
Configure Incoming Email in Central Administration:
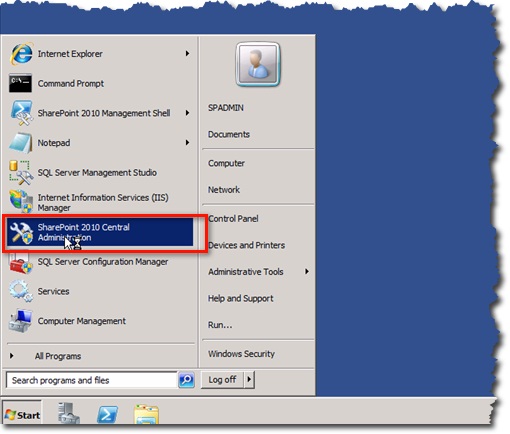
Our next step here is to set the applicable rule with Incoming Email directly from inside the Central Administration. To do this, open the SharePoint Central Administration:
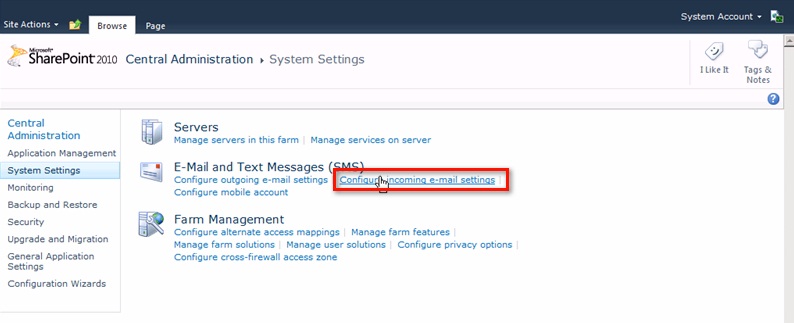
Select System Settings in the left pane:

Under the E-Mail and Text Messages (SMS) section , we choose the Configure incoming e-mail settings link:
And on the right side window, you will see some options as follows:
- Select Yes at Enable sites on this server to receive e-mail?
- Select Automatic at Settings mode
- Select Yes at Use the SharePoint Directory Management Service section to create distribution groups and contacts?

- In the Active Directory container entry where new distribution groups and contacts will be created : you enter the name of the Container set in the following format: OU = [ContainerName], DC = [domain], DC = [com], with ContainerName as the name The organizational unit created above, the domain here is the second - level and com domain name is the top - level domain. The examples are: OU = SP Contacts, DC = carvedrockfitness, DC = com
- SMTP mail server for incoming mail: this option is usually initiated by default.
- Select No at Accept messages from authenticated users only?
- Click No at the Allow creation section of distribution groups from SharePoint sites?

- Keep the default options of E-mail server display address:
- Choose Accept mail from all e-mail servers
After completing the above steps, we click OK :

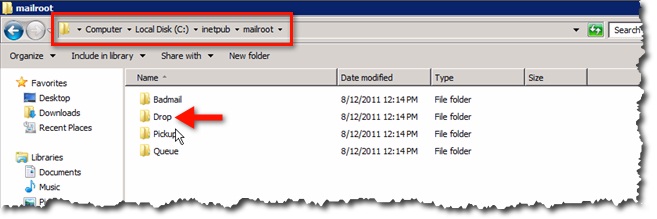
The whole purpose of our work is to create and apply changes to the Drop folder on the system. If you want to make sure that the process has worked, we need to check that directory.
To do this, please open the link: C:> inetpub> mailroot . There will be a Drop folder:
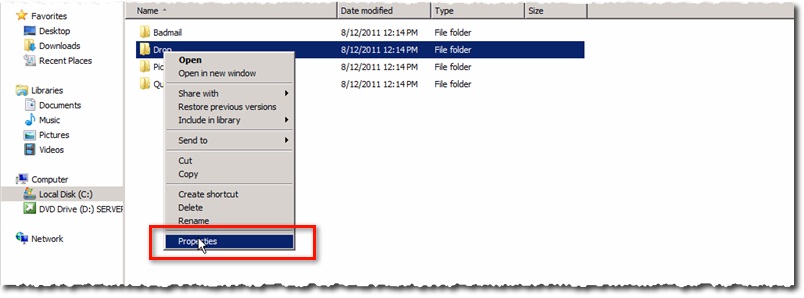
Right-click and select Properties :
The Properties window of the Drop folder appears, select the Security tab, scroll down the list of Group or user names until you see ' WSS_ADMIN_WPG . ' and ' WSS_WPG . ':
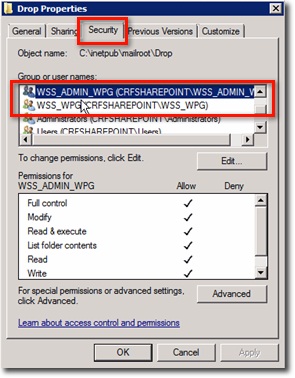
When your system displays an account similar to the image above, it means it has been successful in setting up
Add Library to Contact in the Organizational Unit list:
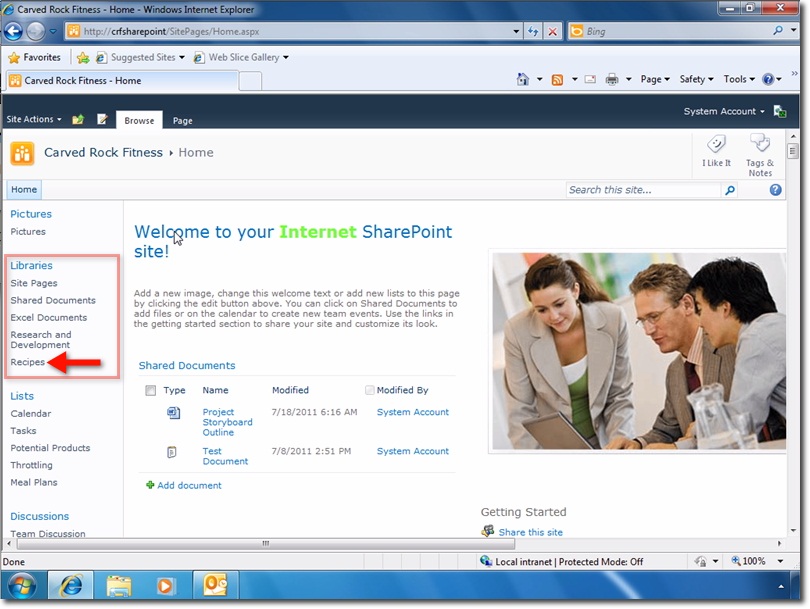
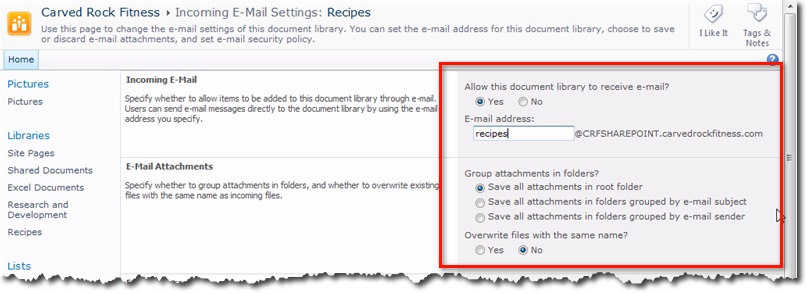
Before checking whether incoming Email feature on the SharePoint server is working, you will need to perform a few other adjustments. On any Client computer, open the browser and access the SharePoint server. Next, select the Libraries section and click the link to any library, in this test is Recipes :
To change the properties of this library, select the Library tab at the top and click Library Settings:

Select the section Communications and Incoming e-mail settings:

On the right side of the screen, you will see a number of different options, set up as follows:
- Select Yes at the Allow this document library section to receive e-mail?
- Assign the name to the email address at the E-mail address:
- Choose the plan that best suits the requirements of using Group attachments in folders?
- Select No at Overwrite files with the same name?
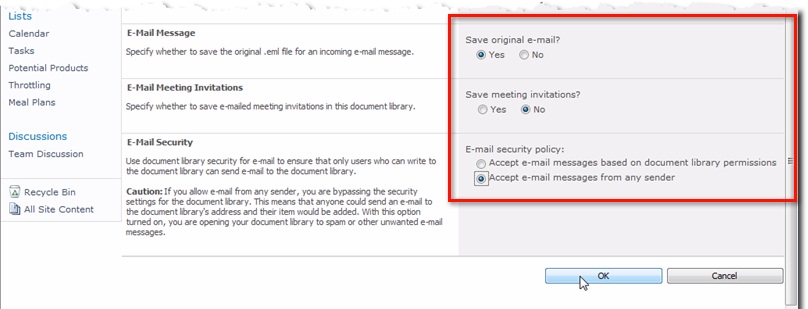
- Select Yes at Save original e-mail?
- Select No at Save meeting invitations?
- In the E-mail security policy section : at this time, we only need to select Accept e-mail messages from any sender . Depending on the specific actual situation, the first box should be selected.
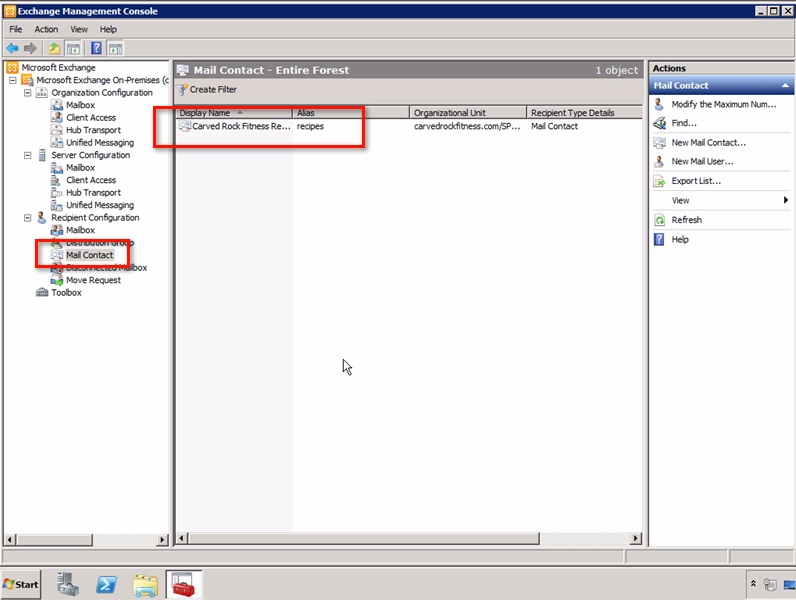
When you have completed the steps above, click OK to close the main control window. Then, the library just set up above will be assigned to Contact under the Organizational Unit section. Open Active Directory Users and Computers> Organizational Unit (in this test is SP Contacts ), we will see the full display library here:

In addition, we will also see the Contact list in Exchange Server fully. Select Exchange Server , open Exchange Management Console> Recipient Configuration> Mail Contact:
Check Incomint Email activity through SharePoint:
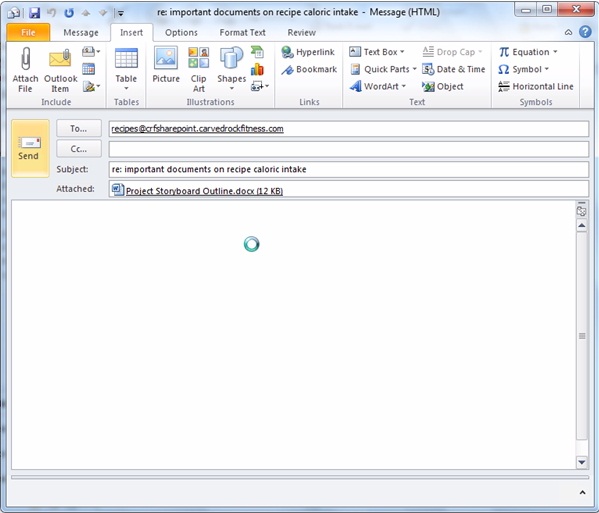
When you have completed all the steps above, let us check the last time before putting the system into practice. Go back to the Client system, open Microsoft Outlook and create a new email:

In the To : section, enter the address of the newly created Library section in the previous step, fill in any Subject , content and any attachments. Then press the Send button:
Then, go back to the SharePoint server and open the corresponding storage library, we will see both the sender's email address and the attachment:

When you receive the above results, you have successfully configured and set up Incoming functions via server using SharePoint . In the next part of this SharePoint series, we will learn about the same application process as above with Outgoing Email. Good luck!
Was this article helpful?
Your feedback helps us improve.
Related Articles
 Configure, set Incoming and Outgoing Email on SharePoint 2010 - Part 36 minutes read
 Configure, set Incoming and Outgoing Email on SharePoint 2010 - Part 18 minutes read
 How to Configure Firewall on Debian Using UFW4 minutes read
 Troubleshoot problems with Kerberos in SharePoint - Part 211 minutes read
 Troubleshoot problems with Kerberos in SharePoint - Part 313 minutes read
 Spyware first appeared on mobile phones2 minutes read
Reader Comments 0
Sign in with email or Google to join the discussion.