Transfer Exchange 2003 to Exchange 2007 (P.4)
In this section we will install additional Exchange 2007 servers, and configure these servers.
Network administration - Exchange system has been gradually formed through the first three parts of this article. So far, we have incorporated the Hub Transport Server and Client Access Server as well as the Clustered Continuous Replication environment consisting of two nodes, which are components that coexist with existing Exchange 2003 servers. However, at this point we still need to install additional Exchange 2007 servers.
>> Transfer Exchange 2003 to Exchange 2007 (Part 1)
>> Transfer Exchange 2003 to Exchange 2007 (Part 2)
>> Transfer Exchange 2003 to Exchange 2007 (Part 3)
Install Edge Server
The last server to deploy is the Edge Transport server used to replace an existing server using MailSweeper software. The MailSweeper server is configured to send and receive Internet Mail through the MessageLabs service, so this configuration still has to be kept in order for configuration management to be easier, because then you won't have to change things like copies. Mail Exchange recording is stored in the system. Dedicated server like Edge Transport server is prepared with the same type of application deployed on other functional servers such as .NET Framework, Powershell, etc. In addition, this server's DNS Suffix is changed from option By default it has a Fully Qualified Domain Name (FQDN).
To change DNS Suffix, open the computer properties window and select the Computer Name tab. Here, click on the Change button, then you will see the Computer Name Changes window pop up, click the More . button to open the DNS Suffix and NetBIOS Computer Name window. In this window you can enter the main DNS Suffix as shown in Figure 1.
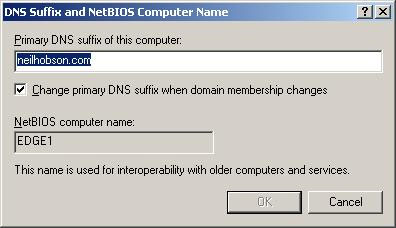
Figure 1: Enter the main DNS Suffix.
You need to make sure that the Edge Transport and Hub Transport servers can handle all different names through normal server files or DNS. Also, in part one, the Edge Transport server is already a member of the internal Active Directory domain, so we removed it from this domain and moved it back to a workgroup configuration.
An important component added to the Edge Transport server is Active Directory Application Mode (ADAM). ADAM needs to be used because the Edge Transport server is running on Windows Server 2003; If the Eddge Transport server operates on Windows Server 2008 you will have to install Active Directory Lightweight Directory Services to replace ADAM on Windows installation options.
Once the related DNS changes have been made and ADAM has been installed, we will proceed to install the Edge Transport server. After you have completed the installation of the Edge Transport server and the related Update Rollup has been applied, enter the Product Key for this server. Although there is now an Edge Transport server, this server is not configured to perform any functions yet. Therefore, we need to register this Edge Transport server into the Active Directory that currently contains Hub Transport function servers.
Edge Subscription Process
Edge Subscription Process is an important feature of Edge Transport server functionality. It allows registering one or more Edge Transport servers to the Active Directory site containing Hub Transport servers, resulting in a one-way mirroring of configuration information as well as information received from Active Directory. in ADAM database running on Edge Transport servers. The main benefit from this process is that you can optionally create the necessary configuration changes on the Hub Transport server and copy to Edge Transport servers. In addition, mail sent from Outlook will be aggregated on the Edge Transport server.
Below is the process needed to register the Edge Transport server, EDGE1 , to the Active Directory site containing both Hub Transport servers.
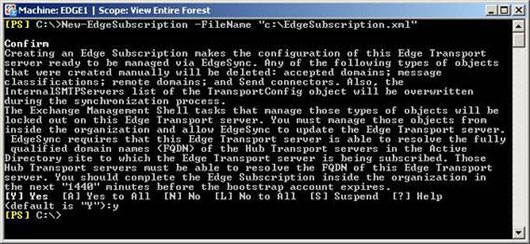
First open Exchange Management Shell on EDGE1 and run the following command:
New-EdgeSubscription -FileName 'c: EdgeSubscription.xml'
This command will create the signed information in a file called EdgeSubscription.xml outside the C: drive on EDGE1 . Note that the information shown in Figure 2 indicates that you must complete the registration within 1440 minutes before the startup account expires.
Next we have to copy the contents of this XML file from EDGE1 to one of the Hub Transport servers.
The Edge server registration process can then be completed using either the Exchange Management Console or Exchange Management Shell on the Hub Transport server. If you choose the Exchange Management Console then you will have to go to the Organization Configuration , select Hub Transport and then select New Edge Subscription on the context menu.
In the New Edge Subscription wizard, you need to install the Active Directory site correctly for the Active Directory site , then click the Browse button to import the previously copied EdgeSubscription.xml file. Also select the Automatically create a Send connector check box for this Edge Subscription (automatically create a Send Connector for this Edge registration process) as shown in Figure 3. Note, in this example the name of the Active Directory page is HeadOffice .
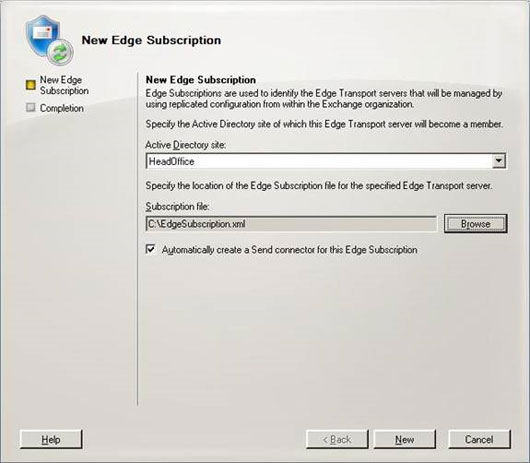
Figure 3: New-EdgeSubscription Wizard.
Finally, we'll force the synchronization process to take place immediately using the Start-EdgeSynchronization command and check if the process is successful. See the example in Figure 4.

Figure 4: Edge synchronization process successfully completed.
Internet Mail
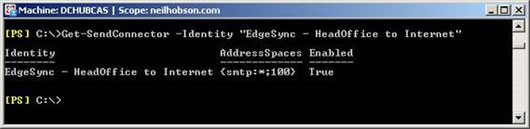
Figure 5: Send Connector default address space and value.
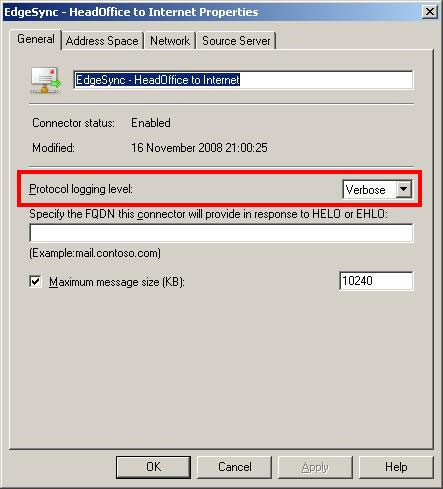
Figure 6: Changing the Protocol logging level for Send Connector.
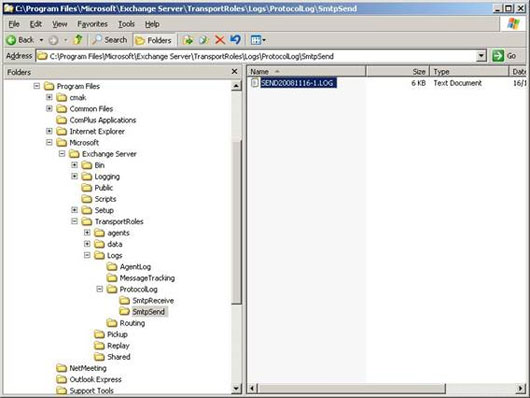
Figure 7: SMTP protocol log.
Conclude
Was this article helpful?
Your feedback helps us improve.
Related Articles
 Transfer Exchange 2003 to Exchange 2007 (P.7)8 minutes read
 Transfer Exchange 2003 to Exchange 2007 (Part 2)9 minutes read
 Transfer Exchange 2003 to Exchange 2007 (P.5)9 minutes read
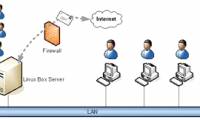 Transfer from Linux Mail Server to Exchange Server 2007 (Part 1)10 minutes read
 Transfer Exchange 2003 to Exchange 2007 (Part 3)10 minutes read
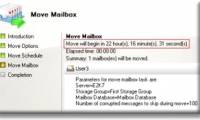 Transfer mailboxes in Exchange 2007 through the Exchange Management Console11 minutes read
Reader Comments 0
Sign in with email or Google to join the discussion.