Configure Windows Server 2008 to remotely access SSL VPN Server (Part 3)
 Configure Windows Server 2008 to remotely access SSL VPN Server (Part 1)
 Configure Windows Server 2008 to remotely access SSL VPN Server (Part 2)
Thomas Shinder
In the previous two articles of this series on how to create an SSL VPN server on Windows Server 2008, we introduced the basics of VPN connection issues, then went into the configuration of the server. . In this process, we have made some minor configuration changes in Active Directory and on the Web CA. After making some changes, we will focus on configuring the VPN client and ending with setting up the SSL VPN connection.
Configure user account to allow Dial-up connection
User accounts need permissions for dial-up access before they can connect to a Windows VPN server (a member of the Active Directory domain). The best way to do this is to use Network Policy Server (NPS) and use the default user account permissions, which allow remote access to be established based on NPS policy. However, we did not install the NPS server in this scenario, so these permissions must be manually configured.
Follow the steps below to activate dial permissions on the user account you want to connect to the SSL VPN server. In this example, we will enable dial-up access of the default domain administrator account:
1. At the controlle domain, open the Active Directory Users and Computers console from the Administrative Tools menu.
2. In the left pane of the interface, expand the domain name and click the Users button. Double-click the Administrator account.
3. Click the Dial-in tab. The default setting is Control access through NPS Network Policy . Since we do not have an NPS server in this scenario, we will change the setting to Allow access , as you can see in the figure below. Click OK to continue.

Figure 1
Configure IIS on the certificate server to allow HTTP connections to be made with the CRL Directory
For some reason, when the wizard is installing the Certificate Services Web site, it will configure the CRL directory to request an SSL connection. This in terms of security seems like a good idea, the problem revealed here is that the URL on the certificate is not configured using SSL. We hope you can create a customized CDP entry for the certificate so that it can use SSL, but you can spend a lot of effort because Microsoft does not have documentation for this issue. Because we are using the default settings for CDP in this article, we need to turn off SSL requests on the CA's Web site for the path of the CRL directory.
Follow the steps below to disable SSL requests for this CRL directory:
1. From the Administrative Tools menu, open Internet Information Services (IIS) Manager .
2. In the left pane of the console, open the server name section and then click the Sites button. Open the Default Web Site button and click CertEnroll , you can see what is done in the drawing below.
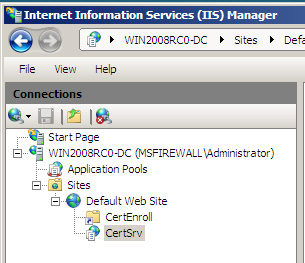
Figure 2
3. If you look at the middle part of the console, you will see the CRL placed in this virtual directory, as shown in the figure below. To view the contents of this virtual directory, you need to click on the Content View button in the lower part of the middle pane.
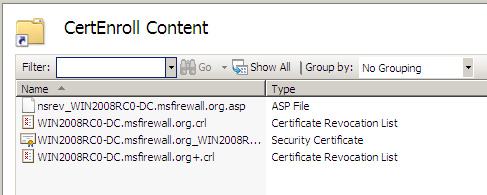
Figure 3
4. Click the Features View button in the lower part of the middle pane. At the bottom of this middle pane, double-click the SSL Settings icon.
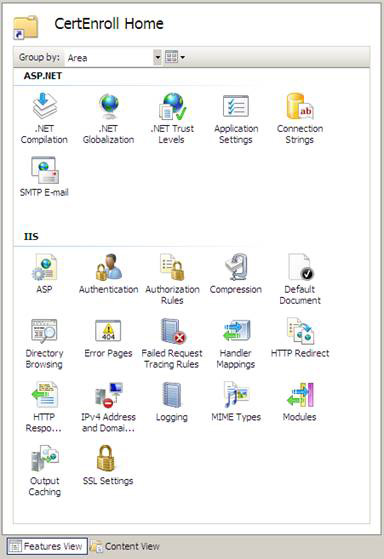
Figure 4
5. SSL Settings page appears in the middle of the panel. Remove the check mark from the Require SSL checkbox . Click the Apply link to the right of the console.
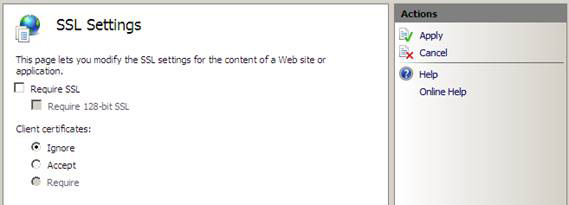
Figure 5
6. Close the IIS console after you see the message The changes have been successfully saved .

Figure 6
Configure HOSTS File on VPN client
Now we can turn our attention to the VPN client. The first thing to do is configure the HOSTS file to be able to simulate a public DNS infrastructure. There are two names that we need to import into HOSTS file (and so on the public DNS server that you will use in a production environment). The first is the name of the VPN server, as defined by the common / subject name on the certificate that you have restricted to the SSL VPN server. The second name needs to be entered into the HOSTS (and public DNS server) file, CDP URL, the name found in the certificate. We have seen the location of the CDP information in the second part of this series.
The two names to enter in the HOSTS file in this example are:
192.168.1.73 sstp.msfirewall.org
192.168.1.73 win2008rc0-dc.msfirewall.org
Follow the steps below on the Vista SP1 VPN client to configure the HOSTS file:
1. Click the Start button and enter the c: windowssystem32driversetchosts line in the search box and press Enter.
2. In the Open With dialog box, double-click Notepad .
3. Enter HOSTS file entries in the format as you can see in the picture below. Make sure to press Enter after the last line so that the cursor appears below that last line.
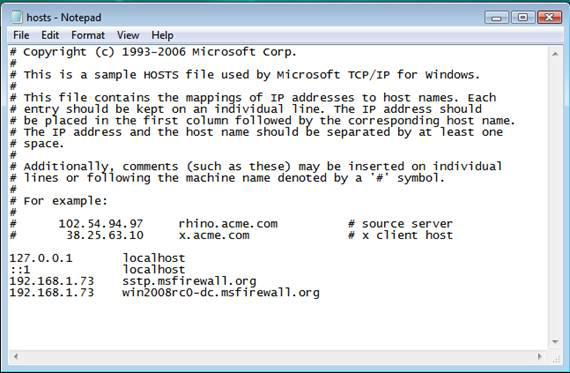
Figure 7
4. Close the file and select the save option when asked.
Use PPTP to connect to the VPN server
We are getting closer to creating an SSL VPN connection! The next step is to create a VPN connection on the Vista SP1 client so that you can create an initial VPN connection for the VPN server. We need to do this in the current scenario because the client computer is not a domain member. Since this computer is not in the domain, it will not have the CA certificate installed automatically in the Trusted Root Certificate Authorities certificate store. If this computer is a domain member, auto-enrollment will take care of that problem, because the Enterprise CA has been installed. The easiest way to do this is to create a PPTP connection from the Vista SP1 VPN client to the Windows Server 2008 VPN server. By default, the VPN server will support PPTP connections and the client will try PPTP first before trying L2TP / IPSec and SSTP. To do this, we need to create a VPN connection or connection object.
Follow the steps below on the VPN client to make the connection:
1. On the VPN client, right-click the icon and then click Network and Sharing Center .
2. In the Network Sharing Center window, click on the link on Set up a connection or network on the left side of the window.
3. On the Choose a connection option window, click the Connect to a workplace item and then click Next .
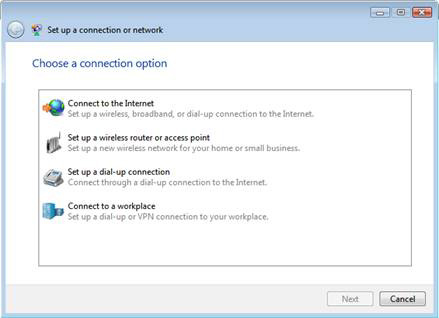
Figure 8
4. On the window How do you want to connect , select Use my Internet connection (VPN) .
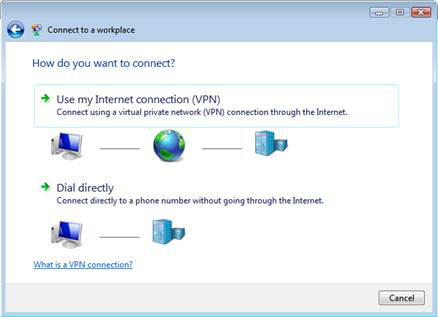
Figure 9
5. On the Type the Internet address window to connect to , enter the name of the SSL VPN server. Make sure that this name is the same as the generic name on the certificate used by the SSL VPN server. In this example, its name is sstp.msfirewall.org . Enter Destination Name . In this example we will name the destination SSL VPN . Click Next .
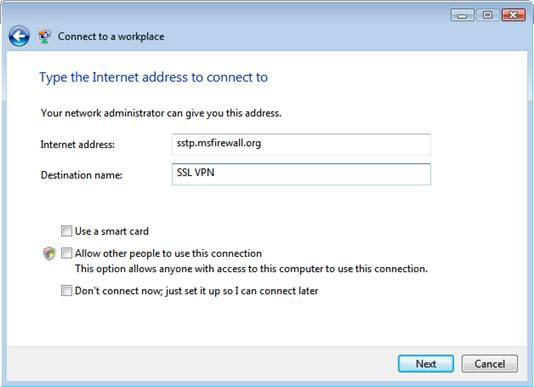
Figure 10
6. In the Type your user name and password window, enter Password and Domain . Click Connect .
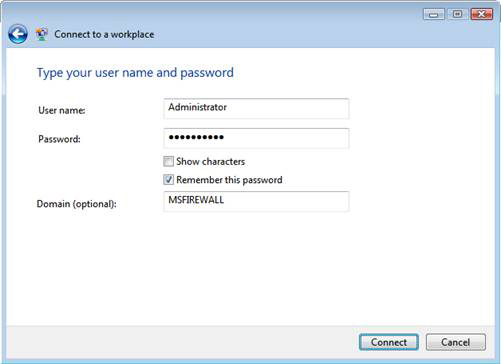
Figure 11
7. Click Close on the window You are connected .
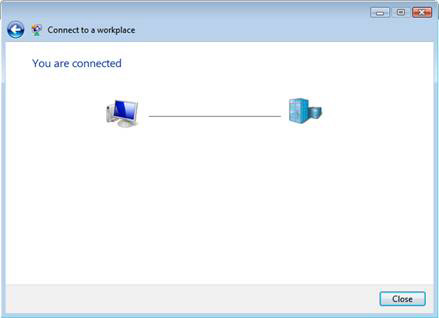
Figure 12
8. On the Select a location for the 'SSL VPN' network window, select the Work option.
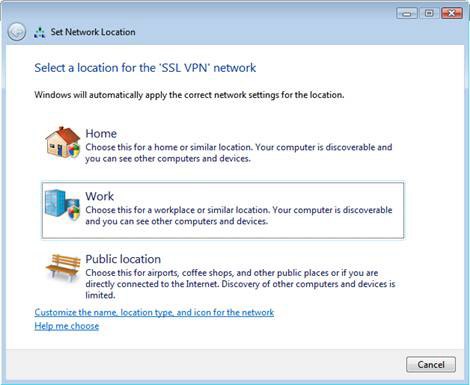
Figure 13
9. Click Continue in the UAC prompt.
10. Click Close on the Successfully set network settings window
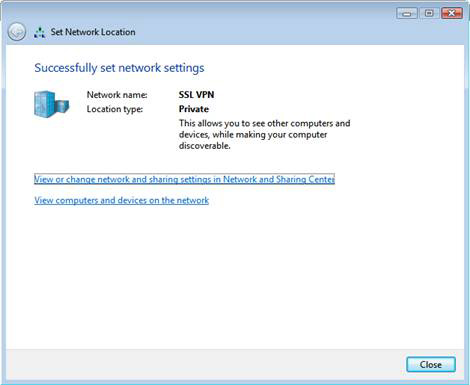
Figure 14
11. In the Network and Sharing Center , click on the View status link in the SSL VPN section, see the image below. You will see in the SSL VPN dialog the Status type of this VPN connection is PPTP . Click Close in the SSL VPN Status dialog box.
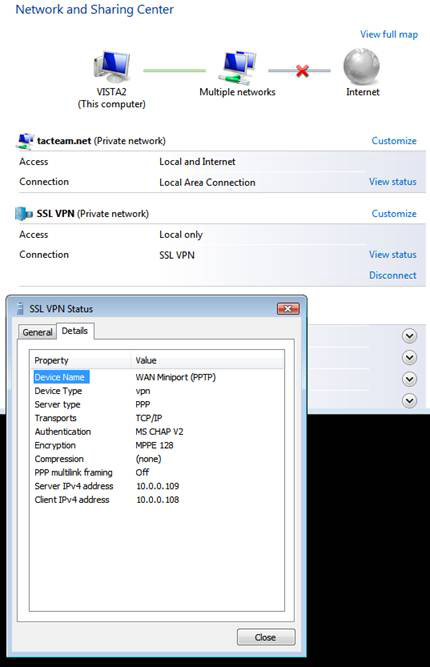
Figure 15
12. Open a command prompt and ping the domain controller. In this example, the IP address of the domain controller is 10.0.0.2 . If the VPN connection is successful, you will receive a reply from the ping process from the domain controller.
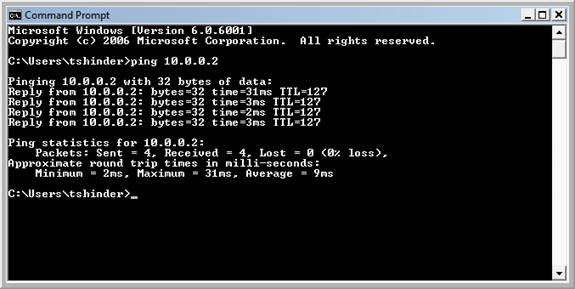
Figure 16
 Configure Windows Server 2008 to remotely access SSL VPN Server (Part 4)