Install and configure the solution to handle email on TMG 2010 Firewall - Part 1: Installation
In this article, I will show you how to install and configure an email handling solution on TMG 2010 Firewall.
You may or may not know, but the TMG firewall is designed to be a comprehensive email handling solution for the network. We can install the Exchange Edge server on the TMG fire field to get email control features included in the Exchange Edge solution, and we can install Microsoft Forefront Protection for Exchange on the TMG firewall. . The combination of Exchange Edge and Forefront Protection for Exchange is a great way to combat spam, malware, and limit the loss of information in organizations.
In the previously released TMG firewall beta, Exchange and Forefront Protection features were built right into the installer. But things will change over time - especially with beta software - and now we find that users don't easily install an email handling solution like at the time of beta.
Some people believe in what has been prepared, but others prefer to install the software without reading the documentation first. Certainly, if you read the previous manual, you will definitely do everything in the right way and be encouraged, but this way will not have other interesting experiences. Many IT professionals also like this way when they buy a new product. But above all, both professionals and users, a friendly and complete installer is one of the advantages that makes Microsoft solutions different from what you get from firms. other software.
In a previous article (How to Install TMG 2010 RTM), we showed you how to install TMG Enterprise Edition on a Windows Server 2008 R2 server with two NICs. In this article, we will show you how to work with some email protection features.
Our first thought here is to run the TMG installation program and see if they will work. As you can see in Figure 1 below, under the 'Additional Options' section, there is an Install Microsoft Forefront Protection 2010 for Exchange Server option . This option is like a starting point, so click on that option (but you can skip it for other purposes).
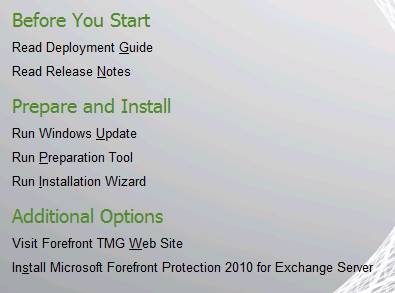
Figure 1
The License Agreement page will appear before your eyes. Sure, you'll guess what you need to do here if you don't want to stop the installation process, so check the I agree to the terms of the license agreement and the privacy statement check box and click Next .
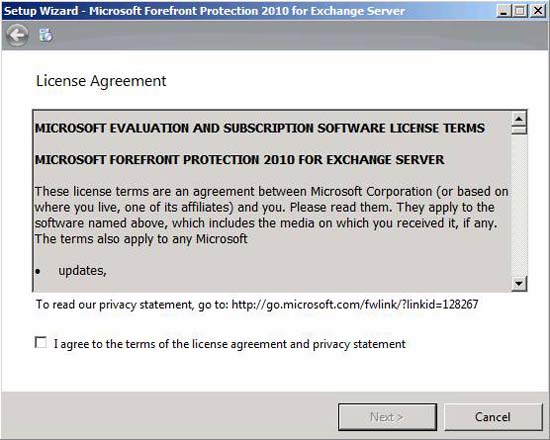
Figure 2
On the required System updates page, we will receive the following message, as shown in Figure 3 below:
Không tìm thấy được ứng dụng máy phục vụ được tìm thấy. Client-only installation is not currently supported '
Mean:
What this means? 'Can't detect a protected server application'? Could it be Exchange Server? It is really a server application and it relates to what we want to do. We can completely follow that link to see more information, but since we do not set up a firewall to allow Internet access, we will go to another computer to check the URL. there. For example, you can go to the client that installed Exchange Edge.
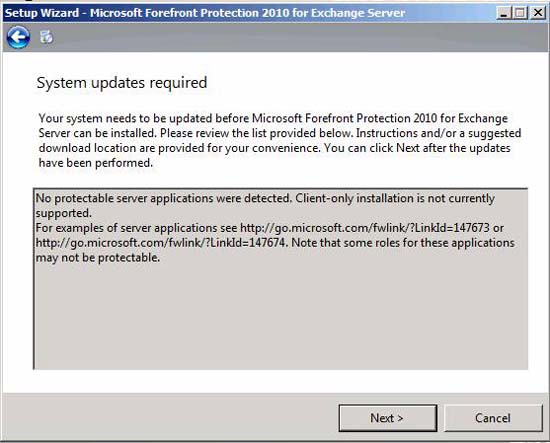
Figure 3
After clicking Next , a dialog box will appear with the message ' Update your system so that it meets the installation prerequisites ' meaning 'You need to upgrade the system to meet the prerequisites of installation' (Figure 4 ). Here we need to install Exchange Edge Services,
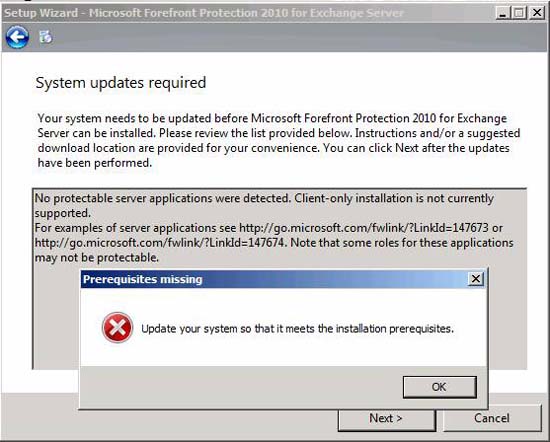
Figure 4
Look for your Exchange 2010 installation DVD and perform this installation. If you haven't installed Exchange 2010 before, you might be wondering about how to install it. The installation dialog box appears and displays a number of options. It indicates the first option we need to address is Step 3: Choose Exchange language option, as shown in Figure 5. Click it to expand this option, and you will be asked to install the language on the disk or want to install other languages. Let us choose the selected language setting on DVD.
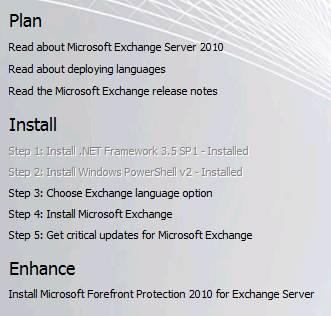
Figure 5
After you've made your selection, you'll move on to the next step, click Step 4: Install Microsoft Exchange , as shown in Figure 6.
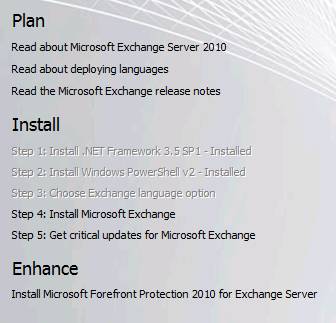
Figure 6
The Exchange Server 2010 Setup Introduction page appears, as shown in Figure 7. After reading the introduction, note the steps on the left panel, we click Next .
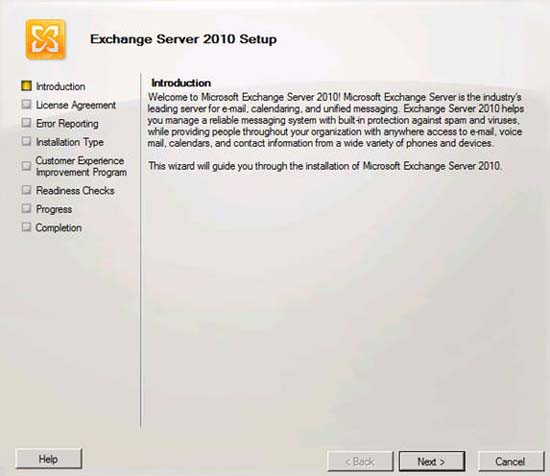
Figure 7
On the License Agreement page, shown in Figure 8, select the option I accept the terms in the license agreement and click Next .
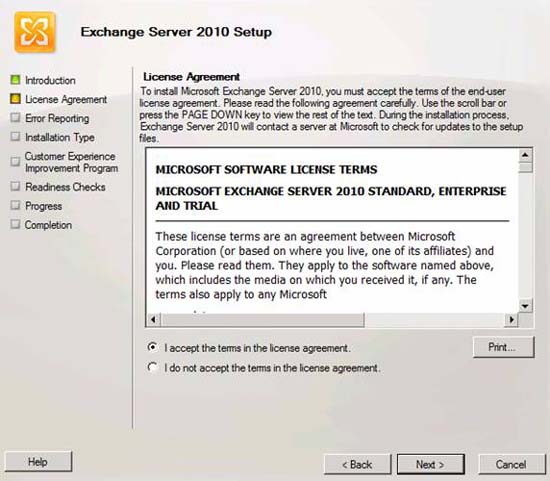
Figure 8
On the Error Reporting page, as shown in Figure 9, we will be asked to make the product better by reporting application errors to Microsoft. This is a good idea, so select the Yes (Recommended) option and click Next .
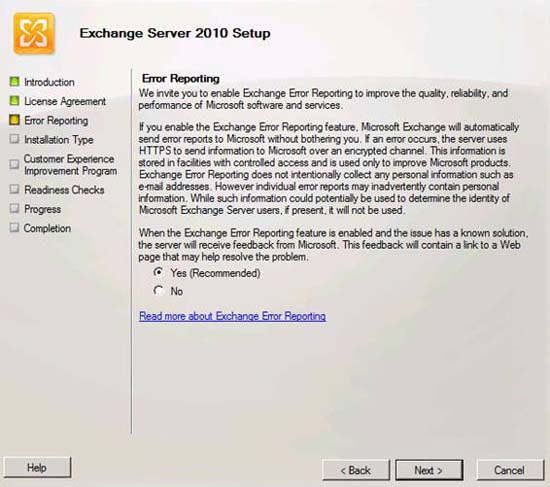
Figure 9
On the Installation Type page, shown in Figure 10, we will see two options:
- Typical Exchange Server Installation - This option will install multiple server roles on the same machine. These roles include Hub Transport, Client access, Mailbox and Exchange Management Tools. This is the most popular option, however it is not the best option for our purpose now.
- Custom Exchange Server Installation - This option allows you to select which server role will be installed on the machine. Since we want to install the Exchange Edge server role on the TMG firewall, select this option.
Select the Custom Exchange Server Installation option and click Next .
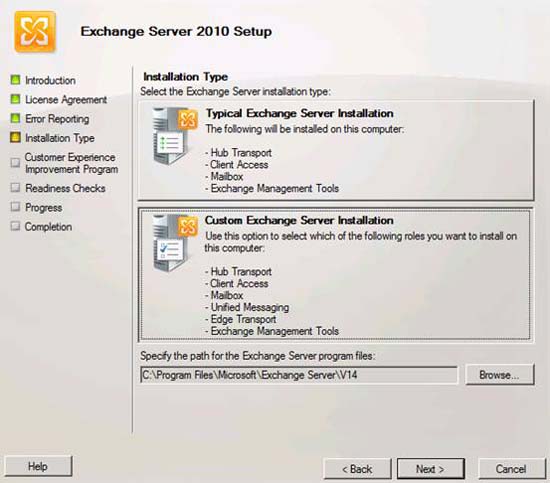
Figure 10
On the Server Role Selection page, shown in Figure 11, check the Edge Transport Role checkbox. So far everything is done quite easily and we hope the next one is the same. Click Next .
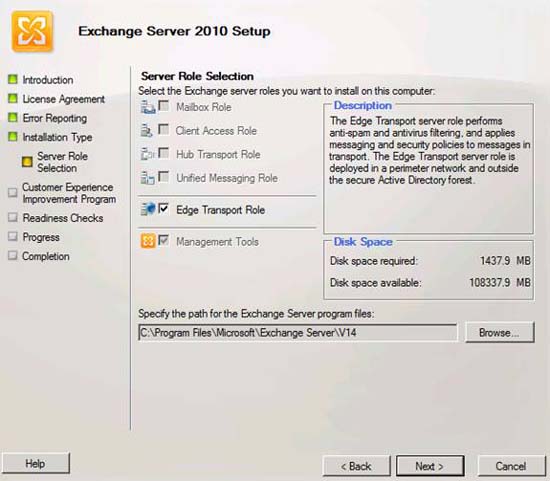
Figure 11
On the Customer Experience Improvement Program page, shown in Figure 12, we are asked whether to participate in the Customer Experience Improvement Program. Nobody doesn't want an improved customer experience so choose the Join the Exchange Customer Experience Improvement Program (CEIP) option. Note that if for some reason in the future you do not want to stick with this program, you can quit the CEIP program.
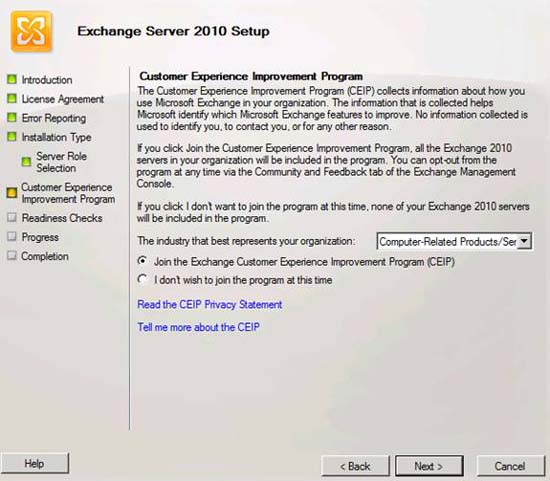
Figure 12
On the Readiness Checks page, shown in Figure 13, there is not much we can do here except to see if the installer checks the machine to make sure it is ready to install the Exchange Edge role. . No decisions need to be made on this page.
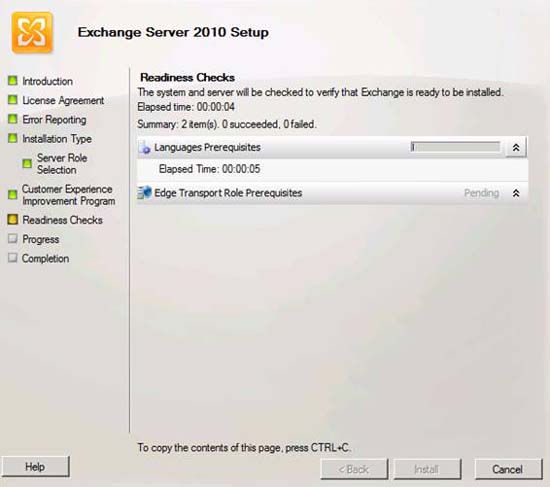
Figure 13
After passing the system check, the Install button will be active, as shown in Figure 14 and you can click on it to start the installation.
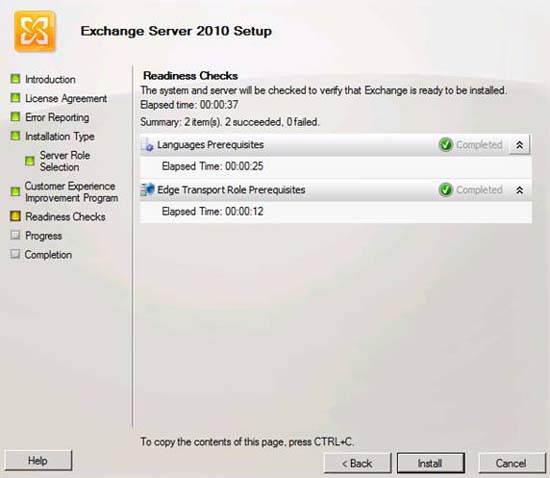
Figure 14
Next is the progress report, shown in Figure 15, which will show you a list of steps that will be taken when Exchange is installed. Like other installers, however, this is a fairly long list and takes a long time to complete the installation.
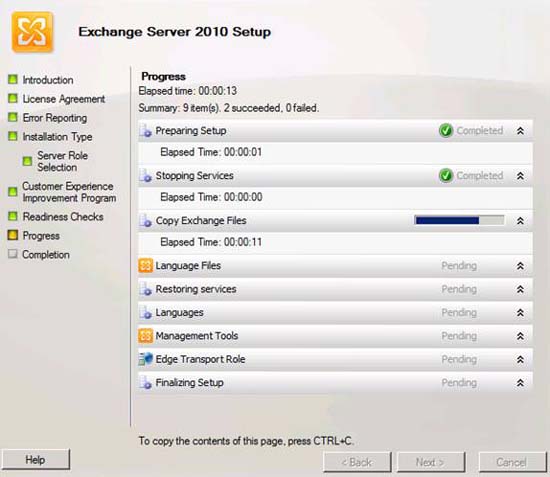
Figure 15
You may be wondering exactly how long it takes to install. This does not matter because it is entirely dependent on the system hardware as well as the components you want to install. In this case, install successfully and have a check mark in the Finalize this installation box using the Exchange Management Console, as shown in Figure 16. Not really sure what to do here but from understanding For example, the entire configuration and management of the Exchange Edge server role is supposed to be done on the TMG firewall console. However, because I want to risk this installation process, let's remove the check box in the checkbox and see what the console looks like.
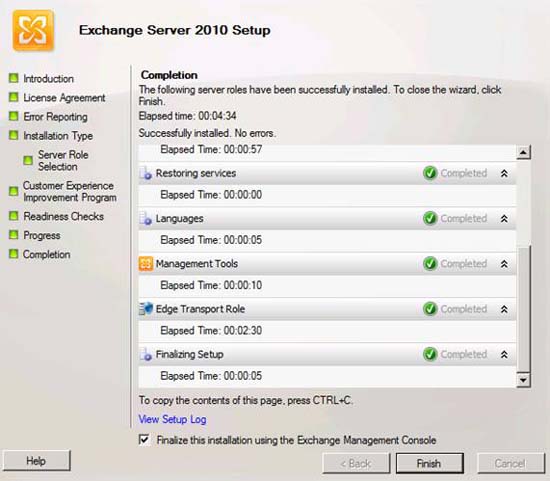
Figure 16
In Figure 17 is the console for the Exchange 2010 Management Console . However, there is no need to do anything here at this time, let's close the Exchange Management Console and return to installing TMG.
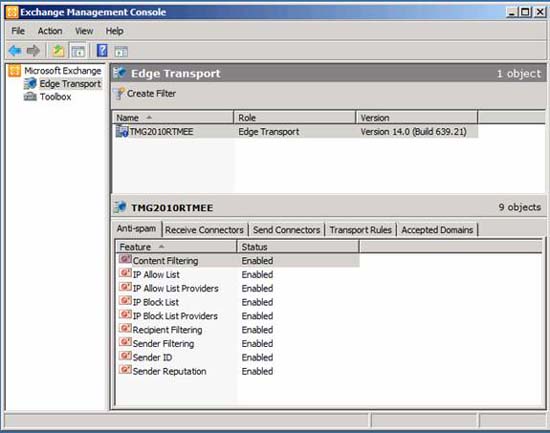
Figure 17
After closing the console, you will see the Exchange installer is still running and you will see the 5th step Step 5: Get critical updates for Microsoft Exchange is still available (see Figure 18). Upgrading the required components is a good idea, so let's click on that option.
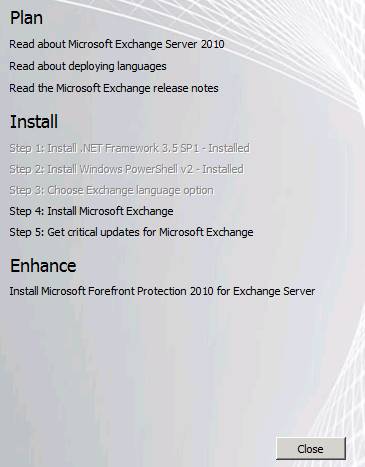
Figure 18
A red error message appears, shown in Figure 19, telling us that Windows could not search for new updates, meaning Windows could not search for new updates . There are several reasons for this error. The most likely reason in this case is that the firewall is not set to allow sending. This is a completely simple problem, we will be interested in this issue later. Now just install the email handling components, so we'll continue without installing those updates right now.
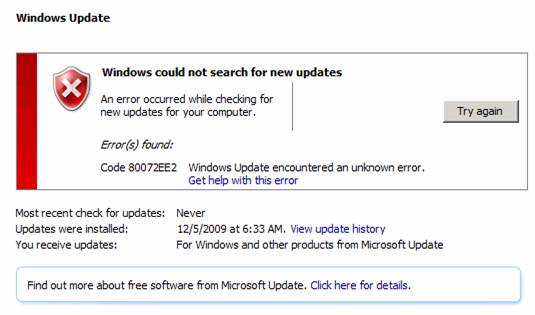
Figure 19
Now let's go back to installing TMG. Click the Install Microsoft Forefront Protection 2010 for Exchange Server link shown in Figure 20.
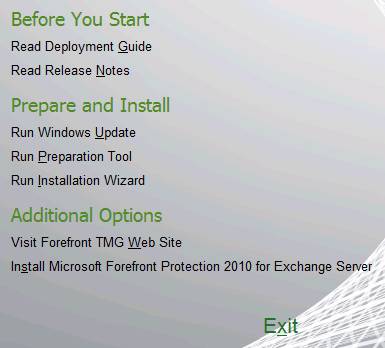
Figure 20
On the License Agreement page, as shown in Figure 21, check the I agree to the terms of the license agreement and the privacy statement check box and click Next . Here, you can feel quite familiar like other settings.
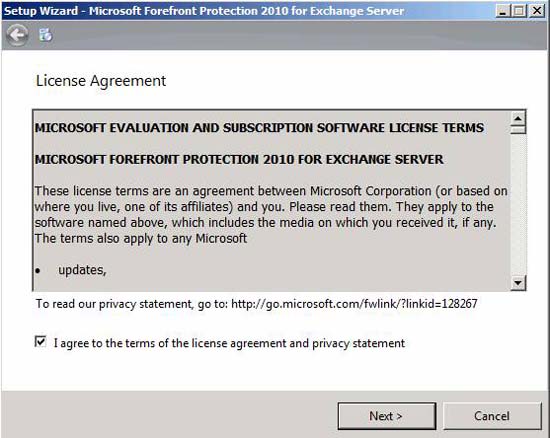
Figure 21
Next you will be taken to the Service Restart page, shown in Figure 22. Note that the installer will need to stop and restart the Microsoft Exchange Transport service . This is not a problem, because we have not used it yet. Click Next .
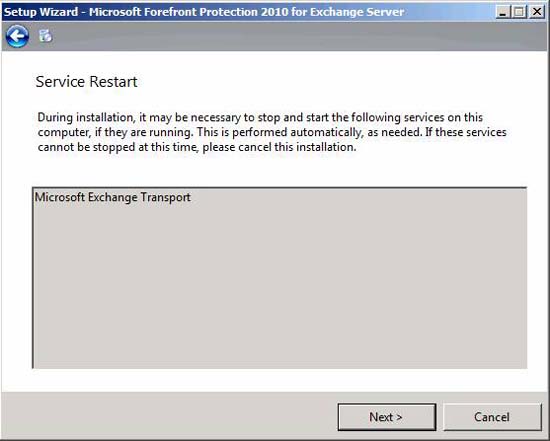
Figure 22
On the Installation Folders page, shown in Figure 23, you can select the location for both the Program folder and Data folder . The Data folder will hold data such as quarantined files and stored files. The best way is to place all data files in a separate partition or a separate hard drive. Since there is no other hard drive and quick instructions on this issue here, we use the default guide and click Next .
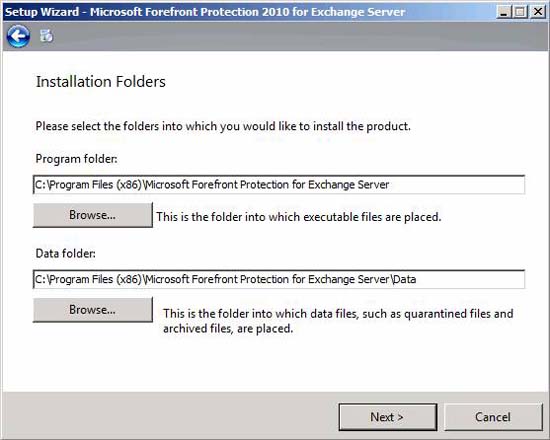
Figure 23
The antispam engine for Forefront Protection for Exchange will download concept updates independently from other machines and conceptual updates used by the TMG firewall. These updates take place HTTPS transmission, so if you have a proxy server in front of the TMG firewall, you can enter the proxy information in the dialog box shown in Figure 24. In this example, we There is no Proxy server in front of the firewall, so click Next .
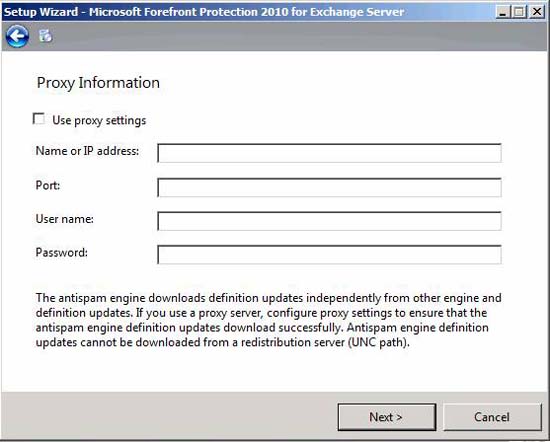
Figure 24
On the Antispam Configuration page as shown in Figure 25, you can turn on the antispam feature now or you can wait and turn it on later. This is a bit misleading, if we tell the installer to turn it on now, this feature will not automatically activate in the TMG firewall interface as we will see later. However we suspect that we didn't turn it on through this dialog, we'll have to turn it on later from another location - which means we have to find the option to do this activation! Do so and click Next .
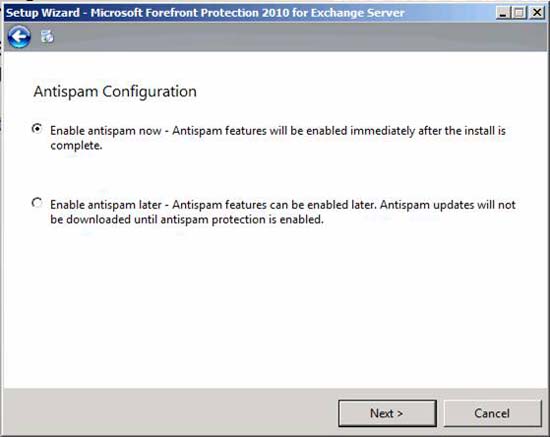
Figure 25
It is only the case that we do not make the right decision initially, now we will take another opportunity to participate in the Customer Experience Improvement Program. Put a checkmark in the Join the Customer Experience Improvement Program check box as shown in Figure 26 and click Next .
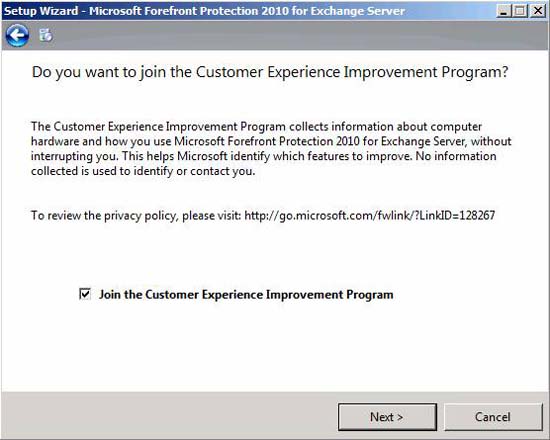
Figure 26
Confirm your selections on the Confirm Settings page. You can scroll to search for some interesting information - some may make you a little messy. For example, if you check Figure 27 below, you will see some detailed instructions on activating the machine upgrade work immediately. This is a bit confusing because there is no clarity that these instructions are for FPE customers or for TMG + FPE customers. Here, to be safe, wait for the installation to complete, then go to the TMG firewall console to see if there are any suggestions.
Click Next .
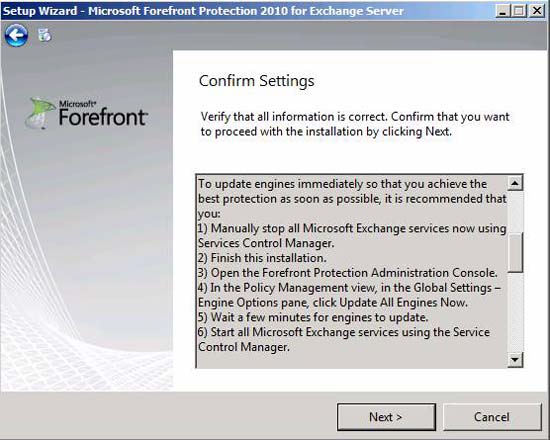
Figure 27
The dialog in Figure 28 will appear when FPE installs on the TMG firewall.
Figure 28
On the Installation results page, shown in Figure 29, we can see that the installation was successful. There is an option here: the Forefront Online Protection Launch for Exchange Gateway installation program . This is an interesting option because it relates to the FOPE product. FOPE is a cloud-based email, anti-spam and anti-malware policy consensus solution. What is unclear here is why we will use FOPE with TMG email handling solution. The answer here is that they need to copy each other's efforts.
Click Finish .
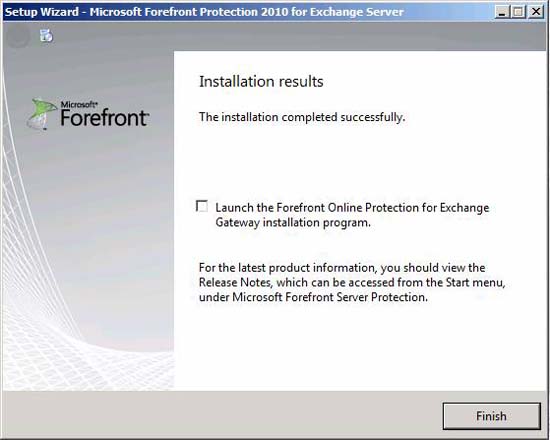
Figure 29
Now let's look at the results for our implementation efforts. Open the TMG Firewall console and click the E-Mail Policy button in the left pane of the interface, as shown in Figure 30. In the middle pane, click the E-Mail Policy tab. Here you can see a hint hint activating protection function against email attacks; Click Configure E-mail Policy . What's here shows that 'Finish' is clicked, but we haven't finished. Installation is complete but we still have some configuration tasks. Please continue to do this work.
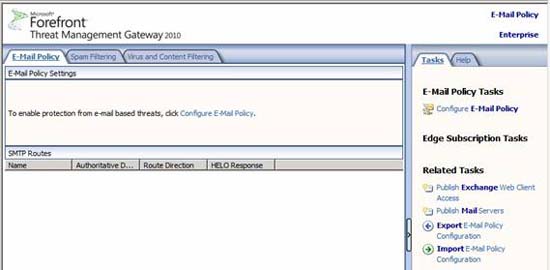
Figure 30
Click the Spam Filtering tab in the middle pane to wake up the dialog box as shown in Figure 31. Here we see some spam filtering options, many of which are like they relate directly to what Exchange Edge . However, it also appears that spam filter settings are in Disabled state. Without worrying about this issue, we will activate them in the next section.
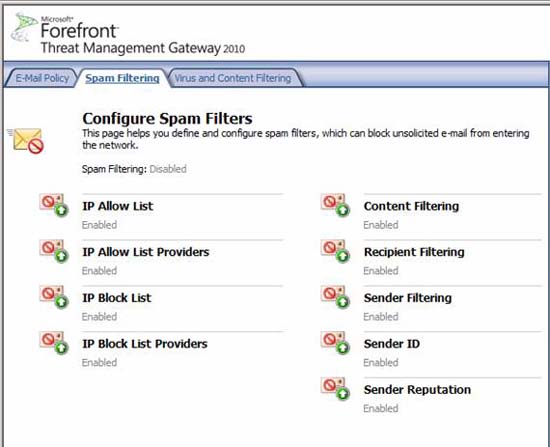
Figure 31
On the Virus and Content Filtering tab of the middle pane of the interface, as shown in Figure 32, you will see some options related to the FPE component of the email handling solution. Note that at this point, both Content Filtering and Virus Filtering options are Disabled . We will fix this problem later.
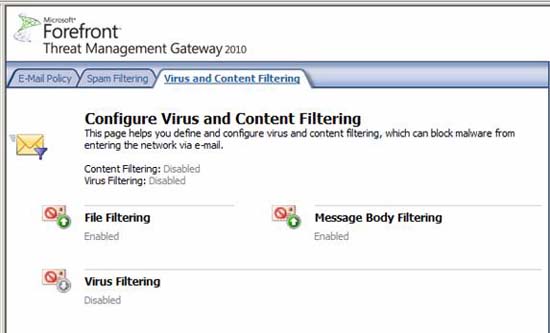
Figure 32
Conclude
In this first part, we installed Exchange Edge Server on the TMG firewall. After installing the Edge server role on the firewall, we used the TMG installer to install FPE. This installation process has been successful and does not take long to complete. That's what we did in this first part, in part two we will do the configuration tasks to be able to implement the solution. In this article, I will show you how to configure the settings in the TMG management console, then test the incoming and outgoing email access to make sure it works as intended.
You should read it
- ★ Install and configure email handling solutions on TMG 2010 Firewall - Part 2: E-Mail Policy
- ★ What is a firewall? General knowledge about Firewall
- ★ Install and configure email handling solutions on TMG 2010 Firewall - Part 4
- ★ Learn about firewalls, Windows Firewall on Windows Server 2012
- ★ How to set up a firewall in Linux