Configure, set Incoming and Outgoing Email on SharePoint 2010 - Part 3
In the previous sections of the article, we introduced you to some points in the process of configuring Incoming Email with SharePoint 2010, and this time we will continue with the rest, which is Outgoing Email. ..
Table of Contents
TipsMake.com - In the previous sections of the article , we introduced you to some points in the process of configuring Incoming Email with SharePoint 2010, and this time we will continue with the rest, that is Outgoing Email.
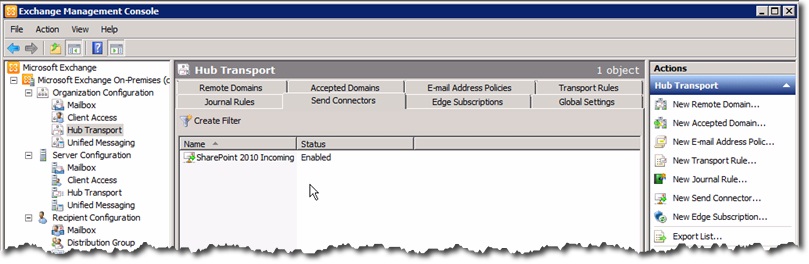
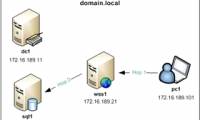
Return to Exchange Server at the time of configuring Receive Connector:
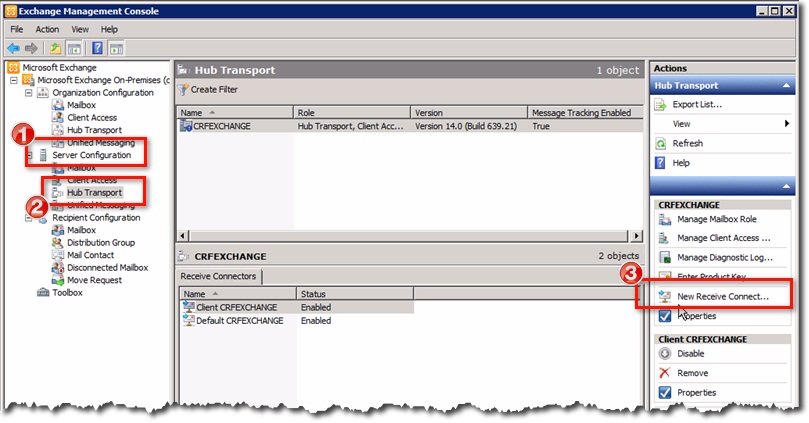
Our next task here is to create a new Receive Connector component , because the Send Connector was created during the Organization Configuration Hub Transport setup process. Open Server Configuration , right-click and select New Receive Connector:
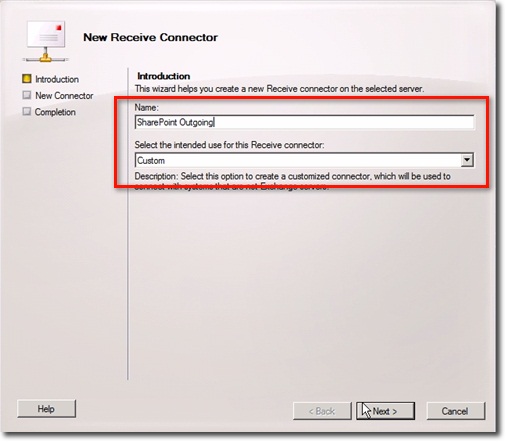
Name and select the purpose of use for that connection (eg Custom ). Click Next to continue:
Keep the settings at Local Network and click Next :

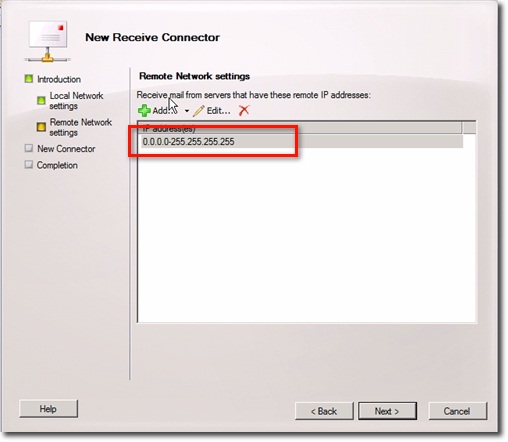
In the Remote Network Settings window , you select the IP range in the list to change. Typically, the only single component is the server's IP address range that the mailbox will receive:
Next, declare the IP address of the SMTP server (in this case, the SharePoint server) in the Start Address section, as well as the corresponding End Address of each system:

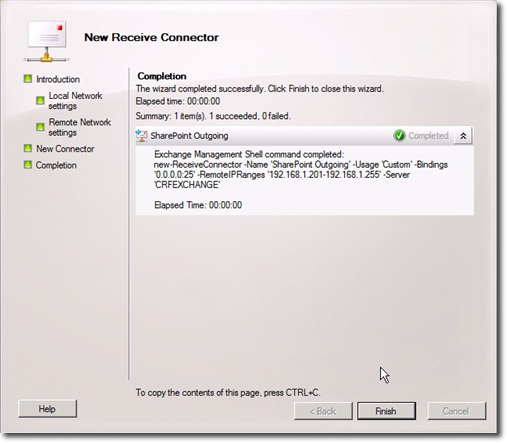
Click OK and then continue to Next . At the following window, click New to create a new connection:
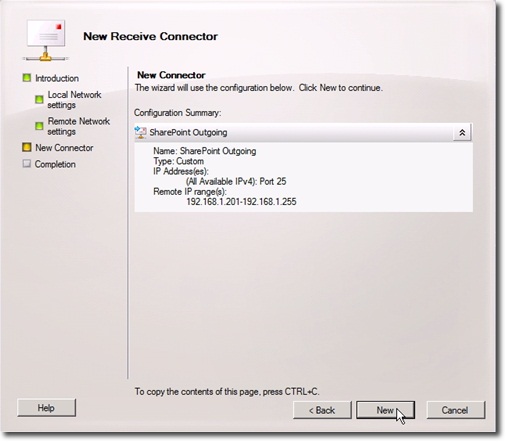
And when this process ends, click Finish :
When you see the newly received Receive Connector , right-click and select Properties :
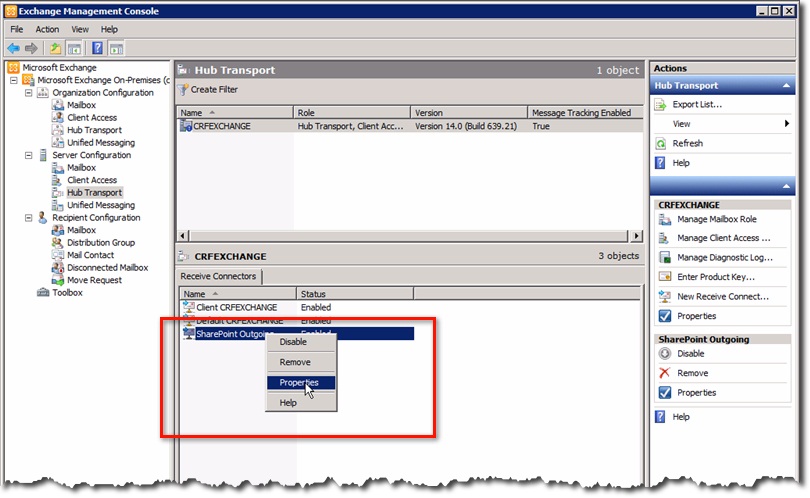
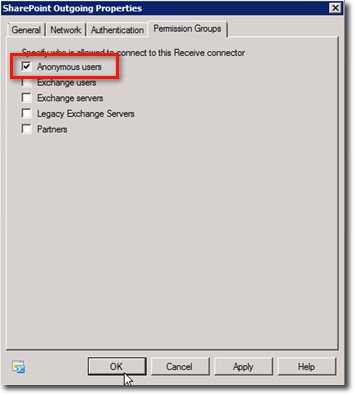
Here, go to the Permission Groups tab and check the check box for Anonymous users , then click OK :
Basically, you have completed the process of creating a Receive Connector. In the next section, we will move on to the configuration of Outgoing Email from Central Administration.
Configure Outgoing Email from Central Administration:
On any client machine, open SharePoint Central Administration and then go to System Settings> Configure outgoing e-mail settings:

In the next display window, enter the information as below:
- Outbound SMTP server : Enter FQDN parameters of Exchange server
- From address : Enter the address of Administrator machine
- Reply-to address : enter Admin's email address
- Character set : according to option
Then click OK when done:

Check Outgoing Email, Create and Manage Alert features:
The next thing to do here is to check the operation of Outgoing Email, more specifically to create the corresponding Alert . Open SharePoint and select the component displayed in the list, open the List tab and click Alert Me . Finally, Set alert on this list:

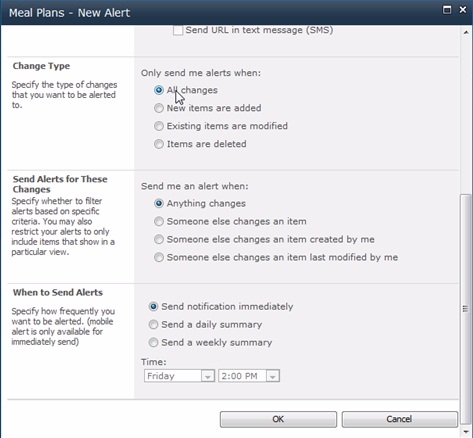
In this New Alert window , set the parameters as follows:
- Alert Title : enter the appropriate title for this Alert
- Send Alerts To: enter the name or email address of the recipient, including your own account to check
- Delivery Method : choose a forwarding method, in this case our email

- Change Type: Selecting the changes in the system will be notified to the user, here we will select All changes
- Send Alerts for These Changes: the 'scope' of the filters in the system, in this test we chose Anything changes
- When to Send Alerts : a certain amount of time the user will receive the warning information, here is Send notification immediately
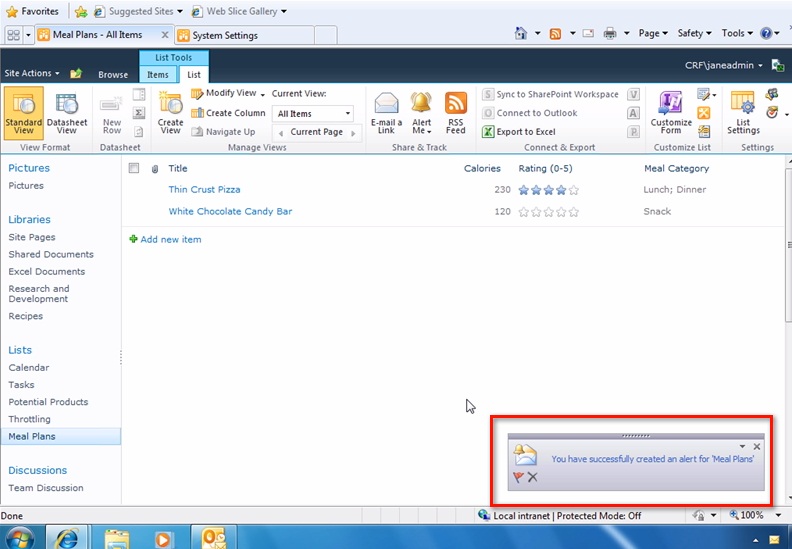
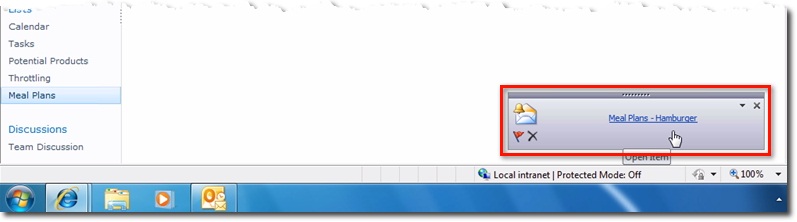
Click OK when finished. If you follow the above steps without any problems, then you will receive the first warning information immediately after clicking OK , we can see the details of this information specifically through Outlook :
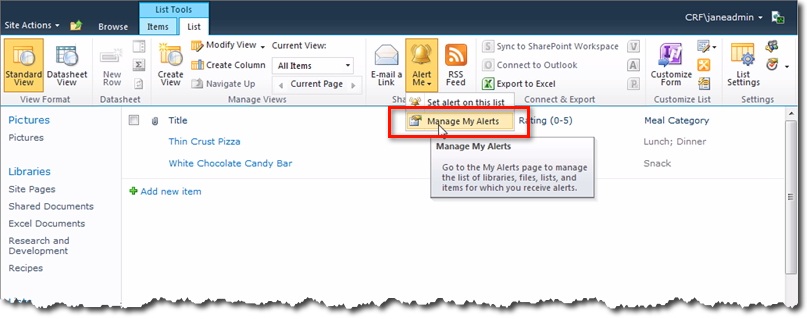
However, we can change these settings by pressing the Alert Me button and selecting Manage My Alerts:
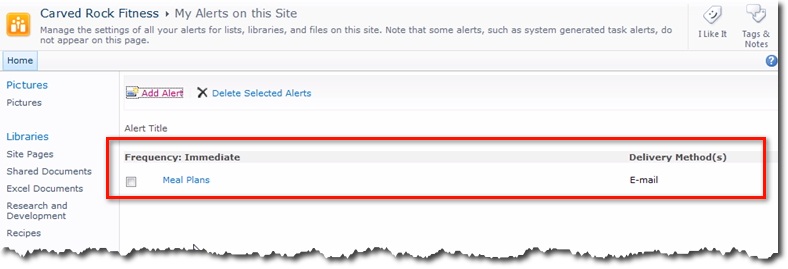
At the next display screen, you will see all Alert information available. If you want to change or reset, just click on it:
If you want to check the operation of Alert , we create a new component right under the Alert that has been activated. Click Add new item:

Fill in any of these fields:

And similarly, after clicking the Save button, you will receive system warning information via Outlook about creating new components:
With simple but extremely useful features as above, with only a few basic SharePoint setup steps for Outgoing Email , we were able to create and manage alert information, which is essential in tracking change in the system of lists, libraries and documents and documents.
Setting up Outgoing Email for web application:
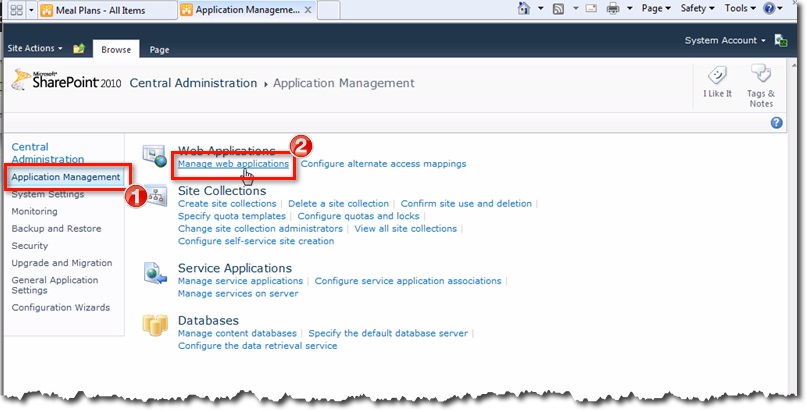
In fact, we can still take advantage of this configuration process. Go back to the Central Administration and select Application Management> Manage web applications:
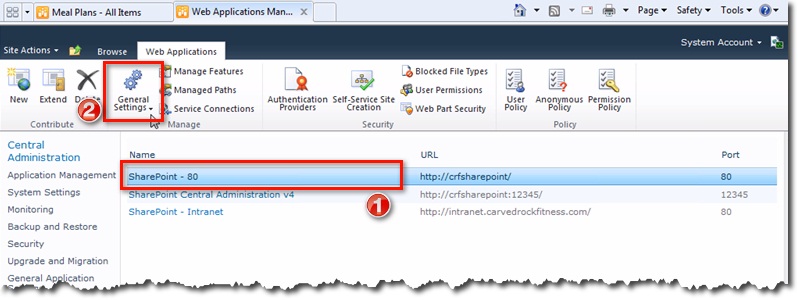
Select any application in the list here, select General Settings> Outgoing E-mail:
And can configure, set up Outgoing Email for that application:

Here, you perform similar to the Outgoing Email configuration above, just pay attention to change the equivalent specifications of that web application. Then click OK when done.
Good luck!
Was this article helpful?
Your feedback helps us improve.
Related Articles
 Configure, set Incoming and Outgoing Email on SharePoint 2010 - Part 18 minutes read
 Configure, set Incoming and Outgoing Email on SharePoint 2010 - Part 210 minutes read
 How to Configure Firewall on Debian Using UFW4 minutes read
 Troubleshoot problems with Kerberos in SharePoint - Part 211 minutes read
 Troubleshoot problems with Kerberos in SharePoint - Part 313 minutes read
 Spyware first appeared on mobile phones2 minutes read
Reader Comments 0
Sign in with email or Google to join the discussion.