Table of Contents
Condition
- Windows 10
- Access to Windows 10 as admin
How to connect L2TP / IPsec VPN on Windows 10
Step 1 - Sign in to Windows 10
This guide explains how to connect L2TP / IPsec VPN on Windows 10, with clear steps, practical tips, and important checks before you begin.
Open Network and Internet .
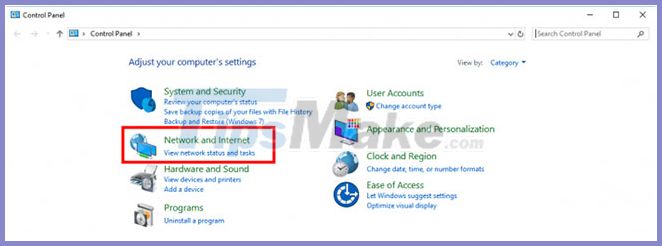
Open the Network and Sharing Center .

Step 2 - Configure VPN
Click Set up a new connection on a network .
Select Connect to a workplace and click Next.
Click Use my Internet connection (VPN) .

Enter your IP address in the Internet Address field . In this example, the article uses IP 193.33.61.185. Click Create.
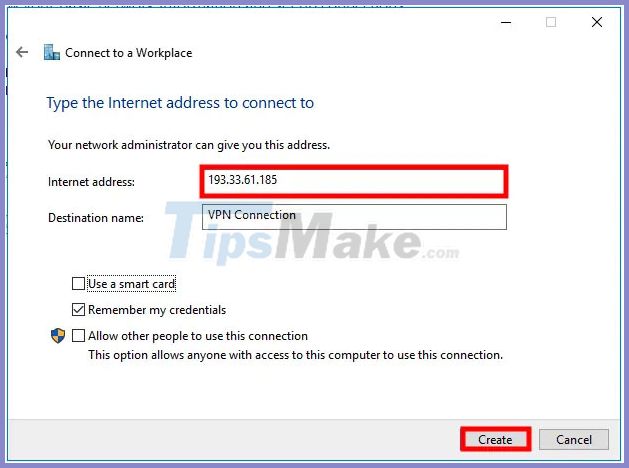
After you click Create , the setup wizard will be closed.
Click on Change adapter settings on the left menu.
You will now see all available interfaces. Open the Properties of the VPN connection interface.
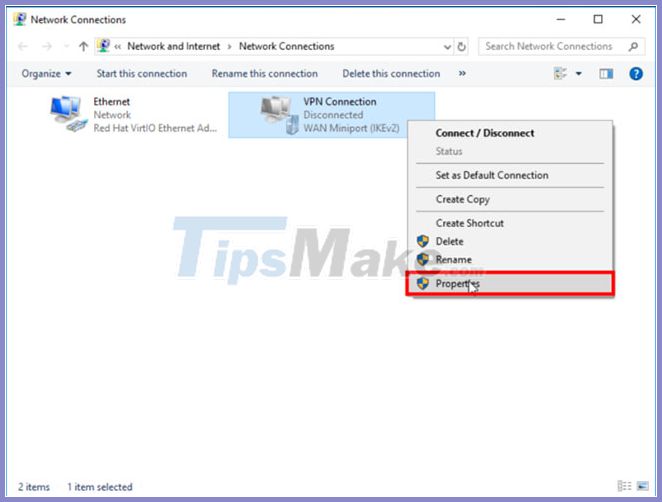
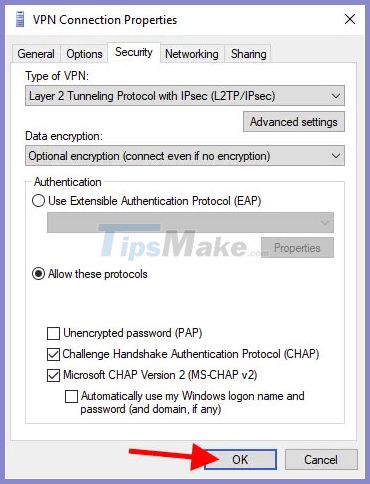
Open the Security tab .
Open the Type of VPN drop-down menu and select Layer 2 Tunneling Protocol with IPsec (L2TP / IPsec) .
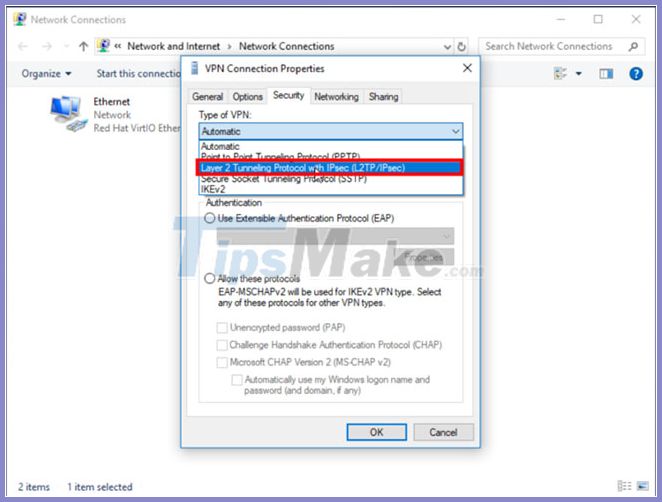
Click Advanced settings . Select Use preshared key for authentication and enter the pre-shared key you created on Windows Server. Apply it by clicking OK.
Go back to the Security tab . Select Allow these protocols and check the following values:
- Challenge Handshake Authentication Protocol (CHAP)
- Microsoft CHAP Version 2 (MS-CHAP v2)
Apply the changes by clicking OK.
Step 3 - Connect to the VPN server
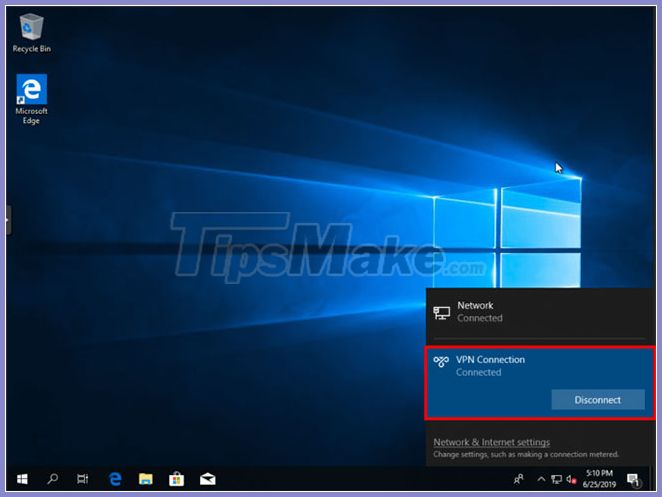
Open the Network icon in the bottom right and click on VPN Connection.
After you click on VPN Connection , the Connect button will display. Click this button .

You will be asked to enter a Username and Password.
The connection process takes place:

Your VPN connection is established.
Step 4 - Check the IP address
If you are routing all traffic through a VPN, you should see your VPN server IP address. You can find your IP address by going to whatismyip. com.
Congratulations, you have successfully configured a VPN client on Windows 10!
FAQ
What should I know about Connect L2TP / IPsec VPN on Windows 10?
Focus on the key features, requirements, limitations, and practical use cases explained in this guide.
How do I get the best results with Connect L2TP / IPsec VPN on Windows 10?
Follow the recommended steps, use current software or information, confirm compatibility, and review settings before major changes.
Are there any risks or limitations?
Potential limitations depend on compatibility, data quality, cost, privacy, support, and how the product or method is used.
Related Articles
 Check the Tmg 2010 Virtual Private Network Server -- Part 316 minutes read
 Updates KB5009543, KB5009566 Crash L2TP VPN Connection on Windows3 minutes read
 L2TP (Layer 2 Tunneling Protocol) Price?4 minutes read
 10 Reasons Why Ipsec VPN Failed1 minutes read
 How to Set up IKEv2 IPsec on Windows4 minutes read
 Ipsec Policy Agent Security5 minutes read
Reader Comments 0
Sign in with email or Google to join the discussion.