Export and Import IPSec Policy
In this article, I will show you how to export an IPSec Policy from one computer and import it to another computer?
Windows 2000 / XP / 2003 computers have a built-in IP security mechanism called IPSec (IP security). IPSec is a protocol designed to protect TCP / IP data packets when they are transmitted in the network using public key encryption. In addition to the above feature, besides encryption, IPSec also allows you to protect and configure workstations and servers with a firewall-like mechanism.
When working on a computer, you can easily set and assign IPSec Policy (IPSec Policy) from the Command Prompt using the NETSH command, or from the MMC console loaded with IP Security snap-in. .
However, when working with multiple computers, you need a better solution than having to go to each machine and reconfigure IPSec Policy. We need a method where we can use the same IPSec Policy on multiple computers or at least establish the same policy on some computers.
One method of configuring multiple computers to use the same IPSec Policy is to configure IPSec policies through the GPO. However in this article we will use the second method - export an IPSec Policy to the .IPSEC file and then import this file to other computers.
There are two methods to export and import IPSec Policy:
Method 1: Use the GUI
This method will definitely be easier for most users.
Export
- Open the MMC window ( Start> Run> MMC ).
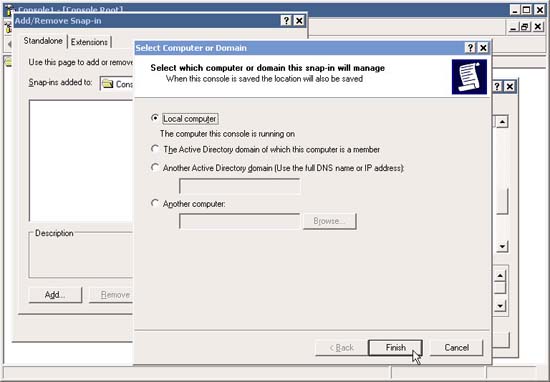
- Add IP Security and Policy Management Snap-In .


- In the Select which computer this policy will manage window, select Local Computer (or whatever policies depend on your needs). Click Close and then click OK .
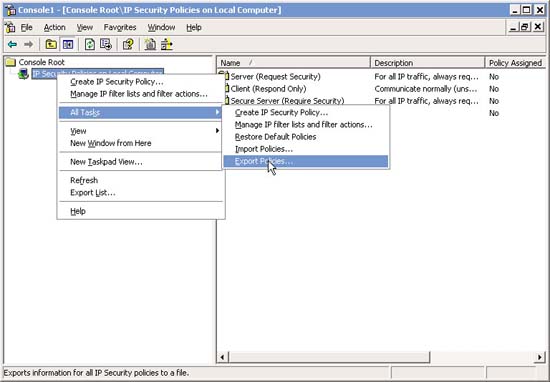
- Right-click IP Security Policies in the left pane of the MMC console. Select All Tasks and then Export Policies .
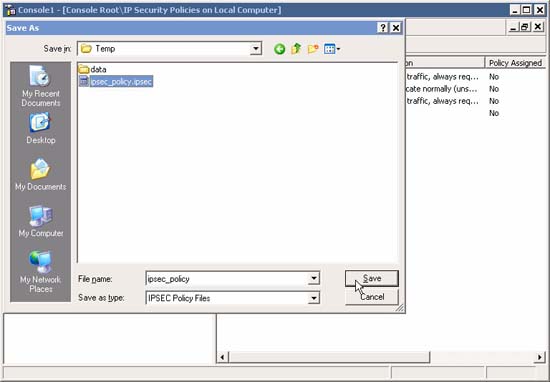
- Browse to the location where you want to save the file, name it and select Save .
- The file is now ready for import, whether you choose a method using GUI or NETSH.
Security warnings : Exporting IPSec Policies to a file may reveal passwords used by IPSec Policies if the file is lost or lost. If you are using Kerberos or Digital Certificates then there is no security issue here.
Import
- In the same MMC as before, right-click IP Security Policies in the left pane of the MCC interface. Select All Tasks and then the Import Policies .

- Browse to the location where you saved the file, name it and select Open .
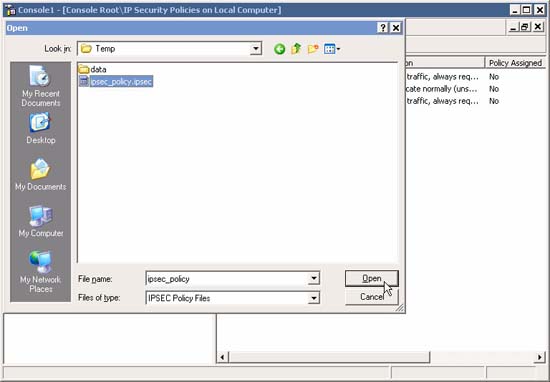
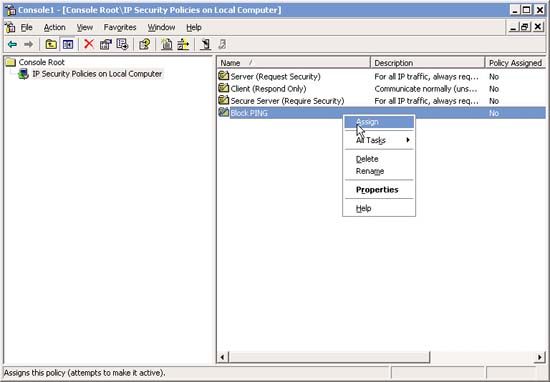
- The IPSec Policy is now ready and you can assign it by clicking on it and selecting Assign .
Method 2: Use NETSH
Requires some knowledge of command prompt, but this method is quite useful for bulk operations.
Export
Open Command Prompt and type:
netsh ipsec static exportpolicy c: 'temp'ipsec_policy.ipsec
Import
netsh ipsec static importpolicy c: 'temp'ipsec_policy.ipsec