9 useful tips with the Registry in Windows 7
In this tutorial we will give you some ways to adjust the Registry to get things that seem impossible to do with the Windows 7 operating system.
Table of Contents
In this tutorial we will give you some ways to adjust the Registry to get things that seem impossible to do with the Windows 7 operating system.
Windows Registry is like the brain of Windows operating system. It is a huge repository, a hierarchical database, easy to access, used to store system settings (and lots of other information). Without the Registry, your Windows computer is just over a paperweight. If the intervention is not correct, you may encounter serious problems. However, if you understand what you're doing with the Registry, you can adjust many Windows parameters according to your wishes.
In this article, we will show you some ways to adjust the Registry to get interesting effects. Remember, to see the effect from the changes, you need to restart the computer.
Backup Registry
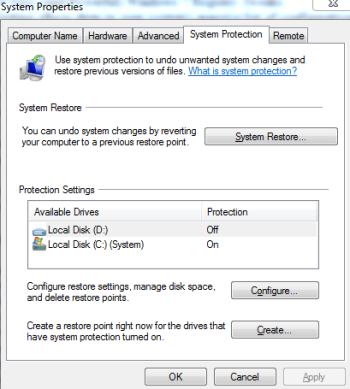
Setting up a restore point can help you restore your computer if the Registry error
Before you start interfering with the Registry, you must backup all important system information. We have to warn you: Setting up an incorrect Registry will prevent you from starting Windows to correct previous mistakes .
To perform a Registry backup, open Control Panel , click System , then click System protection on the left. Click the Create button to show Windows the process of creating a system restore point.
You can also open the Registry Editor - the tool used to make modifications - by typing regedit and the 'Search Programs and Files' box (when the Start button is clicked). When in Registry Editor, right-click Computer and select Export ,
Add Copy / Move menu to Windows Explorer

Add new menu to Windows Explorer
If you're still not satisfied with the drag-and-drop function, you can manage files more efficiently by editing the Registry to add new 'Copy to' and 'Move to' options within the Windows right-click menu. Standard Explorer. This new menu will provide a list of drives and folders, just select the destination folder, where you need to transfer your files to.
In the Registry Editor, locate the key below:
HKEY_CLASSES_ROOTAllFilesystemObjectsshellexContextMenuHandlers . When in this key, right-click the ContextMenuHandlers key and select New, Key ; Enter the Copy to key. Double-click the value (Default) in the window on the right and enter {C2FBB630-2971-11D1-A18C-00C04FD75D13} as its data.
To create the 'Move to' command, perform the same steps (however enter the Move to key) and use {C2FBB631-2971-11D1-A18C-00C04FD75D13} as the value data.
Turn off Aero Snap mode
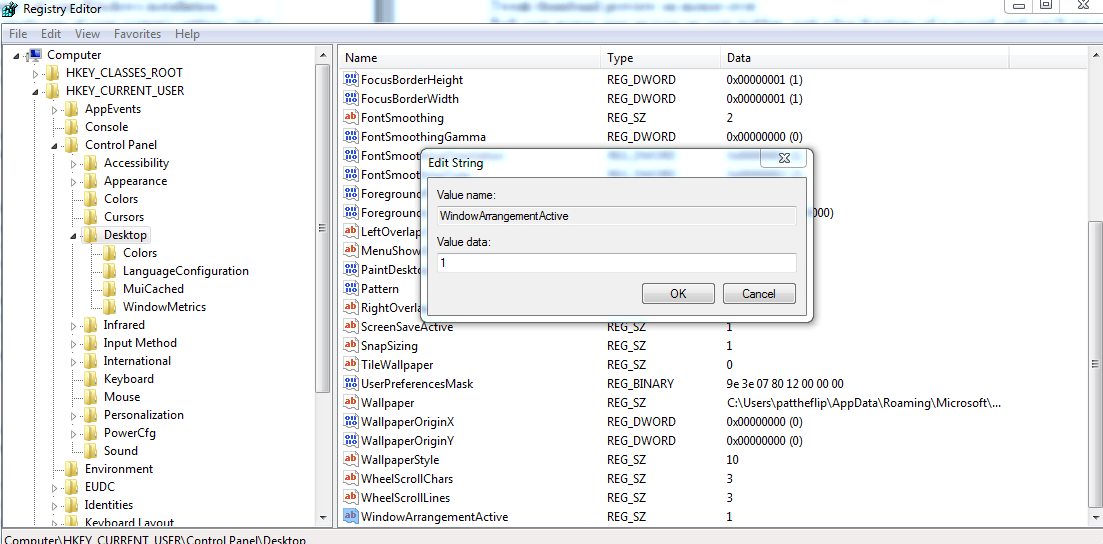
Turn off Aero Snap with the Registry
In Windows Aero environment, windows appear on the side of the screen by default. However, what happens if we want to drag the windows close to the corner of the screen without letting the operating system control the size and arrange them. Here's how: don't turn off the entire Aero feature, just turn off Aero Snap via the Windows Registry.
Navigate to the key below: HKEY_CURRENT_ USERControl PanelDesktop . Then, search for the value named WindowArrangementActive . By default, the data of this value is set to 1. Double-click that value and change to 0, so your windows will no longer have Aero Snap function.
Adjust Thumbnail Preview when moving mouse
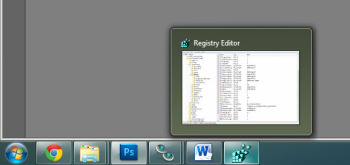
Hover your mouse over an icon in the taskbar and wait a moment, you'll see the thumbnail preview of that window. However, if you don't have the patience, if you want the thumbnail to appear as soon as you hover your mouse over the icon, we have the following:
In the Registry Editor, find the HKEY_CURRENT_USERSoftwareMicrosoftWindows CurrentVersionExplorerAdvanced key. Right-click anywhere in the right sidebar and select New, DWORD . Enter the name ExtendedUIHoverTime. Double-click on the new value and replace 0 with the previous value 1, change Base to Decimal .
Change the name in Windows
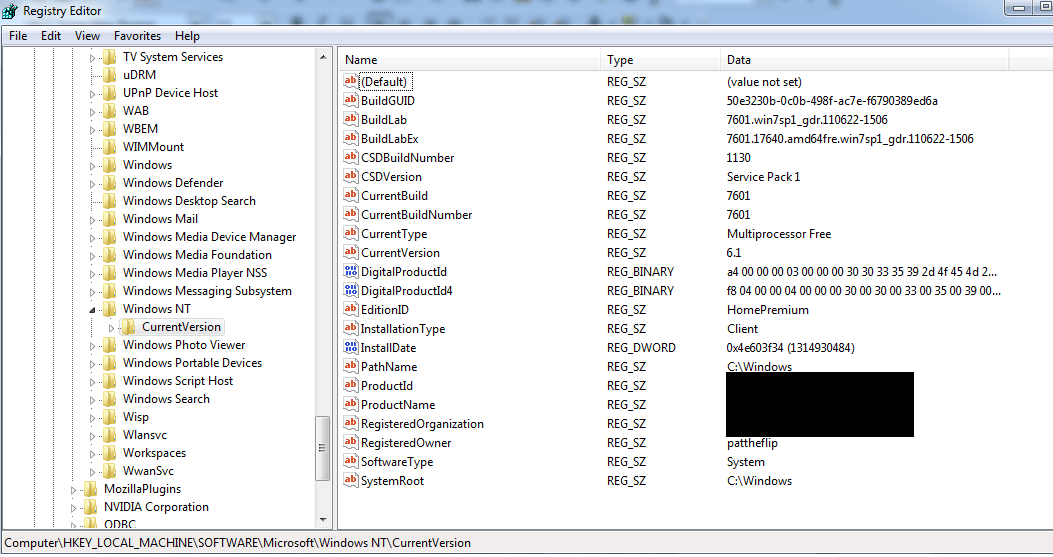
Change the name in Windows
This is an interesting adjustment. When installing Windows, the installation program will ask you to provide your name, organization name (if any), and the name you want to set for the system. However, what to do when you don't feel like these pre-ordered names afterwards? You can change the name of the system through Control Panel, however it is not easy to change the name provided to the computer when installing Windows at the beginning.
To fix this problem, navigate to the key: HKEY_LOCAL_MACHINESoftwareMicrosoftWindows NTCurrentVersion . You will see a series of values on the right side of the screen. Double-click the RegisteredOwner value to change its name.
Disable the Automatic Restart function of Windows Update
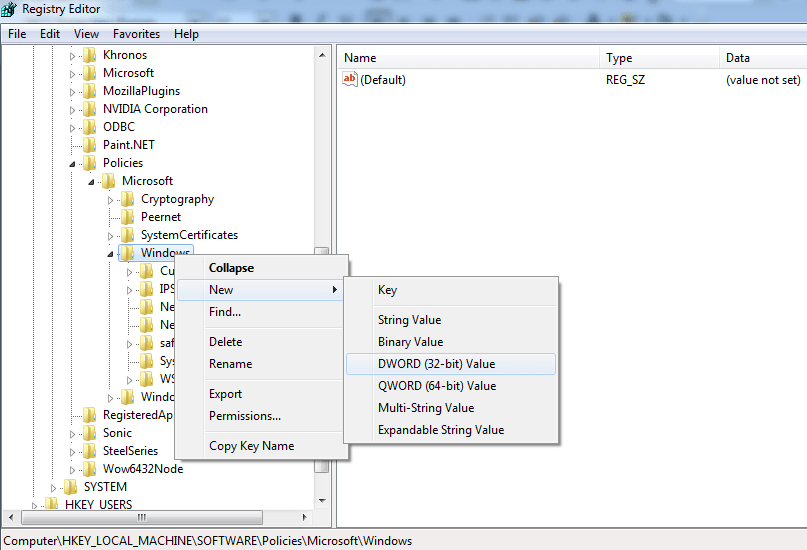
Adjusting the Registry allows you to turn off the Automatic Restart function of Windows Update
Windows Update is one of the best tools available in your system. However, it is also one of the tools that annoys us most because Windows Update regularly downloads and installs updates on your behalf. Upgrading is one of the security measures, but the problem here is that after the upgrade is completed, the system usually automatically restarts the computer for the upgrade to take effect. If you are focusing on something, then you will be interrupted thinking or work.
We can disable the automatic restart function by going to the HKEY_LOCAL_MACHINESoftwarePoliciesMicrosoftWindows key in the Registry. When in this key, right-click the Windows key and select the new key creation option. Enter the name WindowsUpdate . Repeat this process for locking WindowsUpdate, however create a new key named AU . Now your hierarchy will look like this: HKEY_LOCAL_MACHINESoftwarePoliciesMicrosoftWindowsWindowsUpdateAU .
Click the AU key, then right-click on the right sidebar window and create a new DWORD. Enter the name NoAutoRebootWithLoggedOnUsers for this DWORD and then double-click it to change the value from 0 to 1.
Displays the blue screen of death

You can configure your computer to display the blue screen at startup
What is the truth here? Do you really want to break Windows 7 and get a blue screen of death? This is a pretty tricky trick in spoofing that your computer is experiencing a disaster.
To do so, navigate to the following Registry key (if you use a USB keyboard): HKEY_LOCAL_MACHINESystemCurrentControlSetServiceskbdhidParameters . Right-click the sidebar on the right and create a new DWORD called CrashOnCtrlScroll . Double-click the value and change 0 to 1. Next, 'team' give your computer a 'helmet'.
Hide items in Control Panel that are not in use
Windows Control Panel provides a lot of options that you may not know. When was the last time you needed to upgrade the settings in Credential Manager or Windows CardSpace? Control Panel is not the same as Windows Explorer because you cannot move and delete items. However, the Windows Registry will help you hide some unused items.
Navigate to the following key: HKEY_CURRENT_USERSoftwareMicrosoftWindowsCurrentVersionPoliciesExplorer . If you don't see the Explorer key and the Policies key available, create these two keys. Inside the Explorer lock, right-click inside the rightmost window and create a new DWORD named DisallowCpl , then set its value to 1 instead of 0.
Next, right-click on Explorer and create a new key called DisallowCpl . Then select the new key and right-click on the rightmost window again. At this point, you use your right-click menu to create string values. For each icon in Control Panel to hide, you need to create a series of numeric string values: for example, hiding two symbols means that you need to create string values '1' and '2'. Your numbers must be placed continuously.
Each value data of the string (set by double-clicking its value) must be the same as the Control Panel component you want to hide (eg Programs and Features or Action Center ).
Hide web search reminders
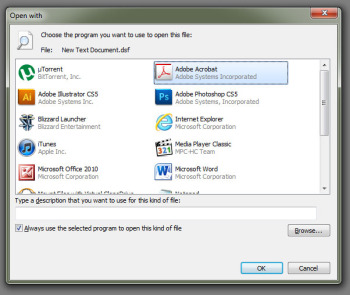
Double-click a file but Windows does not recognize it, and the operating system will display a window asking if you want to search for a program on the network that can open the file. Have you ever used this feature? We are sure not, this is why we introduced how to adjust the Registry to eliminate this window permanently and instead an optional window, a list of programs you have You can use it to open the file.
Go to HKEY_LOCAL_MACHINESoftwareMicrosoftWindowsCurrentVersionPoliciesExplorer key. When in this key, create a new DWORD by right-clicking on the rightmost window. Name DWORD NoInternetOpenWith, then double-click it to assign a value of 1.
Show notification before logging in
Do you share your laptop or desktop with other users? Or do you want to send to your friends or relatives a fairly polite message about how they should use your computer when they start it? A small adjustment in the Registry will help you pop out that message and the user must click it before he can log into your system.
Navigate to the following key: HKEY_LOCAL_MACHINESoftwareMicrosoftWindowsCurrent VersionPoliciesSystem . From here, double click on legalnoticecaption value. Anything you enter as data will be used as the notification header. The data you enter after double-clicking the legalnoticetext value will be used as the notification content.
Was this article helpful?
Your feedback helps us improve.
Related Articles
 50 Registry tricks to help you become a true Windows 7 / Vista 'hacker' (Part 1)7 minutes read
 Learn about the Windows Registry - Part I9 minutes read
 50 Registry tricks to help you become a true Windows 7 / Vista 'hacker' (Part 3)6 minutes read
 Use the .reg file to configure the Registry in WinXP8 minutes read
 How to create a hacked Windows Registry file yourself7 minutes read
 Unlock hidden features on Windows 10 with some Registry tricks17 minutes read
Reader Comments 0
Sign in with email or Google to join the discussion.