Unusually high CPU error correction due to TiWorker.exe on Windows 10 / 8.1 / 8
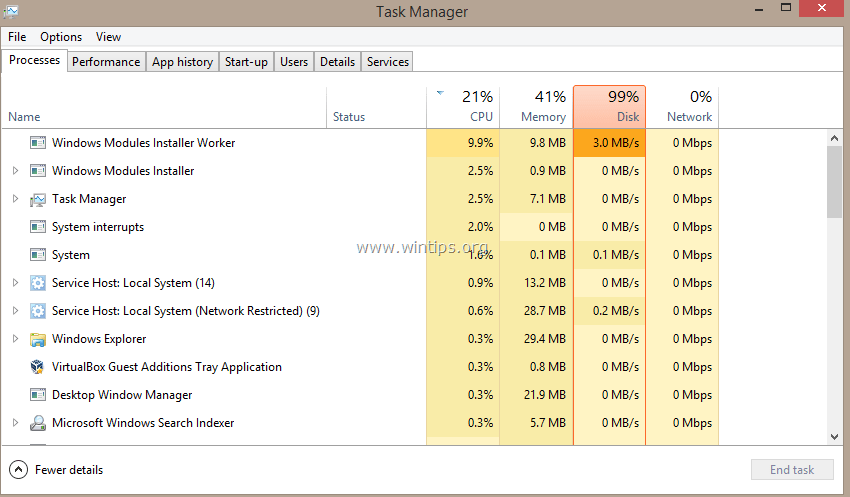
TiWorker.exe (Windows Module Installer Worker) is the process related to the Windows Update Services service. This is an important process on the Windows Update service and programs that start with the computer. Usually TiWorker.exe runs in the background while the system checks for new updates and releases system resources.
However, the point worth mentioning here is that TiWorker.exe is the cause of unusually high CPU error on Windows 8.x and Windows 10 systems. So how to fix this error, invite you to refer to the article below Here of Network Administration.
1. Scan the virus on your computer
Viruses or malicious programs can cause unusually high CPU errors caused by TiWorker.exe. So to fix the error, you can use antivirus programs to find and remove viruses and other malicious programs on your computer and to fix errors.
Some effective anti-virus programs can be found here.
2. Install all available Update versions
Make sure your computer has the available version of Windows Update installed. To do this thing:
- On Windows 8, 8.1:
1. Press the Windows + R key combination to open the Run command window.
2. On the Run command window, enter the following command and press Enter to open Windows Update:
wuapp.exe

3. On the Windows Update window, click Check for updates , then install all the updates you find.
- On Windows 10:
1. Click the Start button and click Settings to open the Settings window.

2. On the Settings window, click Update & security.
3. Next, click on the Check for updates button and then install all the updates you find.
3. Run System Maintenance & Windows Update troubleshooters
Run the System Maintenance troubleshooter to automatically fix system errors.
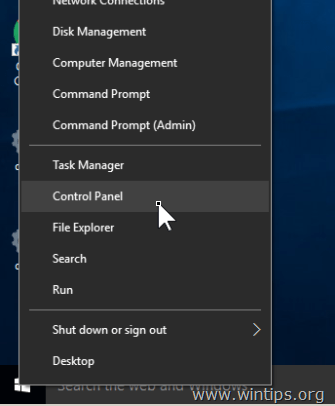
1. Right-click the Start button in the bottom left corner of the screen, click Control Panel.
2. On the Control Panel window, set the View by item to Small icons.
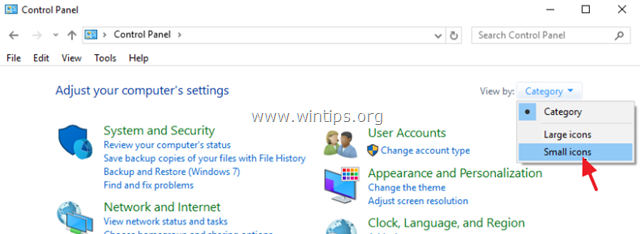
3. Next, find and click Troubleshooting.

4. Click View all.

5. Double-click System Maintenance.
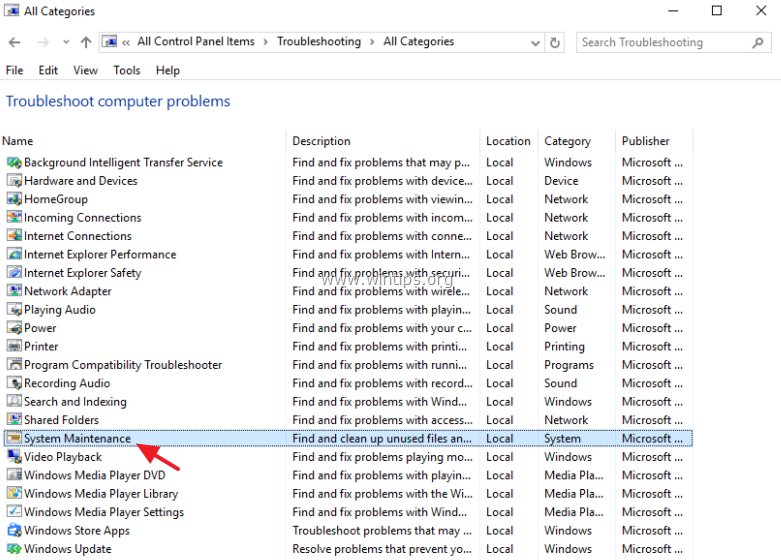
6. Click Next and follow the instructions on the screen to run the System Maintenance troubleshooter.
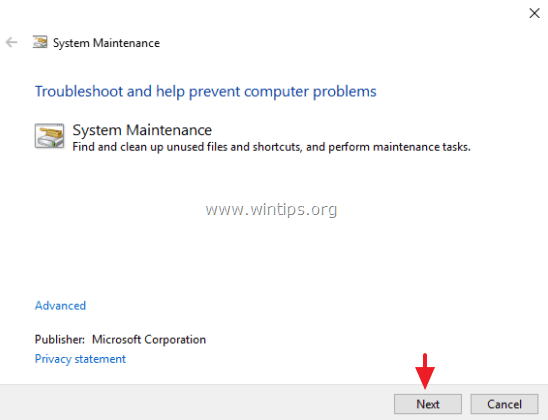
7. After System Maintenance completes the process, select Windows Update troubleshooter from the list.
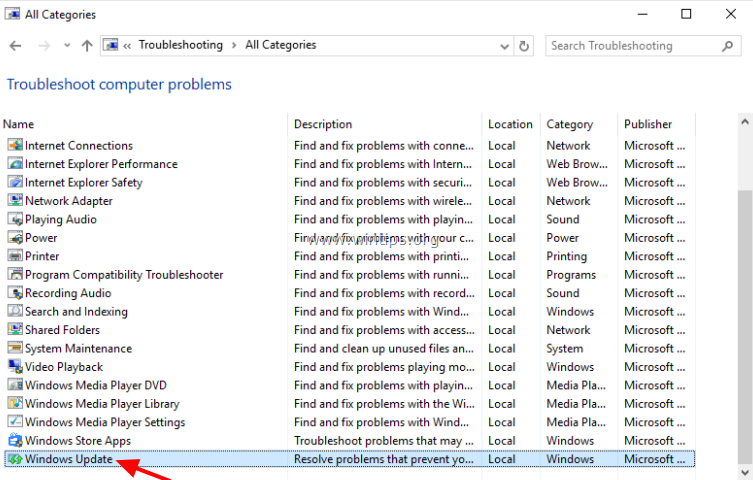
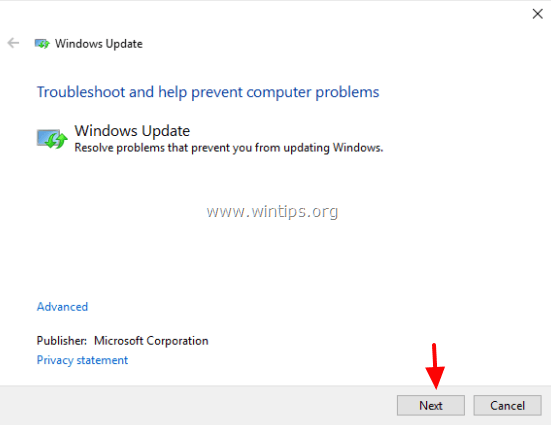
8. Click Next and follow the on-screen instructions to fix the Windows Update error.
4. Delete SoftwareDistribution folder
The Windows Update Store folder (also known as SoftwareDistribution folder) is where Windows stores downloaded updates. If the directory fails, it will cause problems during Windows update. Therefore, to fix the error, it is best to delete all downloaded update folders and force Windows to create a new SoftwareDistribution blank folder.
To do this thing:
1. Press the Windows + R key combination to open the Run command window.
2. On the Run command window, enter the following command and press Enter to open the Services window:
services.msc
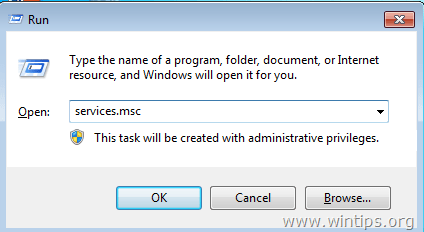
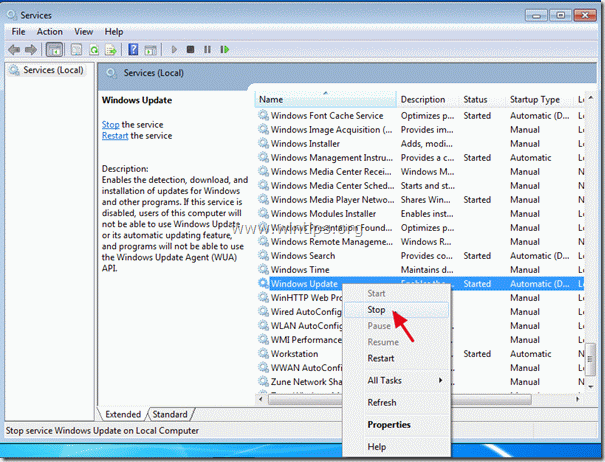
3. On the Windows Service window, find the service called Windows Update , right-click it and select Stop.
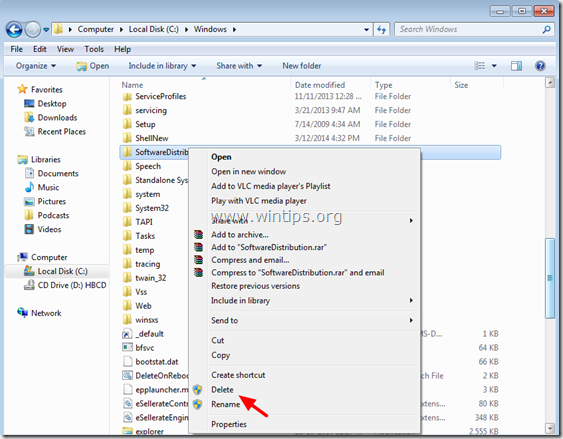
4. Next navigate to folder C: Windows.
5. Find and delete the SoftwareDistribution folder or can rename SoftwareDistribution folder to SoftwareDistributionOLD.
Note:
After booting up, next time Windows Update will check for available updates and automatically create a new SoftwareDistribution folder to store updates.
6. Restart your computer.
7. If an unusually high CPU error is caused by TiWorker.exe, you can apply other solutions below.
5. Reduce TiWorker process priority
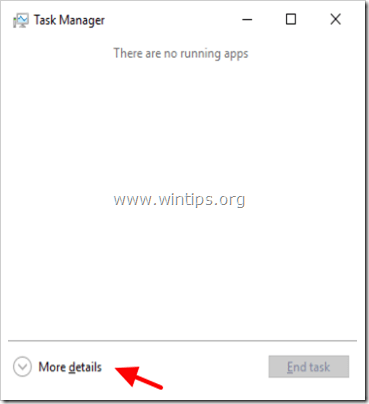
1. Press Ctrl + Shift + Esc or right-click the Start button in the bottom left corner of the screen, select Task Manager.
On the Task Manager window, click More details.
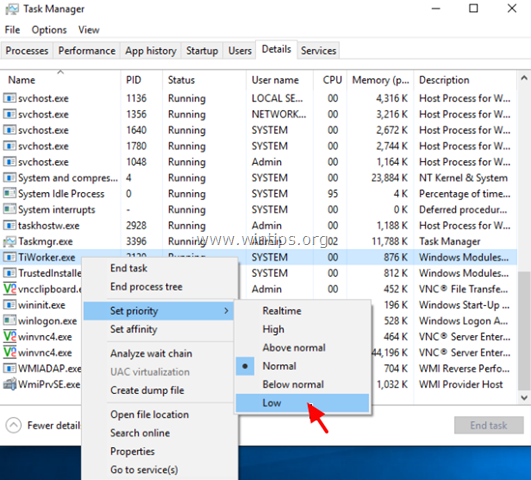
2. Next, click the Details tab.

3. Right-click TiWorker.exe, select Set priority => Low.
Note:
You can also select the End process tree option to stop the TiWorker.exe process.
6. Fix system file errors and faulty services (SFC)
Run the System File Checker tool (SFC) to fix corrupted files and services (services) on Windows computers. To do this thing:
1. Open the Command Prompt window under Admin. To do this, right-click on the Start button in the bottom left corner of the screen and select Command Prompt (Admin) .
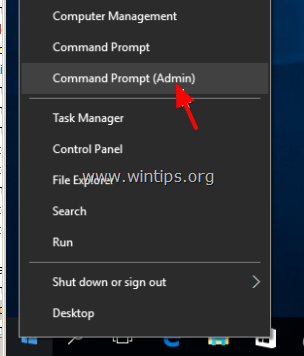
2. On the Command Prompt window, enter the command below and press Enter:
SFC / SCANNOW

3. Wait until the SFC tool checks and corrects files and services on the system.
4. After completing the process, restart your computer and check if the abnormally high CPU error is caused by TiWorker.exe.
7. Fix Windows error with DISM tool (System Update Readiness Tool)
1. Right-click the Start button in the bottom left corner of the screen, select Command Prompt (Admin).
2. On the Command Prompt window, enter the following command and press Enter:
Dism.exe / Online / Cleanup-Image / Restorehealth

3. Wait for DISM to fix the corrupted files.

4. After the process is complete, you will receive a notification to complete the process.
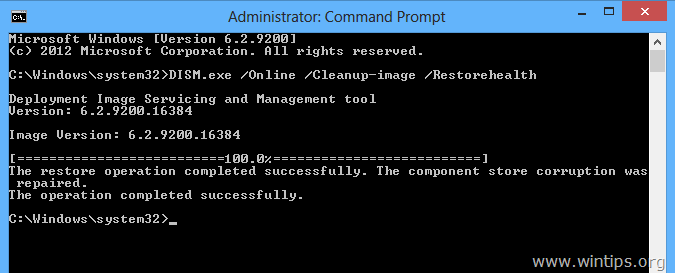
5. Finally close the Command Prompt window and restart your computer.
Refer to some of the following articles:
- Summary of some ways to fix Windows 10 crash, BSOD error and restart error
- Create virtual machines with Hyper-V on Windows 8 and Windows 10
- This is how to reset network settings on Windows 10 with just one click
Good luck!
You should read it
- ★ Summary of driver error codes on Windows and how to fix (Last part)
- ★ How to fix error 0x8007045A ERROR_DLL_INIT_FAILED when using Windows Update
- ★ Summary of several ways to fix No Service errors on iPhone
- ★ How to fix SSL connection errors on Chrome and Firefox
- ★ How to fix the Disk I / O error in Windows