Turn on Private DNS on your phone if you haven't already!
Private DNS on Android unlocks those options. It's a simple setting that can give you faster loading times, stronger privacy, and better protection from malicious websites..
Chances are your Android phone is currently using your Internet Service Provider's (ISP) DNS, and you probably don't even know that's an option. This means you're essentially accepting the speed, privacy, and filtering capabilities that default DNS provides, without knowing that better options exist.
Private DNS on Android unlocks those options. It's a simple setting that can give you faster loading times, stronger privacy, and better protection from malicious websites. And best of all, you don't need to install any apps or pay for a subscription.
What does Private DNS actually do on your phone?
Upgrade your internet connection as needed.
To understand Private DNS, you first need to understand how DNS works . Every time you type in a website URL like TipsMake.com, your phone sends that URL to a DNS server, much like the internet 's phone book . DNS translates that website URL into numerical addresses that your computer understands. This happens with every website you visit, and even those your applications require. This means that almost your entire browsing experience depends on the DNS server you've set up.
The reason you need Private DNS is because it does two very important things. First, it enables DNS over TLS on Android, essentially encrypting your DNS requests before sending them. Normally, DNS requests are sent as plain text, making them easy to intercept. However, with encryption enabled, things are different. Anyone trying to track your browsing activity, whether it's your ISP or someone else on the public network, won't be able to easily see which websites you're visiting.
Secondly, Private DNS allows you to choose your own DNS server instead of being tied to your ISP's default server. This is a big deal. You can switch to a faster, more private server or one that offers better security. All of this without sacrificing anything.
Use Private DNS to block ads, protect privacy, and improve security.
One setup, many benefits

Private DNS is more than just encrypting your traffic. With the right provider, you can set it up to block ads on your Android phone, improve browsing speed, and block malicious websites. It all depends on the third-party DNS server you choose and the benefits it offers. Each server has different strengths.
Additionally, there are DNS providers like AdGuard, which block all the ads you encounter on your Android phone. AdGuard DNS works by preventing your phone from connecting to ad servers. This means that the banner ads you usually see won't load.
If you want a DNS server that doesn't track any of your internet activity, there are also privacy-focused options, such as Quad9 (9.9.9.9) and Next DNS. These services all aim for transparency and provide control over how your data is processed.
Therefore, choosing a DNS server is similar to choosing a browser. Some offer better speed, some focus on privacy, and some offer better protection. There is no single best option for everyone. The right choice really depends on what matters most to you.
Setting up a private DNS is very easy.
Just flip the switch and forget about it.
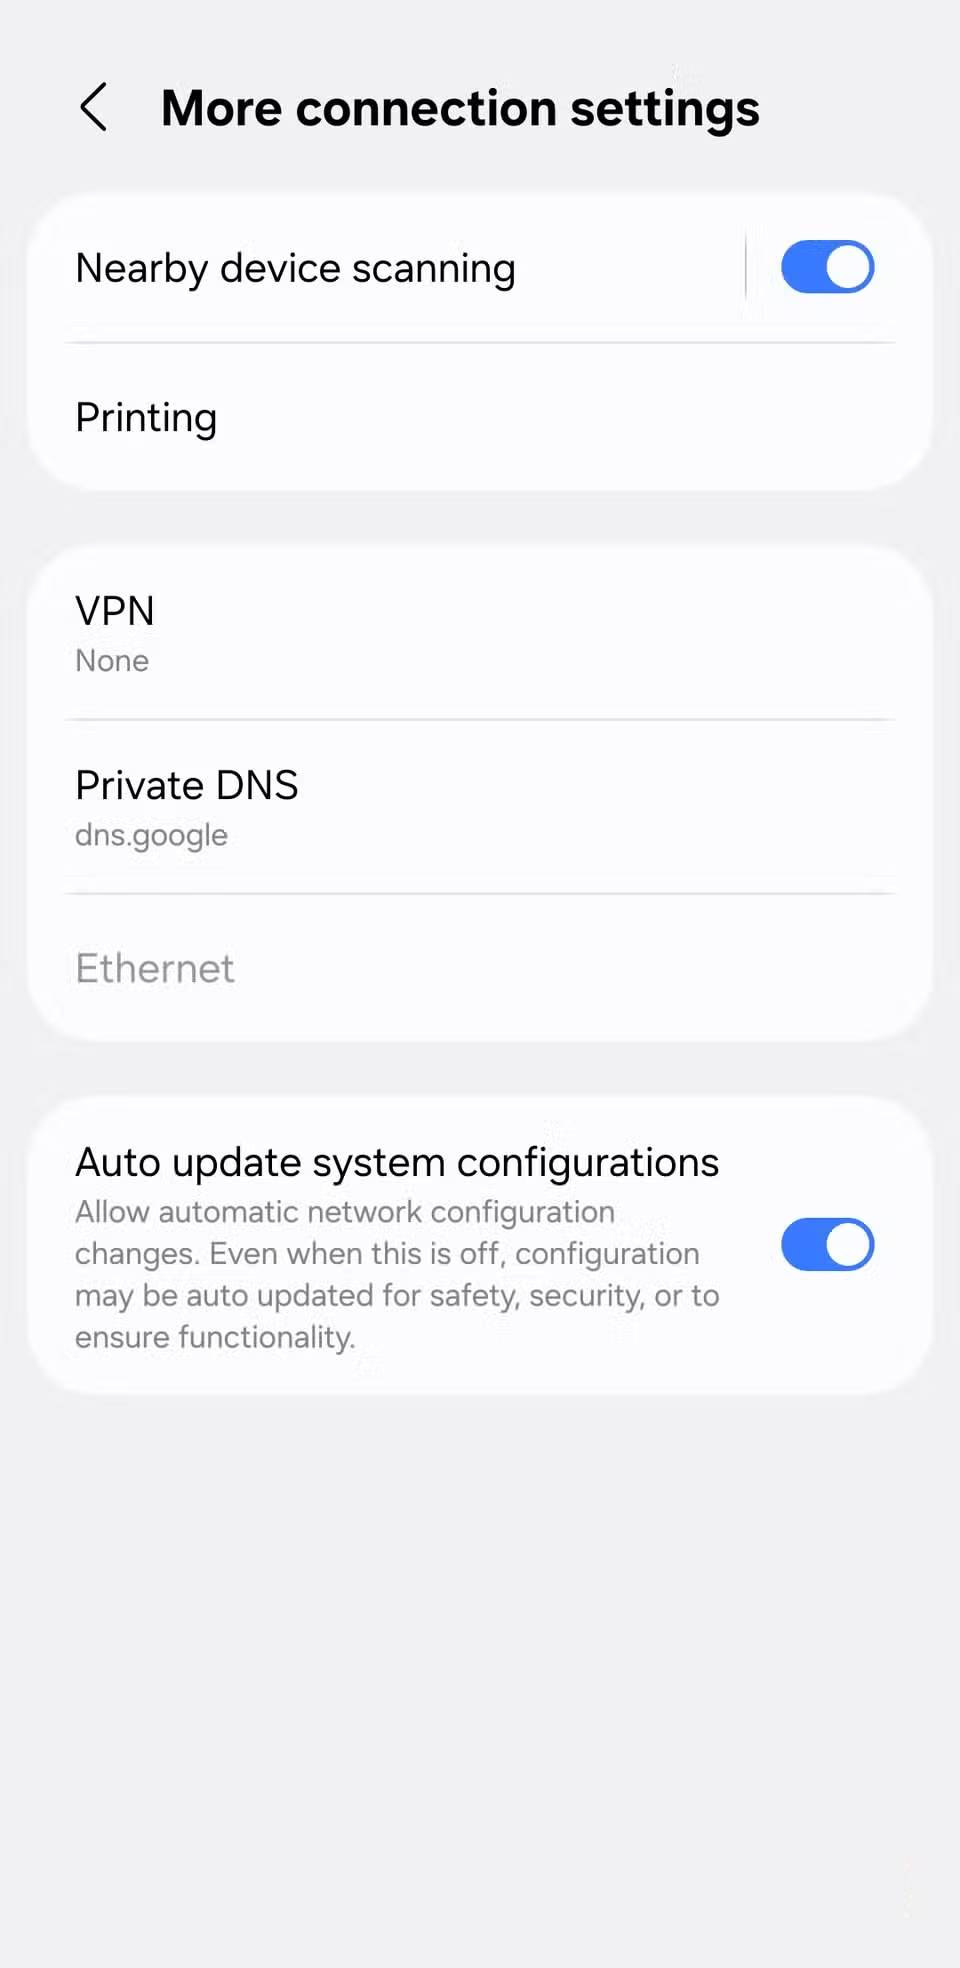
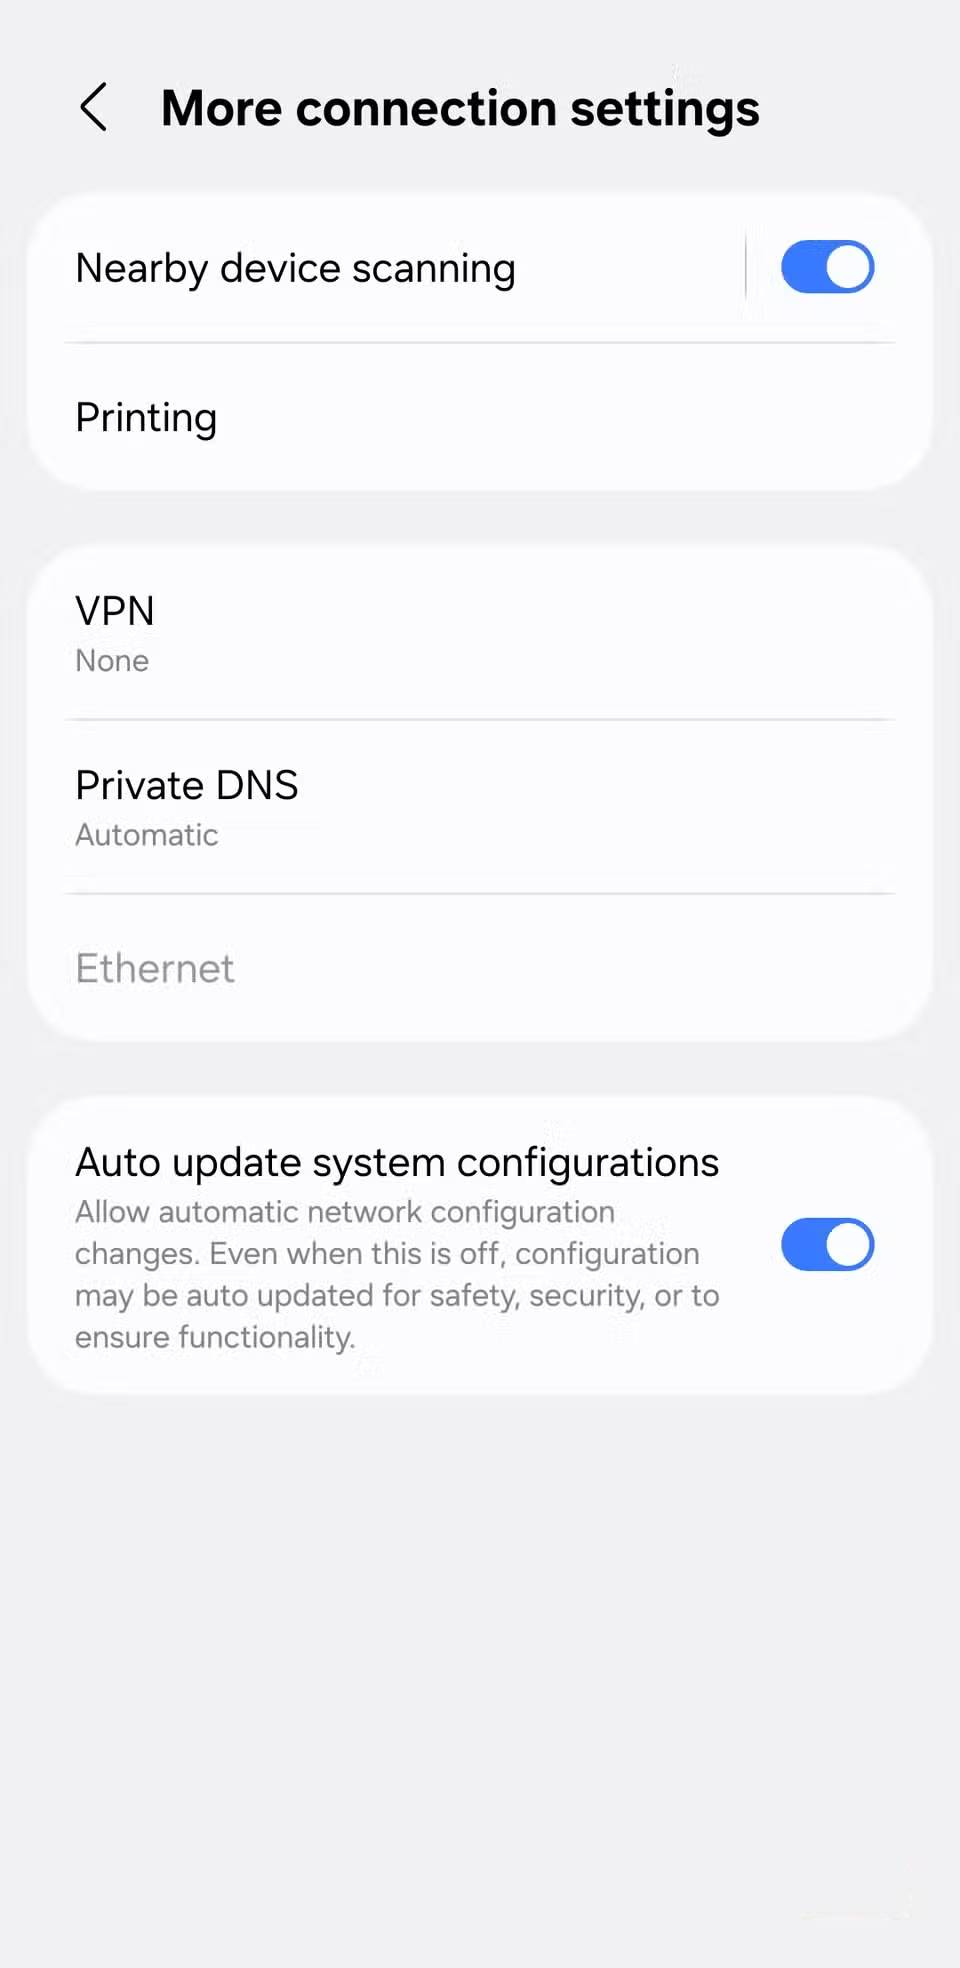
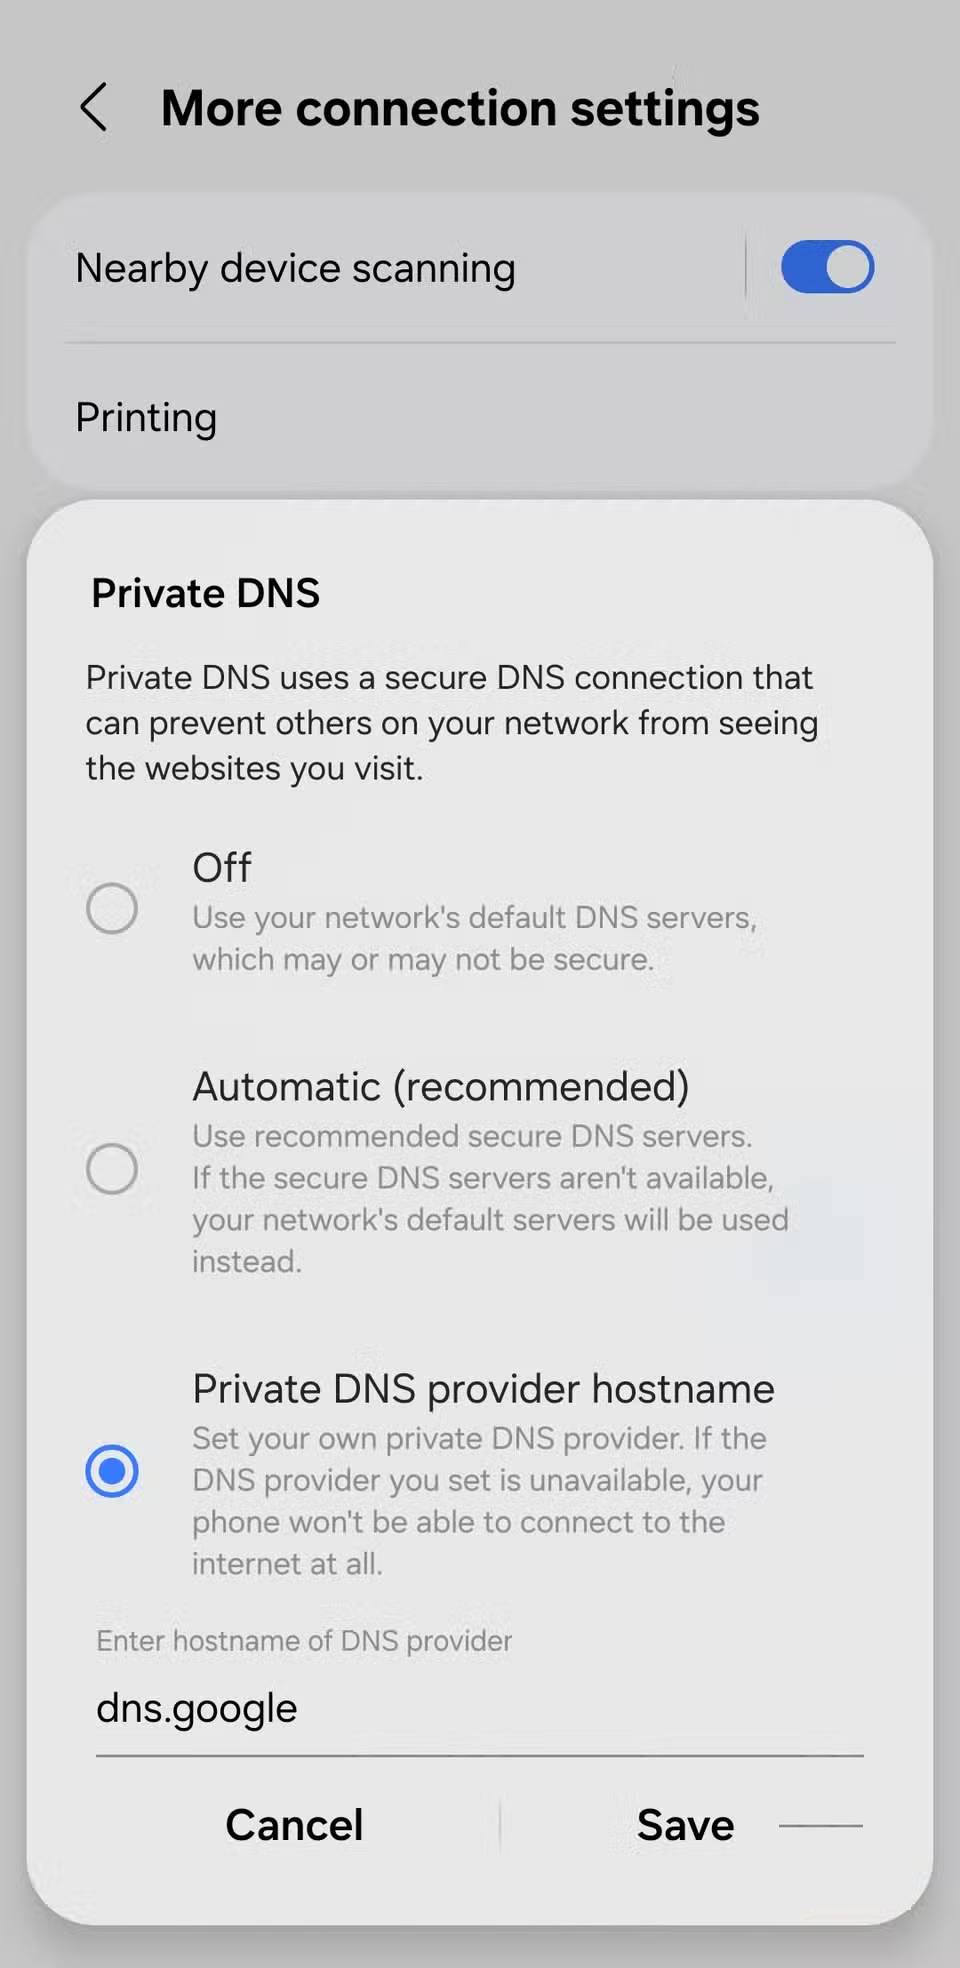
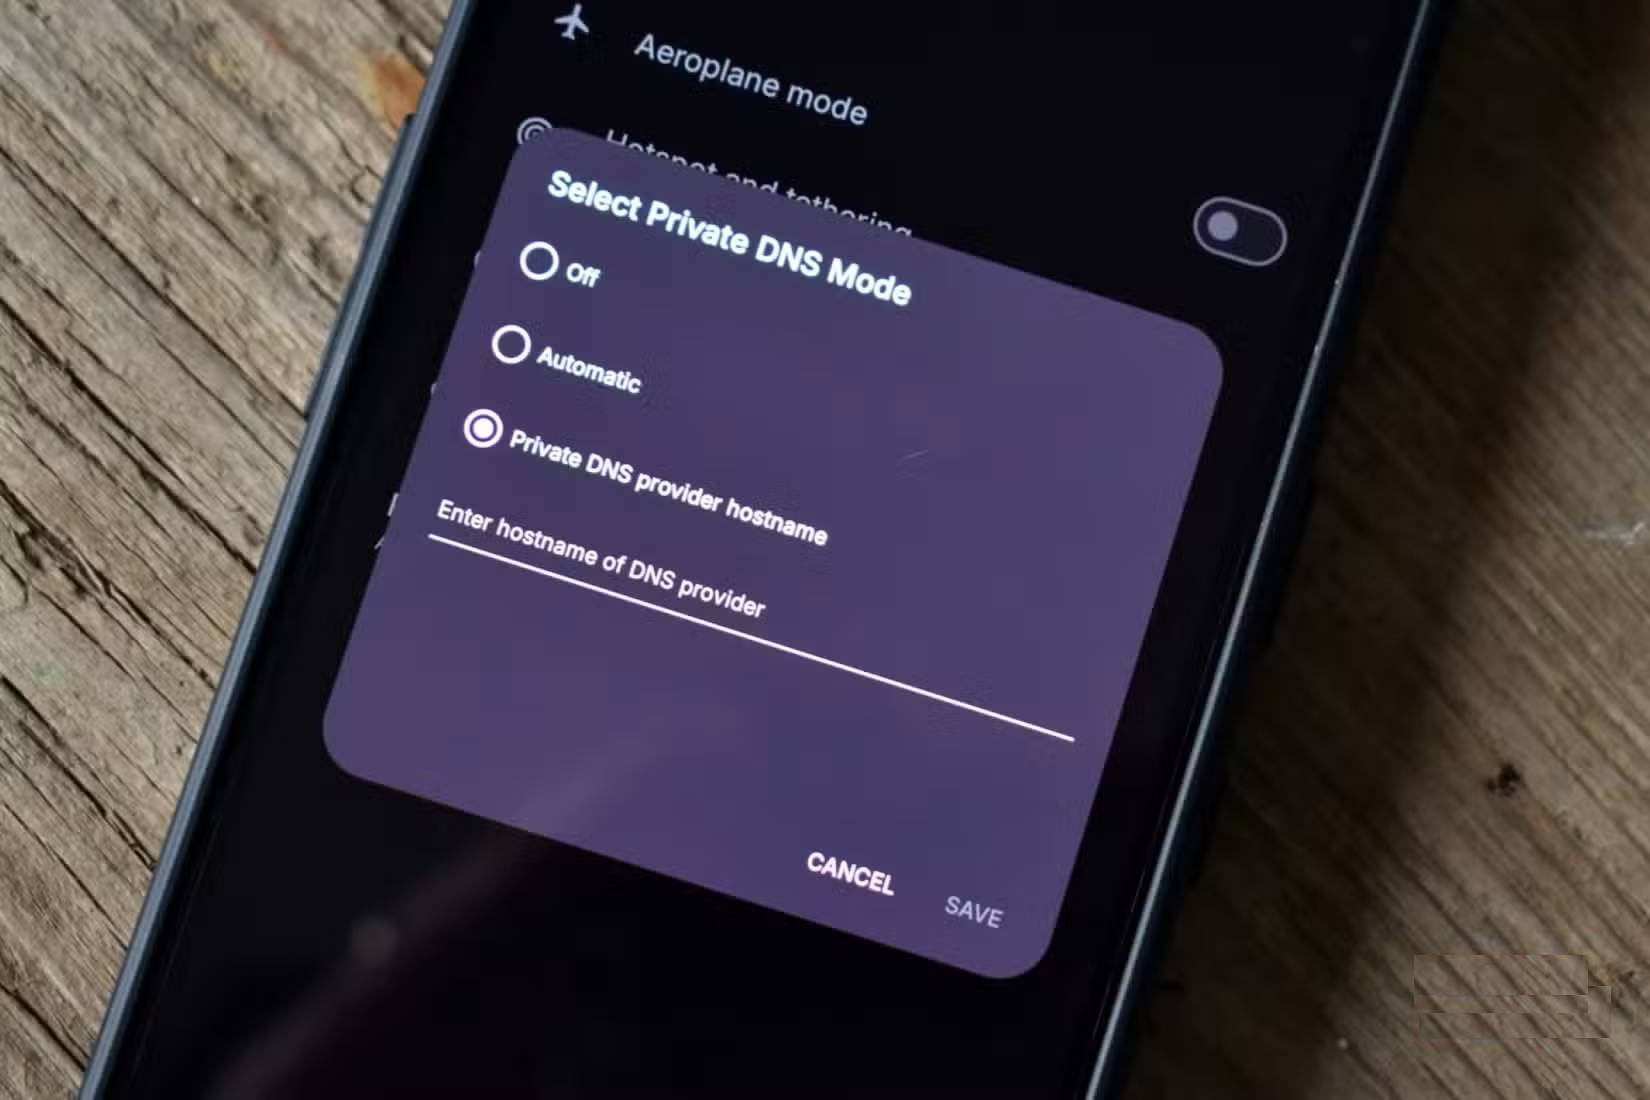
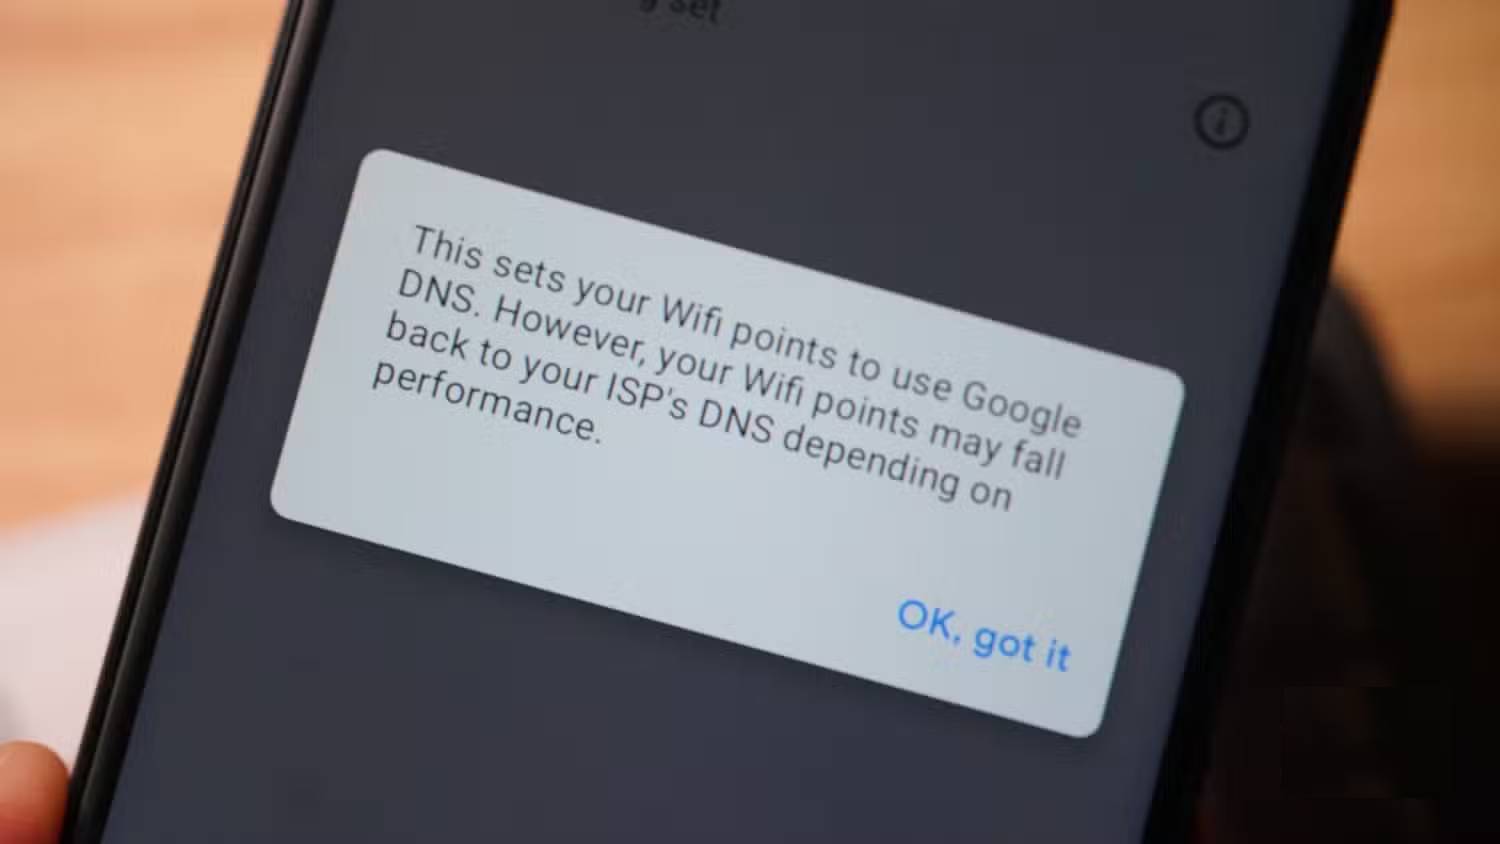
Enabling Private DNS on Android takes less than a minute, and once enabled, it will work system-wide. Go to Settings > Connections > More connection settings > Private DNS . Here, you need to enter the address of the DNS provider you want to use.
Note that this field does not accept simple IP addresses like 8.8.8.8 or 9.9.9.9 , so you need to enter the hostname of your DNS provider. For Google DNS, enter dns.google. For Cloudflare, enter 1.1.1.cloudflare-dns.com. For AdGuard, enter dns.adguard-dns.com.
Tap Save and Android will route all DNS queries through that security provider. This only works with Wi-Fi. For mobile data, your carrier still controls how DNS is handled, and unfortunately, there's nothing you can do about it.