How to set up a private VPN with TurnKey GNU/Linux
The second type is a private VPN, which is installed and configured manually by an individual or workplace.
Setting up your private VPN can seem like a daunting task. However, there is an easy way to set up your own VPN server using a preconfigured solution from Turnkey Linux. So how can you set up a private VPN at your home or at work?
What is TurnKey GNU/Linux?
TurnKey GNU/Linux is a free, open source project that provides easily deployable and preconfigured software and servers. These servers are called 'virtual appliances' and are used across multiple platforms. The goal of application developers is to provide users with simple, ready-to-use solutions for popular versions of servers and software. These devices are based on Debian Linux and come with all the components.
Devices are designed for ease of use, built-in security, and optimized for performance. They can be deployed and run with very few configuration requirements.
TurnKey GNU/Linux provides a wide variety of virtual devices. Content managers like WordPress and Joomla, web servers, e-commerce, and even domain controllers are available to use.
There are over 100 different virtual appliances, including an easily configurable private VPN server.
Set up a private VPN server with TurnKey GNU/LInux
Setting up the VPN tool is pretty straightforward, but you'll need to take a few steps before you can deploy it and go online.
Select settings
The first step in setting up a private VPN server is deciding where you will install it. Virtual appliances require few resources to run. Your VPN server can run on a small hard drive and doesn't require a lot of computing power to operate.
In fact, you can run a VPN app with just 256MB of RAM, although you should really have at least 1GB to avoid speed issues. You can even breathe new life into your old PC or laptop and reuse it for your VPN device.
Another option is to use virtualization technology (such as a hypervisor like VirtualBox) or set up your own virtual private server (VPS). VPS has the added ability to install a VPN server in the country of your choice. This could be an ideal solution for travelers who need to stay connected back home.
Limit
There are some limitations if you plan to host a VPN server at home. If your home Internet connection is behind a CGNAT, you won't be able to host the VPN server. You may want to choose a VPS instead. If you are using a VPS, make sure the service is deployable with a custom ISO before signing a contract. See the Static IP explanation for more information on this.
Download and prepare the device
Once you have selected a platform to install the TurnKey VPN device, you need to download the ISO image. There are two options available for your VPN device: OpenVPN and WireGuard. WireGuard is considered a more modern VPN protocol that is much easier to configure and install than OpenVPN.
You can download the ISO image from TurnKey GNU/Linux.
To prepare for the installation, you need to mount the image to the USB. You also need to set the boot priority on your hardware or virtual machine to USB first.
How to install TurnKey GNU/Linux VPN tool
Installing the device is the same as installing other Linux operating systems. You will need to boot from a USB or mount the ISO to your virtual machine. You can start the installation by selecting Install to hard disk .

Run the installer and choose default options unless there are specific requirements for your environment. Using the Guided partition with the entire drive is the simplest way to make installation easy.
Once done, remove the USB or unmount the ISO and reboot.
Configure GNU/Linux TurnKey Tool

After a successful reboot, there are several additional options to configure before you're up and running. You will first be asked to set a root password; Turn it into a strong password you won't forget.

When asked to select Wireguard Profile, select the Server option.

On the Wireguard Virtual Address screen, you will need to enter the Classless Inter-Domain Routing (CIDR) subnet pool for use by your VPN clients. This address must not actually exist on your network. Using 10.125.5.0/24 is a safe choice; however, this address will be specific to your network setup.

Wireguard Public Address is your public IP address and the one your device will use to connect to the VPN server. Whether or not you enable the rest of the options is up to you - but the article recommends installing updates during the installation process. These can take some time.

When the configuration is complete, you will see a screen containing the information you need to access your VPN. You should write down these addresses as you will need them at the next stage.
At this point, the installation is complete. The article recommends restarting the server again.
Create the first VPN client connection
Before making your first VPN client connection, it is important that you familiarize yourself with the device's features. TurnKey makes things especially easy with its built-in web interface.
Create VPN client Wireguard

The web interface can be accessed by browsing to the server's public IP address. In your favorite browser, type 'https://' . You will most likely get a warning about a self-signed certificate; you can ignore it and continue.
You will be presented with two options:
- Web Shell : This is a web-based SSH client to connect to your device.
- Webmin : This is a browser-based tool for managing your device.
The user credentials to log into both web shell and webmin are: 'root' and the password you set during the installation.
Add your first VPN client

Adding a VPN client is also an easy process. You will need to log into the web shell with your root account and enter the command:
confconsole 
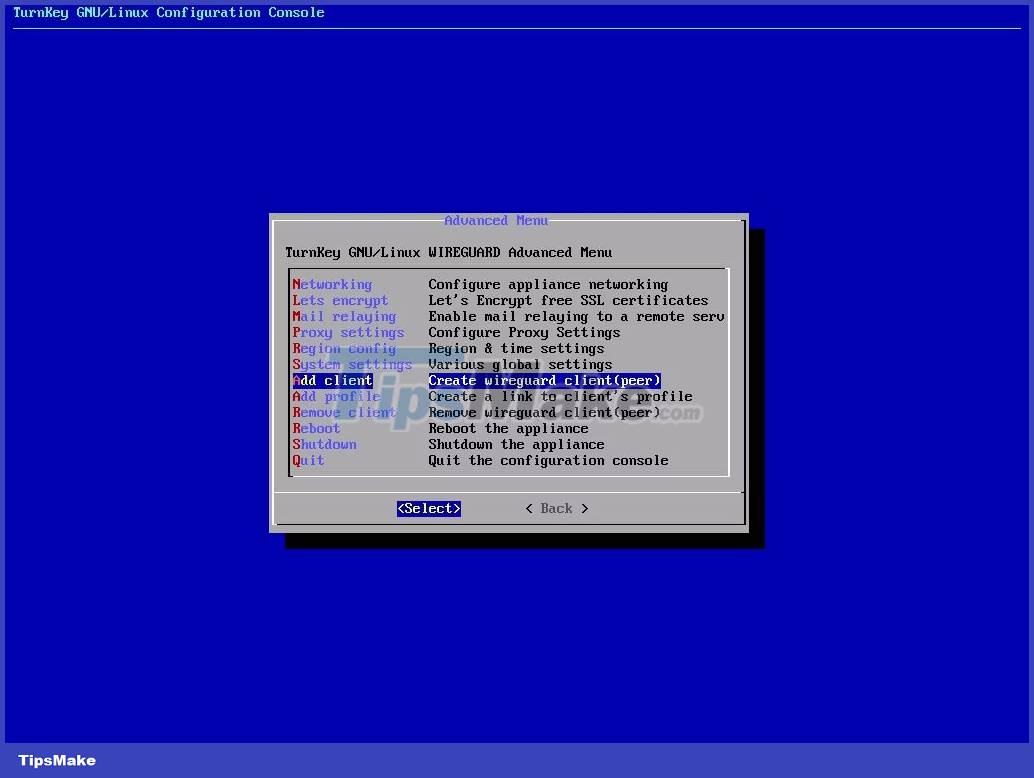
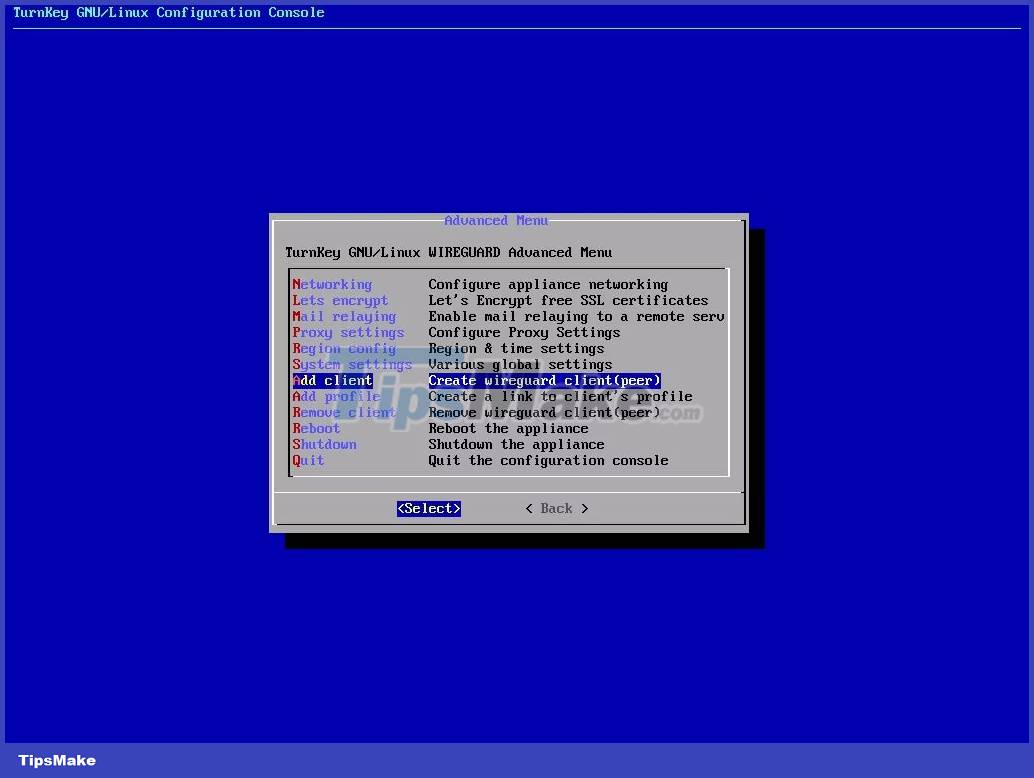
Now, select Add client from the list and enter the name you want to give the client. The name can be anything, but it's best to avoid spaces and symbols. Next, you will need to specify the IP addresses that are allowed to access the VPN server. To allow any address, just type:
0.0.0.0/0The VPN server will now generate a URL where you can download the configuration for the VPN. This URL will also give you access to a QR code for easy installation of mobile apps.

You can download profiles and import using the Wireguard app from Wireguard.com, available on multiple platforms.