Turn off Indexing Service to let the computer run faster
Indexing Service is a feature that helps NTFS hard disk partitions find and access files faster, but basically this feature can be said to be useless. If you are a computer user, you can quickly find and access the files on your hard drive. Therefore, shutting down this feature is a simple way to improve the efficiency of the system because Windows keeps 'losing power' when it comes to doing a useless job. In addition, if you do not want to turn off this feature, the article will guide you how to customize, add folders to search results in Windows 10 better.
- Small tips to improve Windows Search Indexing
- Search files faster than Windows Explorer with this Command Prompt command
- Search more easily with tagged files in Windows
1. Open Indexing Options in Windows 10
Press Windows + R key combination, then enter control.exe srchadmin.dll command and click OK.
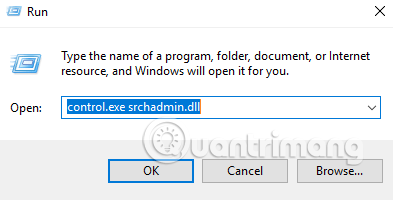
By default, Windows uses the index when searching to produce search results as quickly as possible because it only searches for the selected location. You can filter this location by file extension, properties, file contents you want to index.


2. Add or delete the Search indexing folder
In Index Options, click Modify and check the folder you want to index or deselect to remove the search folder.

3. Add file type to Search Indexing
You must log in as an admin to add or remove file types to the index. In, Indexing Options , click on Advanced and select the file extension you want to add to the index by checking the box. Select Index Only Properties or Properties and File Contents is how to index the file extension.
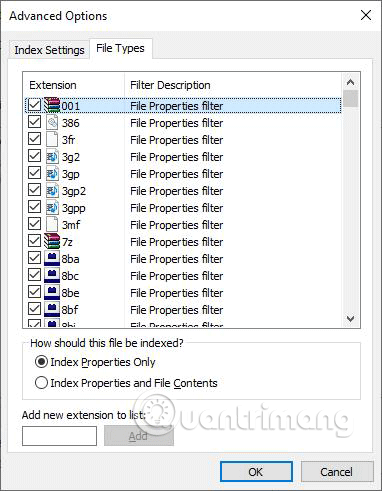
Index Properties Only : The metadata tags for this file are in the index. For example, file name, change data, author, etc. It is the information you can see when right-clicking on the file and clicking Properties , tab Details .
Index Properties and File Contents : Just like Index Only properties it contains information about file and file contents. For example, the entire text in a text file. However, not all file types contain text.
4. Turn off Search Indexing Service on Windows 10
The index uses the Windows Search service and runs the Searchindexer.exe process in the background. It automatically recreates and updates to change the selected position when the last index recreates to improve search results. By default, index speed decreases due to user activity. When the computer is inactive, the index speed reaches the maximum to search faster.
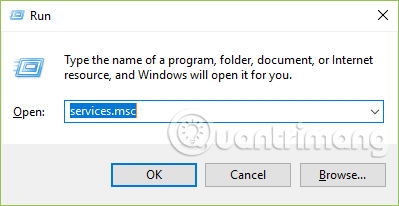
To turn off Search Indexing Service in Windows 10, press the Windows + R key combination and enter the command services.msc , then press Enter or the OK button.
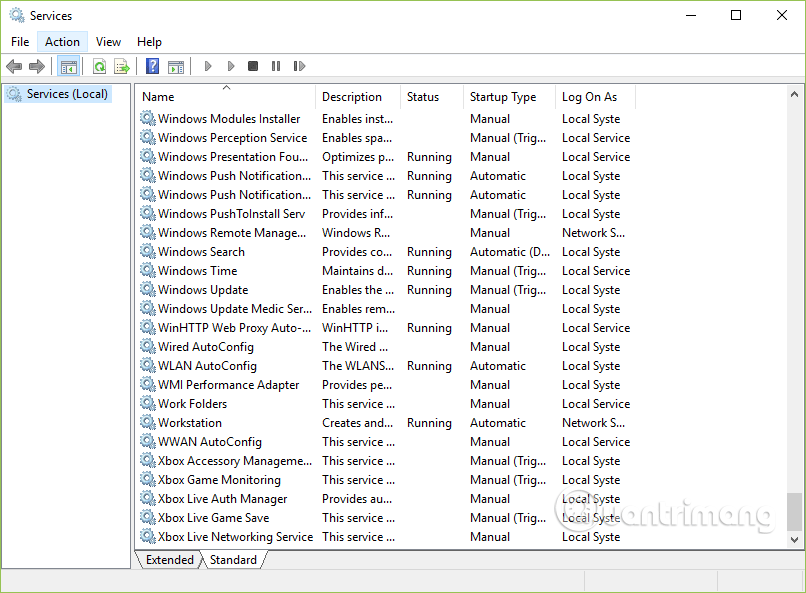
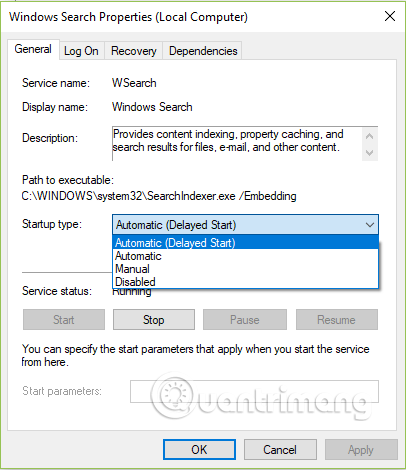
In the new window that appears, double-click Windows Search to open the Search Indexing Service setting.
On the General tab, select Disabled from the Startup type drop-down menu and then select Stop to stop the current search service.
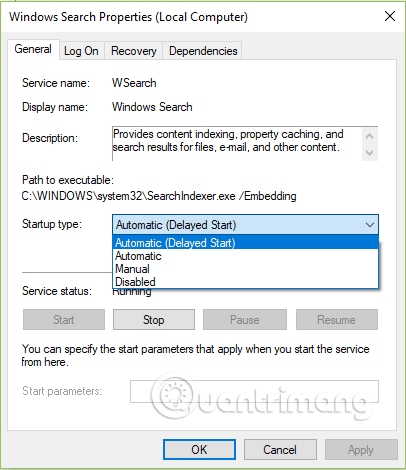
Then click the Apply button to apply changes to the Windows search service.
I wish you all success!