How to transfer from Public Network to Private network on Windows 10
Network location determines the type of network the computer connects to a network adapter. By default, the first time you connect to a new network (wireless or wired), you'll get a message saying ' Do you want to allow your PC to be discoverable by other PCs and devices on this network? '(Do you want to allow this computer to be detected by PCs and other devices on the network?). If this setting is enabled, it means that you allow your computer to share files and other devices on the network. Therefore, based on the network location you choose, Windows will automatically assign Network discovery settings to the network and automatically install Windows Firewall and security appropriate for that type of network. However, in some cases this Public network is not safe for the user's computer. So it's a good idea to set up Private Network to use.
- Public Network: Whenever your computer is connected to a network, such as Ethernet or Wifi, your computer will ask if you want to share the device with other devices on the same network. If you click Yes , your computer will be set to Public . And of course your computer will also see other devices connected on the same network.
- Private Network : In stark contrast with Public Network, if clicked No on the confirmation dialog after connecting to a network, your computer will be set to Private . And shared files, printers, . will be blocked by the firewall (Firewall).
- How do Private Network and Public Network on Windows differ?
Windows is smart enough and therefore the Firewall will set up according to the options you will choose. After selecting the options, it will be quite difficult for you to change the settings - if you don't know anything about the settings.
In the following article, Network Administrator will guide you how to set up Private Network on your Windows 10 computer.

How to set up Private network on Windows 10
- 1. Use the Settings application
- 2. Use PowerShell
- 3. Use Local Security Policy
- 4. Through Registry Editor
- 5. Using VBS file
1. Use the Settings application
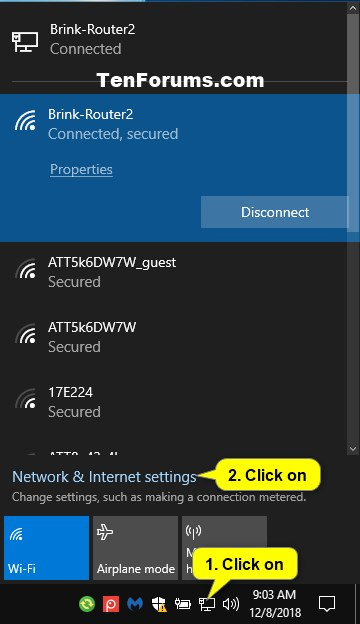
Step 1 . Open Network settings by clicking on the network icon on the taskbar, then choose Network & Internet settings or open Settings , click the Network & Internet icon.
Step 2.
On the wired network: Click Ethernet on the left, then click on the Ethernet connection (the example here is Brink-Router2) on the right.
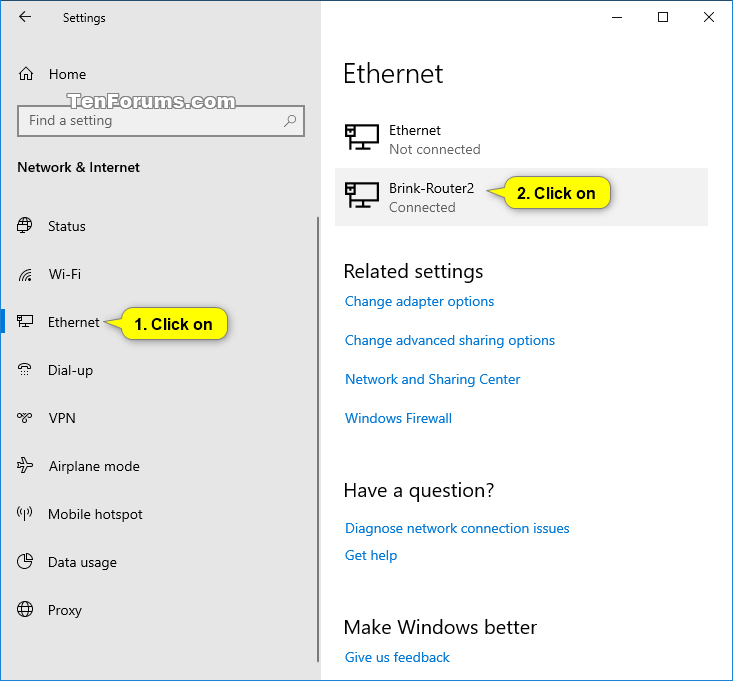
On the Wifi network: Click Wi-Fi on the left, then click on the wireless network name (for example here is Brink-Router2) you are connecting.

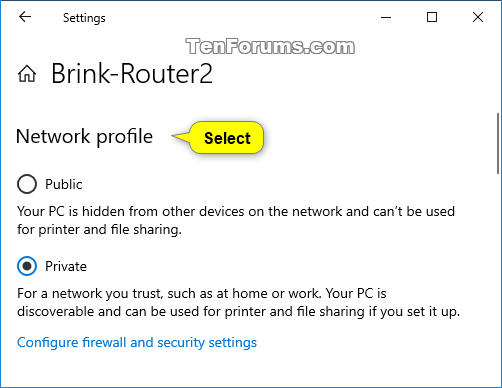
Step 3 . Choose Private .
Step 4 . When finished, close Settings .
2. Use PowerShell
To set up Private Network using PowerShell, follow the steps below:
First open the Windows PowerShell window under Admin, then enter the command below and press Enter:
Get-NetConnectionProfile 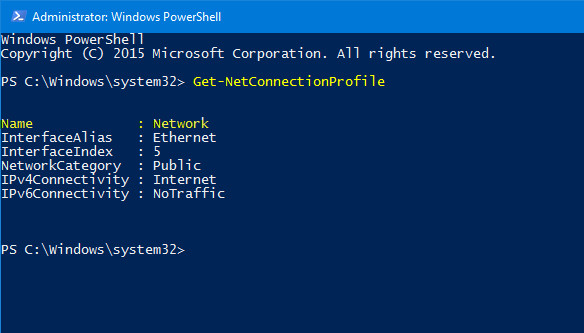
The command will allow you to display the network name and network classification (Public / Network). Next, enter the following statement into:
Set-NetConnectionProfile -Name network_name -NetworkCategory Private Note:
Change network_name with your network name.
In case, if you want to set up Public Network, follow the same steps but change Private with Network .
Another faster way is to use the following statement with advanced PowerShell.
$net = get-netconnectionprofile;Set-NetConnectionProfile -Name $net.Name -NetworkCategory Private 
3. Use Local Security Policy
First press the key combination W indows + R to open the Run command window, then enter secpol.msc there and press Enter to open the Local Security Policy window.
Here you find and click Network List Manager Policies .
At this time the screen appears a new window named Network.

Now switch to the Network Location tab. By default the option is set to Not Configured or Public, you just need to select Private then click Apply / OK to finish.
4. Through Registry Editor
Registry Editor is a useful tool on Windows operating system, this tool allows you to change network settings. However, before using this tool, you should create a backup copy of Registry Editor and create a system restore point to prevent in case something goes wrong.
First open the Registry Editor window. To do this, press the Windows + R key combination to open the Run command window, then enter regedit there and press Enter to open the Registry Editor window. If the UAC window appears, click Yes to continue.
In the Regitry Editor window you navigate to the key:
HKEY_LOCAL_MACHINESOFTWAREMicrosoftWindows NTCurrentVersionNetworkListProfiles
Here you will see some keys with long and rather special characters. If you connect your computer to 4 different networks, you will get 4 different keys. This means that if you connect more and more networks, you will get more keys.
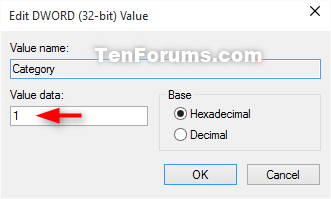
So just click on each key and find the key you want to set to Private. When you click each folder, you can find the network name in the right pane. Here you can find Category Category .
Double click on the Category item and set the value to 1, then proceed to save the changes.

Values to set up Public Network, Private Network and Domain Network.
- Public Network: 0
- Private Network: 1
- Domain Network: 2
5. Using VBS file
Hands-free with 5 VB scripts that automate the use of Windows computers
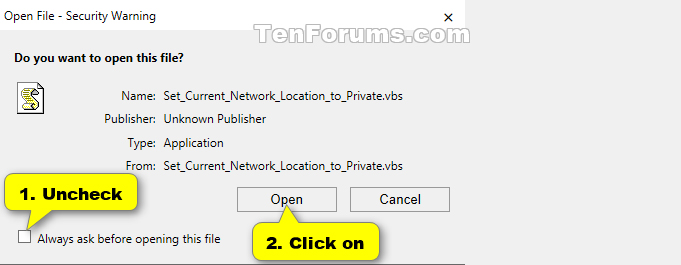
- Download the Set_Current_Network_Location_to_Private.vbs file
- Save the .vbs file to the desktop.
- Run the .vbs file.
- Unblock file. Click Yes or OK when you see the UAC message
Refer to some of the following articles:
- Automatic timer to turn on Wifi after 1 hour, 4 hours or 1 day on Windows 10
- This is a way to prevent hackers from stealing your data when using public Wifi
- This is how to reset network settings on Windows 10 with just one click
Good luck!