How to Change Indexing Options in Windows 8
Part 1 of 3:
Using Libraries to Add/Remove Locations
-
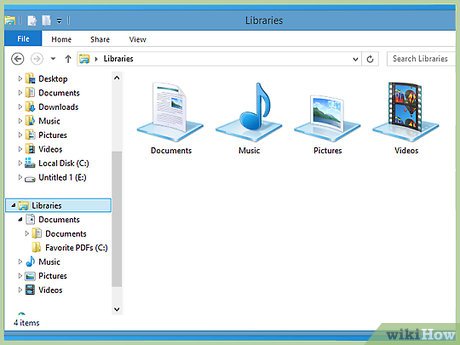
 Understand the process. The quickest way to add a folder to your search index is to add it to a "Library", which is a collection of locations on your computer devoted to a similar topic. All libraries are automatically indexed by Windows Search.
- Any folders currently in your libraries, such as folders in your Documents or Music directories, are already indexed.
-
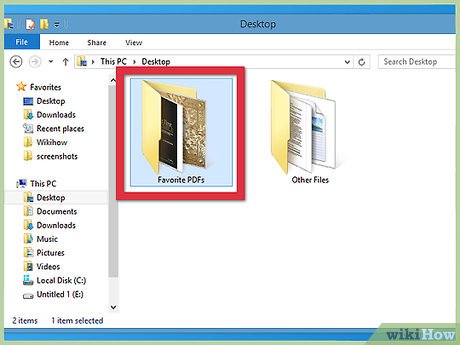
 Find the folder you want to add to the index. Open an Explorer window and find the folder that you want to add.
 -
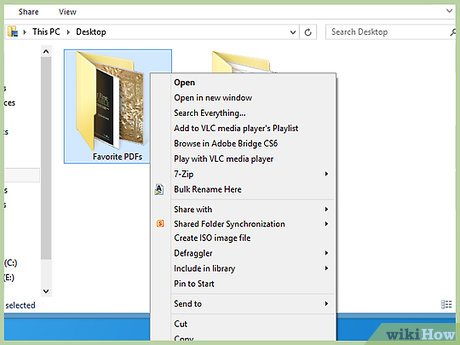
 Right-click on the folder. You can select multiple folders in one location before right-clicking if you want to add them all at the same time.
 -
 Select "Include in library" and then select a library. Select the library that most accurately describes what you are adding, or select "Create new library" to create a custom library. Your libraries will be automatically indexed for quick searches.
- You can't include folders from CDs or DVDs, as well as some USB drives. Many USB drives will allow you to include folders on them in the library.[1]
-
 Remove folders from libraries to remove them from the index. If you no longer need a folder included in the index, right-click on it and select "Remove location from library". You can only do this for folders that you manually added to a library. To remove default libraries from the index, see the next section.
 -
 Avoid adding folders you don't actually need to search often. Windows search will eventually search everything on your computer, so there's no need to add every folder on your computer to the index. All this will do is slow down all of your searches. Limit your index to just the most essential folders for the quickest searches.
Part 2 of 3:
Using the Indexing Options to Add/Remove Locations
-
 Open the Start screen. You can press the ⊞ Win key to open this screen, or click the Windows button in the lower-left corner of the Windows 8.1 desktop.
 -
 Type "indexing options". This will search your computer.
 -
 Select "Indexing Options" from the list of results. This will open the Indexing Options utility.
 -
 Click the .Modify button to change the included locations. This will open another window where you can add and remove locations from the index.
 -
 Expand the tree in the top frame to see your folders. You can expand the tree to see all of the folders on your hard drive(s).
 -
 Check or uncheck locations to add or remove them. When you check the box on a folder, all of the subfolders inside will automatically be selected as well. You can exclude folders from the index by unchecking the boxes. If a folder is included but some of its subfolders are not, they will be listed in the "Exclude" column.
 -
 Save your changes. Any changes you make won't take effect until you click the OK button. If you've made a bunch of changes and don't want to keep any of them, click Cancel.
Part 3 of 3:
Adjusting Indexing Options
-
 Open the Indexing Options window. If you don't already have it open, launch it by searching for "indexing options" on the Start screen.
 -
 Click the .Advanced button. You'll need administrator access to change these options. If your account is not an administrator account, you'll be prompted to enter the administrator password.
 -
 Decide if you want to index encrypted files. Most users don't need to worry about this option, but if you work with encrypted files often you'll likely want check this box. This will slow the search down.
 -
 Change the index file location. If your index file is too large for its current location, or you want to migrate it for other reasons, you can select a new location for it. The index file will be moved to this location after your computer reboots.
 -
 Remove certain file types from the search results. By default, every new file extension that you add to Windows will be added to the list of file types that are indexed. You can remove specific file types so that they don't show up in search results. Most users don't need to worry about adjusting these settings.
- Click the File Types tab to open a list of file types that are currently indexed.
- Uncheck the box next to each file type that you don't want to index.
-
 Rebuild the index database if your search isn't working. If there is something wrong with Windows Search or the index, rebuilding the index may help. Click the Rebuild button to delete your current index and rebuild it from scratch based on the folders you selected earlier.[2]
Share by
Jessica Tanner
Update 04 March 2020


