How to Install/Uninstall Wireless Display on Windows 11
In Windows 11, Wireless Display is an optional feature and requires a Miracast-compatible PC to work. Since it's an optional feature, you'll need to install it to get started with Miracast.
The Wireless Display feature in Windows 11 allows you to connect and mirror your smartphone screen to your PC. This is a useful utility for viewing content from your phone or tablet on a larger screen.
In Windows 11 , Wireless Display is an optional feature and requires a Miracast-compatible PC to work. Since it is an optional feature, you will have to install it to get started with Miracast. Today's article will show you two ways to install Wireless Display in Windows 11 to help mirror your Android phone screen to your PC.
How to enable Wireless Display using Settings
You can install Wireless Display as an optional feature from the Settings panel. Before doing so, make sure to check if your PC is Miracast compatible. If so, follow the steps below to install Wireless Display.
To set up Wireless Display:
1. Press Win + I to open Settings .
2. Open the Apps tab in the left pane.
3. Next, scroll down and click on the Optional features option.
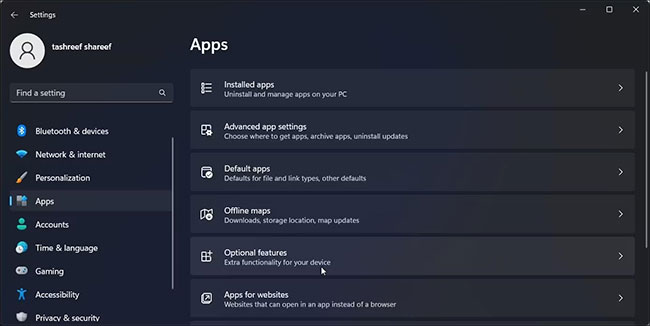
4. Click View features for Add an optional feature .

5. In the Add an optional feature dialog box , type wireless display.
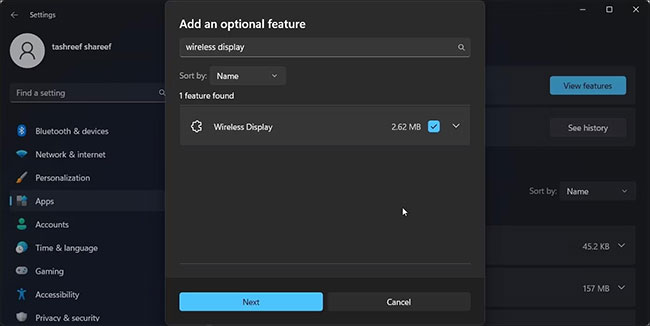
6. Select Wireless Display from the search results and click Next.
7. Click Install , then wait for Windows to download and install the application.
After installation, restart your PC . After restarting, open Windows Search ( Win + S ) and type Wireless Display. Now you can connect your smartphone or tablet to your PC and project your screen wirelessly.
How to Install Wireless Display Using Command Prompt
You can also install Wireless Display using Command Prompt . To install the application, you can use the Features on Demand(FODs) command in the command line utility.
To install Wireless Display using Command Prompt:
1. Press the Win key and type cmd.
2. From the search results, right-click Command Prompt and select Run as administrator.
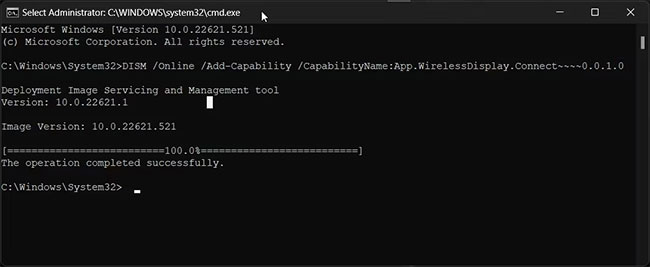
3. In the Command Prompt window , type the following command and press Enter:
DISM /Online /Add-Capability /CapabilityName:App.WirelessDisplay.Connect~~~~0.0.1.04. Windows will download and install the Wireless Display application. This process may take a while, so wait until the progress bar reaches 100%.
5. Once you see the success message, close the Command Prompt window and restart your PC.
How to project screen using Wireless Display
Now that you have successfully set up Wireless Display, you can start projecting your smartphone or other compatible devices to your screen.
To use Wireless Display:
1. Connect your Android phone and Windows PC to the same WiFi network.
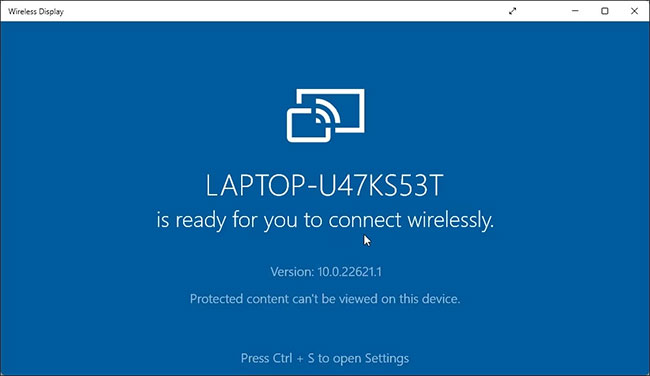
2. Next, press the Win key and type wireless display.
3. From the search results, click Wireless Display to open the application.
4. On your Android phone, scan for wireless displays. For example, on a Samsung Galaxy device, open Smart View and select your PC from the list of available devices.
You can configure additional projection settings on your PC so that Wireless Display is always available. This way, you can project from your Android phone even if the Wireless Display app isn't open on your PC.
To keep Wireless Display available:
1. Press Win + I to open Settings.
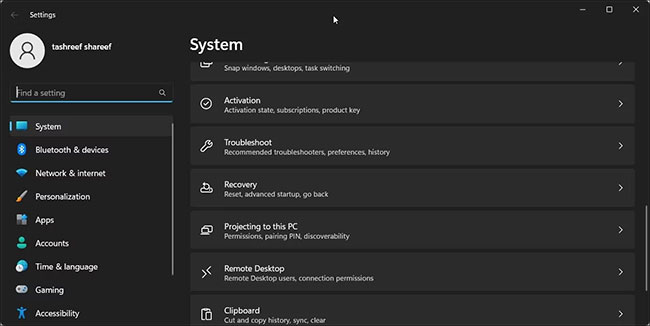
2. With the System tab selected, scroll down and click Projecting to this PC .

3. Next, click on Some Windows and Android devices can project to this PC when you say it's OK and select Available everywhere.
Now, if you try to mirror your Android phone screen to your PC, Windows will automatically launch the Wireless Display app and start mirroring the screen.
How to Uninstall Wireless Display in Windows 11
You can uninstall Wireless Display from Settings. Similarly, Command Prompt is another reliable option to uninstall apps in a jiffy.
Let's look at two ways to uninstall Wireless Display in Windows 11.
Using Settings:
1. Press Win + I to open Settings.
2. Go to Apps > Optional features .
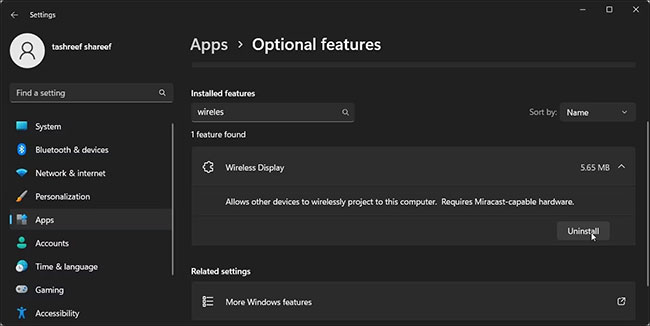
3. Type Wireless Display into the Installed features search bar .
4. Click Wireless Display and then select Uninstall.
Using Command Prompt:
1. Open Command Prompt with admin rights .
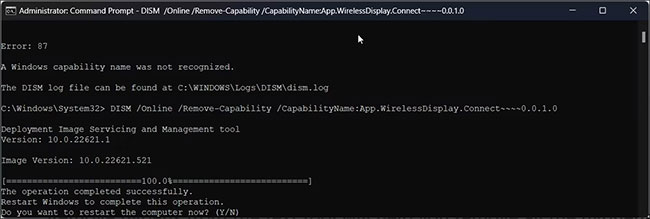
2. In the Command Prompt window , type the following command and press Enter:
DISM /Online /Remove-Capability /CapabilityName:App.WirelessDisplay.Connect~~~~0.0.1.03. Wait for the app to uninstall. Then restart your PC to apply the changes.
The Wireless Display app makes it easy to view your Android screen on your Windows PC. It also saves you the hassle of installing third-party screen mirroring apps that often require a subscription.
Unfortunately, you can't use Wireless Display to mirror your iPhone screen to your PC. Due to Apple's ecosystem, you'll have to rely on third-party apps to mirror your iPhone screen to your Windows computer.
- How to project a laptop screen on a TV using WiFi Display / Wireless Display / Screen Share
- How to Set up a Wireless Network in Windows XP
- Toshiba's new laptop connects wirelessly to the TV
- Wireless LAN technologies and Microsoft Windows
- The difference between Wireless and True Wireless headphones
- Set up wireless network
- Top best wireless mouse 2024
- How to turn on / off automatically wireless network connection in Windows 10
- Error handling when running the Wireless Network Setup Wizard after updating Windows XP SP2
- What is wireless charging? Is it faster or slower than charging?
- Useful AI features in Windows 11
- Thanks to Windows 11, the part that nobody cared about before suddenly became in short supply, increasing the price many times
- Microsoft continues to raise hardware requirements Windows 11: Requires 8th generation Intel chip, Ryzen 2000 or later
- Download Ghost Windows 11 Pro Full Soft v1.0 Best New Standard 2021
- Download Ghost Windows 11 Pro No Soft v1.0 2021
- Run Android on a computer without installing emulator software with Windows 11
- Minimum and recommended computer configuration to run Windows 11
- Windows 11 officially launched: Copy many features from macOS, run Android apps, update for free
- Steps to use Windows PC Health Check, check whether the computer can install Windows 11 or not
- What is WDDM 3.0? Features enabled by WDDM
-
 What are wireless headphones? Differentiating between Wireless and True Wireless headphones.
-
How to fix a malfunctioning Wireless Router or Wi-Fi transmitter.
-
Advantages and disadvantages of wireless charging
-
9 Essential Tech Gadgets for Working from Home
-
What is a silent wireless mouse? Top best silent mice
-
Where to buy the best, durable wireless headphones?
 What are wireless headphones? Differentiating between Wireless and True Wireless headphones.
 How to fix a malfunctioning Wireless Router or Wi-Fi transmitter.
 Advantages and disadvantages of wireless charging
 9 Essential Tech Gadgets for Working from Home
 What is a silent wireless mouse? Top best silent mice
 Where to buy the best, durable wireless headphones?