Set of recovery and diagnostic tools - Part 4
In this article, I will show you how to use the DaRT 6.5 boot disk to troubleshoot Windows computers..
In this next article we will show you how to use the DaRT 6.5 boot disk to troubleshoot Windows computers .
In the first two parts of this series, we learned about Microsoft's Diagnostic and Recovery Toolset (DaRT) toolkit as well as how to install DaRT, create a bootable CD and use the DaRT tools on the CD to solve. Fixed some problems that make Windows computers unable to boot. In part three, I showed you how to use System File Checker (SFC), a component of the DaRT toolkit; In this fourth part, we will introduce you to some other tools in DaRT.
Some other tools in DaRT
Let's go back to the MSDaRT Tools screen, this is the screen that appears when we start the computer crashed with the DaRT CD and answered all the prompts (see previous section of this series for how to start dynamic computer by DaRT CD):

Figure 1: MSDaRT Tools screen
Let's go explore some other tools of DaRT. Click the Explorer option on the MSDaRT Tools screen, Windows Explorer will appear:

Figure 2: Windows Explorer
Note that hidden files and system files will be displayed by default in Explorer window. By using the options available in the menu and from the right-click menu displayed when right-clicking on items, you can perform several tasks such as creating folders, copying files, etc. You can also map. Network drives if configuring a network connection manually or via DHCP. If you do not want to re-map the drive when booting from the DaRT CD, you will see the hidden System Reserved partition, which stores boot configuration database files for the computer.
Click the ERD Registry Editor option on the MSDaRT Tools screen to appear ERD Registry Editor:

Figure 3: ERD Registry Editor
Using ERD Registry Editor, you can make changes to the registry on the computer that has the problem. Note that there is no HKEY_CURRENT_USERS hive displayed here because there is no user logged into the computer you are troubleshooting. Note that we can browse and edit sub-branches SAM and SECURITY in HKEY_LOCAL_MACHINE hive. These sub-branches are by default placed on the hidden Windows settings.
Clicking the Search option on the MSDaRT Tools screen will bring up a File Search dialog box:
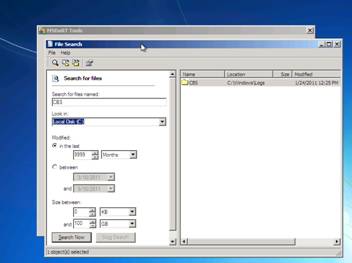
Figure 4: File search dialog
Using this dialog box, you can search for files and folders on the target computer. You can search by name, by time, to search for files within a certain size range. Once you've found the file or folder to search for, right-click it to display its properties (we can also do this from within the Explorer tool):
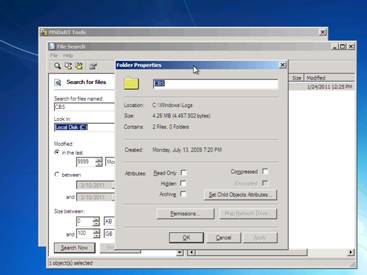
Figure 5: View directory properties
Clicking the Permissions button will allow you to view NTFS privileges on the file or folder.
You can also right-click the folder in the search results page and open it in Explorer:
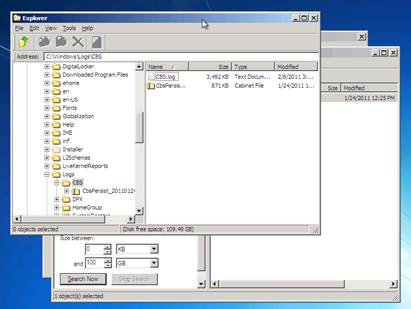
Figure 6: Open the folder in Explorer
Double clicking on the log file will allow you to view the file with Notepad:

Figure 7: View the CBS.log file in Notepad
Click the Hotfix Uninstall option on the MSDaRT Tools screen and open the Hotfix Uninstall Wizard:
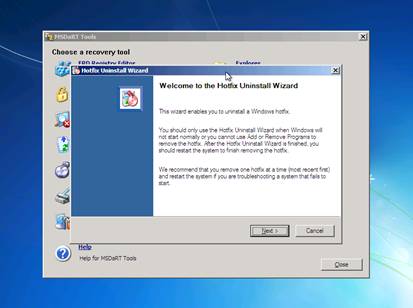
Figure 8: Hotfix Uninstall Wizard
If the target system is not stable after downloading and installing the latest security hotfix from Windows Update, you can use this wizard to uninstall each hotfix until the system returns to a stable state. Also, if you can boot into Windows, you will be able to use System Restore more simply, but here we are assuming the system cannot boot.
Click Next , DaRT will search all the hotfixes installed on the system:
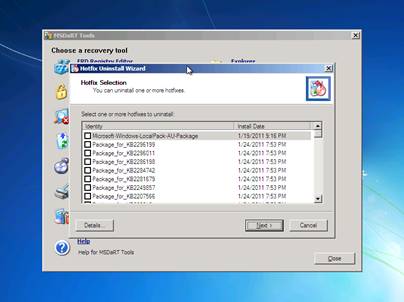
Figure 9: List of installed hotfixes
Find the latest hotfixes, select and click Details , the Deployment Image Servicing and Management (DISM) utility will open the package and display detailed information related to the hotfix:
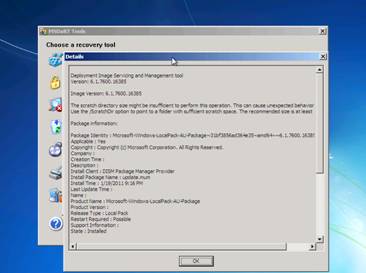
Figure 10: See the hotfix information
To remove a hotfix from the system, select the check box for the hotfix and continue to follow what is in the wizard.
Some troubleshooting scenarios (plus a pair of DaRT tools) need to connect to the network to solve the problem. If you have a DHCP server on your network, DaRT can borrow the IP address as described in the previous section of the series. However, if there is no DHCP server, you can click the TCP / IP Config option in the MSDaRT Tools screen to open the TCP / IP Configuration dialog box, which will allow you to manually configure the IP address, subnet mask. , default gateway and DNS server addresses for the target system:
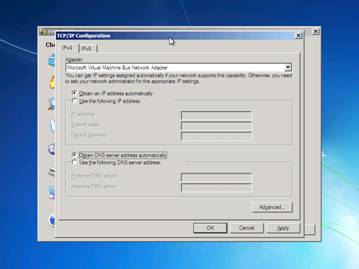
Figure 11: Self-assigning an IP address to the target system
Sometimes the computer may not boot due to malware infection. If this is the case, start your computer with a DaRT CD and click the Standalone System Sweeper option in the MSDaRT Tools screen to launch Standalone System Sweeper:

Figure 12: Step 1 of using Standalone System Sweeper
When Standalone System Sweeper is launched, click the Check For Updates Now button here:

Figure 13: Step 2 of using Standalone System Sweeper
Click Download to get the latest malware definitions updates from the Microsoft Malware Protection Center. Note that you need a network connection (and Internet) to perform this action:
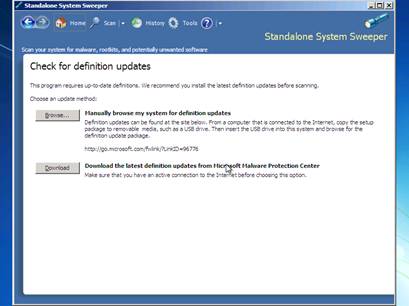
Figure 14: Step 3 of using Standalone System Sweeper
The next screen displays the latest malware definitions being downloaded. This process will take a few minutes:
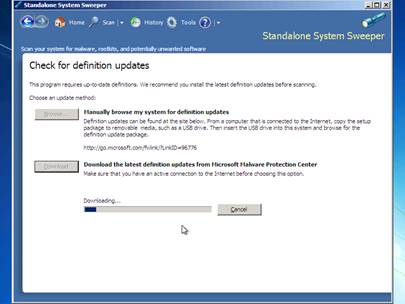
Figure 15: Step 4 of using Standalone System Sweeper
Once the definitions have been downloaded, you can use the Scan button on the toolbar to scan for malware on the target system. Here you have several options such as quick scan, full or custom scan:
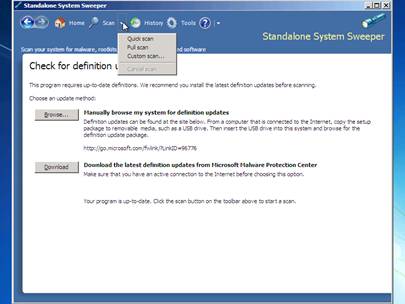
Figure 16: Step 5 of using Standalone System Sweeper
The next screen shows the scanning process. The yellow (!) Symbol indicates that it has found malware in the system:
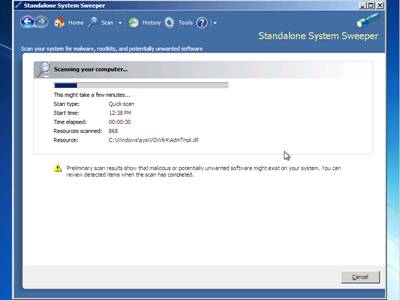
Figure 17: Step 6 of using Standalone System Sweeper
When the scan finishes, you can click Clean System to remove the malware infection or you can click Review Detected Items to see what Standalone System Sweeper has found on the system. We will choose the second option here:
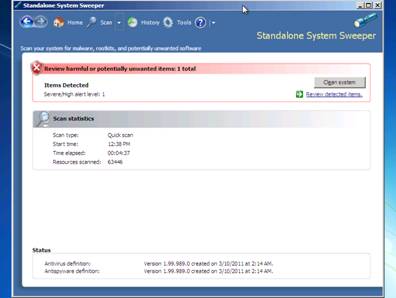
Figure 18: Step 7 in using Standalone System Sweeper
Click the Review Detected Items option and you will get some prompts to send malware infection information to Microsoft so that it will be added to their database for analysis:
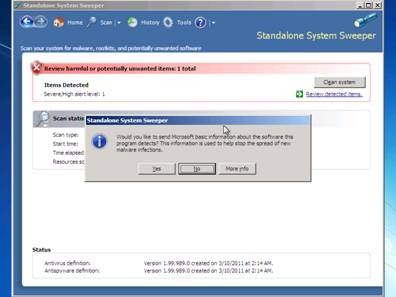
Figure 19: Step 8 in using Standalone System Sweeper
After clicking Yes (or No ) in the above dialog box, the Standalone System Sweeper Warning will open and display the list of detected malware items. Action control will allow you to Remove, Quarantine or Allow malware (default is Remove):
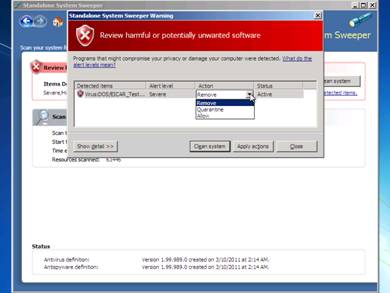
Figure 20: Step 9 of using Standalone System Sweeper
To remove malware, click Clean System . If the removal is successful, this information will be indicated below the status column:
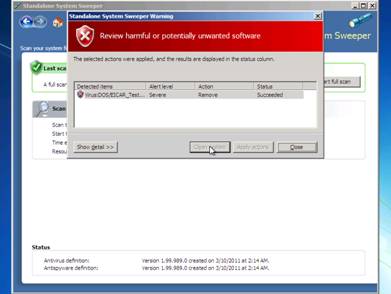
Figure 21: Step 10 in using Standalone System Sweeper
Another useful DaRT tool is Computer Management:
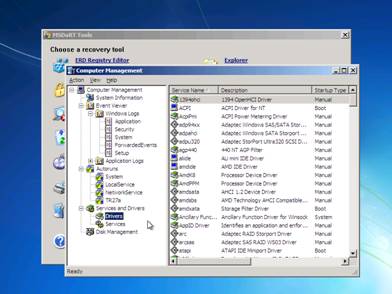
Figure 22: Computer Management
As you can see above, the Computer Management version in DaRT only allows you to have the following options:
- View system information
- View event log
- View autorun files and delete customizations
- View drivers and services (change boot mode)
- View and manage disks and partitions
Another DaRT tool is File Restore, which allows you to find files deleted by users accidentally and empty the Recycle Bin:
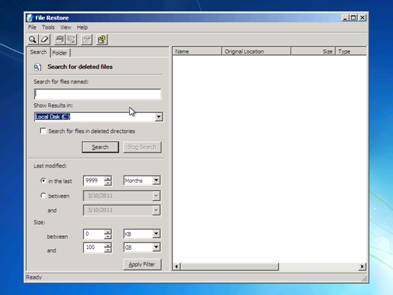
Figure 23: File Restore
Note File Restore does not restore deleted files if they have been overwritten.
Another tool, Locksmith, allows you to reset user account passwords on the target computer:
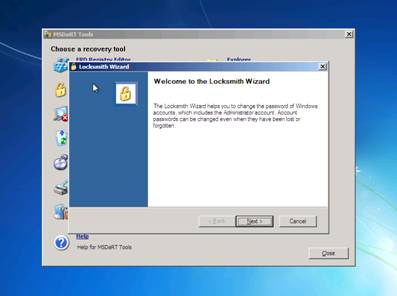
Figure 24: Locksmith
Locksmith even allows to reset the local Administrator account if you forget its password:
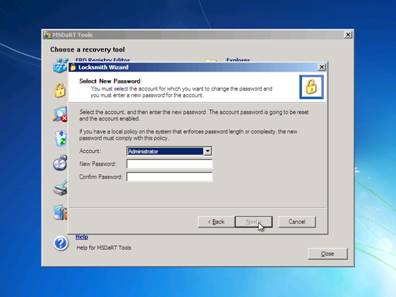
Figure 25: Locksmith can reset the local Administrator account
Another useful tool here is called Disk Commander:
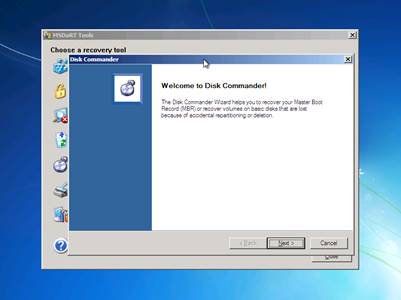
Figure 26: Disk Commander
You can use Disk Commander to restore the system's master boot record and partition information (malware can make mistakes in these logs and make the system unbootable):
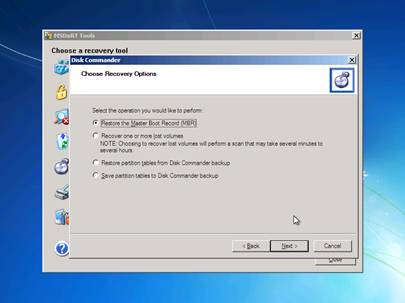
Figure 27: Disk Commander options
There is one thing Disk Commander cannot fix, which is related to the boot configuration database (BCD). However, if your BCD fails, you will see the dialog box below before entering the MSDaRT Tools screen:
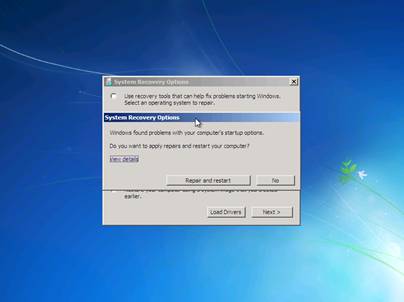
Figure 28: Fixing BCD error
Finally, if you are unsure of the use of DaRT, you can use the Solution Wizard:
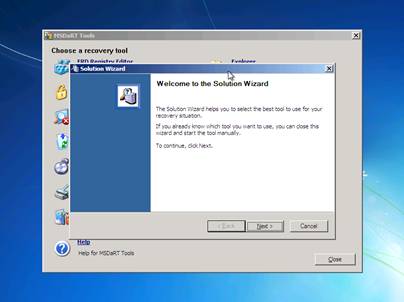
Figure 29: Solution Wizard
This wizard will guide you through a series of questions to help you use the tools of DaRT:
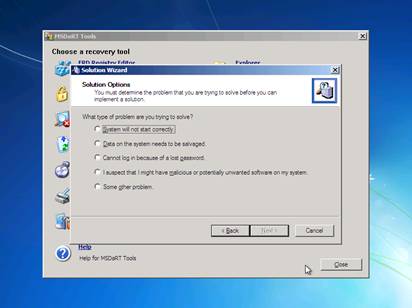
Figure 30: Use the Solution Wizard