Moving a website to a new server does not interrupt access
In this article, we will show you how to transfer your website to a new server easily without interrupting the website's access..
Network Administration - If you own or manage a website then surely one day you will have to change its hosting server. The reason is so much, maybe because the server hosting the current website is too weak, or maybe the traffic on the website increases quickly and requires you to switch to a new server to ensure traffic .
In any case, most people will agree that server transfers are really a problem. Your website may not be accessible during the transfer process and may result in a loss of guests in such a process. In order to overcome the problem of losing access during the server transfer process for the website, in this article, we will introduce how to transfer your website to an easy new server without interrupting your access. website.
There are two main types of web hosting: Shared hosting and VPS / Dedicated hosting . Shared hosting means that the website is hosted in a shared environment and shares the same IP address as hundreds (even thousands) of other websites. In shared hosting, the management capability is very limited, so there is no way to manipulate the DNS feature. And the second type of web hosting, VPS / dedicated hosting allows users to have complete control on their servers and they can manipulate the DNS feature to reduce the time of losing access to the website. Let's look at how we can reduce access time for both types of environments.
Note : This tutorial assumes that you are using cPanel / WHM for hosting your website.
Transfer website in shared environment (shared hosting)
1. Backup all files in the old server. You can easily do this with FTP programs. If you are running a dynamic website (like WordPress), remember to backup your database (via PhpMyAdmin-> Export).
2. Set up a new server. Copy all files from the old server to the new server. Care must be taken to keep the file structure intact. With dynamic websites, set up a new database (with the same name and password) and import the entire database into it. Next, make sure that the database structure is intact.
With static websites
3. Enter your domain registrar and change the nameserver server name to a new server. DNS will take 24-48 hours to propagate. During this time, your website will be inaccessible, fluctuating between new and old, but because it is a static website, your visitors will not see the difference. Avoid creating any changes during this transfer.
With dynamic websites
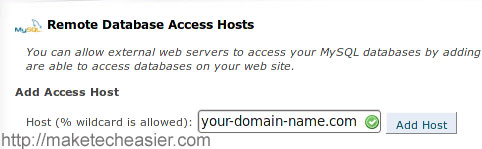
4. You need to configure your website to point to the database at the new server (some hosting servers do not allow remote access to their databases, so check the hosting server first When conducting). Open your cPanel in the new server. Find the Remote MySQL icon and click on it.
Enter the domain name in the field and click ' Add Host '.
Log out of cPanel. In the old server, open the database configuration file (with WordPress, it's wp-config.php file ). You will be asked for the database hostname details, change it to the new server's IP address. In WordPress:
/ ** MySQL hostname: Change 123.456.789.000 to your new server IP address * /
define ('DB_HOST', '123,456,789,000');
Save and upload to the old server.
5. Enter the domain registrar and change the server name to a new server. While DNS is popular, visitors will see content from the old server. However, because the database is pointing to the new server, all changes made on the site will be updated in the new server. When the server transfer is successful (24-48 hours), your new server will work with all changes made during the transfer.
Transfer website in VPS / Dedicated hosting environment
Before we start, we assume that all users have root access to their servers, both old and new servers are running cPanel / WHM.
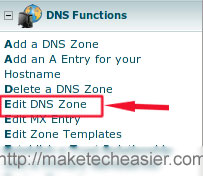
1. Log in to WHM in the old server. In the left pane, scroll down and look until you see the ' Edit DNS Zone ' link, then click on this link.
2. Select the domain you will be transferring to.
3. Note these fields, where the domain name and IP address will be displayed.

Change 86400 (or 14400) to 300. Then save the changes.

What you have done is set the TTL (Time To Live) value to 5 minutes so that the DNS client only stores the information in that record for about 5 minutes (the general setting is 24 hours and 48 hours). Then you have to wait 24-48h for this TTL value to be popular, depending on the initial value.
4. In the meantime, you can backup your old server and transfer all files and databases to the new server. New server test to make sure everything is working very well.
5. When you are ready to move the website, log in to the old WHM server again. Go to the DNS domain page. Now change the IP address to the IP of the new server. Then save the changes.

What you do here is create a transition and point it to the new server.
6. Enter your domain registrar and change the server name to a new server. In about 5 minutes, your new server will be up and running. In all cases, DNS will need 24-48h to propagate, so in the meantime keep the old server intact (do not delete any files or disconnect any service) until too Popular DNS process is completed.