TipsMake.com - In this tutorial, you will learn how to design and create romantic Valentine cards in Photoshop. These are simple instructions for those who are not proficient in Photoshop through tools like Pen Tool, Custom Shape and Layer Style .

Create a new file ( File > New ) in Photoshop at 1920 x 1200 px ( RGB color mode) with a resolution of 72 pixels / inch . Use the Rectangle Tool (U) and draw a large rectangle equivalent to the file's background size.
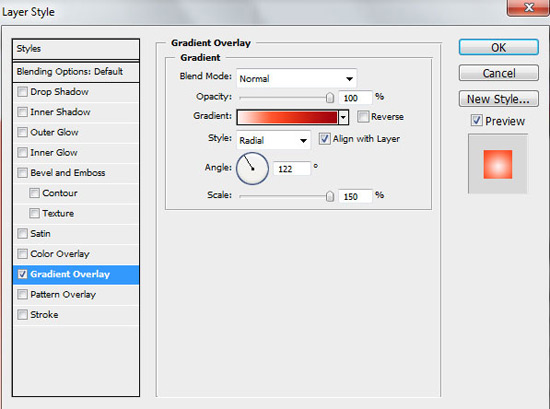
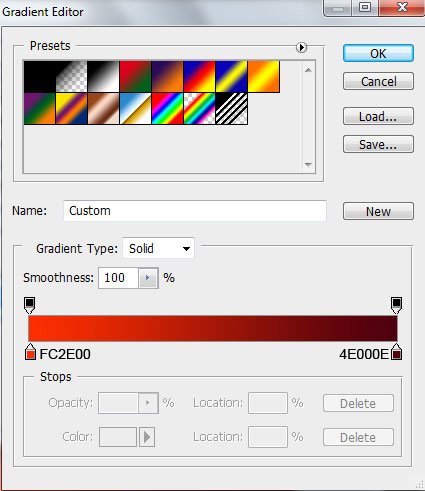
At this layer, click the Add a layer style icon in the bottom part of the Layers panel and select Gradient Overlay
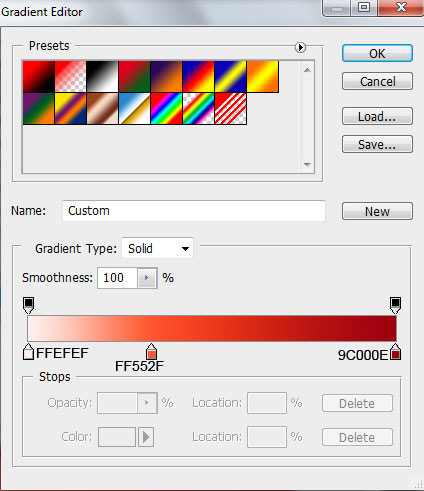
Click on the color bar to open the Gradient Editor and set the color as shown below. Click OK to close the Gradient Editor window.
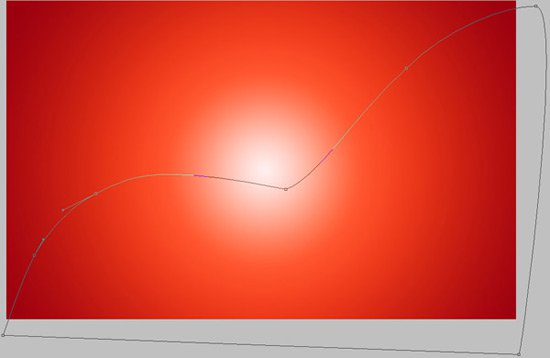
After setting the color, we will have the background image as follows:

Next, you need to draw a curve at the created background. Select the Pen Tool (P) , select from the Options bar , draw Shape Layers mode and draw the following shape:
Set Fill to 0% for this layer and use Gradient Overlay color by selecting Add a layer style from the bottom part of the Layer panel.
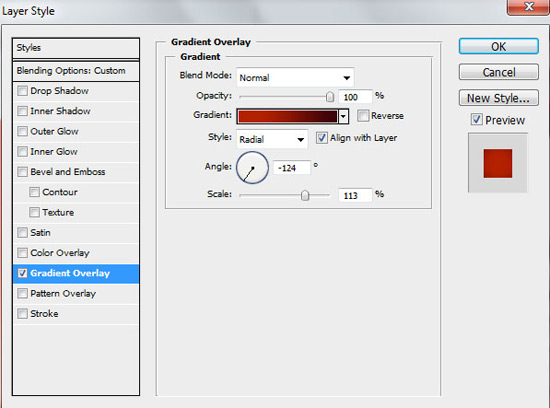
Click on the color bar to open the Gradient Editor and set the color according to the following image. Click OK after the color is set.
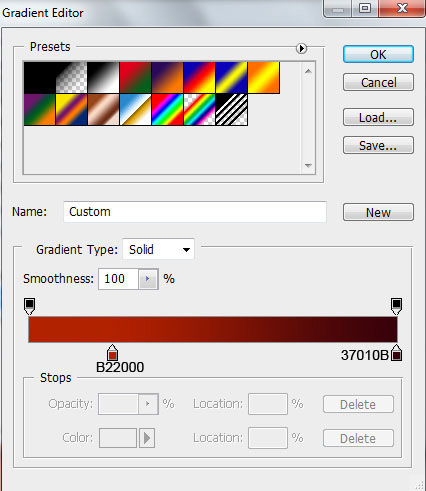
We will be shown the following

Create a copy of the layer with the image just drawn above. Then select the F ree Transform (Ctrl + T) to move this copy to the right a bit. You can edit some points on this drawing using the Convert Point Tool
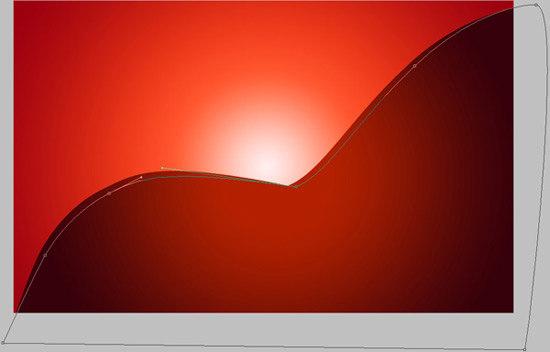
Set this layer's Fill to 0% and use Gradient Overlay with the following color schemes
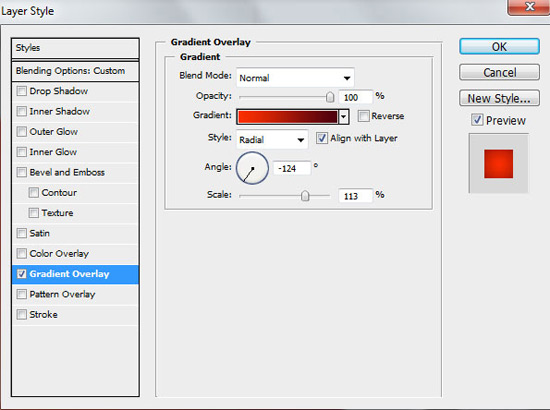
So we have finished the background of the card

Page 2: Draw the heart
Draw heart
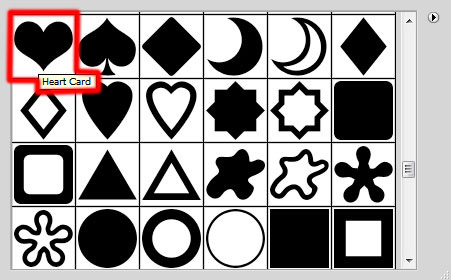
Select Custom Shape Tool (U) on the toolbar, in the Options bar click Shape to open the selection menu. Find the Heart Card at the bottom of the menu and double-click on it to choose to draw.
Drag that heart shape onto the existing card

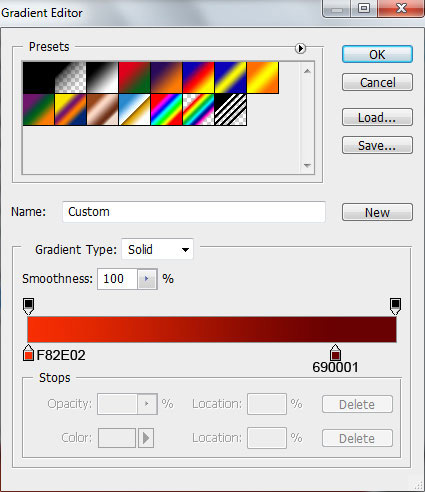
Click the Add a layer style icon and select Gradient Overlay :
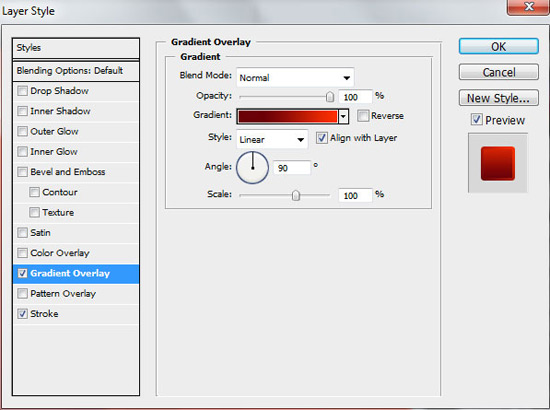
Then set the color in the Gradient Editor as follows
Use the Stroke
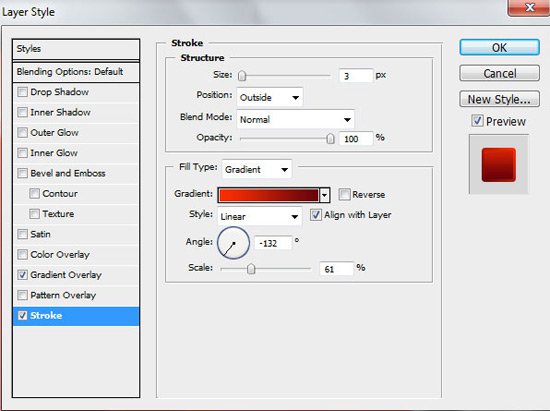
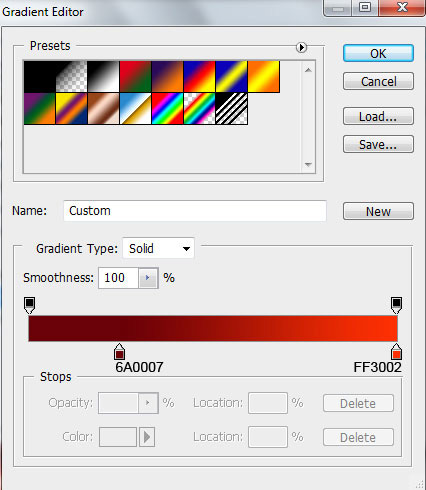
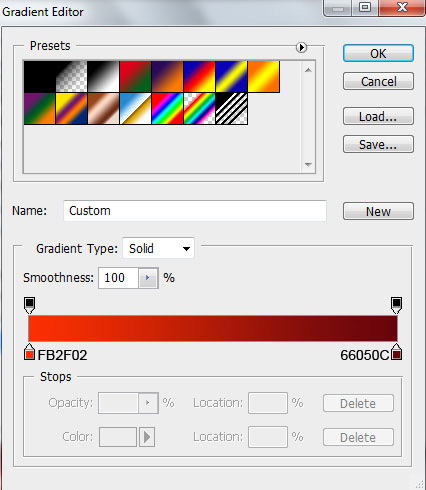
In Stroke , select Fill Type - Gradient and click on the color bar to open the Gradient Editor, set the color as shown below and click OK to close the Gradient Editor dialog box.
Complete the drawing of the heart

Make a copy of the heart layer and use the Free Transform (Ctrl + T) tool to drag the copy of the heart back

Set Fill for this new heart layer to 0% and use Gradient Overlay to change its color as follows
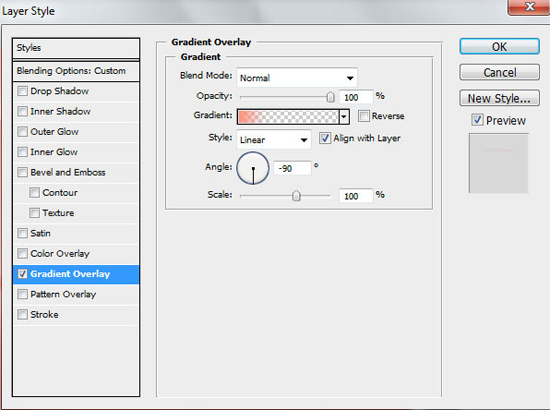
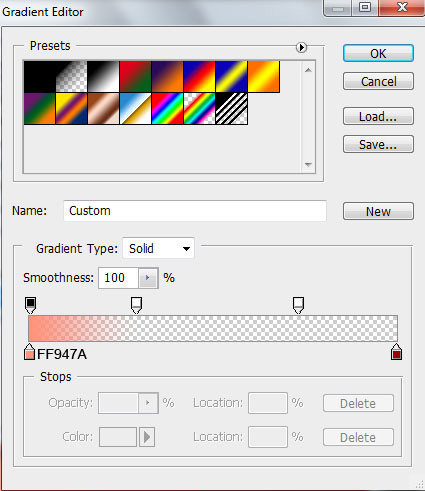
We will get the following picture

Page 3: Create a shadow for the heart
Now need to create a little shine for the heart. To create a light shadow, you need to draw many shapes on a layer and edit the first shape with the Subtract option. Select the Ellipse Tool (U) , draw the ellipse first, then hold down Alt (or click on the S ubtract From Shape Area option on the Options bar ) and then draw the second ellipse as shown below.
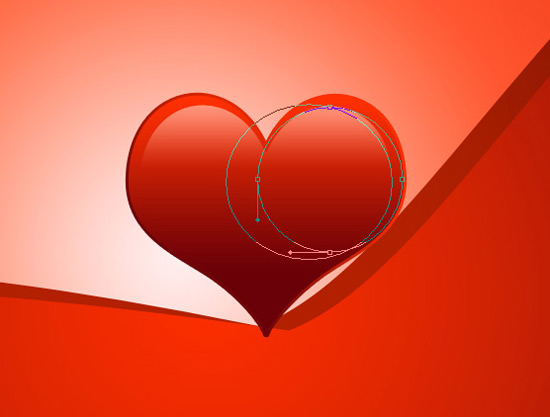
Set this layer's Fill to 0% and use Gradient Overlay with the following color options
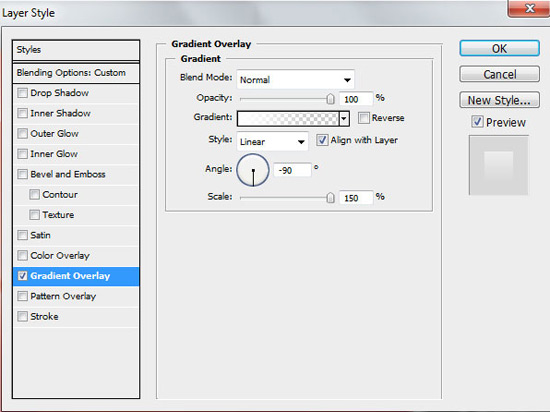
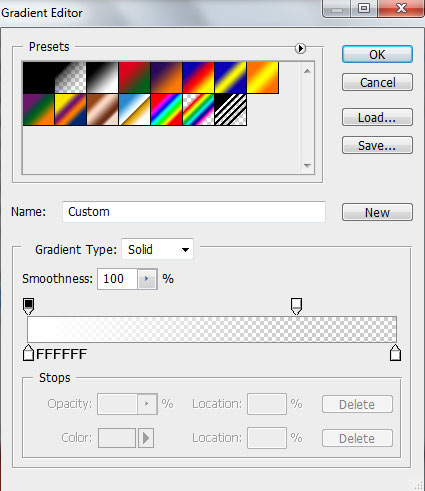
The shiny result of the heart is as follows

Create a copy of the lighted shadow layer, using the Free Transform (Ctrl + T) tool to reverse this light shadow copy to the following position.
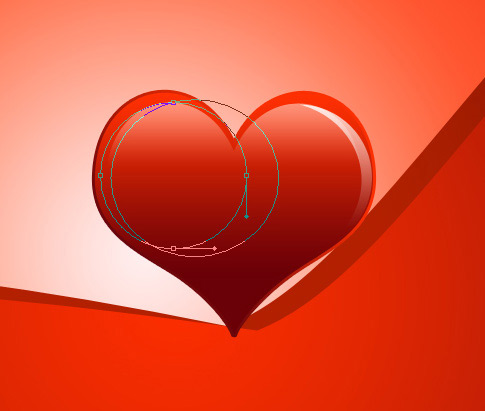
Set its Fill to 0% and apply Gradient Overlay to fill the shadow color

Temporarily complete the heart:

Create another copy of the heart and select Free Transform (Ctrl + T) to drag it a little smaller. Using the Ellipse Tool (U) , hold down Alt ( Subtract From Shape Area ) and draw an ellipse at the following position compared to the newly created heart shape.
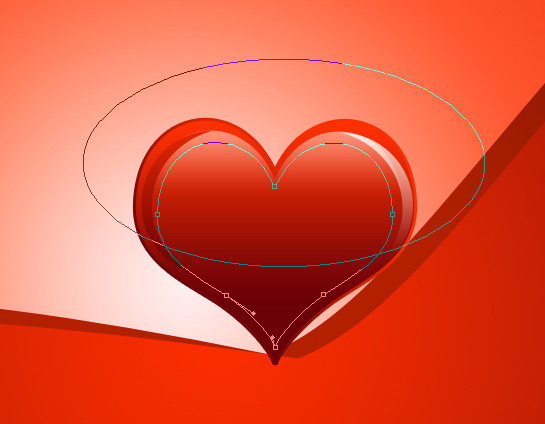
Set Fill to 0% for this new layer and click on Add a layer style to set the color for the Gradient Overlay :
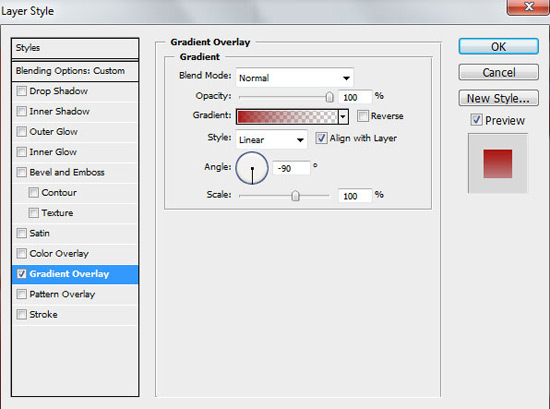
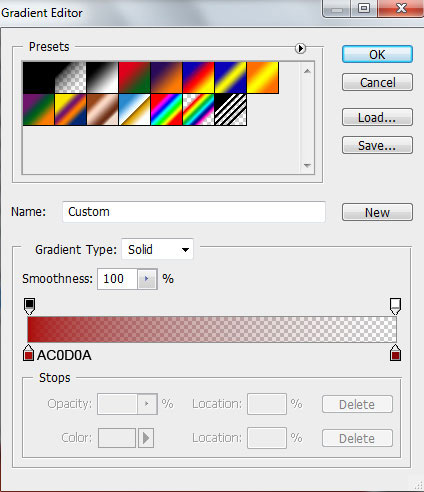
Completely perfect a heart for the card

To merge all the layers of the heart into one, at the Layers panel, place the layers in succession, hold down the Ctrl key while selecting the layers and press Ctrl + E to group them.
Create a copy of 2 hearts of the heart then use the Free Transform (Ctrl + T) tool to resize and rotate the directions for those two hearts.


Page 4: Create light rays around the heart
Need to create some light effects around '3 hearts'. Using the Pen Tool (P) draw some light rays below the heart layers

Result

Combine these drawn rays into a layer in the same lumped way as above (merging the heart layer). Duplicate this beam and drag them to smaller sizes with the Free Transform tool (Ctrl + T) and then rotate them to set the following angles.

Set the Fill of the light ray layer later to blur a little more, about 53%

Continue to make copies of the light if you are not satisfied and remember to fade its opacity ( Fill )


Create a new layer and select the Hard Mechanical brush from the Brush Tool (B).
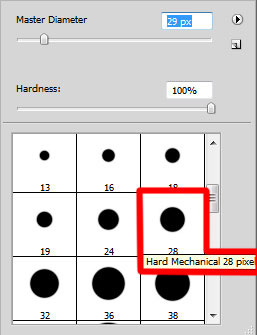
Select the Foreground color color to white and draw dots of different sizes as shown below


 How to create clipping mask in GIMP
  How to create spherical images in GIMP
  How to sign a document with GIMP
  How to create movie posters in GIMP
  How to Color Inside the Lines in FireAlpaca
  How to swap and combine faces in GIMP