Instructions to install the theme for Windows 7
You are bored with the default theme of Windows 7 and you want to replace the default theme with other themes to use other beautiful interfaces. The following article will help you simplify the installation of Windows 7 theme..
You are bored with the default theme of Windows 7 and you want to replace the default theme with other themes to use other beautiful interfaces. Changing the theme for Windows is very complicated for first-time users.
The following article will help you simplify the installation of Windows 7 theme, invite you to follow along.
Change the Theme for Windows 7
Step 1: Download the Universal Theme Patcher here, available in 32-bit and 64-bit versions and the Start button changer .
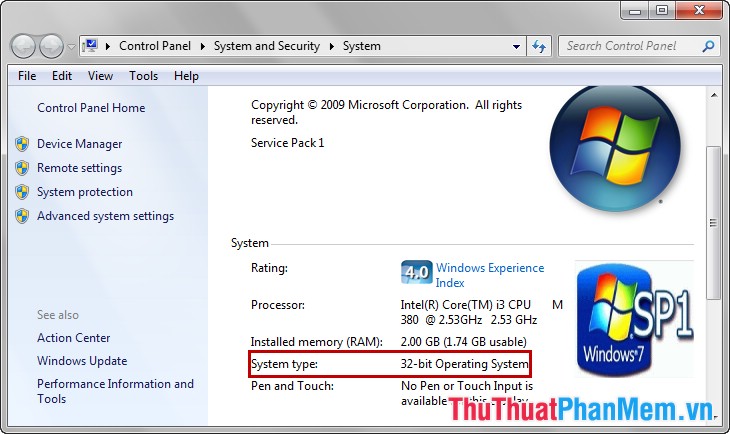
Step 2: See how many bits of your computer version to choose the appropriate Universal Theme Patcher .
Right-click Computer -> Properties and look at the System type row .
Step 3: Install UniversalThemePatcher .
Because the computer is a 32-bit version, after extracting the downloaded file, select the 32bit - X84 folder. If it is a 64 bit version, then you choose the 64bit - X64 folder.
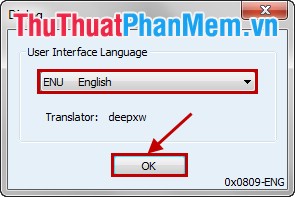
Run the file UniversalThemePatcher-x86.exe in the directory of your choice, first select the language and click OK .
Dialog box you choose Yes .

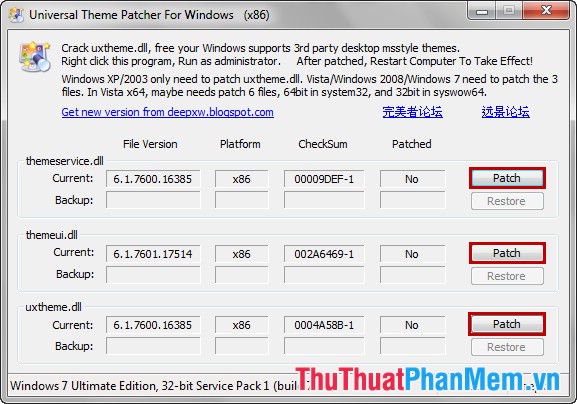
Next, you in turn click on the 3 Patch buttons, each time you click on a Patch button will appear a message you choose OK .
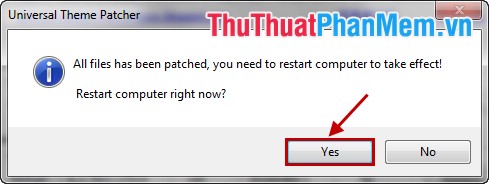
After performing the system requires restarting the computer, click Yes to restart the computer.
Step 4: After the computer boots up, download the theme you like to your computer.
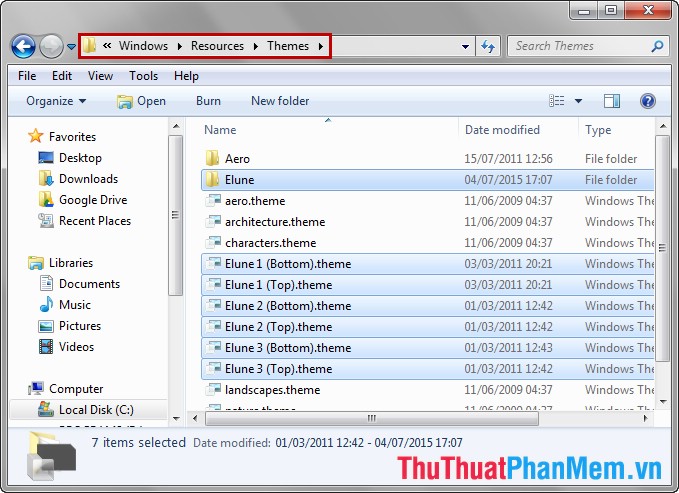
After downloading you extract the file, and select the Theme folder, then copy all the folders in the same folder containing the .theme file and paste it into the Themes folder under the path C: WindowsResourcesThemes .
After copying, double-click on the .theme file you just copied to install the theme for Windows 7.

Thus the Windows 7 interface has been changed.
Change the Start button
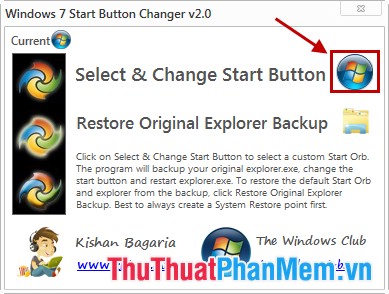
Step 1: Download the Windows 7 Start Button Changer here. Then run the Windows 7 Start Button Changer v 2.0.exe file.
Step 2: Click the default Windows Start icon button .
Then choose the file ending in .bmp in the Start Orb folder of the Windows theme that you downloaded.
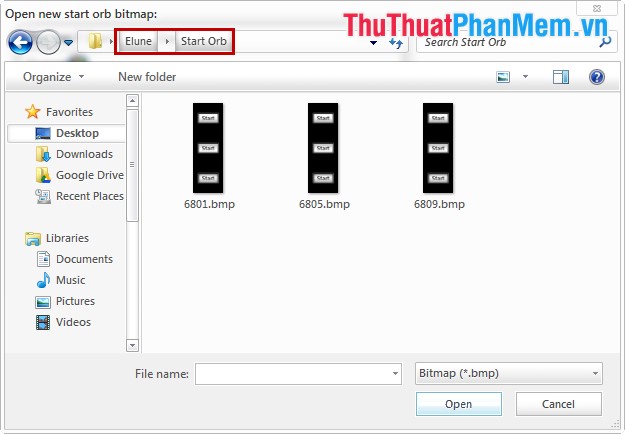
If in the Windows theme you downloaded does not have the Start Orb folder, you can select the Start icon in the Butoons folder of the Windows 7 Start Button Changer folder in the file you downloaded at the beginning of the article.
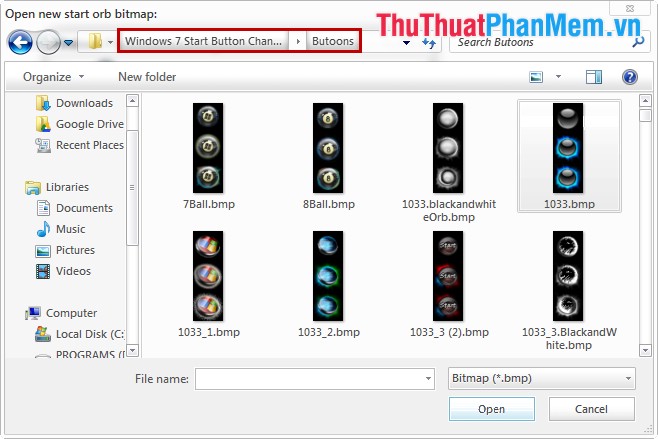
After choosing, click Open to change the Start button .
Thus, the article has finished instructing you how to install the theme for Windows 7, you perform the turn and exactly the steps as in the article, you will quickly change the theme for your Windows 7. Good luck!