Instructions on how to use Camtasia Studio from AZ
Camtasia Studio is one of the most popular Desktop recording software available today. Compared to competitors such as Mirillis Action, Bandicam, . Camtasia Studio is more appreciated for the quality of work and the functions it provides.
If you are a new user, is quite vague about this software, please track the article below to learn TipsMake.com same features as well as how to use Camtasia Studio from A - Z .
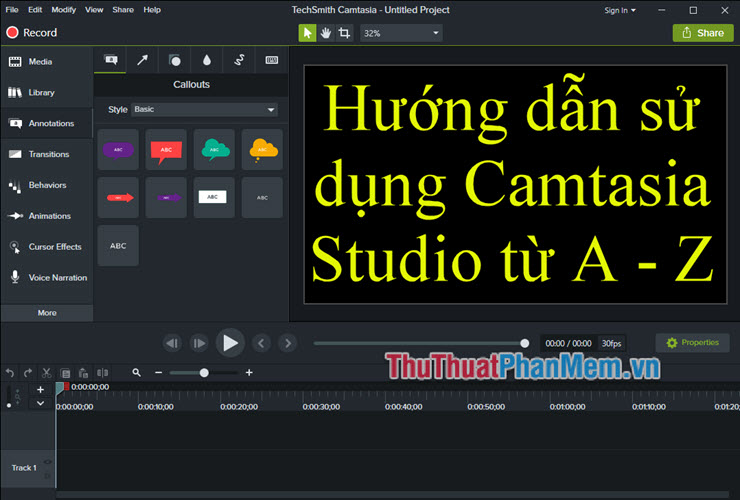
Main features of Camtasia Studio
- Back to the computer screen
- Add photos, audio and video up to 4k
- Edit and edit videos easily with many professional tools
- Add captions on the video with a pen tool, arrows, squares, .
- Works effectively with all multimedia files such as video, audio or images
- Voice recording
- Special rich set of effects
- Support smart video recording feature
- Support multiple output formats
- Convenient connection to social networks, after creating videos you can share them quickly in a few clicks
- Support multiple operating system platforms
However, the price of $ 249 to own Camtasia Studio is not an easy thing if you are not a professional. But if you've determined your work needs the best screen-editing and video-editing software, don't hesitate to take Camtasia on hand as it is worth it.
For now, let's start to learn how we will use Camtasia Studio!
Install Camtasia Studio
First, you access the address to download Camtasia Studio latest version. Select the version appropriate to the computer operating system.
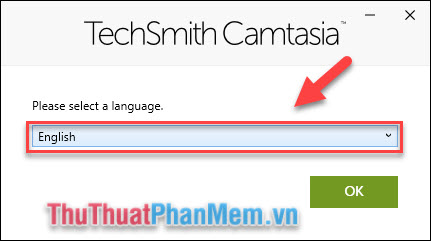
You perform the steps to install Camtasia Studio as follows:
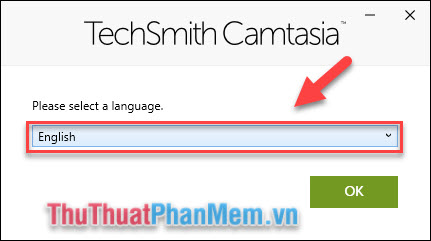
Choose English language .
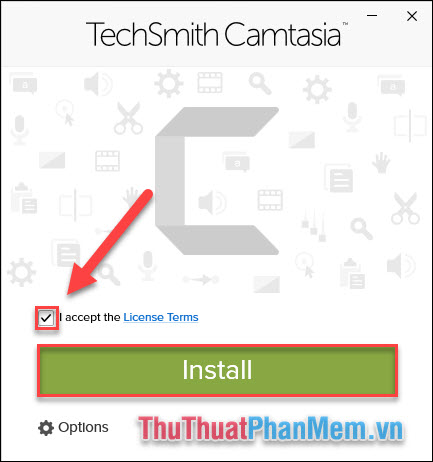
Check the box I accept the License Terms and then Install .
Finally, just click Finish to complete.

Record video with Camtasia Studio software
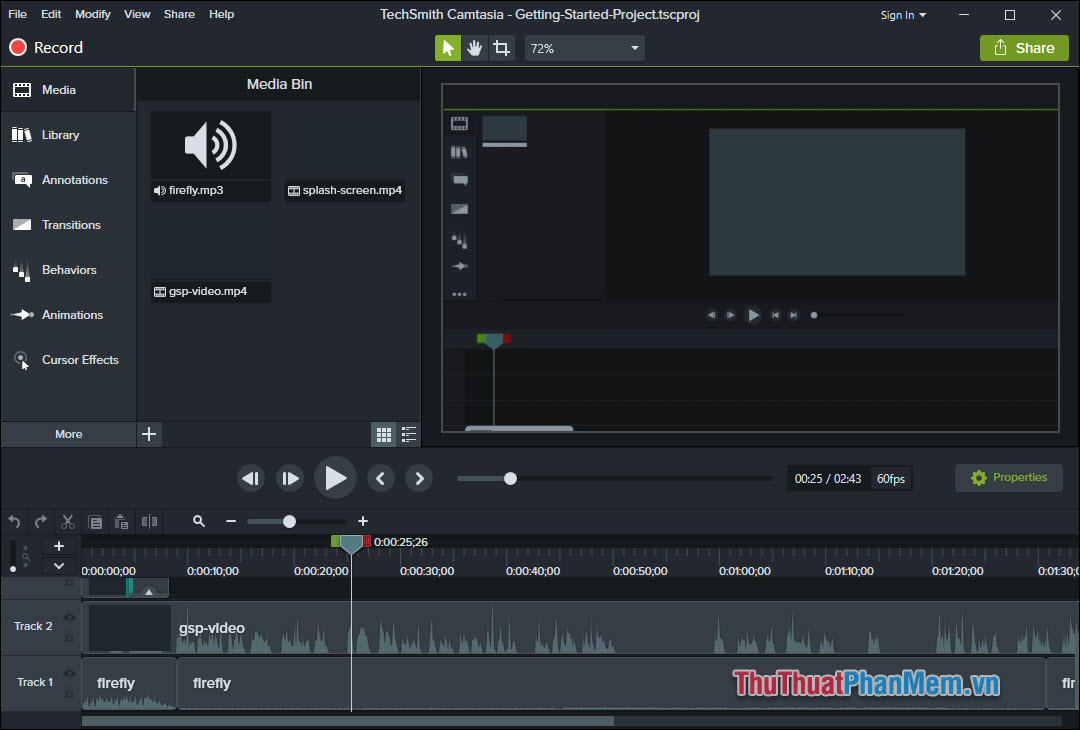
Open the software and you will see the main interface of the software like this:
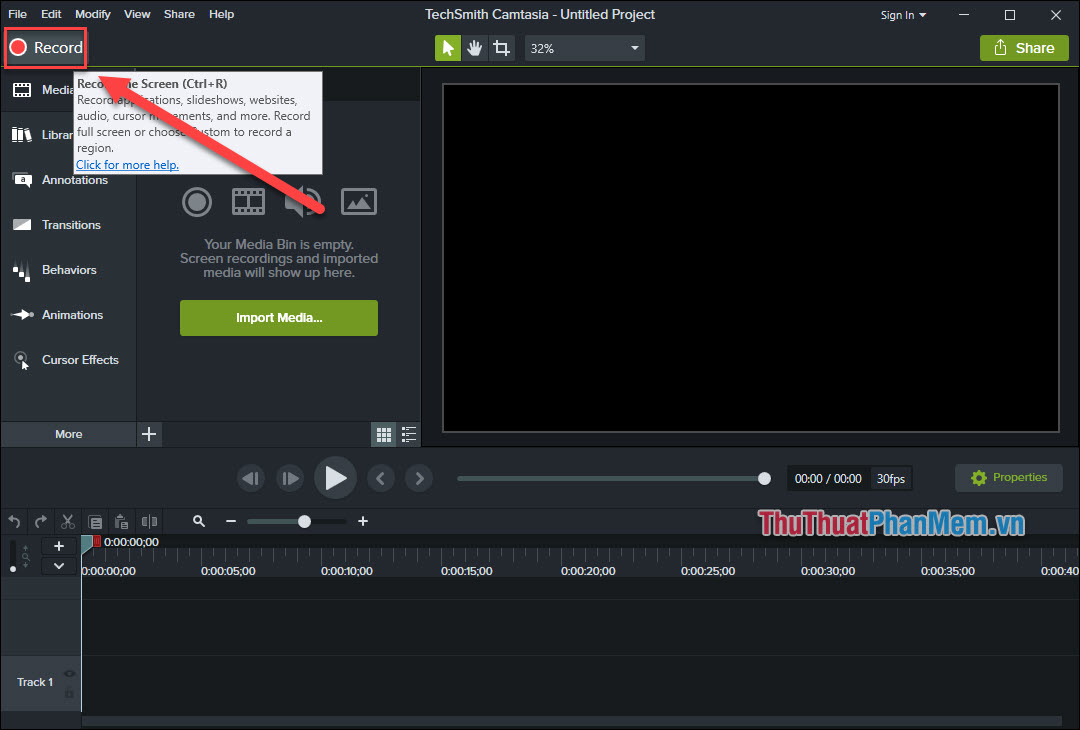
Step 1: to start recording the computer screen, click the Record icon on the corner of the software window:
Step 2: Your screen will appear a tool panel including:
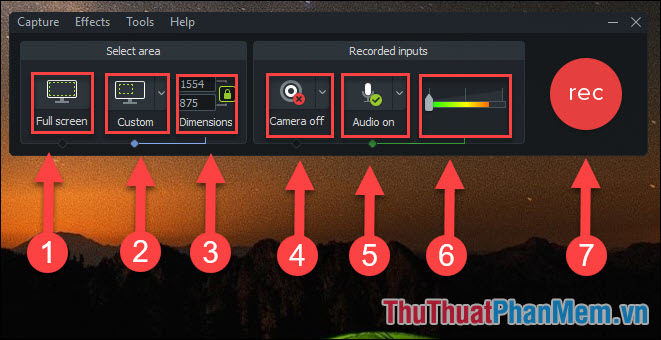
- Full Screen: Full-screen recording mode
- Custom: Select a custom full screen size, displayed as a blue dashed frame on the screen. You can hold on its center to move to the desired position, or drag the corners and edges to adjust the size:
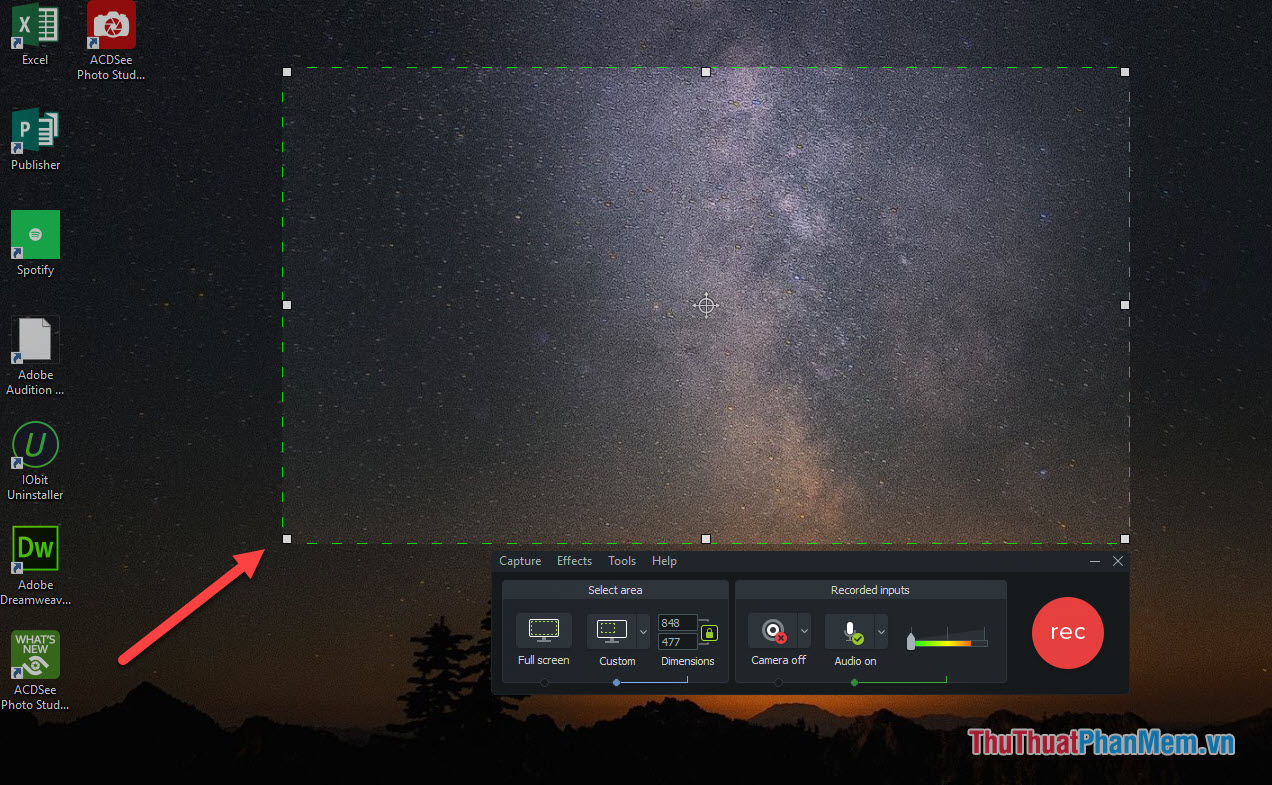
- Dimensions: You select a specific frame size, the number above is the length of the horizontal, the number below is the length of the vertical, the unit of measurement is pixels.
- Camera Off: Webcam recording mode, if you want to record using Webcam, turn it on.
- Audio On: Mode on / off of the microphone
- Volume icon: Adjust the volume during recording
- REC: Start recording
Step 3: Once the frame is set to the position you want to record and the recording settings are complete, it is time to start recording, and press the REC button. You will have 3 seconds to count down to prepare to record.
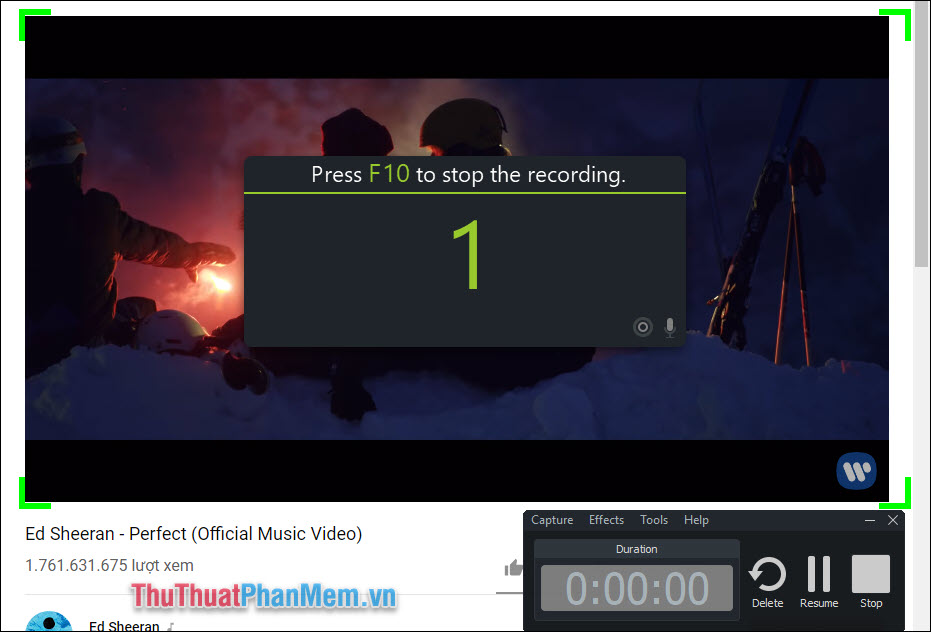
Step 4: When you feel that you've recorded enough, press F10 or Stop button to stop.

Step 5: Return to the editor of Camtasia Studio, you will have special editing options for the video. Let's take a quick look:
In the toolbar below, you will have the following options:

- Undo and Redo: go back / forward to your previous / next steps .
- Cut: Moves the selected object to another timeline.
- Copy: Copy the object
- Paste: Paste the cached object down to the selected time period
- Split: Separates the object at the selected timeline
You drag the time indicator to a certain time point, then use the functions you want.
For the effect panel on the left corner of the screen, we have:
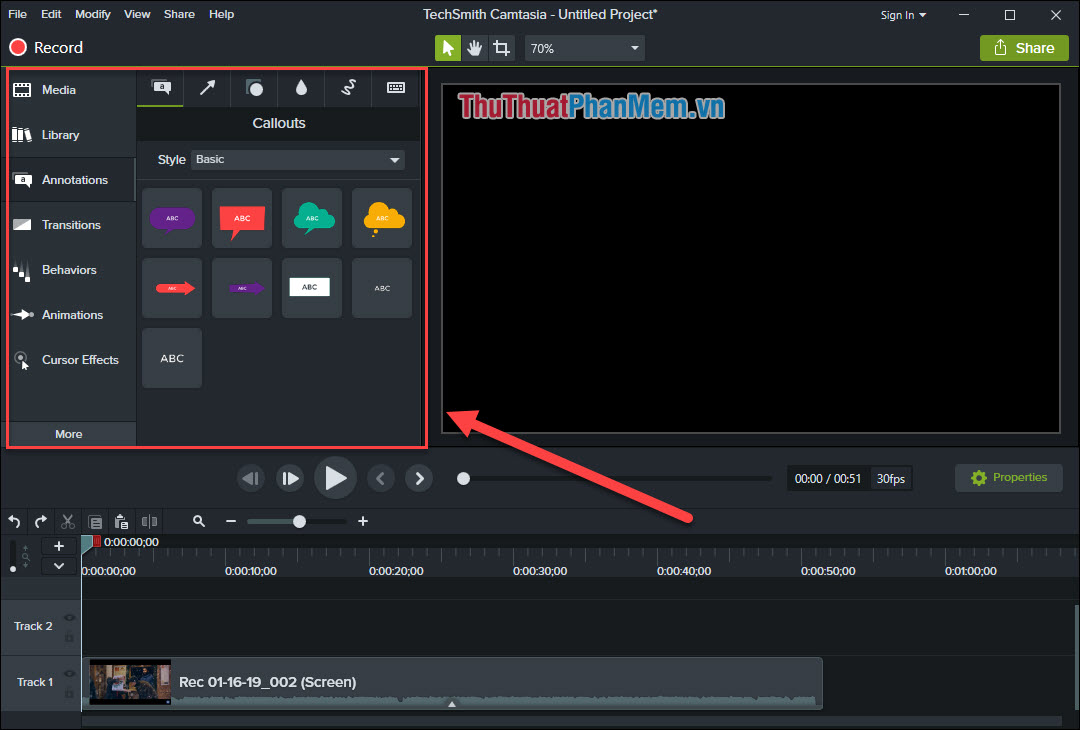
- Annotations: Annotations , you will have the symbols, strokes for annotation purposes such as cells, arrows, squares, circles, .
- Transitions: Transition effects
- Behaviors : Camera actions such as tilting the camera, flipping the frame, .
- Animations: Animation
- Cursor Effects: Cursor effect
- And some other features in the More section , you discover them all!
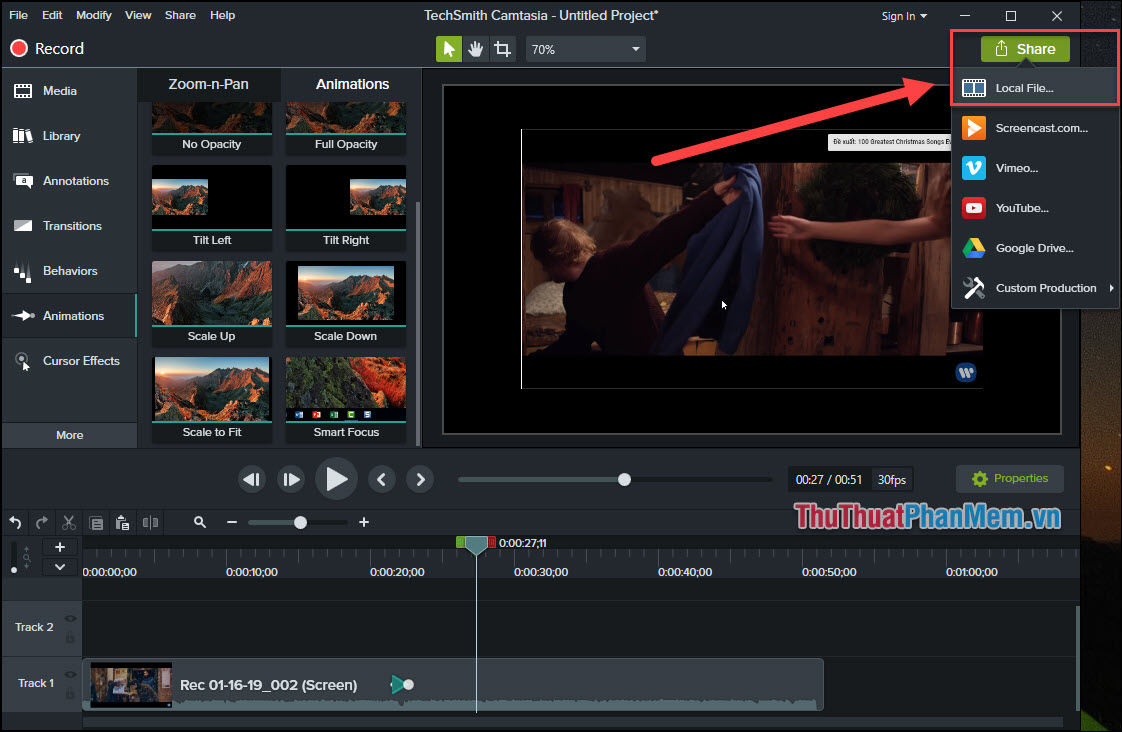
Step 6: Export the file:
After cutting, adding effects as you like, proceed to export the video by clicking the Share button in the right corner of the screen, select Local File :
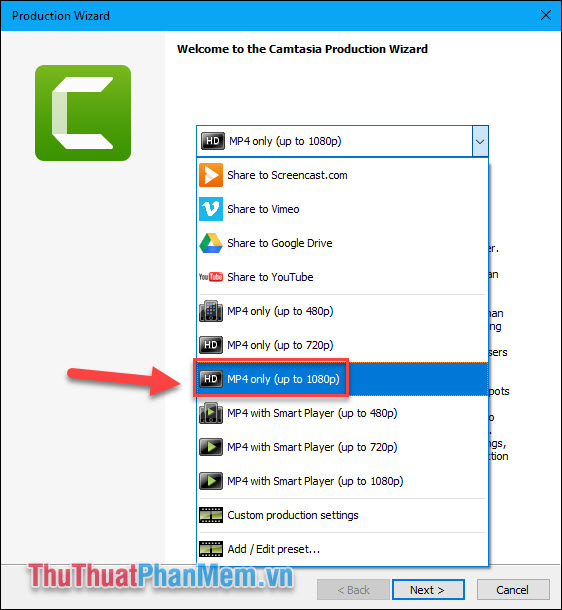
Select the video format you want:
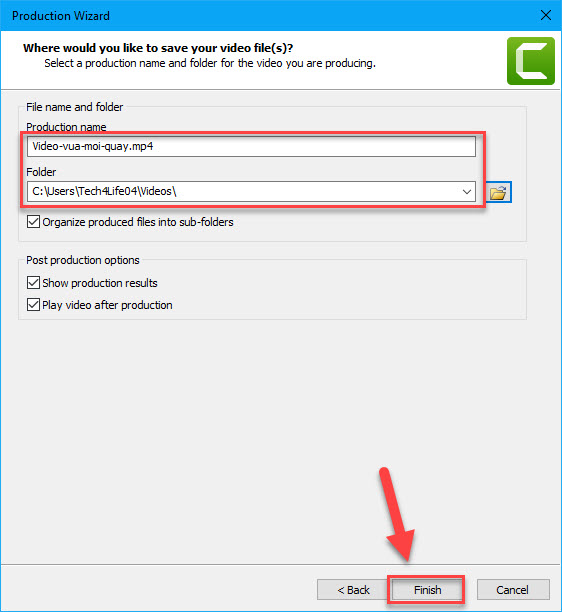
Name the video and select the output folder, then click Finish .
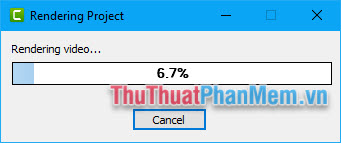
Wait for the Video to be created successfully.
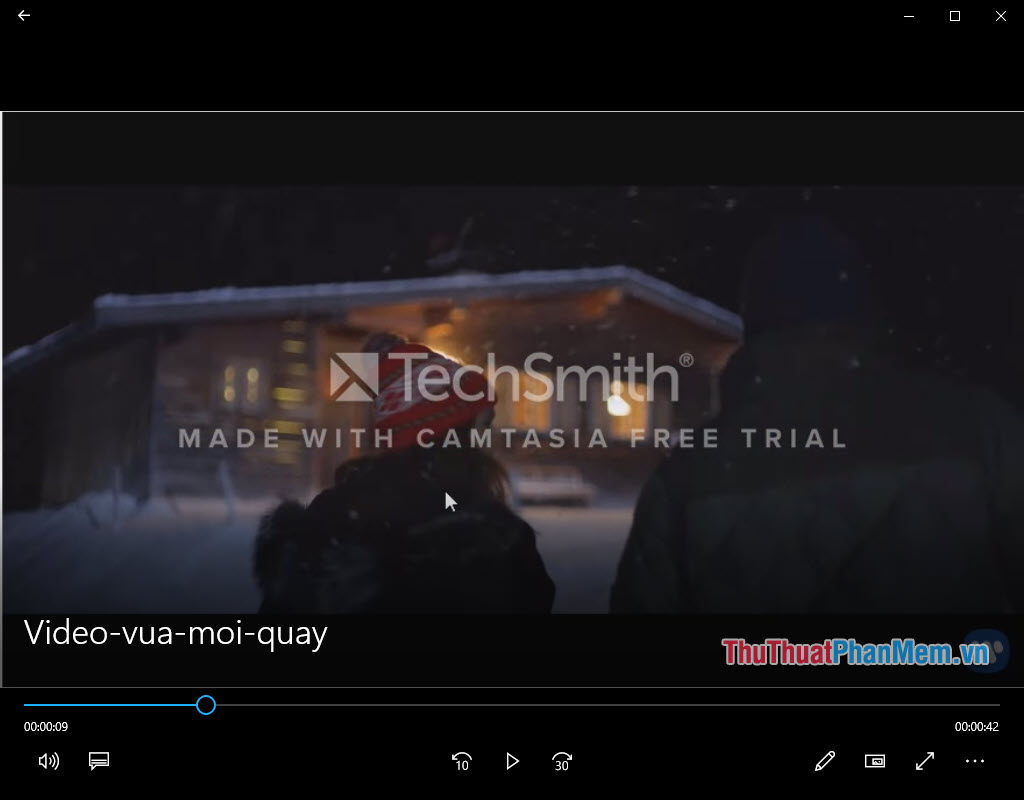
Open and verify your video, here my video appears watermark of Camtasia very large because of the trial version of the software, if you want to remove the watermark, you need to register for a paid version.
Conclusion
Above TipsMake.com instructed you how to use Camtasia Studio to record the computer screen from A - Z . You can realize that the operation to shoot a video with Camtasia Studio is nothing too complicated because the interface and its functions are designed very intuitive.
In addition to the excellent screen-back capabilities, there are also special editing features and effects that Camtasia provides, so we should also use it as a quick Video editing software without too much skill. Adobe Premier.
For now, let's start practicing video recording of your computer screen now! Good luck!