Instructions on how to record laptop screen win 10 with sound
Recording laptop screen is a need that many users need during use when playing games, working,. or simply chatting with friends. Understanding this, Microsoft has immediately integrated the way to record laptop screen with live sound into their operating systems win 7, win 10 and 11 with a software called: Xbox Game Bar .
How to record laptop screen with sound with Xbox Game Bar
To return to the laptop screen with Xbox Game Bar, we first need to press the Windows + G key combination to turn on the interface of this program.
In the Xbox Game Bar interface, click on the Capture box with the camera icon in the toolbar at the top of the screen.
When the Capture panel appears, you will see 4 buttons with the following functions:
- Take screenshot: Take a screenshot.
- Record last 30 seconds: Record the laptop screen in the last 30 seconds. Background recording mode must be enabled.
- Start recording: Return to laptop screen.
- Turn mic on while recording: turn on mic while recording, this is the key to how to record laptop screen win 10 with sound .

Select Turn mic on while recording to record laptop screen win 10 with sound
To record the screen of a laptop with sound on Windows 10, you need to press the Turn mic on while recording button to enable recording mode. In case the device displays the message: "Your privacy settings are blocking your microphone", you need to follow these steps:
- Click the Start Menu button in the lower left corner of the screen, select Settings.
- In the Settings window, click on Privacy.
- Click on Microphone on the left Menu bar.
- In Allow access to the microphone on this device, click change and switch the setting to "On".
- Under Allow apps to access your microphone, click to switch the setting to "On".
- Finally, in the Choose which Microsoft Store apps can access your microphone section, scroll down, find Xbox Game Bar and switch the setting to On.

Settings to perform laptop screen recording with sound using Xbox Game Bar
Now, you can press Windows + G to open Xbox Game Bar, turn on the mic with the turn mic on while recording button and start recording the laptop screen with sound using Xbox Game Bar. To stop recording, just press the Stop button on the right side of the screen. The video recording of your Windows 10 laptop screen with sound will be automatically saved at the path: Videos/Captures.
Instructions for recording laptop screen using other software
Instructions for recording laptop screen using PowerPoint
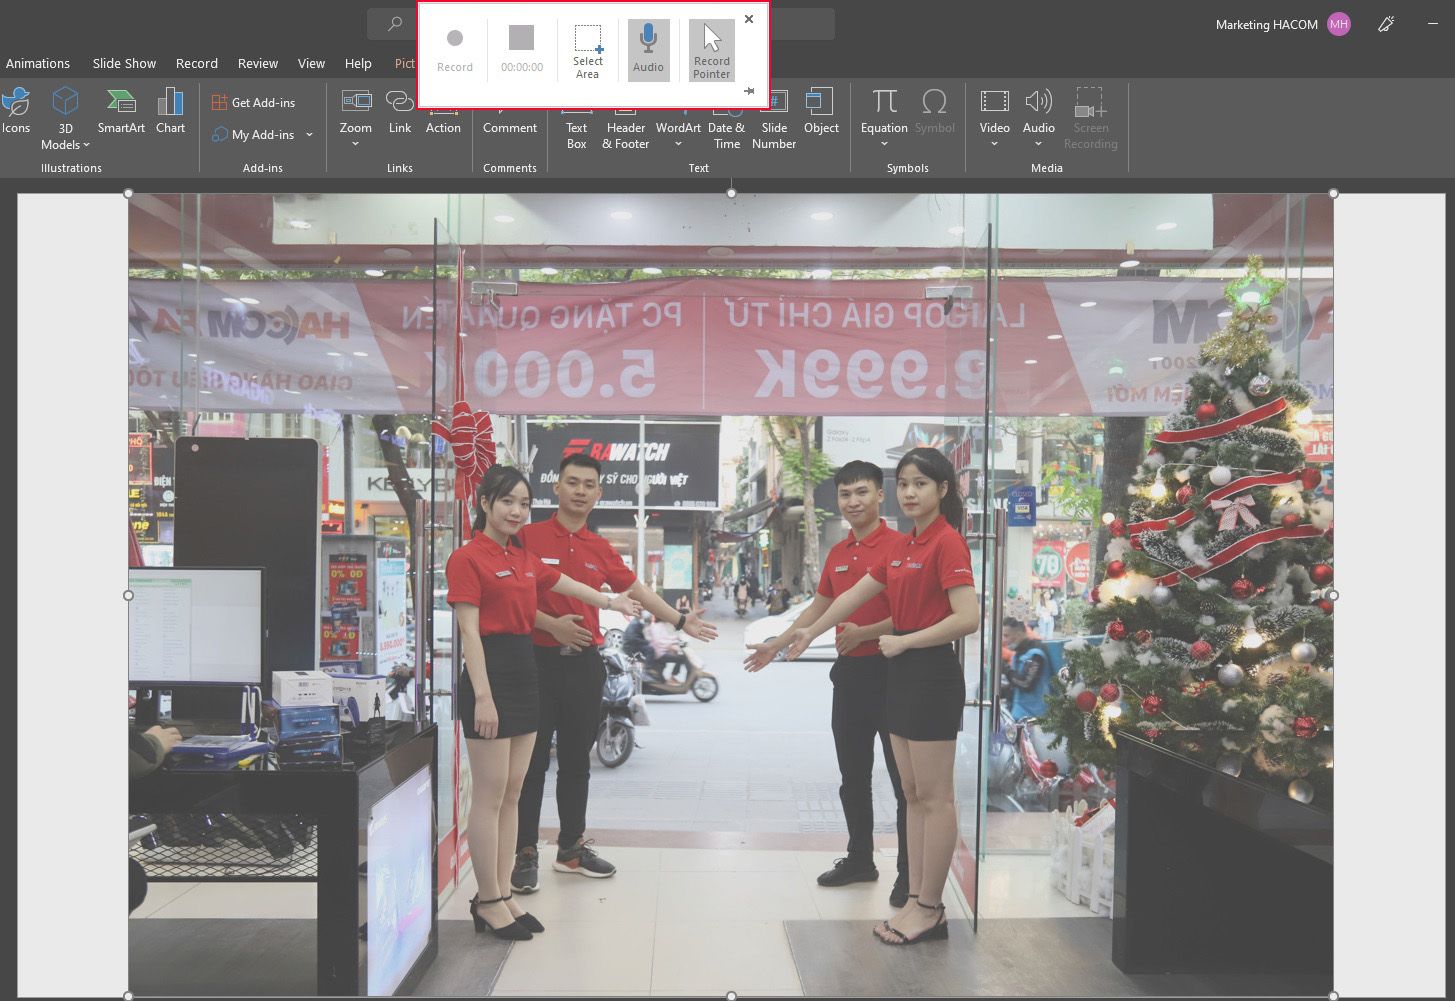
You may not know but PowerPoint is also a great tool for recording laptop screen, moreover it is very convenient when you can circle the screen area to record. To perform this way of recording laptop screen with sound , you follow these steps:
- Open the PowerPoint application.
- On the Insert tab, select Screen Recording.
- Click Select Area to drag the area of the screen you want to record.
- Check the Audio button to record laptop screen win 10 with sound .
- You can also click the Record Pointer button to choose whether or not to record the mouse pointer along with the frame.
- Click Record to start recording.
- To stop recording, press Windows + Shift + Q. After stopping recording, you will see your video appear on the Power Point slide content. You can click the Play button to review it.
- To save your Windows 10 laptop screen recording video with sound, right-click on the video and select Save Media as.

Return to laptop screen using PowerPoint
How to record laptop screen with sound using Power Point has many advantages such as: only record 1 area of the screen, can choose to record the mouse pointer or not. In return, the implementation is a bit cumbersome and requires PowerPoint to be installed.
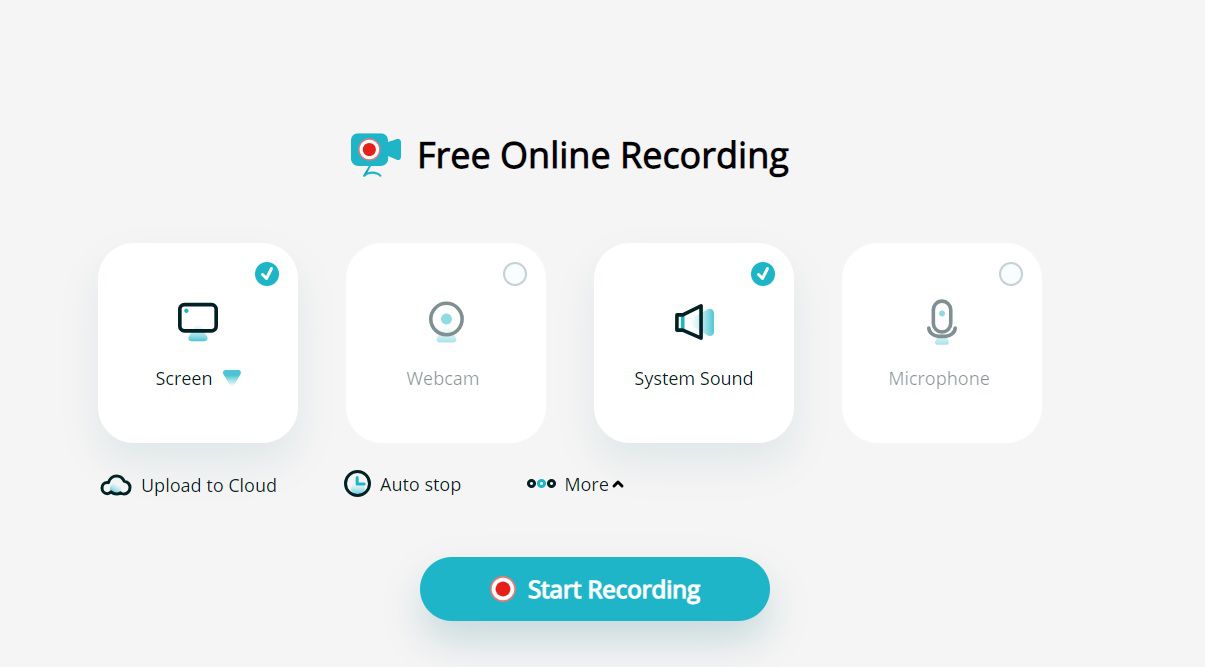
Instructions for recording laptop screen using Apowersoft
Visit Apowersoft's homepage at: Apowersoft.com
- Under Product & Solution, select Screen Recorder in the Online column.
- Click the Start Recording button.
- A dialog box will appear asking you if you want to record the entire screen or a window or browser tab. Remember that the recorded data will be shared with Apowersoft, so avoid recording personal private data.
- After clicking to select the frame you want to record, you can select Share system audio to record the Windows 10 laptop screen with sound.
- Click share and start recording your screen.
- When you want to stop recording, just click the Stop Sharing button at the bottom of the screen.
The recorded video will appear on the Apowersoft website interface. You can view it or click the Save button to download it.

Instructions for recording laptop screen with Apowersoft.
In addition to this way to record laptop screen with sound online, Apowersoft also provides software for you to download and customize the screen recording of laptop win 10 with sound much more in-depth. You can learn more about Apowersoft software through the website's Support channel.
How to record laptop screen using OBS Studio
First, you need to visit the OBS Studio homepage at: obsproject.com
Choose to download the Windows version to be able to return to the laptop screen, this version will also be suitable for other Windows operating systems such as: Win7, Win 11,.
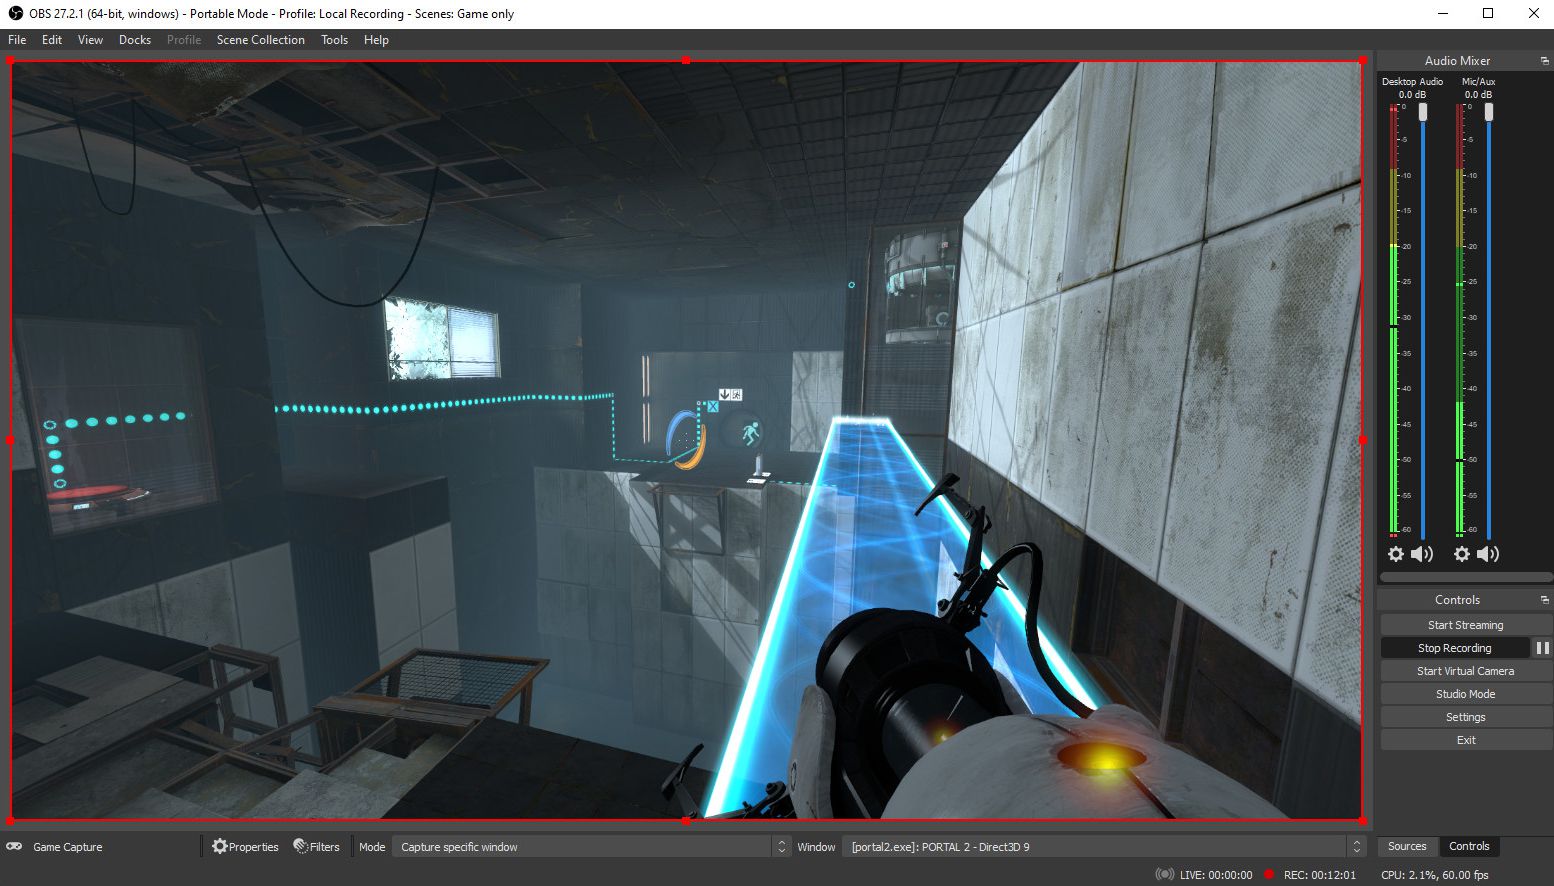
- After installation, open OBS Studio, click on Sources at the bottom of the screen, select Display captures, name the source and press OK.
- A window will appear allowing you to select the screen you want to record, check the screen you want and press OK.
- Similar to how to record laptop screen with sound using PowerPoint, you can also choose whether or not to record the mouse pointer.
- To record audio for screen recording video, you can select source and choose Audio Output Capture.
- Similar to screen recording, you can name your audio file.
- OBS Studio also supports how to record laptop screen with microphone sound, to activate you go to source, select Audio Input Capture and name it the same as above.
- After setting up, go to Controls and press Start recording to start recording the laptop screen with sound on Windows 10.
- When you want to stop recording, press the Stop recording button and the screen recording video will be saved to the Videos folder on your laptop.

How to record laptop screen with sound with OBS Studio.
OBS Studio is the leading application that supports recording laptop screens with sound today, and moreover, it is free, so many people choose to use it. In addition to recording laptop screens, OBS Studio also supports many other interesting features that you can learn and explore.
Above are detailed instructions on how to record laptop screens using the most popular and accessible tools. Hopefully TipsMake has provided readers with useful knowledge to help you use your laptop in the most effective and satisfying way.
You should read it
- How to use Camtasia Studio to record a screen
- Instructions for rotating screen, video game using Bandicam software
- How to record a screen with VLC Media Player?
- How to record Windows 10 computer screen videos quickly
- How to rotate the screen with iOS 11 audio microphone
- How to record iPhone screen video, How to record iPhone screen with sound
 How to turn off laptop keyboard to use separate keyboard quickly and easily
 Instructions on how to split laptop screen in half on Windows 7, 10, super easy!
 Causes and how to fix laptop screen flickering continuously
 Instructions for connecting PC to laptop screen extremely simple
 Instructions on how to fix the error of laptop screen rotating horizontally!
 5+ Simple and fast laptop screen testing software