Instructions on how to adjust the voice after recording
Instructions on how to adjust the voice after recording. You need to record your voice to sing, to perform a tutorial, or to explain a topic, but your voice quality is not attractive enough, or the recording device is not high quality. ?.
You need to record your voice to sing, to perform a tutorial, or to explain a topic, but your voice quality is not attractive enough, or the recording device is not high quality. ? Don't worry, just refer to the article below, you can completely edit your recorded voice as long as you like.
There are two forms for us to record: one is to record only the sound, and the other is to record videos with the recording. Here I will guide the adjustment of voice after recording with both cases.
1. Adjust your voice after recording
If we only record audio, the result we get is an audio file. So first we need to have specialized audio editing software, specifically here I will use Audacity - a free application but possesses features not inferior to professional software.
Step 1: Click File -> Open . and select the recording file to adjust the voice.

Step 2: Start customizing the voice.
Because the job is editing sound, we will be interested in the features to create effects, located in the Effect section on the menu bar.

a) Volume up / down function group
- Amplify: Increase or decrease the volume of the track you have chosen.
- Auto Duck: Decrease the volume of one or more tracks whenever the volume of the specified "controlled" track reaches a specific level. Often used to make background music softer each time a speech is spoken.
- Compressor: Reduces dynamic range of sound. One of the main purposes of reducing dynamic range is to allow sound to be further amplified. Therefore, by default, Compressor will amplify the sound as much as possible after compression. This feature may be useful for audio played in noisy environments.

- Limiter: Transmits signals below a specified input level unaffected or only slightly reduced, while preventing stronger signal peaks from exceeding this threshold.
- Normalize: Set the maximum amplitude of the track, balance the amplitude of left and right channels of the stereo track and optionally remove any DC offset from the track.
b) Feature group to create effect of ascending / descending volume
* Some terms:
+ Clip : A clip inside an audio track is a separate part of the track that has been split so that it can be handled independently of the other clips in the track.
+ Fade In : An audio track with fade-in effect will appear with increasing volume.
+ Fade Out : An audio track with fade-out effect will end with decreasing volume.
+ Crossfade : The purpose of crossfade is to create a smooth transition between two audio parts. They will overlap in one section and when one part fade-out , the rest will fade-in .
- Crossfade Clip: Apply a simple crossfade to a pair of selected clips in an audio track.
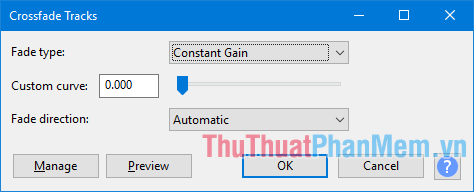
- Crossfade Tracks: Create crossfades or make smooth transitions between two overlapping tracks. Place the fade-out track above the fade-in track, then select the overlapping area of both tracks and apply the effect.
- Fade In: Apply linear fade-in effect to the selected sound - the speed of fade-in depends entirely on the length of the selection being applied.
- Fade Out: Apply linear fade-out effect to the selected sound - the speed of fade-out depends entirely on the length of the selection applied.
- Studio Fade Out: Apply melodious fade-out effects to the selected sound, resulting in more pleasant sound results.
- Adjustable Fade: Allows you to control the applied fade shape (non-linear), by adjusting different parameters.
c) Group of features that change sound quality
- Bass and Treble: Increase or decrease the lower frequencies and higher frequencies of the audio independently.
- Classic Filters: Three different types of filters, which simulate most similar filters together, provide a useful graphical tool for analysis and measurement. This effect is not enabled by default (to enable it, click Effect > Add / Remove Plug-in .)
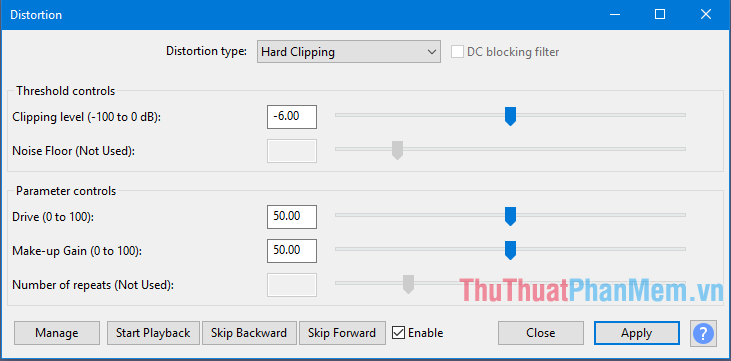
- Distortion: Make the sound distorted. By distorting the waveform, the frequency content is changed, which will often make the sound "brittle" or "abrasive".
- Equalization: Adjust the volume level of specific frequencies.
- High-Pass Filter: Transmits frequencies above its cutoff frequency and attenuates frequencies below its cutoff frequency.
- Low Pass Filter: Transmits frequencies below its cutoff frequency and attenuates frequencies above its cutoff frequency.
- Paulstretch: Only used for extreme time stretching or "condensing" effects.
- Phaser: Combining phase transition signals with the original signal. The movement of the phase change signals is controlled by a low frequency oscillator (LFO).
- Spectral edit parametric EQ: When the track is selected in spectral view or spectral log (f) and the spectrum selection has a central frequency along the upper and lower boundaries, perform a band cut or increase the specified frequency band specified. This feature can be used instead of Equalization, or it can also be useful when fixing damaged audio by reducing spike or other frequencies to cover the spikes.
- Spectral edit shelves: When the track is selected in spectral view or spectral diary (f), a low or high frequency value filter is applied, or both filters, depending on the spectrum selection made.
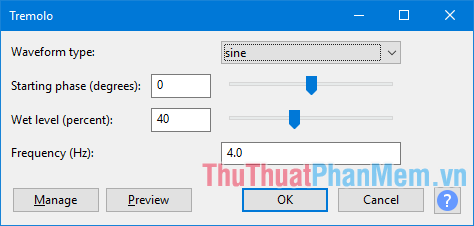
- Tremolo: Adjust the volume of the selection with the depth and scale selected in the dialog box. Like the familiar tremolo effect with guitar and keyboard players.
- Vocoder: Synthesizes sound (usually voice) in the left channel of the stereo track with load wave (usually white noise) in the right channel to create an adjustable version of the left channel. Normal speech with white noise will create a robot-like voice for special effects.
- Wahwah: Fast sound quality variations, like guitar sounds, were very popular in the 1970s.
d) Group of damaged sound repair features
- Click Removal: Delete discrete clicks on audio tracks.
- Clip Fix: Try to rebuild cropped areas by interpolation of lost signals. It is only effective to repair slightly clipped sound.
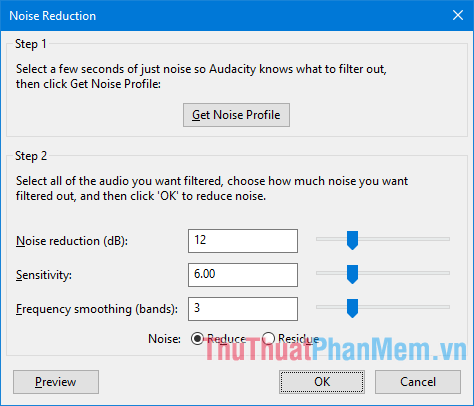
- Noise Reduction: Ideal for continuous background noise reduction such as fans, tape noise or humming. Ineffective when removing conversation or music in the background.
- Notch Filter: Significantly reduces a narrow frequency band. This is a good way to get rid of the noise or hiss that are limited to a specific frequency, causing minimal damage to the rest of the sound.
- Repair: Fix specific clicking noises, or other problems, with a length not exceeding 128 signal patterns.
- Spectral edit multi tool: When the track is selected in spectral view or spectral log (f), apply notch filter, high-pass filter or low-pass filter according to the spectral selection made. This effect can also be used to change the sound quality instead of using Equalization.
e) Feature group that makes sound faster, slower, lower, or higher
- Change Pitch: Change the pitch of the selection without changing its tempo.
- Change Speed: Change the speed of the selection, also change its pitch.
- Change Tempo: Change the tempo and length (duration) of the selection without changing its pitch.
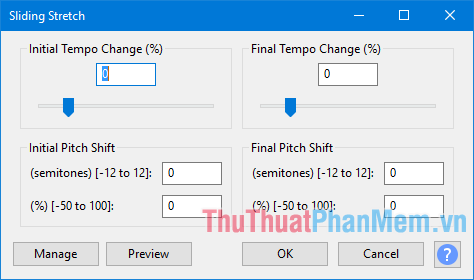
- Sliding Stretch: Allows making a continuous change according to the tempo and / or pitch of the selection by selecting the initial and / or final change values.
- Paulstretch: Only use Paulstretch for extreme time stretching or "condensing" effects. Use Change Tempo or Sliding Stretch instead of Paulstretch for tasks like slowing the song down to a "practice" tempo.
- Truncate Silence: Automatically tries to find and eliminate audible silence. Do not use with blurred audio.
f) Feature group that adds echo
- Delay: Create multiple echo effects with options for time delay changes between successive echoes and the number, amplitude, pitch of consecutive repetitions.
- Echo: Create echo by repeating the selected sound area repeatedly, each time reducing the amplitude by one level.
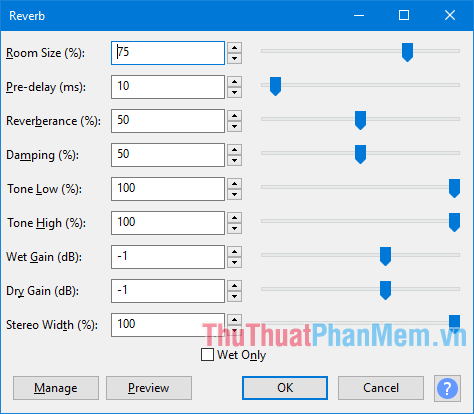
- Reverb: Add echo (quick repetitions, adjusted to mix with the original sound). Can be used to add atmosphere (impression of sound emitting space) to mono sound.
g) Voice delete feature group
- Invert: Flip the audio samples, reverse their polarity. This usually does not affect audible sounds, but is sometimes helpful to remove voices.
- Vocal Reduction and Isolation: Try to remove or isolate the central sound (common to both left and right channels) from stereo tracks.
- Vocal Remover: Try to remove voices from stereo tracks. The output of this effect is always mono. Help text is available in the dialog box.

h) Audio control features group
- Repeat: Repeat the selection with the specified number of times.
- Reverse: Reverse the selected sound, the first part will be heard first and the first part will be heard later.
i) Nyquist Call feature
- Nyquist Prompt: Gives a dialog box in which you can enter Nyquist commands . Nyquist is a programming language for creating, processing and analyzing sounds.
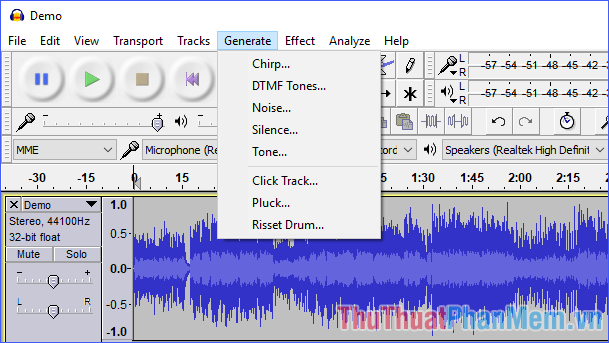
In addition to the Generate section on the menu, there are also some features that affect the voice and speech that you can use such as Noise (create noise) and Silence (create silence) .
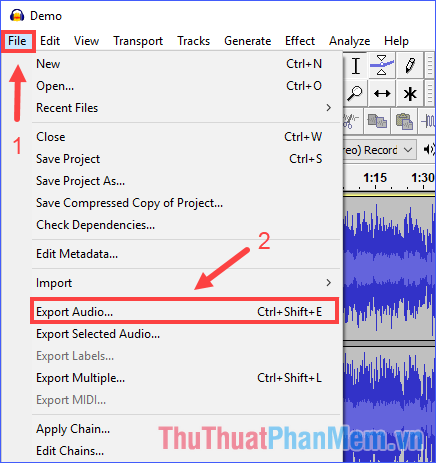
Step 3: Export results. Click File > Export Audio ., name the output file and press Save .
2. Adjust the voice in the video
If you are familiar with using Audacity, you can separate audio from the original video for processing separately, then merge the processed audio into the original video. However, this is a bit inconvenient, and there are many other software that supports audio editing in video without separate. Here, I will guide you to adjust the voice with Wondershare Filmora.
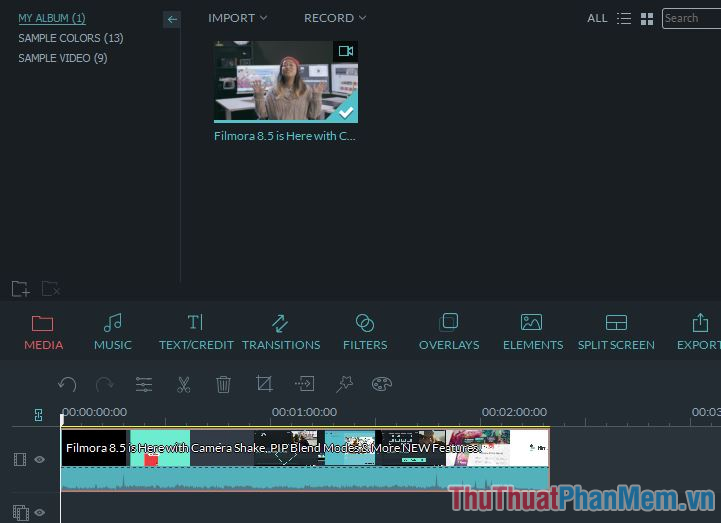
Step 1: Click Import to import video containing voice to be edited. Imported videos can be added to the timeline for editing, while the recorded audio will automatically appear on the Audio track.
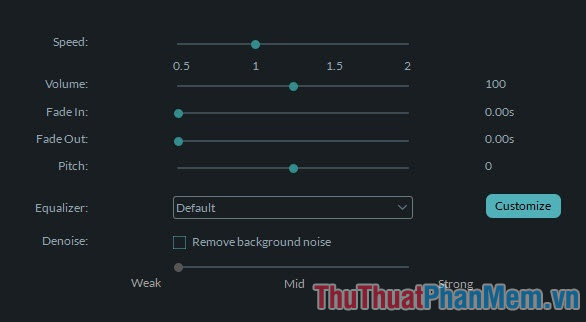
Step 2: Change the voice.
Every time double click the video added on the timeline, the edit panel will appear. At the Audio tab, you'll see options like Speed (speed), Volume (volume), Fade in (volume increases at the beginning), Fade out (volume decreases at the end), Pitch (high). degrees) and Denoise (noise reduction).
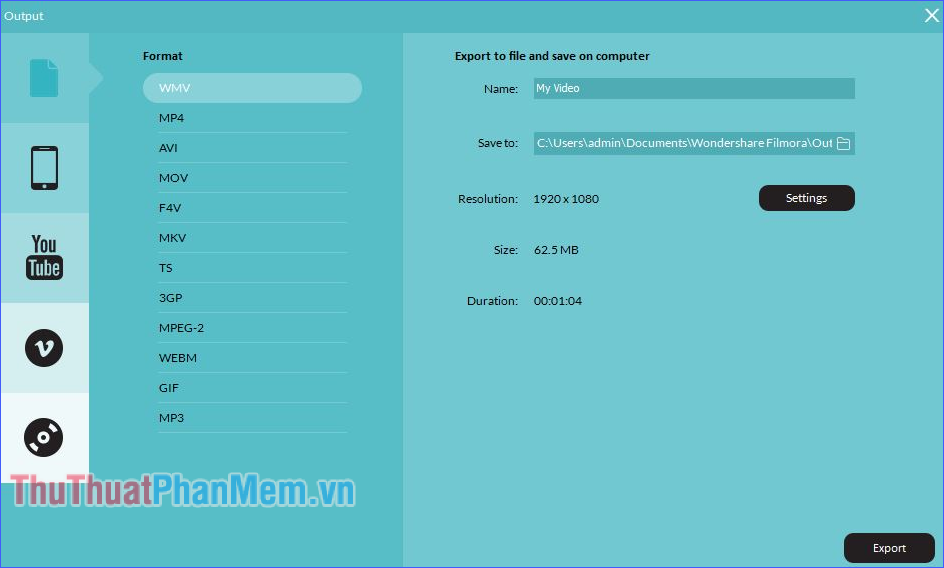
Step 3: Click Export and select the name, format and folder of the output file, finally press the Export button to start exporting the results.
Above is a guide on how to adjust the voice after recording (both audio and video) that TipsMake.com would recommend. Hopefully this article will help you to edit your own voice very well, very attractive to listeners. Good luck!