How to Improve the Sound Quality of Voice Recordings on iPhone
Improving the quality of your voice recordings on your iPhone is easier than you think. Whether you're recording an interview, podcast, voiceover, or anything else, there are steps you can take to make your iPhone voice recordings sound better. Let's dive into some of these tips!
1. Don't forget the basics!
The key to getting great-sounding voice recordings is to focus on the basics of recording. For example, it's essential to position your iPhone's microphone properly – about 15 to 20cm from the source – to get clear, balanced audio without distortion.
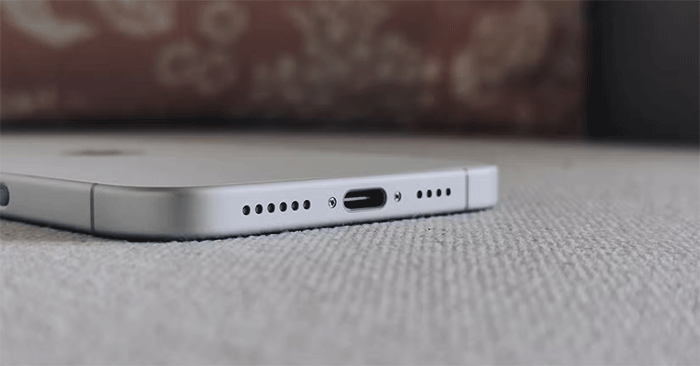
Remember, the iPhone uses a microphone located at the bottom near the charging port, so make sure the microphone is not blocked by your hand, case, or any other object while recording.
Another thing you should do is turn on Do Not Disturb mode on your iPhone. This will prevent incoming notifications, calls, and alerts from interrupting your recording.
Finally, ambient noise – whether it's traffic, voices, or household noise – can seriously affect the clarity of your recording. To avoid this, choose a quiet, controlled environment to record in. This will not only improve the quality of your audio, but will also save you the trouble of fine-tuning it later.
2. Switch to lossless quality
By default, the Voice Memos app on iPhone records in a compressed format. However, if you want to improve the quality of your voice recordings and storage is not an issue, switching to lossless audio quality is the ideal option.
Lossless audio preserves all of the original audio data, ensuring your recordings remain crystal clear without the degradation associated with compression. This is especially beneficial when recording podcasts, lectures, or any high-quality audio work.
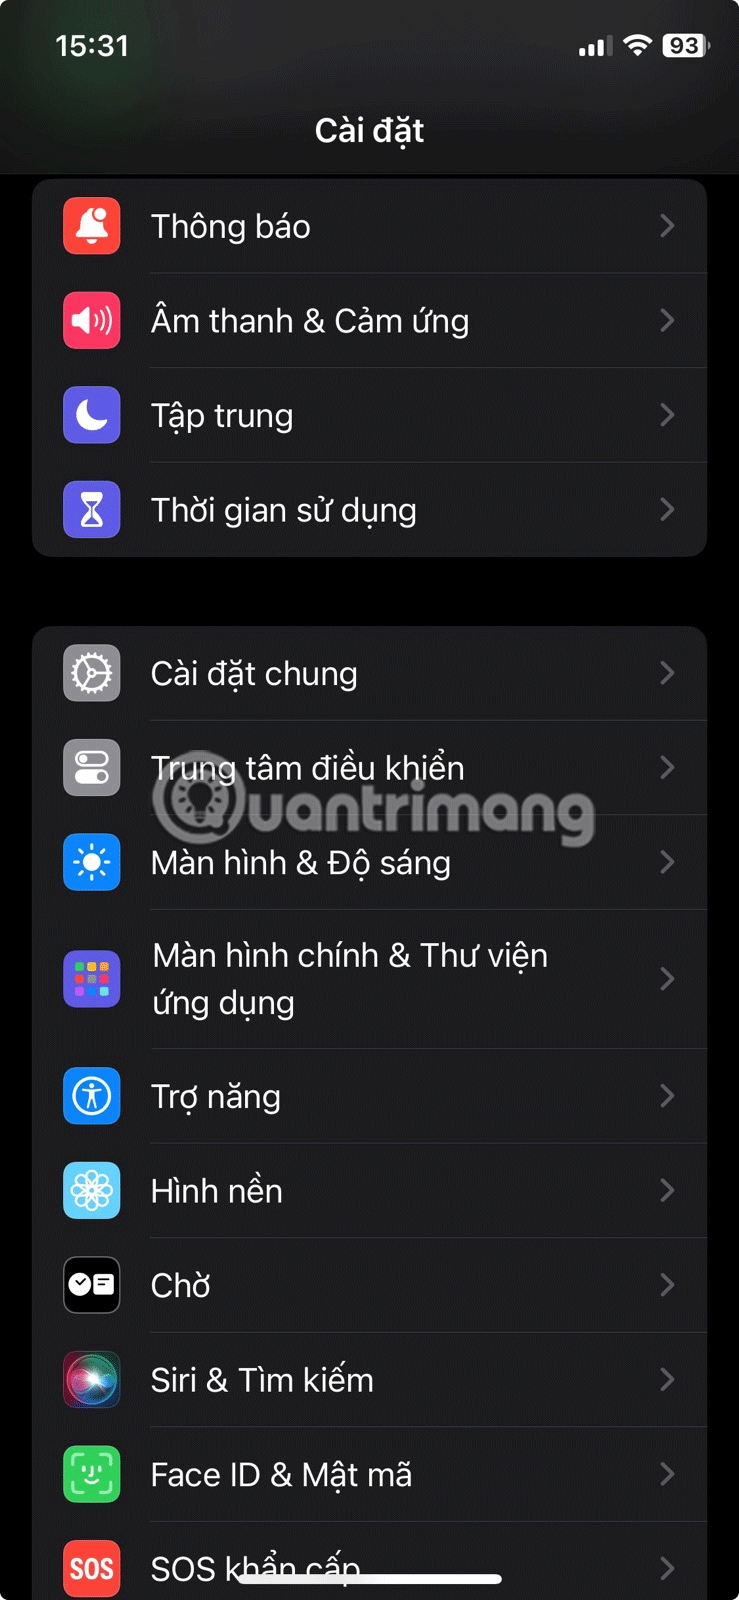
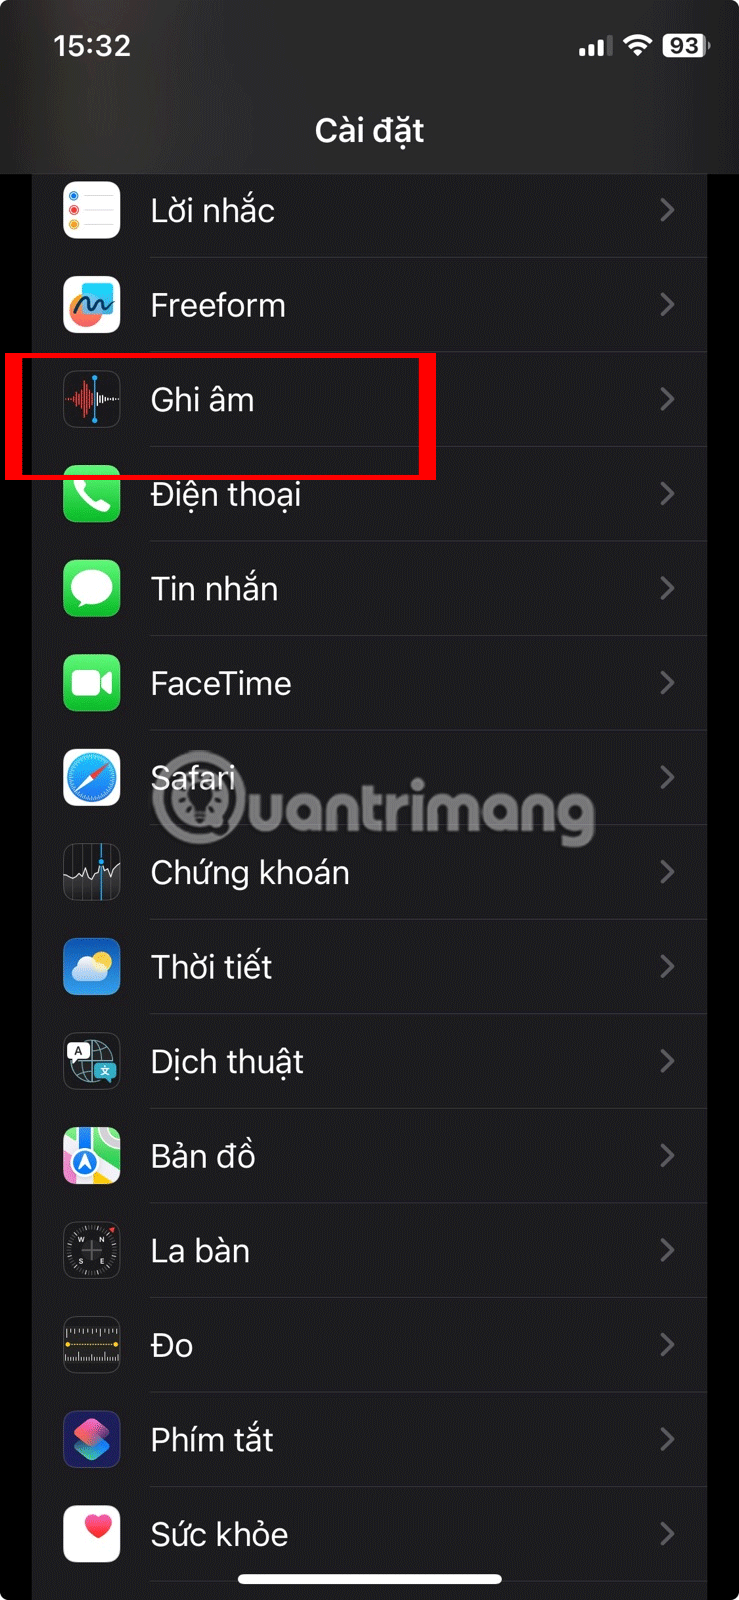
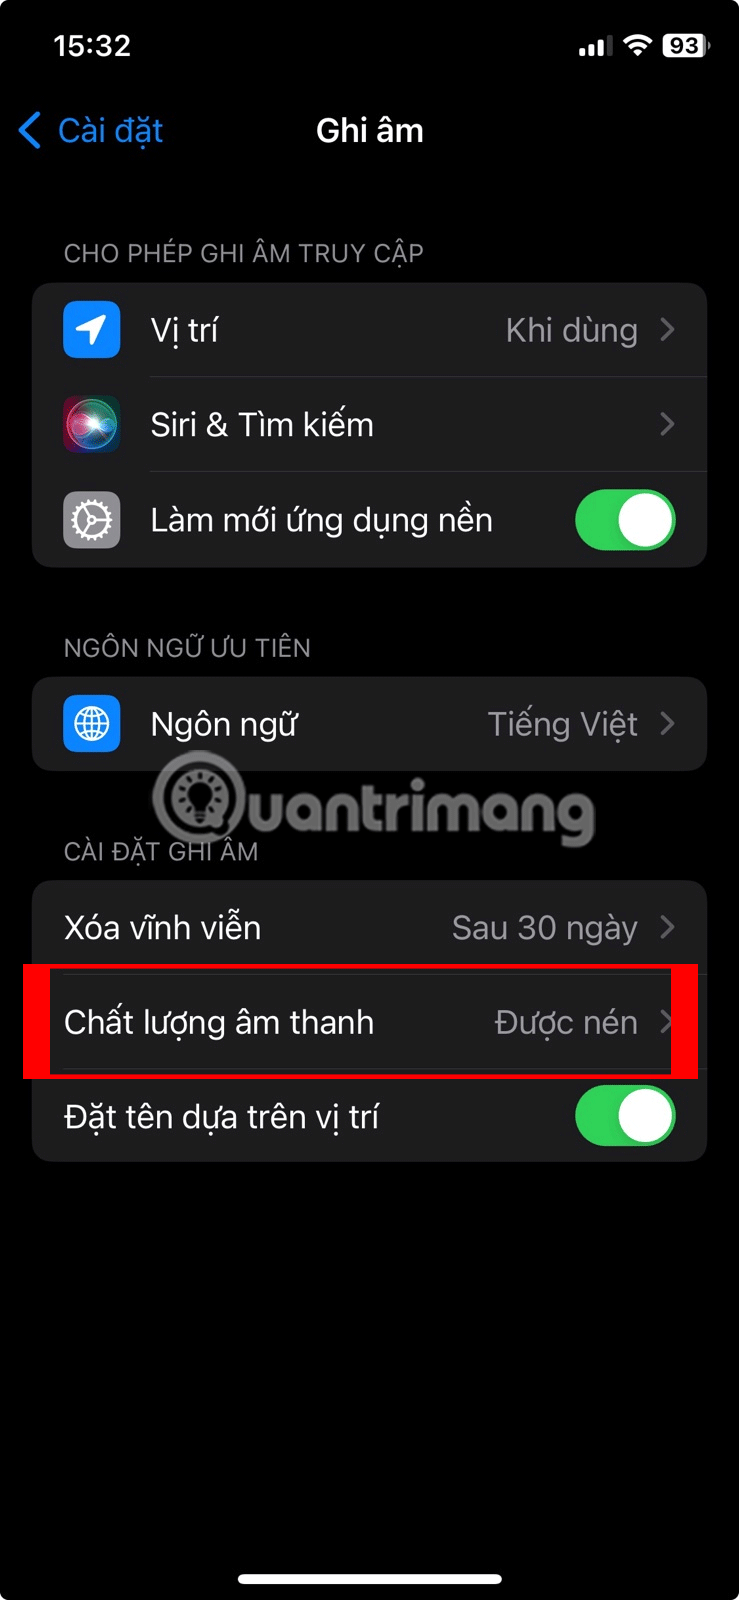
To change the default audio quality in the Voice Memos app, follow these steps:
- Open the Settings app and scroll all the way down to the apps section.
- Scroll through the list to find and tap the Voice Recorder app .
- Select Audio Quality and choose the Lossless option from the menu.

3. Use the "Improve recording" option
If your voice recordings aren't as impressive as you'd like, even after ensuring proper recording technique and selecting lossless audio quality, the "Improve Recording" option in the Voice Memos app can help.
This feature can analyze your audio and improve the quality by reducing background noise and echo, creating clearer and smoother sound. Here's how to use it:
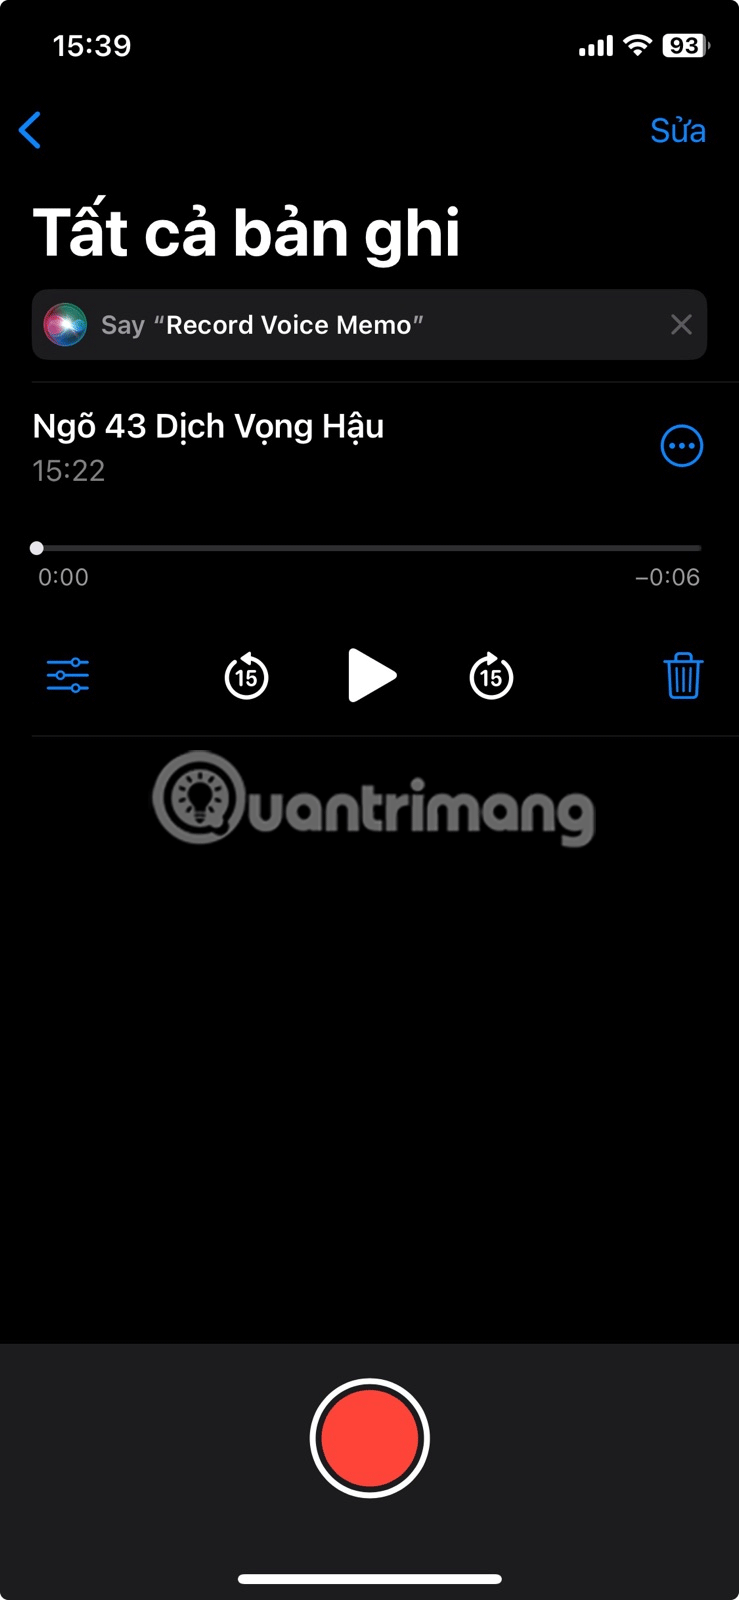
- Open the Voice Memos app on your iPhone and find the recording you want to enhance.
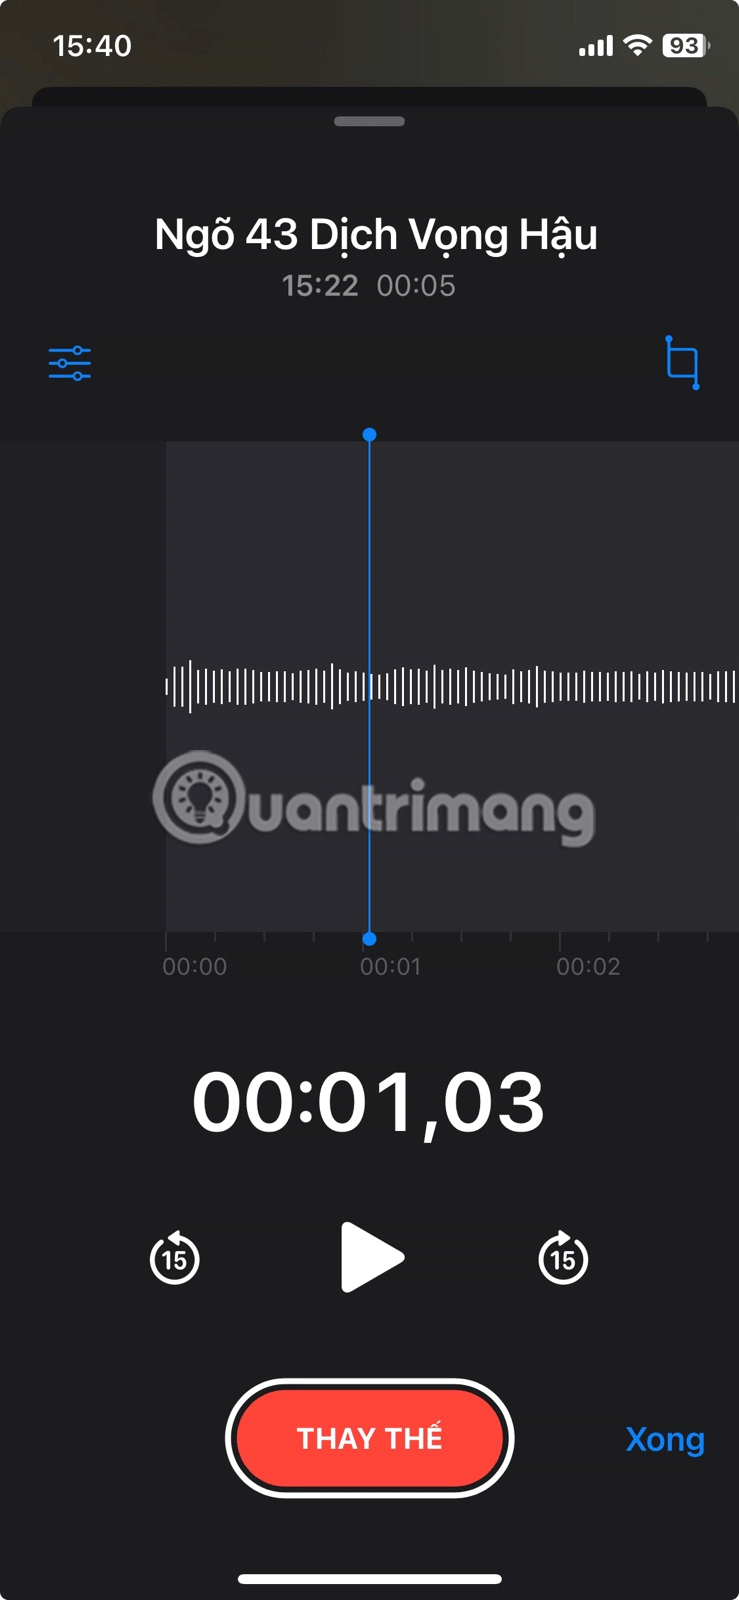
- Click the record icon below the audio file.
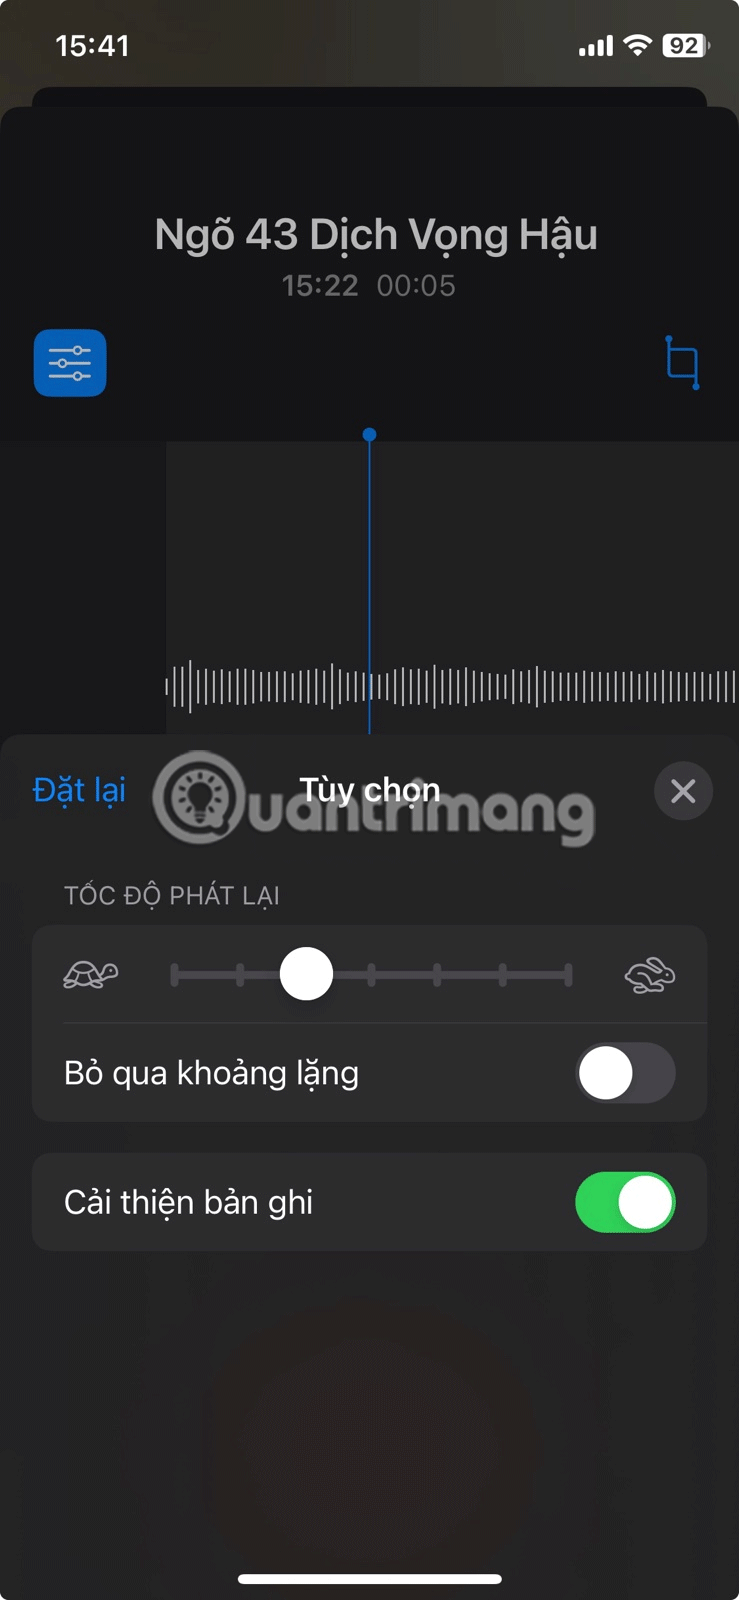
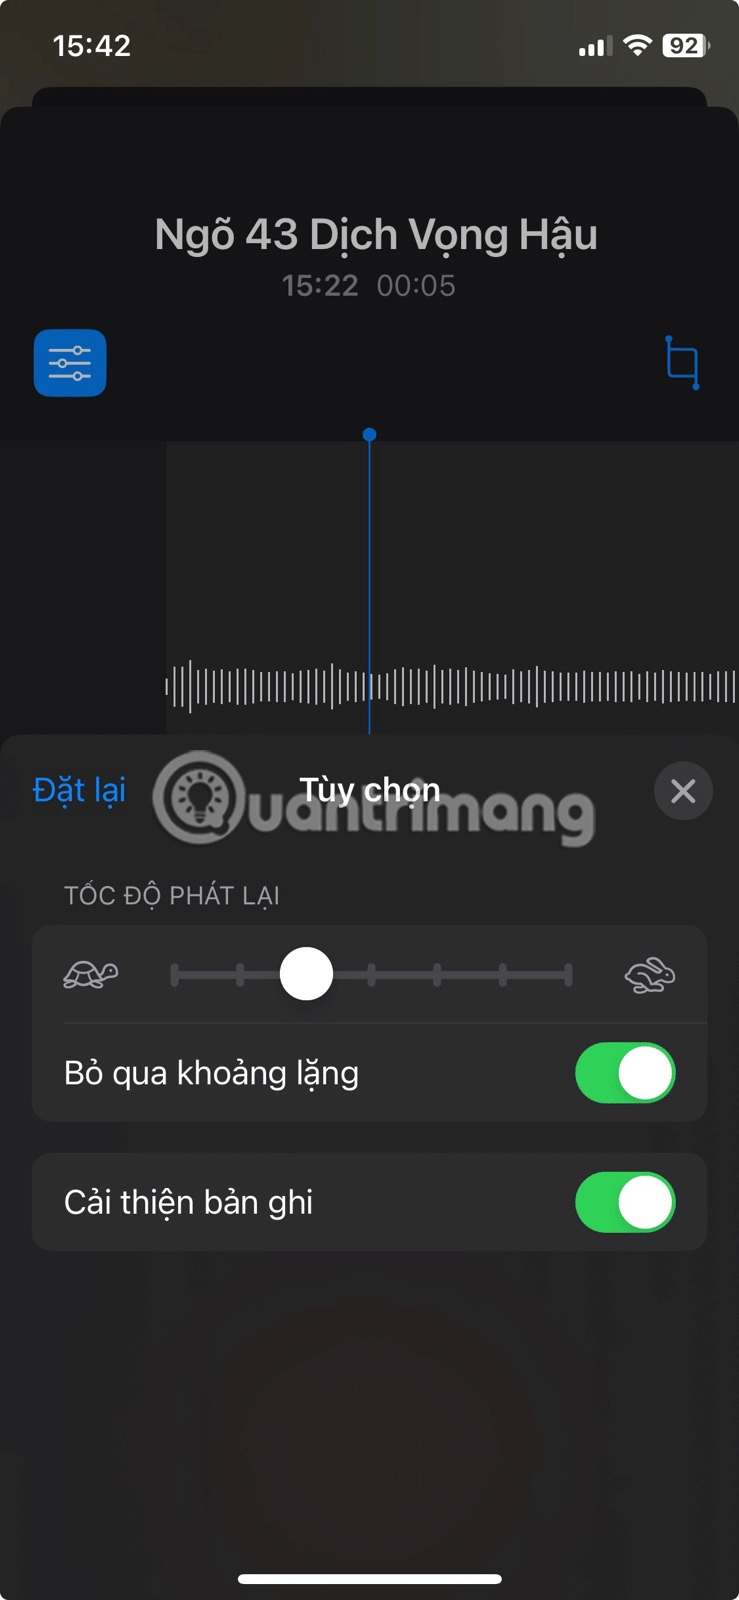
- Tap the options icon in the top left corner.
- Turn on the Improve recording toggle .
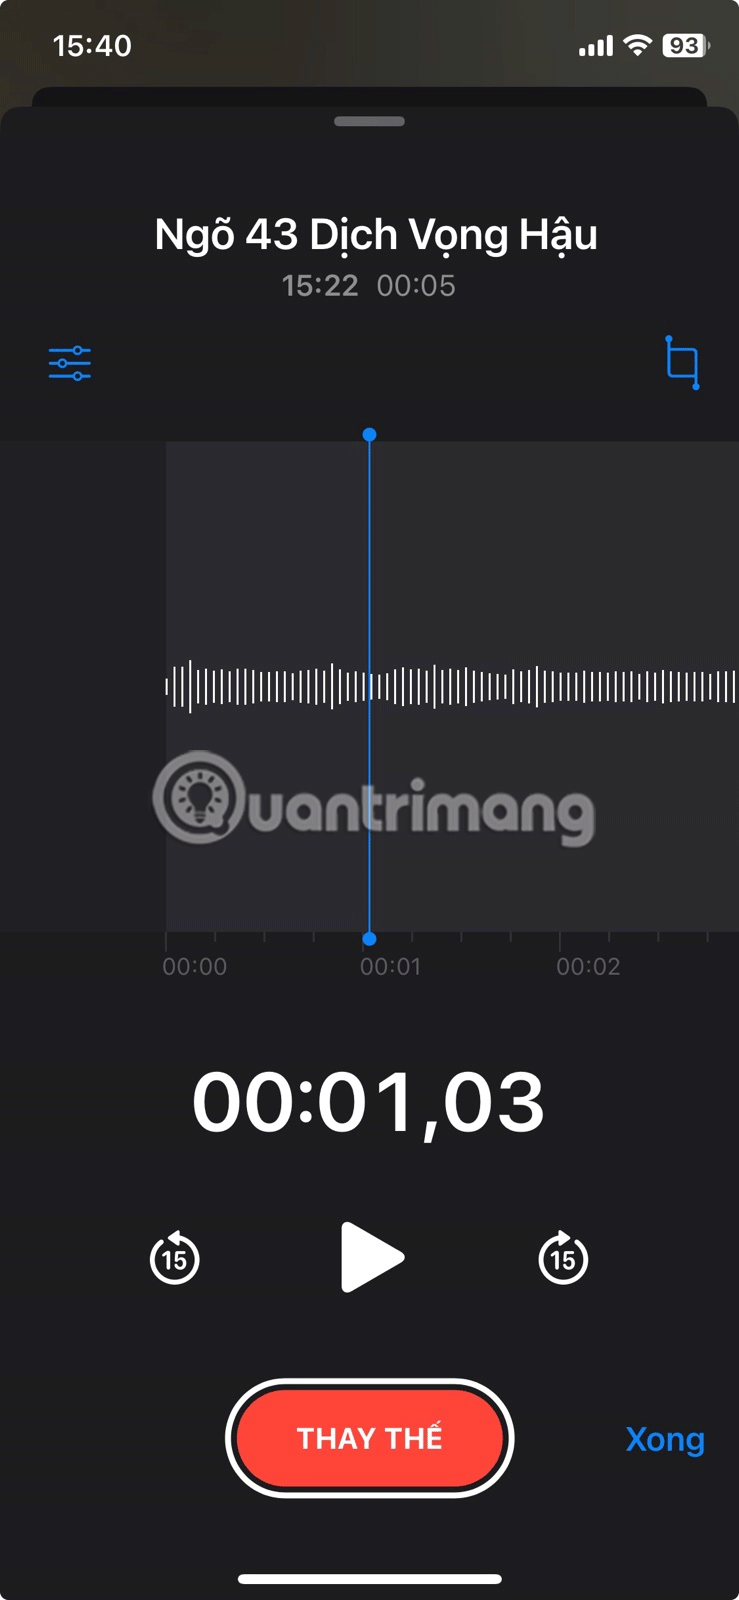
- Press X to save changes and exit.
4. Remove silence and adjust playback speed
Silence in your recordings can make them sound less interesting, so it's a good idea to remove any unnecessary silence. The good news is that you don't need a third-party app for this - the Voice Memos app has a built-in feature that can automatically identify and remove silence from your recordings.
All you have to do is select your voice recording in the Voice Memos app, tap on the options icon, and turn on the Skip Silence toggle switch . In the same menu, you can also adjust the playback speed using the Playback Speed option to speed up or slow down the recording as needed.
Improving the sound quality of your voice recordings on your iPhone isn't complicated. By applying the tips above and experimenting with different settings, you should be able to create voice recordings that sound great. For even better results, you might consider using an external microphone with your iPhone.
See also: