Table of Contents
This guide explains how to voice video on Windows 10 using a clear, step-by-step process. It also highlights the settings and checks that can help you avoid common errors.
To record on a Windows computer, we will use the built-in recording tool or some other recording software such as Audacity, Free Sound Recorder, etc. If users wants to have voice recording feature added to the video You can use Windows 10's Voice Over & Recorder application. It allows users to record and export audio files to mp3, m4a, wma and wav format. Besides, the app also has the option of dubbing sound recording to video, recording sound to insert into video. Voice Over & Recorder allows use of mp4, avi, wmv videos. The steps below explain how to use the Voice Over & Recorder application application.
- Instructions for setting up and installing Microphone on computer
- Fix the error of inactive microphones in Windows 10
- Improve the sound quality of the microphone on the computer
- Instructions for checking Microphone, Headphone on Windows 7
Manual recording on Voice Over & Recorder
Step 1:
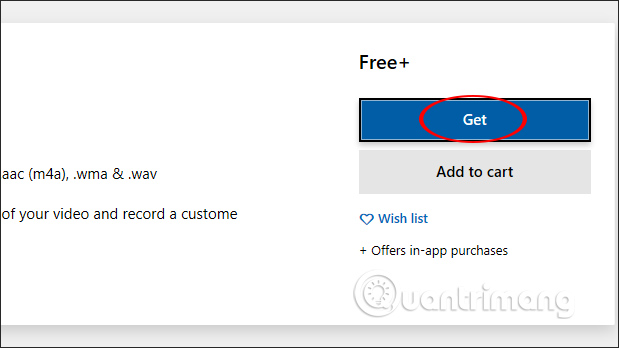
Users click the link below to download and install Voice Over & Recorder application on Windows 10 computer.
- Download the Voice Over & Recorder app
Step 2:
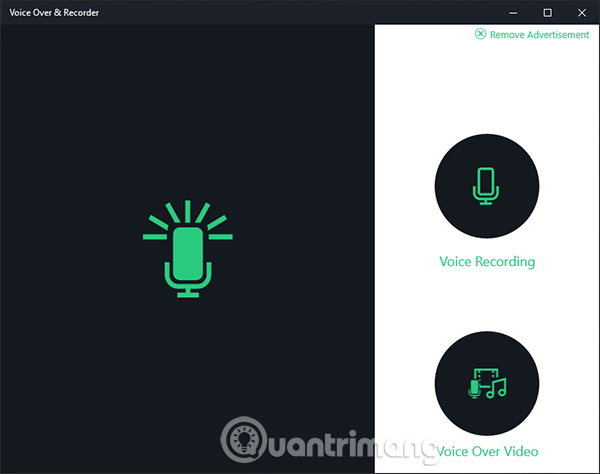
After installation is complete, display the interface of the app with 2 main features of Voice Recording for recording and Voice Over video to voice into video. Click Voice Recording To start recording on the computer.
Step 3:
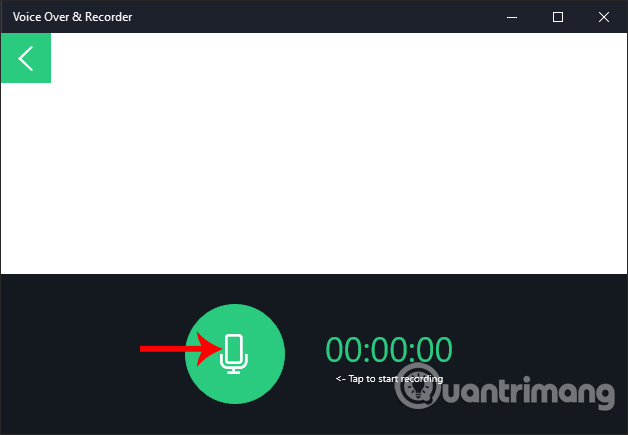
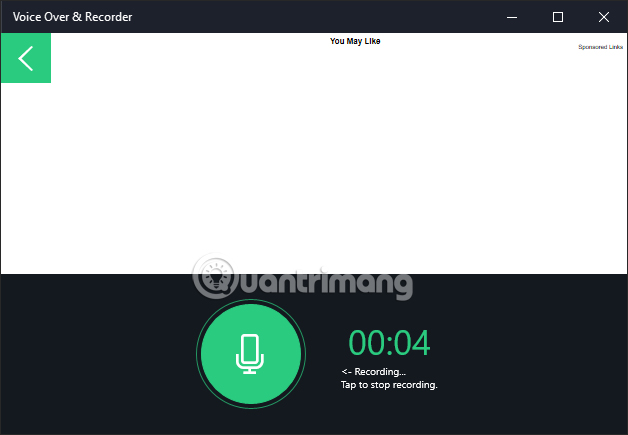
In the selected recording interface on The microphone icon To conduct recording.
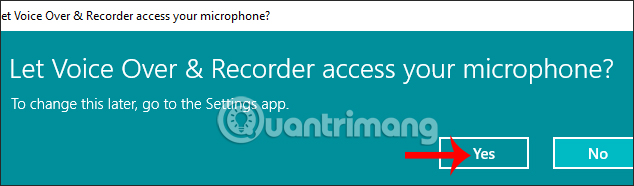
At this time, the app will require users to Use the microphone on the computer To record, click The Yes button To agree.
The recording process on the computer will take place immediately with the recording time displayed on the interface. To stop recording, press the microphone icon again to stop.
Step 4:
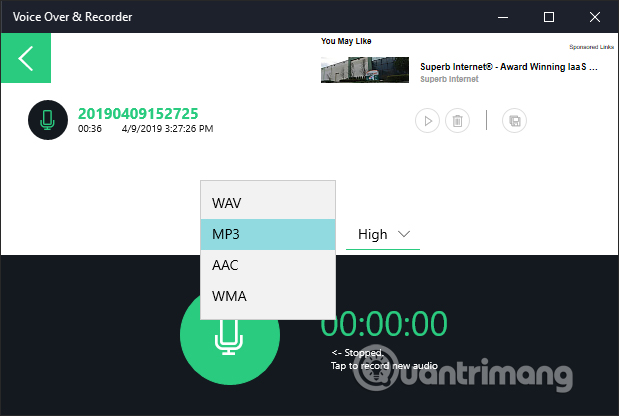
Sound recording recording displayed in the interface with the total recording time, recording file name, specific recording time. Besides the play icon to play the audio file, the trash icon to delete audio files and floppy icons to download the recording to the computer.
When needed to Save the audio file, you First need to play the sound and then Select the file format And Sound quality you Want to save.
Step 5:
Going back to the app interface click Voice Over video feature , insert audio into video and extract to MP4. In the new interface click The circle icon in the middle To enter the video into the app.
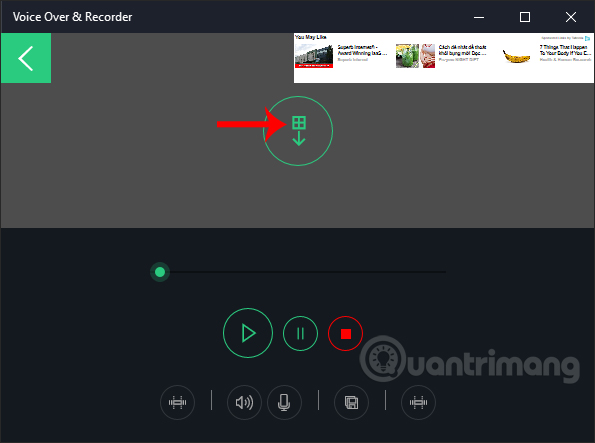
Next click The microphone icon To conduct a recording for the video.
Step 5:
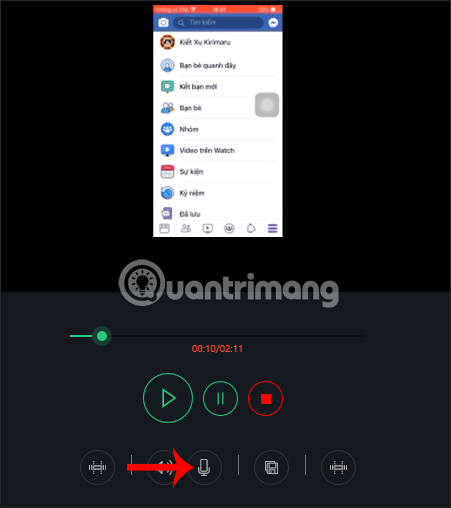
Users can select The sound level To insert into the current video, then click The red microphone icon To proceed with the recording. You have up to 2:06 to record sound.
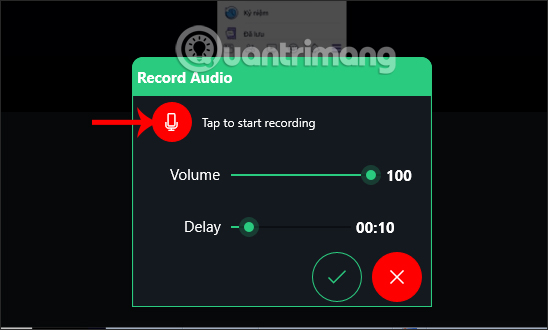
The recording process takes place immediately after that, the recording time appears on the same interface. If recording is complete, press the microphone icon or v again to save it.
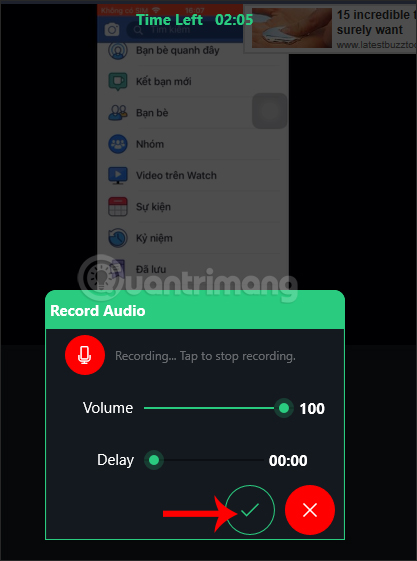
Step 6:
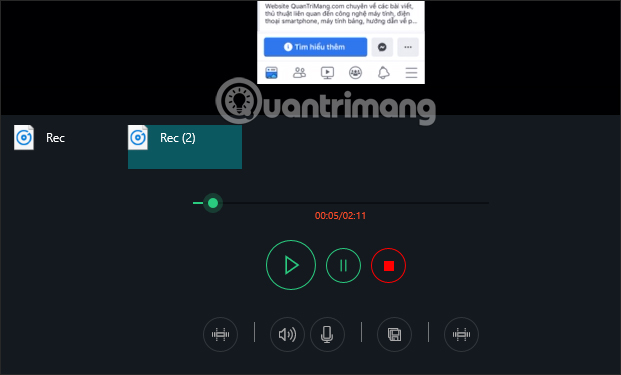
Going back to the app interface we will see the audio recording on the video displayed right below the playback frame. Each video can be dubbed multiple times. We click to view the selected video and audio recording.
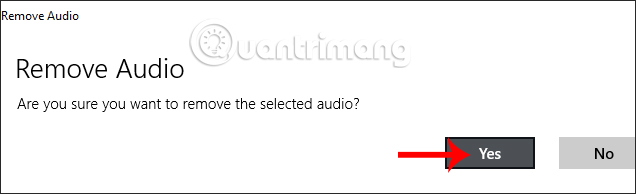
When needed to delete the audio track recorded in the video, right-click the recording and select Remove Audio .
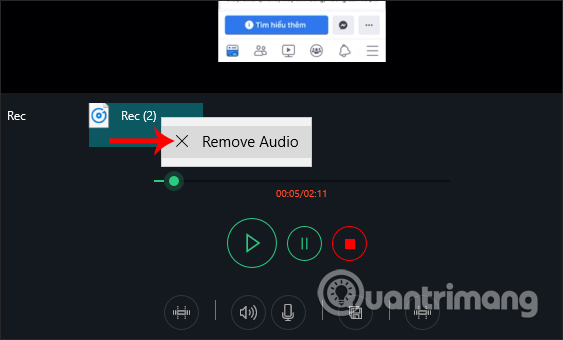
Next, Press Yes To delete the audio clip in the video is okay.
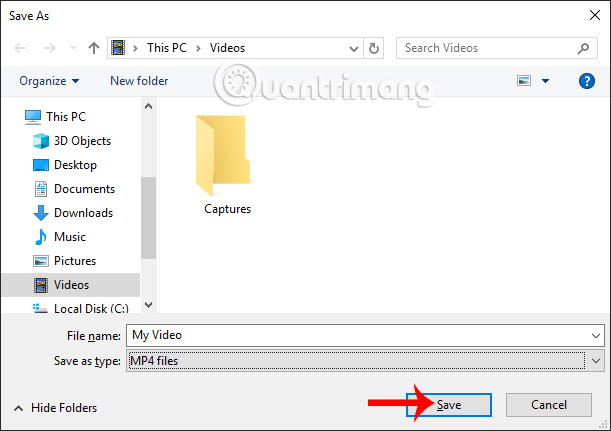
Finally, click the floppy disk icon to save the audio dubbing video to your computer in MP4 format.
Although the voice recording time on Voice Over & Recorder video is still limited, users can also add sound or even record the voice into the video. It is possible to nest multiple audio tracks or delete audio clips in video if desired.
I wish you all success!
FAQ
What should I prepare before I voice video on Windows 10?
Review the requirements in the guide, confirm that your device or software is compatible, and save important work before changing settings related to voice video on Windows 10.
Why might voice video on Windows 10 not work as expected?
The most common causes are incompatible versions, missing permissions, incorrect settings, or an interrupted internet connection. Recheck each step and restart the app or device when appropriate.
Can beginners follow these voice video on Windows 10 steps?
Yes. Follow the steps in order, avoid skipping confirmation screens, and compare your interface with the screenshots because labels may differ slightly between versions.
Related Articles
 How to Do a Voice Over: Step-by-Step Guide14 minutes read
 How to Recording Live Video on ChatGPT Voice3 minutes read
 How to Insert Google Voice into Video on Capcut3 minutes read
 How to Dub Voice into Videos on Your Phone Quickly and Simply: Clear7 minutes read
 How to Set Up Voice Recognition in Windows 104 minutes read
 Microsoft Upgraded Bing's Voice Recognition Capabilities3 minutes read
Reader Comments 0
Sign in with email or Google to join the discussion.