Instructions for using a computer to perform print and scan tasks
In many cases, computers and the Internet can reduce the amount of paperwork that we need to use. However, not always, sometimes using ink paper in some cases makes it much more convenient.
You can completely print and scan in Windows XP without using any other programs.
Perform printing
There are a lot of people who are familiar with printing documents already, but the purpose of this article is also towards those who have not used the printing feature from Windows so we will still introduce this section.
To do the printing job, the first thing you have to do is buy a printer, connect it to your computer, load paper to the machine and turn on the power supply to the printer. Follow these steps to print:
1. Open the document, Web page or email that you want to print
2. Click the File menu, and then click Print .
3. In the Print dialog box, review all settings for the page and the number of copies. If you want to change the print quality or other printer settings, click the Preferences button, then click Print .

Windows XP will print your documents. Be sure to provide enough printing paper for your device so you don't run out of paper when you need to print something important.
Perform Scan
To do this, you must purchase a scanner or a multifunction device that is both printable and scanable, connect it to the computer and plug in the power. If the scanner needs to be used with genuine software, you can use that section to scan the document. Please follow the instructions below for scanners to be able to scan using the Scanner and Camera Wizard in Windows XP.
Scan with the Scanner and Camera Wizard in Windows XP
1. Put the document you want to scan into the device.
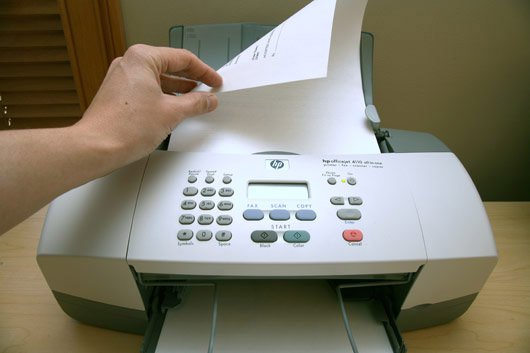
2. Go to Start > All Programs > Accessories , and then Scanner and Camera Wizard .

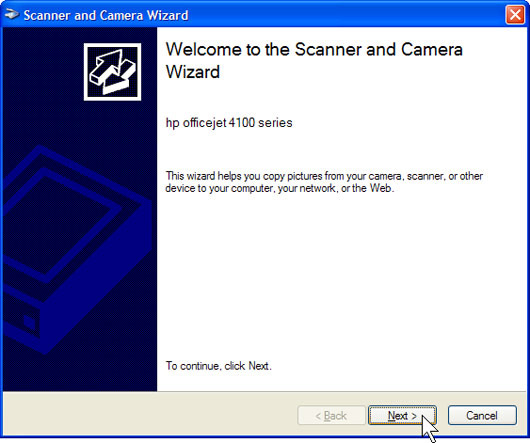
3. Scanner and Camera Wizard will appear, click Next .
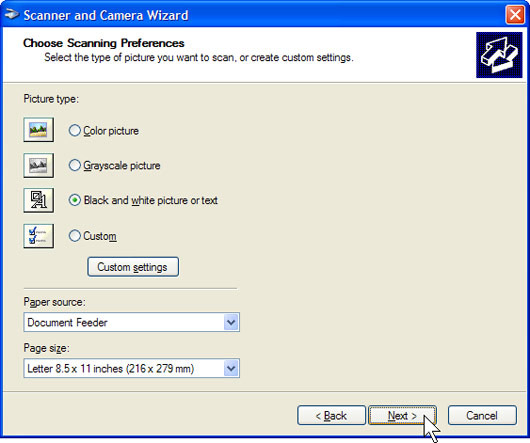
4. In the Choose Scanning Preferences window, click the Picture type option to select the best match for your scanned paper, and then click Next .
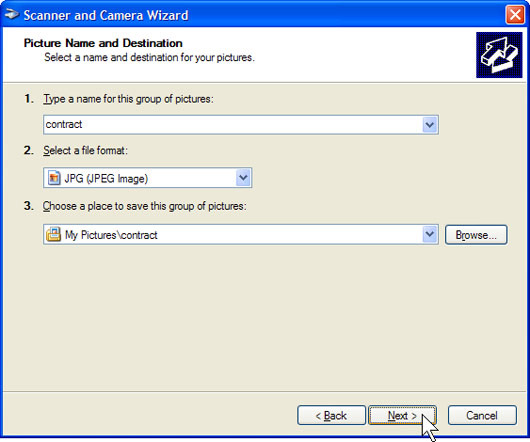
5. In the Picture Name and Destination window, enter your photo name, select the JPG file format, then select the folder where you want the scanned image to be saved there. Click Next .
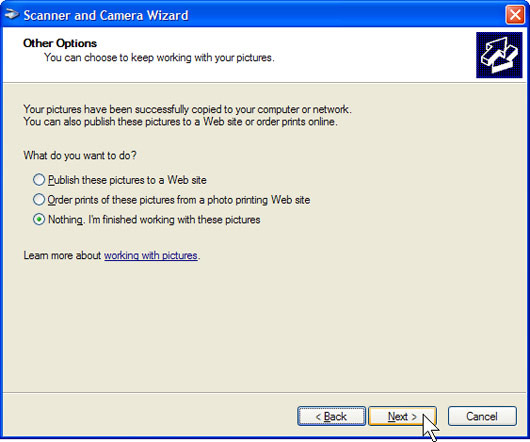
6. Windows XP will scan your document. On the Other Options page, click Nothing . Then click Next .
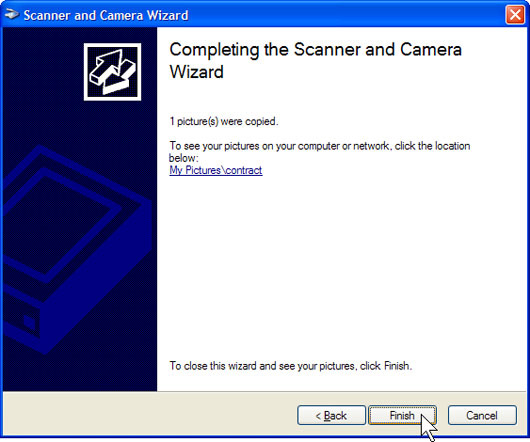
7. Completing the Scanner and Camera Wizard window, you can view the scanned document by clicking on the link displayed in it. If you are not happy with the result, click Back to return to the Choose Scanning Preferences window, adjust the settings and re-scan. Repeat this action until you are really happy with the scanned image. Click Finish to close the utility and open the folder with the scanned document.
Once you have scanned a document, you can send it in an email or fax it to another machine. This is way faster and much less expensive than sending via post. Scanned documents will not be affected by time so they can exist forever.
 Send a fax from a Windows XP-based computer