Table of Contents
This guide explains how to scan Documents Using Notes App on iOS, with clear steps, practical tips, and important checks before you begin.
Scan documents using Notes application
Step 1: Open the Notes app on your iPhone or iPad.

Click the Notes icon in the lower right corner to create a new note. While composing notes, to scan documents, you click on the plus icon.
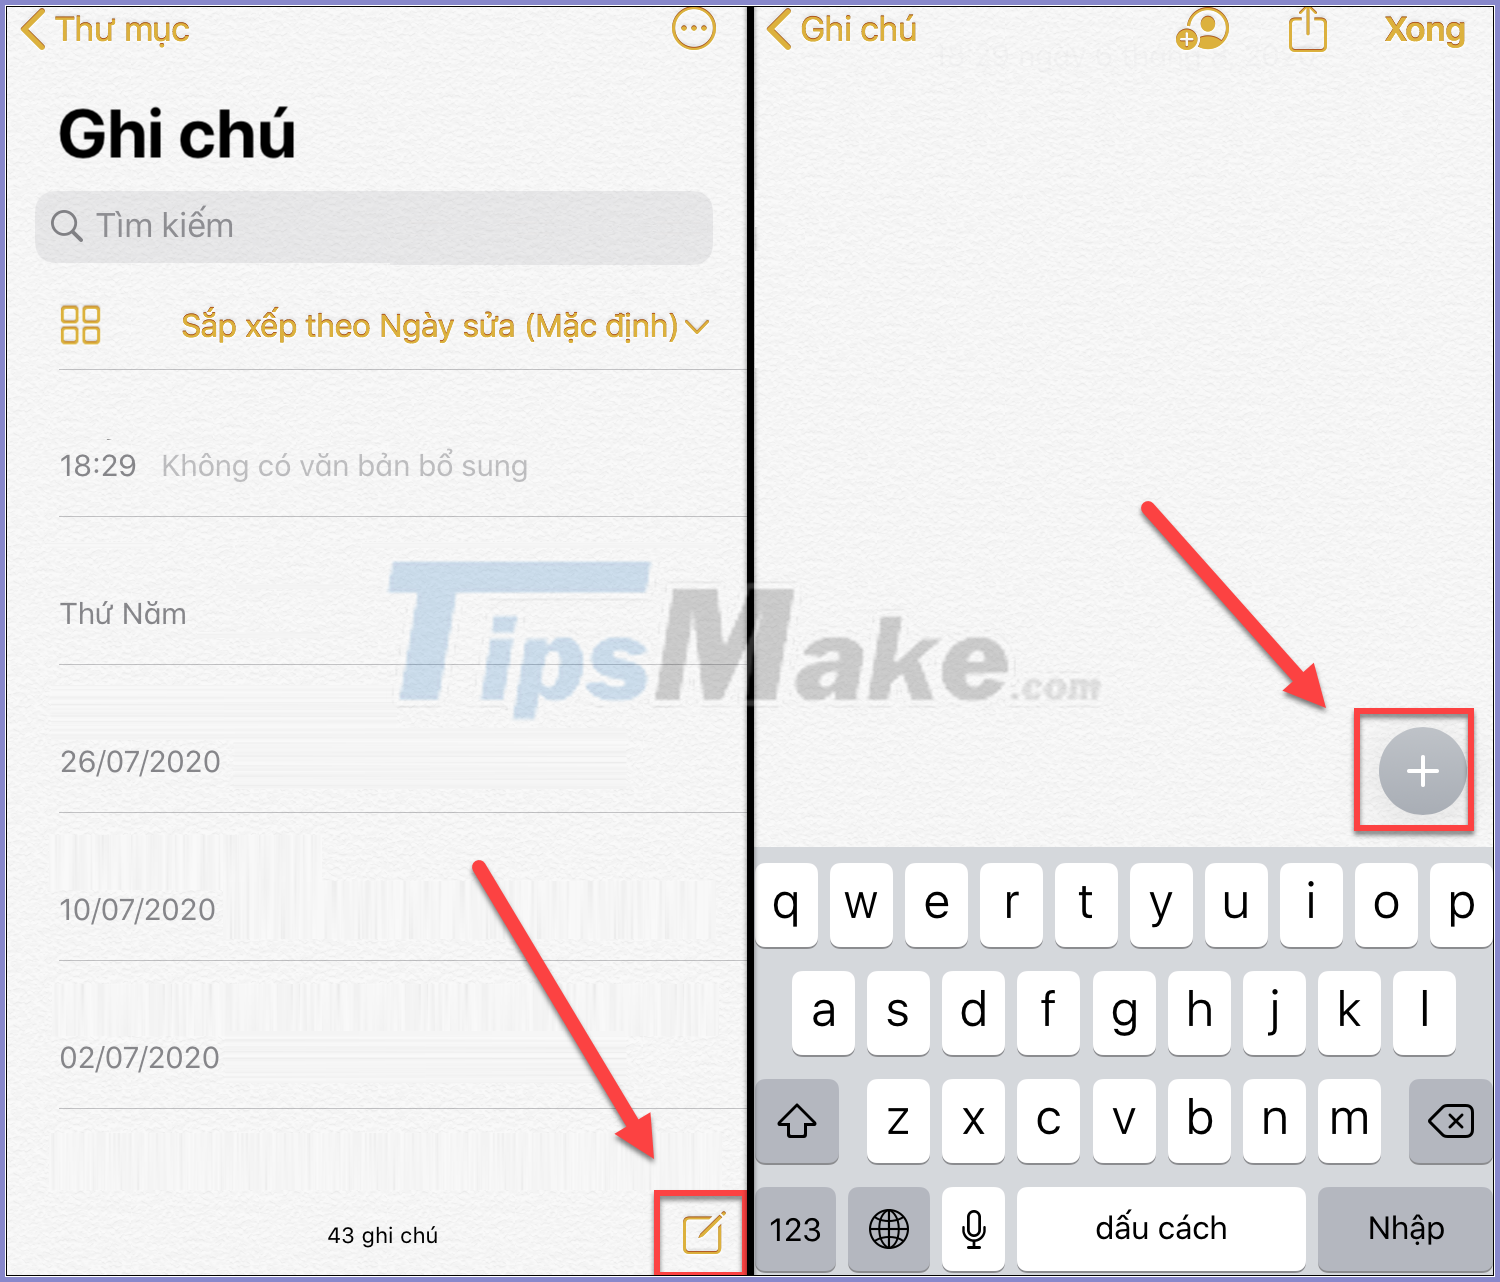
Step 2: Select the camera icon in the toolbar >> Scan document .

Step 3: When the camera opens, bring up the screen on the document. Once your document page is recognized, the camera will automatically capture it. You can disable this feature by pressing Automatic in the top right corner. From there you will be able to take a selfie using either the Shutter button or the volume button.

Step 4: You can take multiple pages continuously, just turn the document to the page and take the photo, the photo will automatically save to the temporary gallery. When you have taken enough, you click on the thumbnail in the lower left corner to review the photos.
At this screen you can perform basic editing steps such as rotate, flip, crop and add color filters.
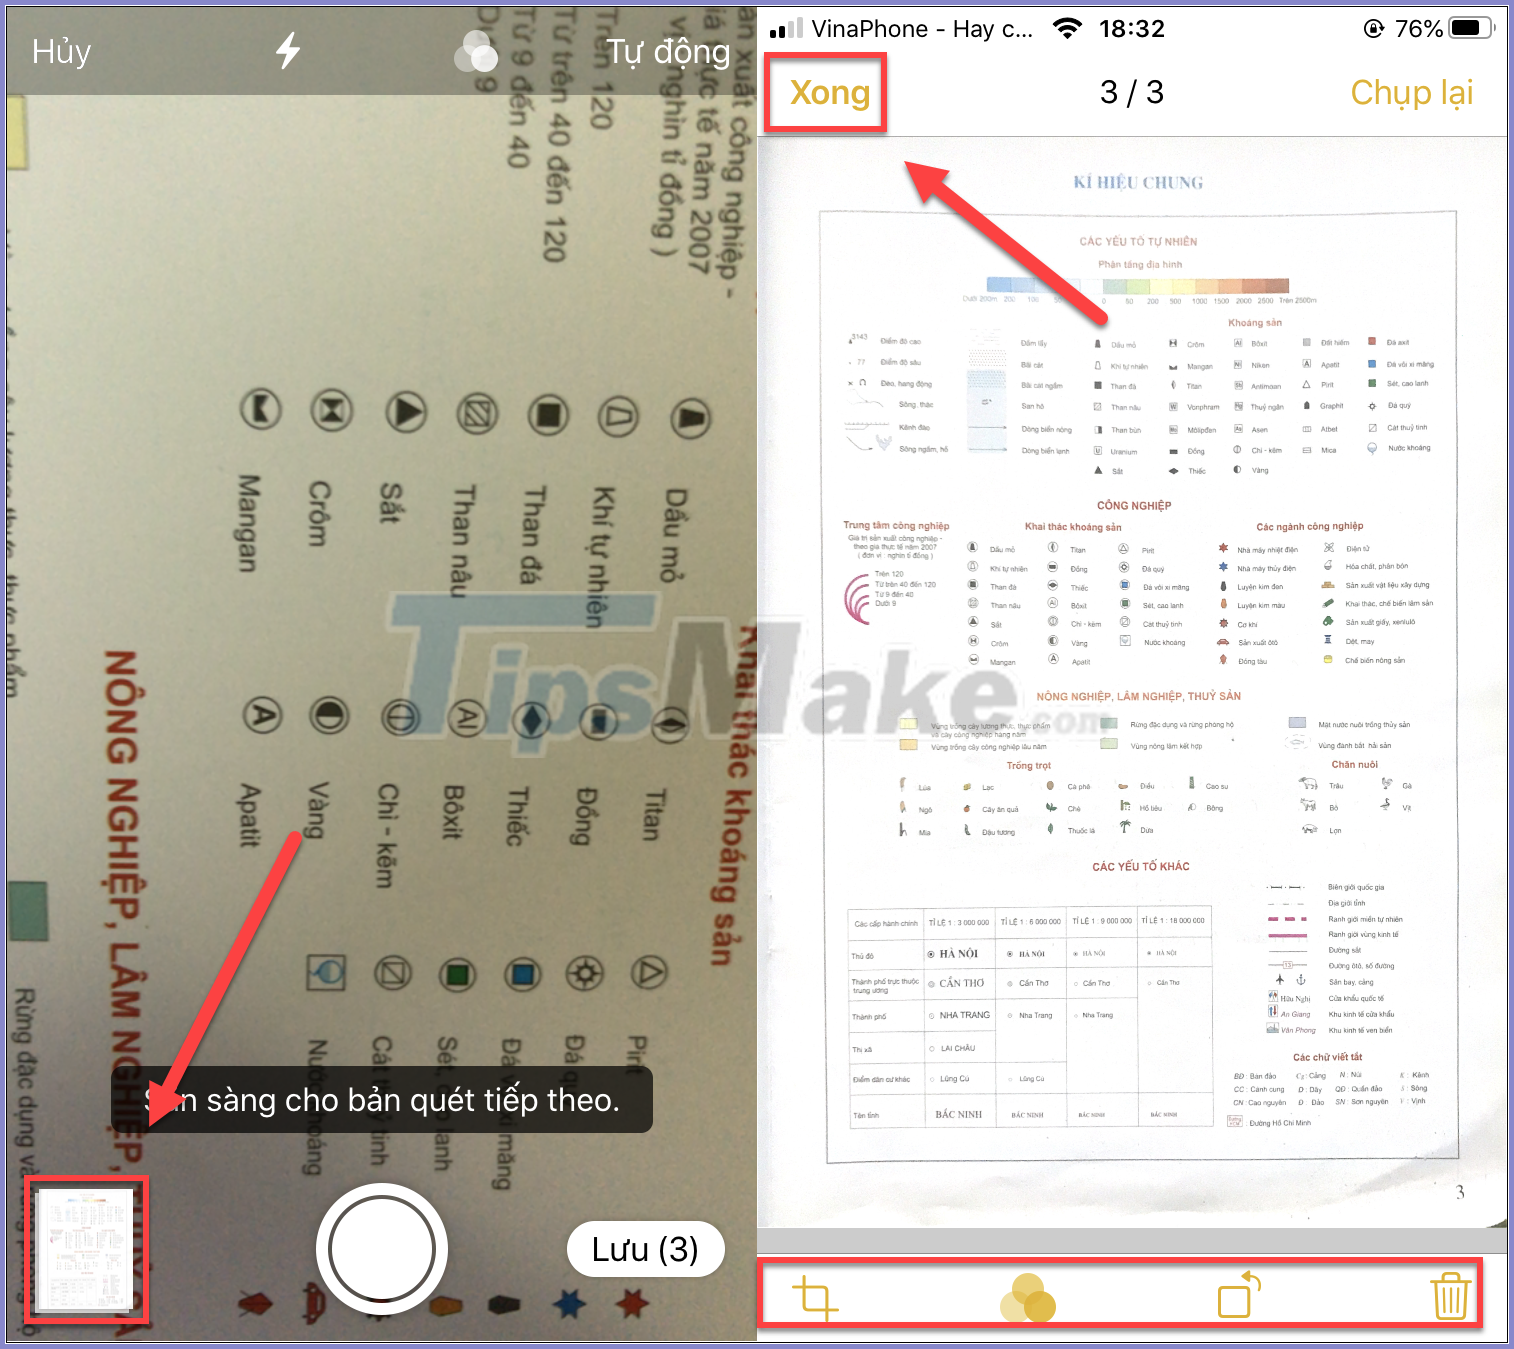
When you're satisfied, tap Done .
Step 5: Go back to the camera, choose Save .

You'll see the document added to the Notes page in a header (taken from the first line in the document). You can click on the title to double name it whatever you want.
Alternatively, you can open the document and tap Share in the top right corner to share it with others. From here there are also other features like marking up, printing, copying, and saving the document to File.

Scan documents using the Evernote Scannable application
In addition to the Notes app, you can also use a third-party app to scan documents, the Evernote Scannable for example.
Step 1: Download Evernote Scannable here.
Step 2: Open the app, you'll be asked if you want to connect to Evernote? If you've never created an Evernote account, choose Not Now .

Step 3: When taken to the camera, do the same as above, just place the document in front of the lens and the app will automatically capture it. If you do not want to take a selfie of your own accord, choose the three-dot icon and set the capture manually .

Step 4: When taking a photo, open the photo and click on the Customize icon to rotate and crop the picture as you like.

Step 5: Once done, choose Save >> Camera Roll .
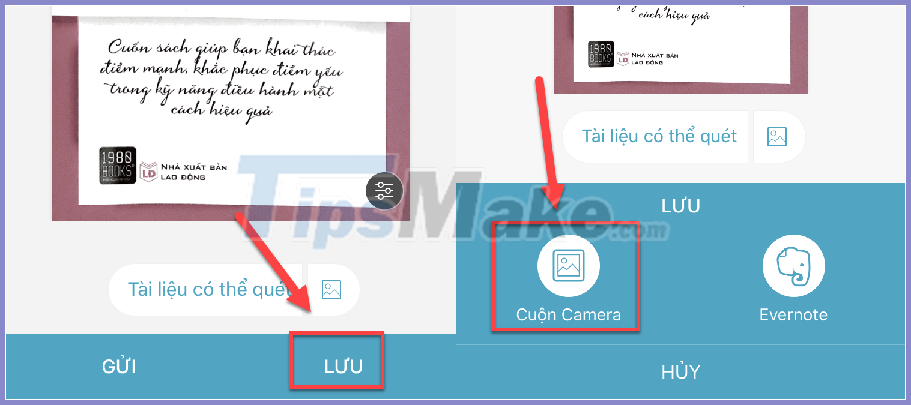
And those are two methods for you to scan documents on iOS to get clear images, serving well for your work.
Good luck!
FAQ
What should I know about Scan Documents Using Notes App on iOS?
Focus on the key features, requirements, limitations, and practical use cases explained in this guide.
How do I get the best results with Scan Documents Using Notes App on iOS?
Follow the recommended steps, use current software or information, confirm compatibility, and review settings before major changes.
Are there any risks or limitations?
Potential limitations depend on compatibility, data quality, cost, privacy, support, and how the product or method is used.
Related Articles
 How to Scan Documents on iOS 11 Note Application6 minutes read
 How to Pin a Note on iOS 11 Notes Application4 minutes read
 Instructions for Scanning Documents with 3 Simple Steps4 minutes read
 Applications Scan Documents to PDF on iOS4 minutes read
 How to Scan Documents in Windows6 minutes read
 Adobe's New Adobe Scan Application Turns Your Phone into a Document5 minutes read
Reader Comments 0
Sign in with email or Google to join the discussion.