Table of Contents
This updated guide explains how to Print a Document through clear steps, practical examples, and important checks that help prevent common errors.
Method 1 of 2:
On Windows
-
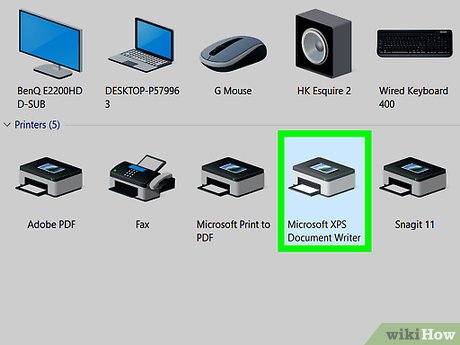 Make sure that your printer is connected and turned on. If your printer connects over Wi-Fi, this will mean making sure that you're on the same Internet network as your printer; otherwise, you'll need to plug your printer's USB cable into your computer.
- Check your printer's manual to confirm how to set it up if you haven't already done so.
-
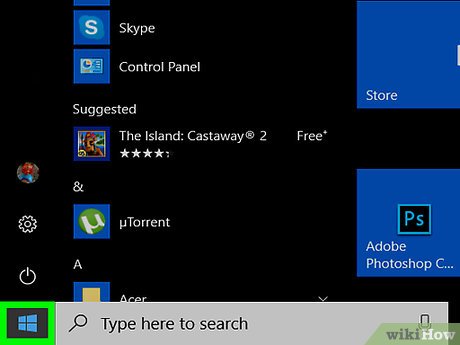 Open Start. Click the Windows logo in the bottom-left corner of the screen.
-
 Open File Explorer. Click the folder-shaped icon in the bottom-left side of the Start window.
-
 Go to the document that you may need to print. Click the folder that contains the document on the left side of the File Explorer window. Common documents that you can print include the following:
- Word, Excel, or PowerPoint documents
- PDF files
- Photos
-
 Select the document. Click the document that you may need to print.
 -
 Click the Share tab. It's in the upper-left corner of the window. Doing so prompts a toolbar to appear below the Share section.
 -
 Click Print. You'll find this in the "Send" section of the toolbar. The Print window will open.
- If Print is greyed out, your selected document can't be printed. You'll see this for things like Notepad Next documents.
-
 Select your printer. Click the "Printer" drop-down box, then click your printer's name.
 -
 Select a number of copies. In the "Copies" box, type in the number of copies of the document that you'd like to print.
- This is different than the number of pages.
-
 Edit other print settings if need be. The menu for each document type will vary, but you'll have the following options for most documents:
- Orientation - Determine whether your document is oriented vertically or horizontally.
- Color - Decide between printing in black and white or including color printing. You must have colored ink in your printer to print in color.
- Number of sides - Choose single-sided printing to print one sheet of paper per page, or choose double-sided printing to use both sides of a piece of paper.
-
 Click Print. It's either at the bottom of the window or at the top of the window. Your document will begin printing.
Method 2 of 2:
On Mac
-
 Make sure that your printer is connected and turned on. If your printer connects over Wi-Fi, this will mean making sure that you're on the same Internet network as your printer; otherwise, you'll need to plug your printer's USB cable into your computer.
 -
 Open Finder. Click the blue, face-like app in your Mac's Dock. A Finder window will open.
 -
 Go to your document. Click the document's folder on the left side of the Finder window, then look for your document.
 -
 Select the document. Click the document that you may need to print.
 -
 Click File. This menu item is in the upper-left corner of the screen. A drop-down menu will appear.
 -
 Click Print.... It's at the bottom of the File drop-down menu. This will open the Print window.
 -
 Select your printer. Click the "Printer" drop-down box, then click your printer's name in the drop-down menu.
 -
 Select a number of copies. Select the number in the "Copies" field, then enter the number of copies that you would like to make.
 -
 Edit other printer settings if needed. You'll need to click Show Details first if you may need to change anything other than the "Pages" settings:[1]XResearch source
- Pages - Select pages to print. If you leave "All" selected, your entire document will print.
- Paper size - Use this option to scale your printer's margins up or down for different paper sizes.
- Orientation - Determine whether your document is oriented vertically or horizontally.
- Number of sides - Choose single-sided printing to print one sheet of paper per page, or choose double-sided printing to use both sides of a piece of paper.
-
 Click Print. It's in the bottom-right corner of the window. This will prompt your printer to begin printing your document.
FAQ
What is the easiest way to Print a Document?
Start with the requirements in this guide, then follow each step in order. Check the result after every major change so problems are easier to identify.
Can beginners follow these instructions?
Yes. The process is organized into practical steps, and you can repeat any step before moving forward.
What should I check if the method does not work?
Confirm your software or device version, permissions, settings, file format, and internet connection when the task depends on online services.
Related Articles
 How to Print a PDF File - the Easiest Way to Print a PDF Document8 minutes read
 How to Cancel the Print Job Immediately: Step-by-Step Guide3 minutes read
 Lesson 21: Print the Document: Word 20073 minutes read
 Printer: How to Print in Windows 815 minutes read
 How to Print a Document in Word Without Errors, Easily5 minutes read
 How to Print PDF Files5 minutes read
Reader Comments 0
Sign in with email or Google to join the discussion.