How does Windows 7, 8 not automatically upgrade to Windows 10?
For Windows 7 and Windows 8 users, if Windows 10 is eligible to upgrade Windows 10 will receive a notification to upgrade Windows 10 in the system tray. However, if you don't want to use Windows 10, you can still block Windows 7 and 8 upgrades to Windows 10..
For Windows 7 and Windows 8 users, if Windows 10 is eligible to upgrade Windows 10 will receive a notification to upgrade Windows 10 in the system tray.
However, sometimes these notifications make many users feel uncomfortable and troublesome. If you wish, you can disable (turn off) this notification icon.
1. Disable the GWX application and stop upgrading Windows 10
To block Windows 10 upgrade notifications via Windows Update, you must install the KB3065987 update package on Windows 7 and KB3065988 on Windows 8.1.
Download KB3065987 for Windows 7 here.
Download KB3065988 for Windows 8.1 here.
After downloading is complete, you install the update package by double-clicking on the update package you just downloaded. The installation warning dialog box will appear on the screen, click on Yes to complete the installation and restart your computer.
2. Block Windows 10 upgrade using Group Policy
After you have installed the update package, follow the steps below:
Step 1:

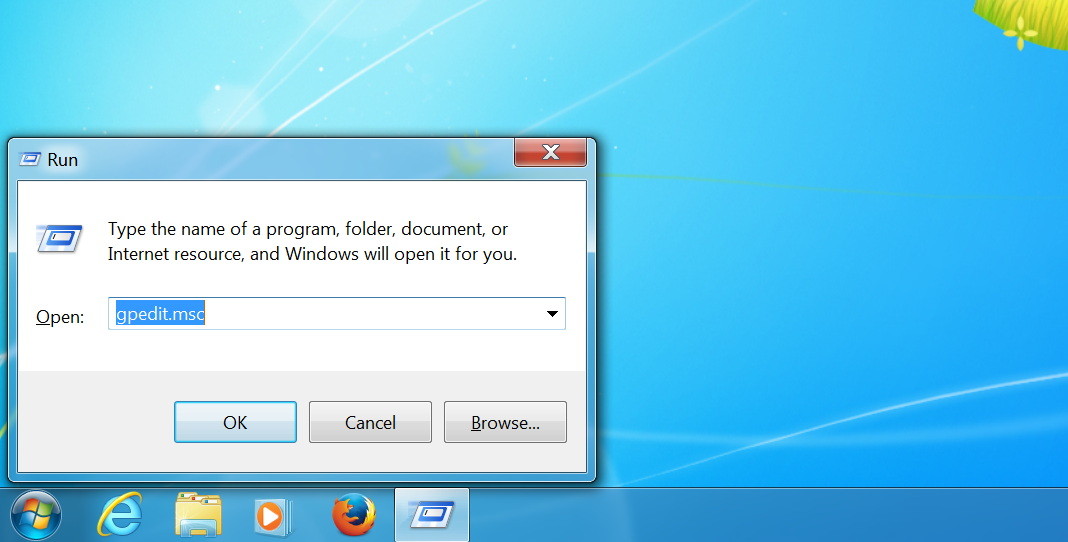
Press the Windows + R key combination to open the Run command. Next, enter the keyword gpedit.msc in the Run dialog window and press Enter to open Local Group Policy Editor.
Step 2:
Find the path: Computer Configuration> Administrative Templates> Windows Components> Windows Update.
Step 3:
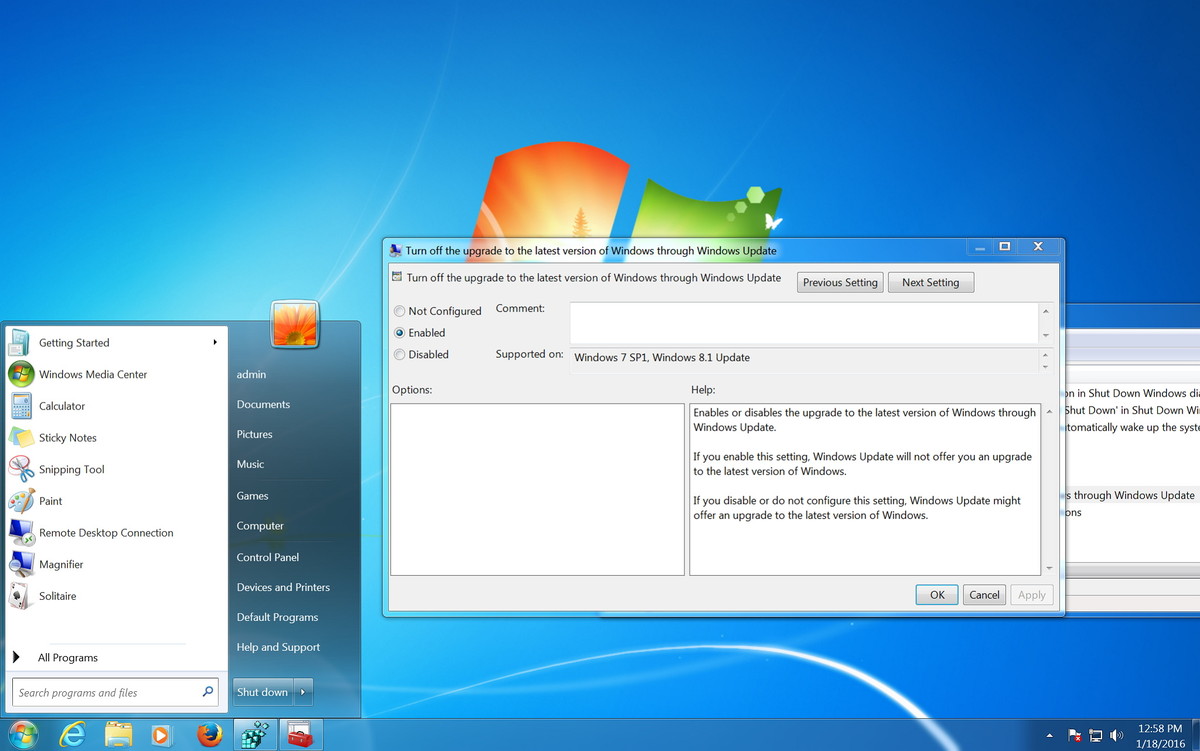
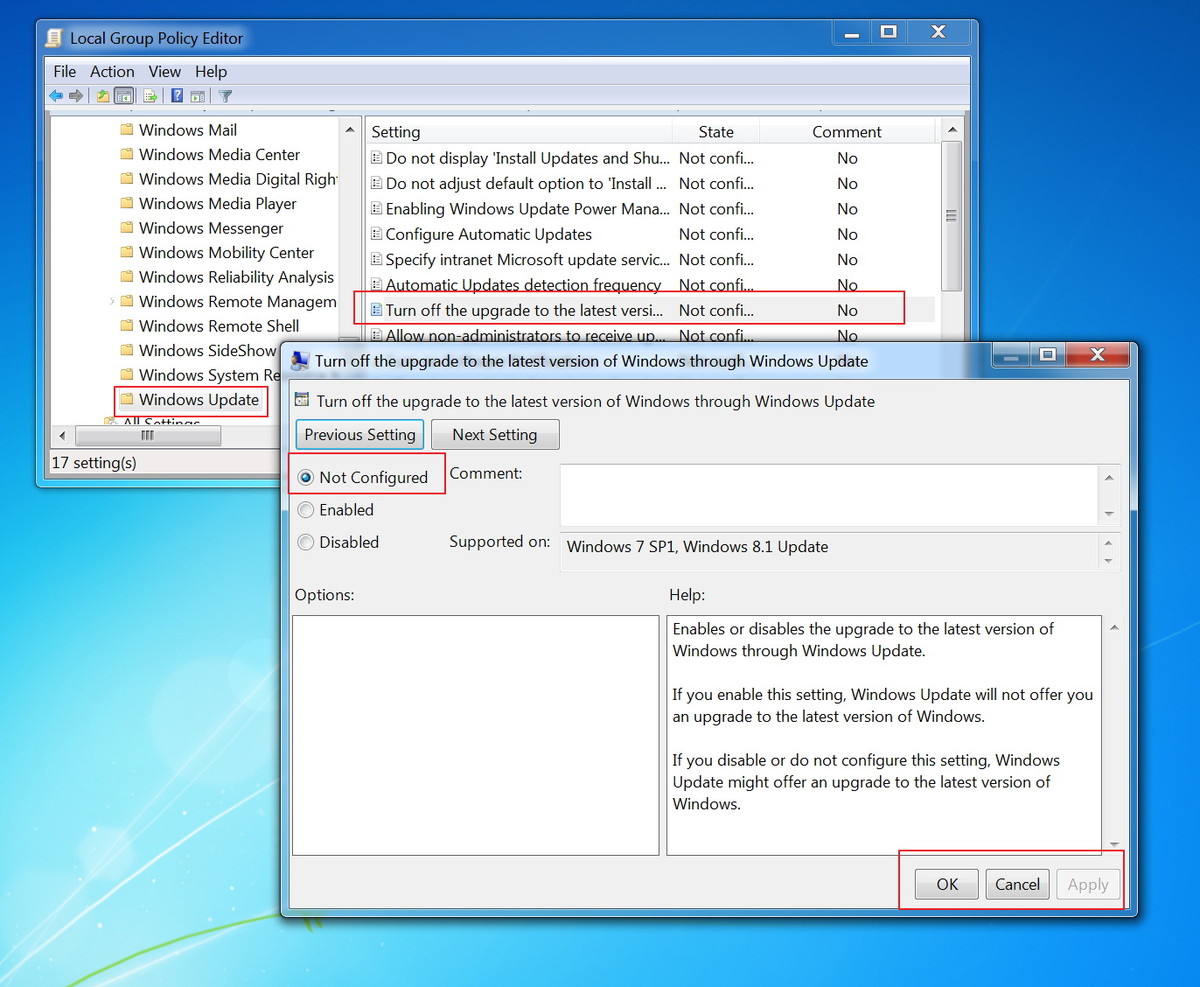
On the Windows Update screen, find and double-click the Turn off the upgrade to the latest version of Windows option through Windows Update.
Step 4:
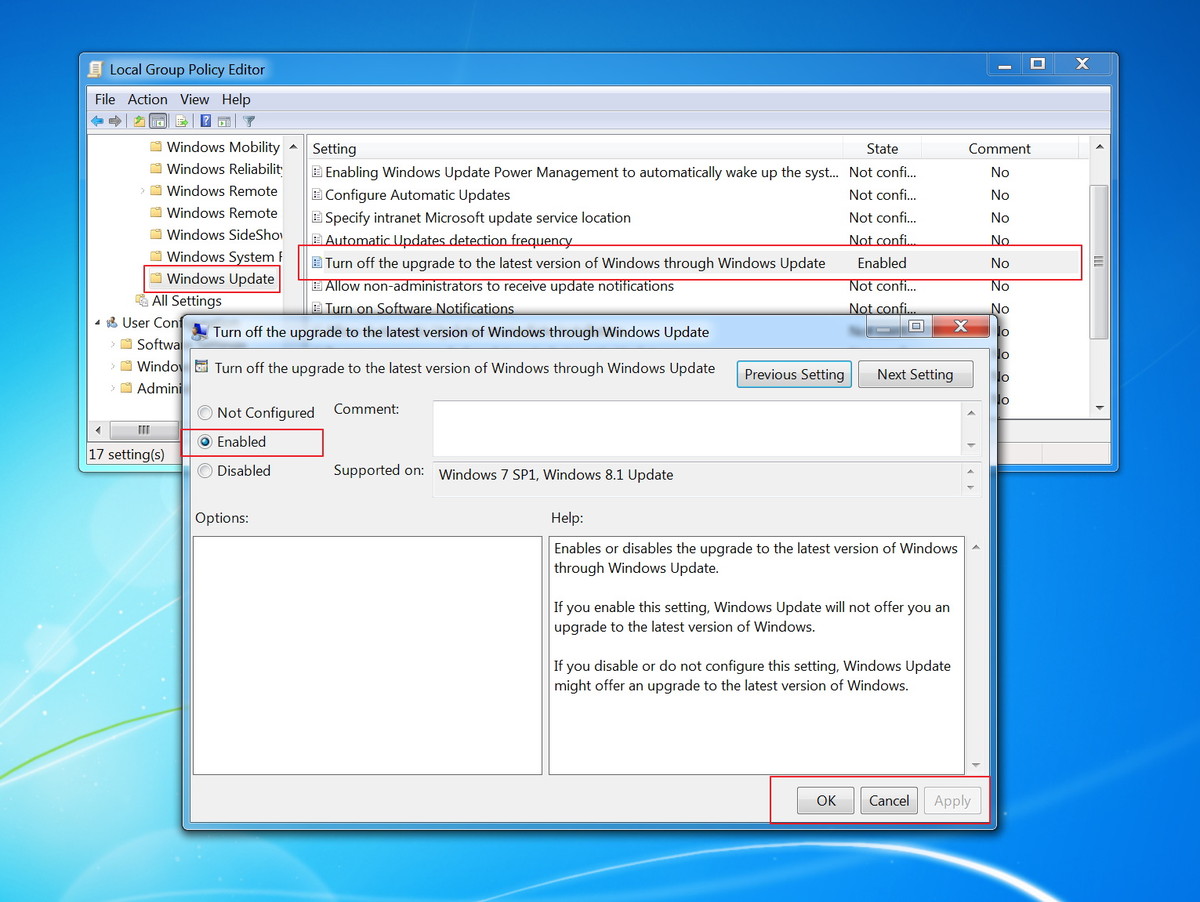
Click on Enable , then click Apply and click OK .
3. Block Windows 10 upgrade using Regitry Editor
If your computer is using the Windows Home version operating system, Local Group Policy Editor is not available. In this case you can block Windows 10 upgrade by using the Registry.
Step 1:

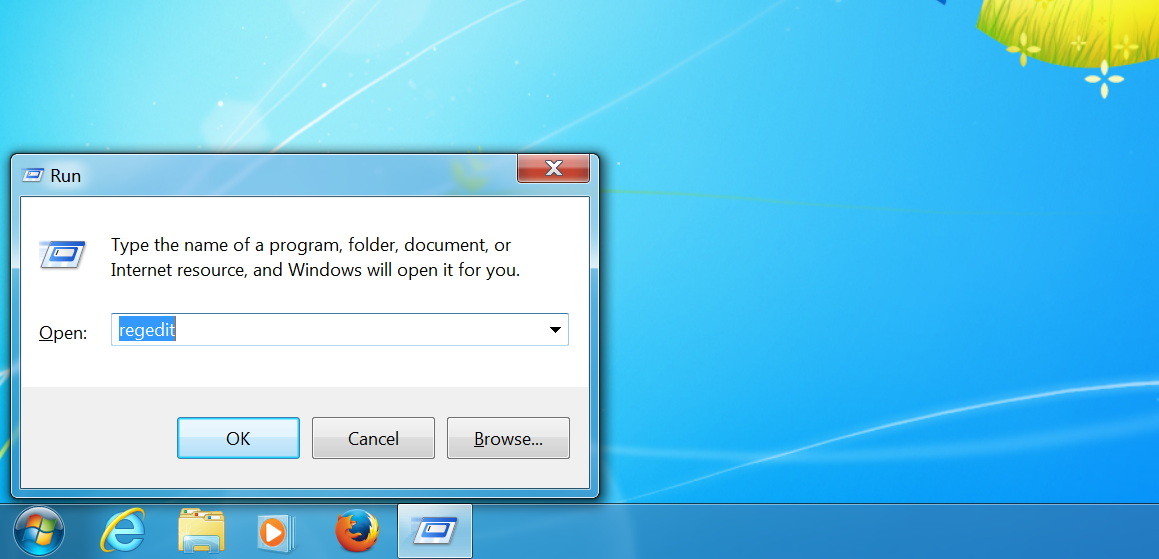
Press the Windows + R key combination to open the Run command. Next, enter the regedit keyword into the Run dialog window, then press Enter to open the Registry Editor.
Step 2:
Find the link below:
HKEY_LOCAL_MACHINESOFTWAREPoliciesMicrosoftWindowsWindowsUpdate.
Step 3:

On the Registry Editor window, right-click any space in the right pane and select New , create a DWORD key and name this key DisableOSUpgrade .
Step 4:
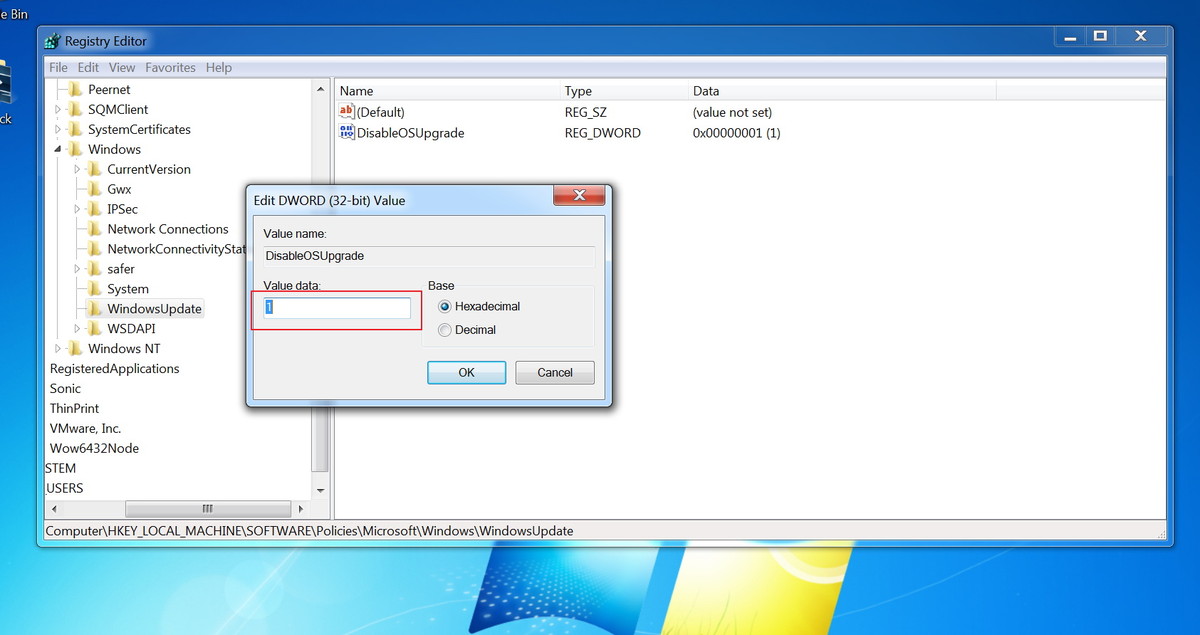
Double click on the key DisableOSUpgrade you just created and changed the value in Value Data from 0 to 1.
Note:
If you can't find the WindowsUpdate key when you search for it by following the link above, you can right-click Windows, select New and then select Key. Then name this new key WindowsUpdate.
4. Disable (turn off) applications Get Windows 10
Group Policy cannot disable the application of Get Windows 10. So to disable Get Windows 10 application you can only use the Registry.
Note: You can use the Registry on both the Pro and Home versions of Windows 7 and Windows 8.1 operating systems.
Step 1:
Press the Windows + R key combination to open the Run command. Then enter the regedit keyword into the Run window, press Enter to open the Registry Editor.
Step 2:
You follow the path:
HKEY_LOCAL_MACHINESOFTWAREPoliciesMicrosoftWindowsGwx.
Step 3:
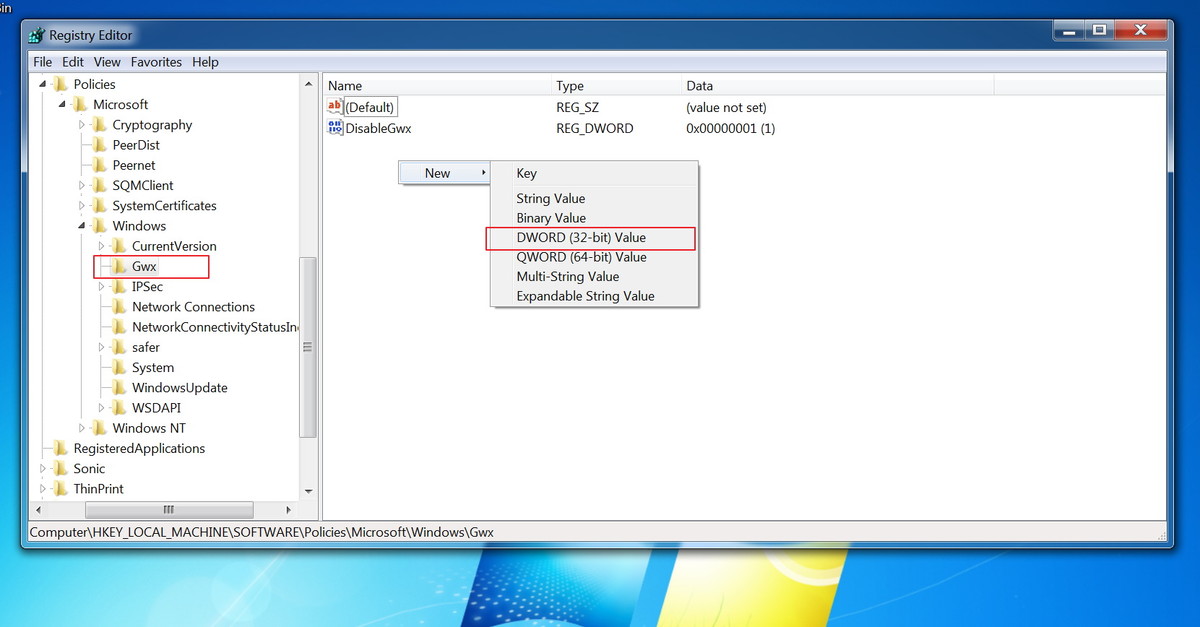
On the Registry Editor window, right-click any space in the right pane and select New , create a DWORD key and name this key DisableGwx .
Step 4:
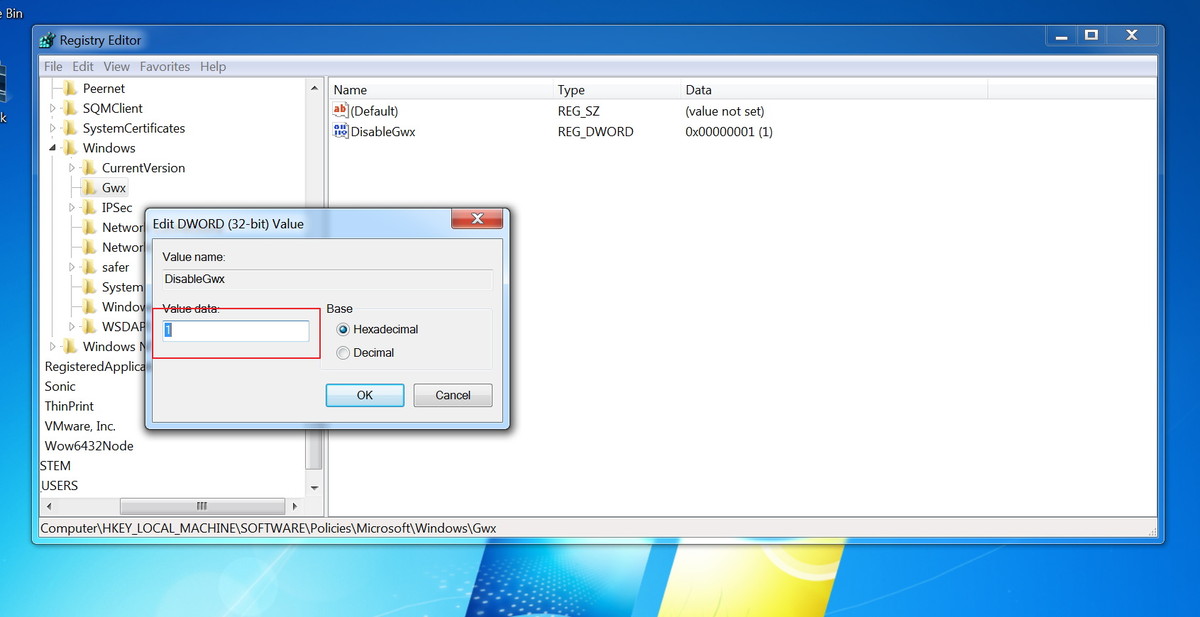
Double-click the DisableGwx key that you just created and change the value in Value Data from 0 to 1 .
Note:
If you can't find the Gwx key when you search for it according to the above guide, you can right-click Windows and then select New, select the Key and name this new key Gwx .
After completing the steps, proceed to restart your computer. When your computer has finished booting, you will see the GWX application no longer appears in the system tray (Notification Area).
5. Upgrade Windows 10
If you intend to upgrade to Windows 10 operating system, you must re-activate Windows 10 via Windows Update and Get Windows 10 application.
Follow the steps below to re-enable Windows 10 upgrade.
A: On Windows 7 Pro and Windows 8.1 Pro
Step 1:
Press the Windows + R key combination to open the Run command, then enter the key gpedit.msc on the Run command window, press Enter to open the Local Group Policy Editor.
Step 2:
Browse through the following link: Computer Configuration> Administrative Templates> Windows Components> Windows Update.
Step 3:
Find and double-click the Turn off the upgrade to the latest version of Windows option via Windows Update.
Step 4:
Select the Not Configured option, then click Apply then click OK to delete WindowsUpdate and DisableOSUpgrade from the Registry.
B: On Windows 7 Home and Windows 8.1 Home
Step 1:

Press the Windows + R key combination to open the Run command, then enter the keyword regedit in the Run command window to open the Registry Editor.
Step 2:
You follow the path:
HKEY_LOCAL_MACHINESOFTWAREPoliciesMicrosoftWindows.
Step 3:
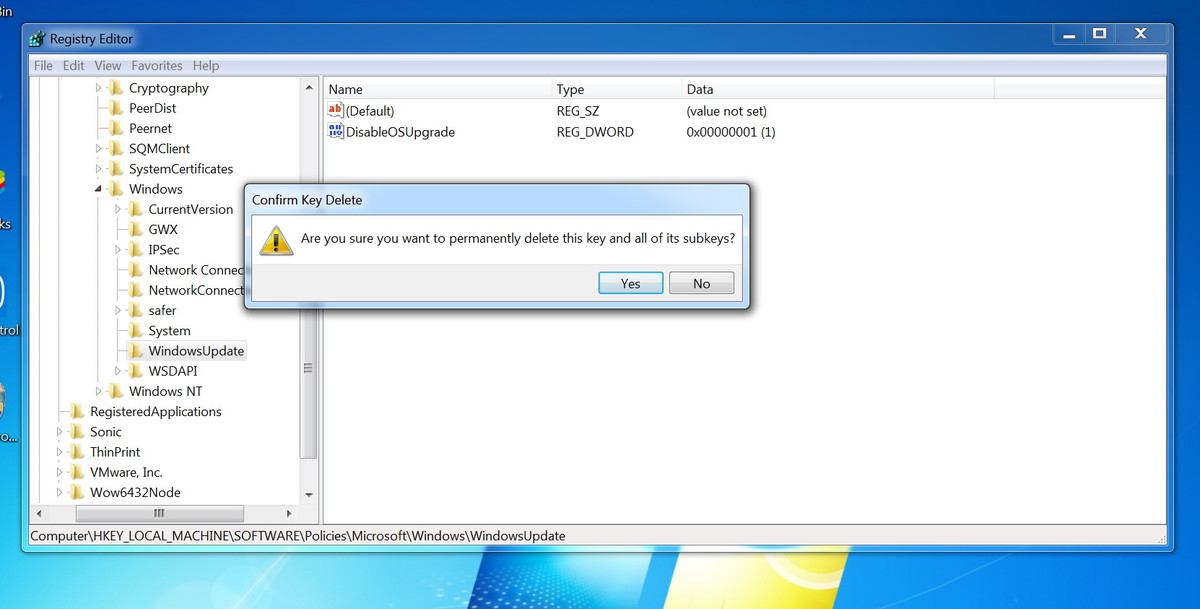
Right-click the WindowsUpdate key, select Delete, then click Yes to confirm the WindowsUpdate key deletion.
C: Reactivate the application Get Windows 10
On all versions of Windows 7 and Windows 8.1 you can re-enable Get Windows 10 application by deleting the keys you created earlier.
Step 1:
You browse by link:
HKEY_LOCAL_MACHINESOFTWAREPoliciesMicrosoftWindows.
Step 2:
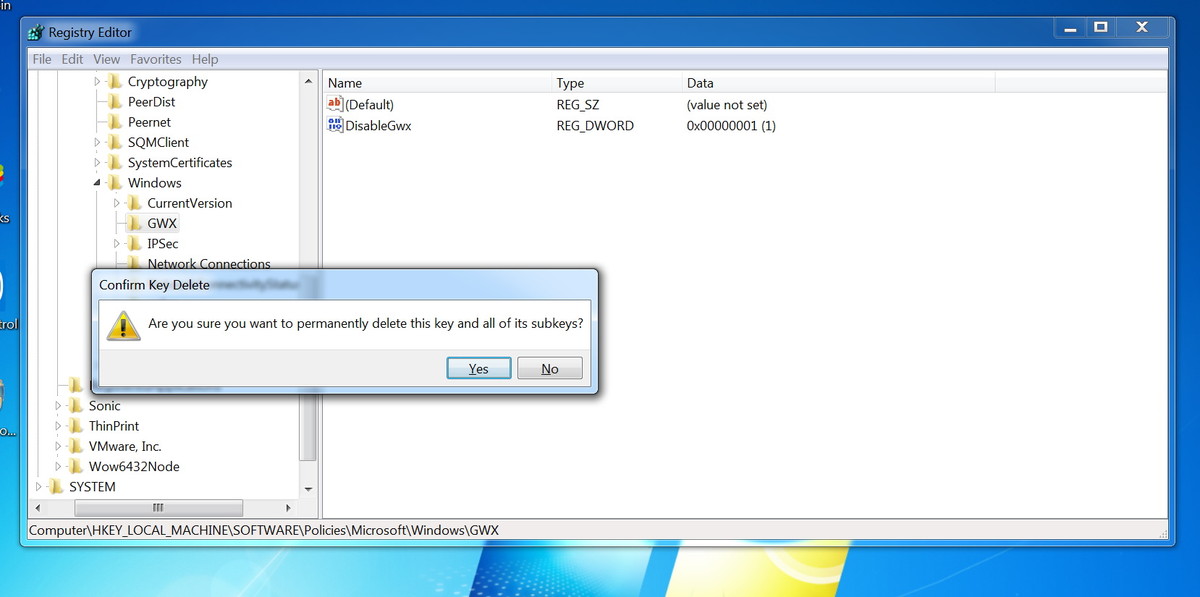
Right-click the GWX key, select Delete and then click Yes to confirm the GWX key deletion you created earlier.
Finally proceed to restart your computer to complete the process. After you have finished booting the computer, you will receive a notification to upgrade Windows 10.
You can refer to some of the following articles:
-
4 ways to do this will help your Windows 10 "as fast as the wind"
-
How to turn off Windows 10 Auto Update?
-
How to get back 20GB of storage after the Windows 10 November update
Good luck!