Instructions for installing SQL Server 2019
On September 24, Microsoft announced the release of SQL Server 2019 Community Technical Preview (CTP) 2.0. It is very suitable for database professionals to keep up with modern technology.
Table of Contents
On September 24, Microsoft announced the release of SQL Server 2019 Community Technical Preview (CTP) 2.0. It is very suitable for database professionals to keep up with modern technology. Therefore, today's article will write about SQL Server 2019 and guide you to install SQL Server 2019 CTP 2.0 from Microsoft. The article contains three initial installation and testing steps with SQL Server 2019 CTP 2.0 on a virtual machine running Windows Server 2016.
Step 1: Prepare installation media
The first thing is to access this link to start the process of getting bits for SQL Server 2019 CTP 2.0:
https://www.microsoft.com/en-us/sql-server/sql-server-2019#Install
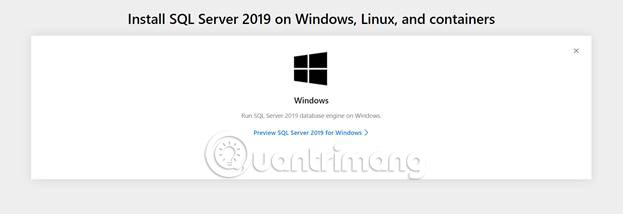
When entering this link address in Internet Explorer on the virtual machine, you will see the following screen:

As you can see, there are 4 different options for a usable target operating environment for SQL Server 2019. As mentioned, the article will install SQL Server 2019 version on Window Server 2016, so we will choose to install 'Windows'.
When clicking the link in the Windows installation type, the following screen is displayed:
After clicking on the ' Preview SQL Server 2019 for Windows ' link above, you will be taken to the evaluation center for them SQL Server 2019 CTP product. To get a 180-day trial version of SQL Server 2019, you must provide your name, email address, phone number, etc.
After you have provided all your personal information, you will be prompted to run or save the following exe file: SQLServerVNext-SSEI-Eval.exe. Save it to a virtual machine and run this file. Then, choose one of the following installation types:

As you can see, there are three different types of settings you can use: Basic, Custom and Download Media. For example, in this article, select the "Download Media" option. When the download process starts, the following page is displayed:
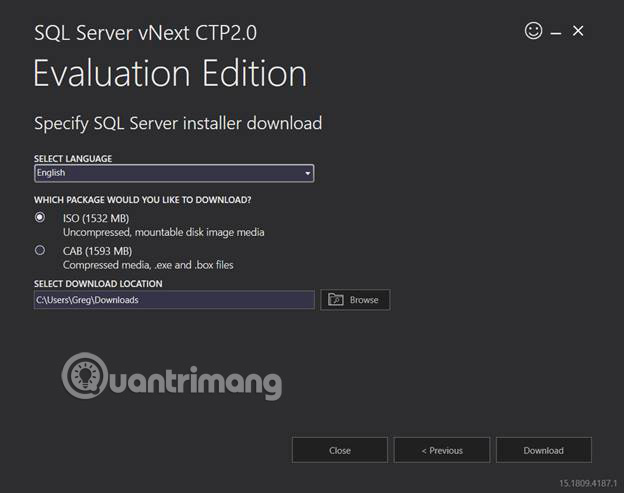
On this screen, you can choose your language, the type of package you want to download (ISO or CAB) and the location for installing the image. Just select the default values and click the 'Download' button . This starts the download process and displays the download progress screen as follows:

When the download is complete, you will receive a screen to notify the successful download as follows:

By reviewing the selected download location, you can see your ISO image, after it has been downloaded: SQLServerVnextCTP2-x64-ENU.iso.
Now that the SQL Server installation file is ready, you can go to the installation step for SQL Server 2019 CTP 2.0.
Step 2: Install SQL Server 2019 CTP 2.0
To install the new version of SQL Server 2019, first mount the ISO image to the virtual machine and then browse to the ISO image to see what it contains:
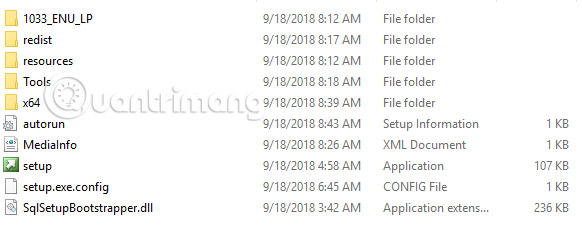
Do you see it look familiar? To start the installation, double click on the "setup" file , then it will return the following " SQL Server Installation Center " dialog box:

Start the installation process by clicking on the 'Installation' link in the left panel above, and it will display the following 'Product Key' dialog box:
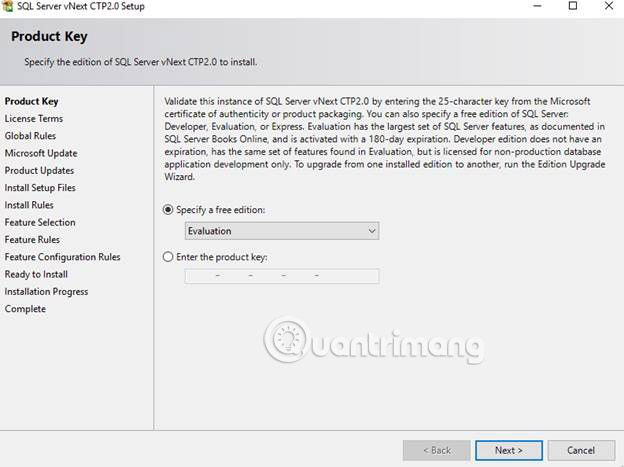
On this screen, select the default values to install the free version for 180 days. To continue the installation process, click the 'Next' button . After that, the following dialog box will appear:
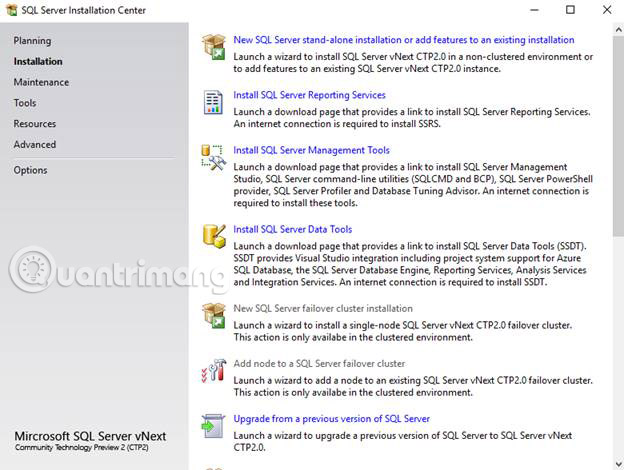
In the "Installation" section, select the " Stand-alone installation or add features to New SQL Server installation " section. When clicking on this item, the following 'Licensing Terms' dialog box is displayed:
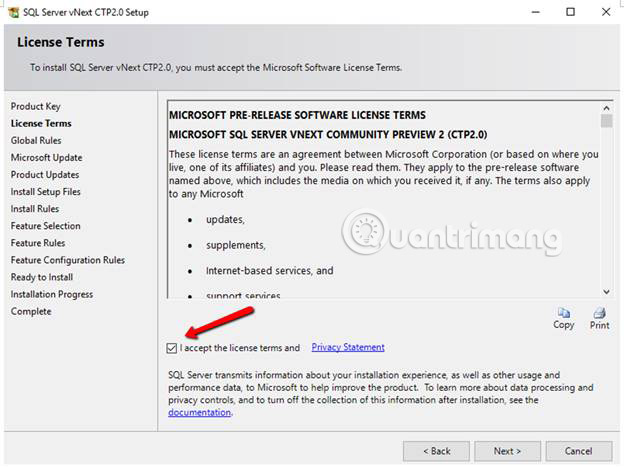
Check the ' I accept the licensing terms . ' entry and then click the 'Next' button , and the following 'Global Rules' window will display:

This screen is only displayed for a few seconds and then disappears, then the "Microsoft Update" dialog is displayed:

In this dialog box, check the option ' Use Microsoft Update to check for updates (recommended) '. This way, your installation will follow if there are any updates from Microsoft. After clicking this option, click on the "Next" button to display the following dialog box:
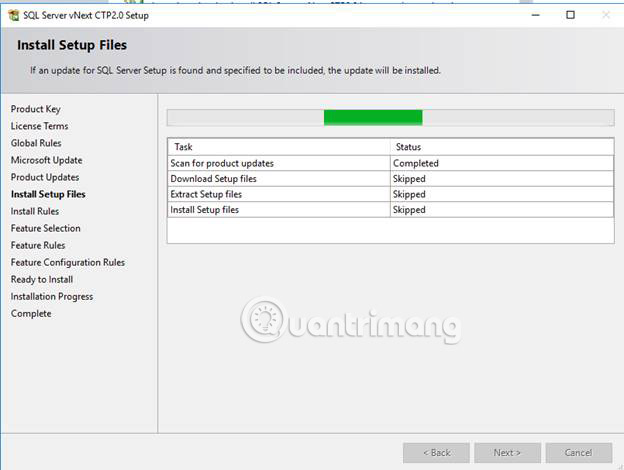
This screen is displayed while the installation is scanning for updates. When the scan for updates is complete, the following 'Install Rules' dialog box is displayed:
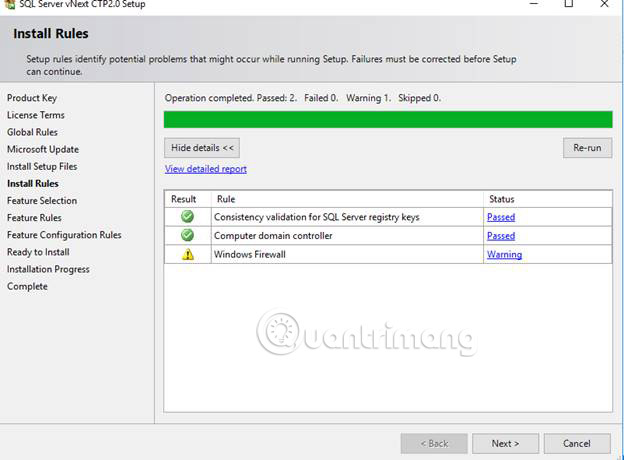
You can see that this example only warns the Install Rules rule . Skip this now and click the "Next" button . Doing so will return the following 'Feature Selection' dialog box:
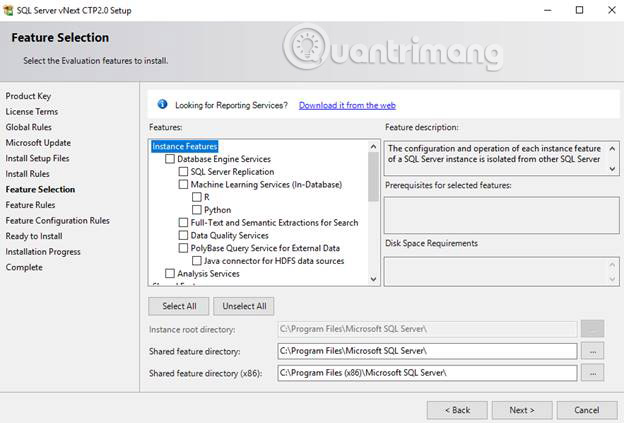
After reviewing the list of available features for SQL Server 2019 CTP 2.0, at this point, there is only one new entry, " Java connector for HDFS data sources ", which can be found under " PolyBase Query Services for External Data ". Click the "Select All" button . And then, the installation will contain all the features of SQL Server 2019. You may not need to test all the features, but at least install all those features, if possible. After selecting all features, click the "Next" button . When you do this, the following 'Features Rules' dialog box is displayed:

As you can see, the process has an error and a warning appears.
By looking in the file directory bootstrap log (the location of the file bootstrap log is: C: Program FilesMicrosoft SQL Server150Setup BootstrapLog), you can find more information about the warning and the status of the error.
This is a subset of bootstrap file that logs why the 'warning' status above appears:

As you can see, C ++ redistributable is required if you want to use " Polybase Teradata Connector ". Because the example will not use Teradata, the author will ignore this warning.
To understand why the 'Failed' message was received , review the subset of the messages from this bootstrap log file:

As you can see, the machine in the example lacks Java Runtime environment. To solve this problem, just install Oracle JRE. To install Oracle JRE, download the latest JRE from: https://www.oracle.com/technetwork/java/javase/downloads/jre10-downloads-4417026.html.
When visiting this site, the following information is displayed:
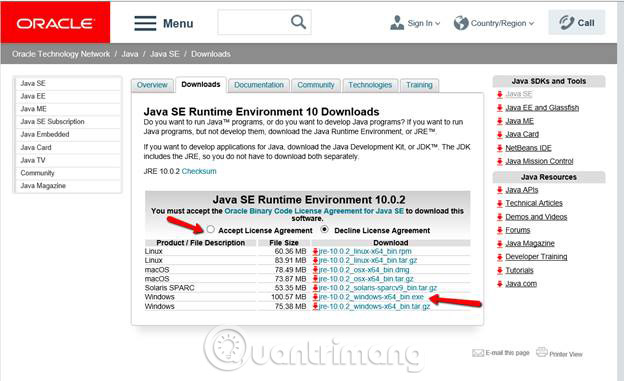
On this page, click on accept the license and then select the correct version to download for the operating system you are using to install SQL Server 2019.
When the exe Java runtime file is downloaded, execute it, to start installing Java SE Runtime 10 environment on the virtual machine. When the Java runtime is installed, click the Re-Run button on the "Feature Rules" dialog box to re-authenticate the installation, as shown below:
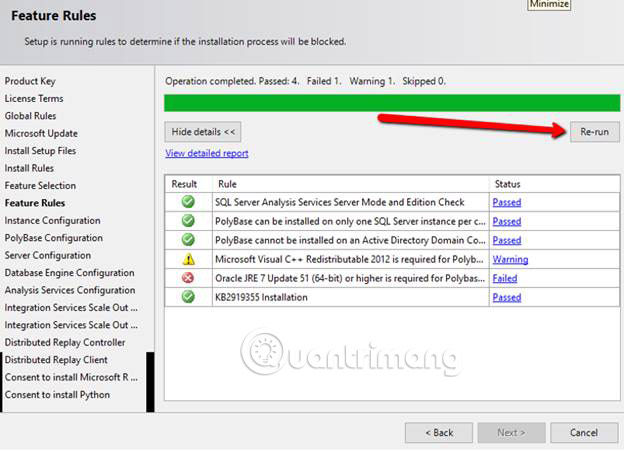
After the new JRE is installed, there will be no more JRE errors, like the screenshot below:

As you can see, the error status related to the JRE is now gone. At this point, for example, there is only one warning and will be ignored because the author will not perform any PolyBase test for the Terradata data source.
Continue to proceed to the next step by clicking on the "Next" button , then the following "Instance Configuration" dialog will be returned:

On the "Instance Configuration" screen, I have the option to install a Default instance or Named instance. This example will select Default instance. To continue installing, click the 'Next' button , and the 'PolyBase Configuration' option will display:

For PolyBase, select the default values and click the 'Next' button . It will take you to the 'Server Configuration' dialog box :

At this point, the author is only testing SQL Server 2019, so the author will only take the default values for Service Accounts and Collation by clicking on the 'Next' button . Typically, for a production installation, you need to ensure that the accounts used for the services comply with industry best practices and standards for installing SQL Server.
The next section to configure is the database configuration:

For this test case, the author will use "Windows authentication mode", then, add yourself as the SQL Server admin by clicking on the 'Add Current User' button. If you don't add someone as an admin, the process will get an error. Next, click on the 'Data Directories' tab to see where the data will be stored.

Select the default values and click the "TempDB" tab to display the default configuration for TempDB:
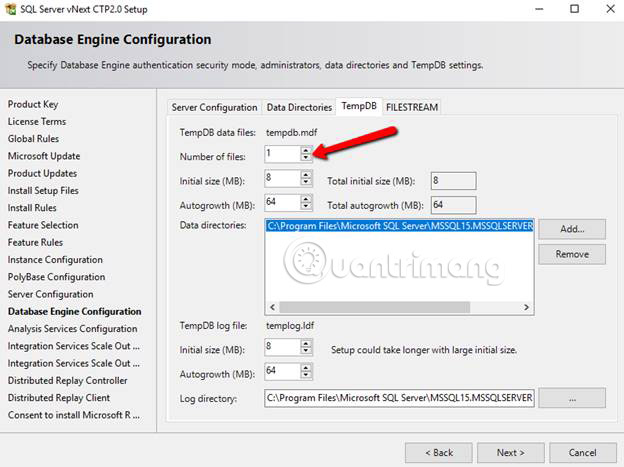
The default configuration for the installation in this example only has TempDB 1 mdf file. Because many mdf files for TempDB are considered the best option, the author changed it to 4 and then clicked the FILESTREAM tab .
Below is the file configuration dialog box:

At this point, if you are not sure if you will do any FILESTREAM tests, keep it disabled. If you want to perform some FILESTREAM operations later, you can always enable this feature when needed. At this point, click the "Next" button to switch to Analysis Services Configuration:
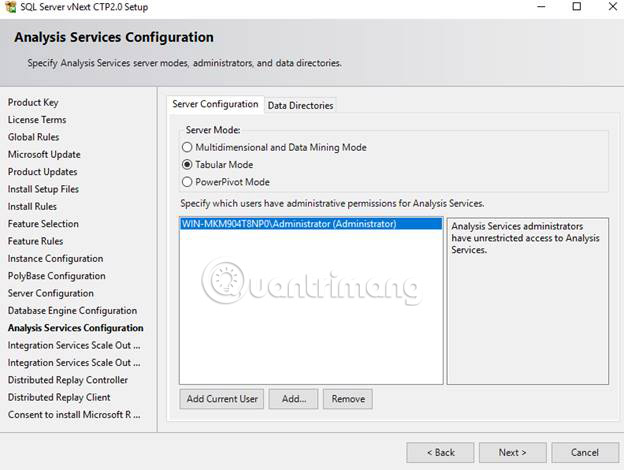
Again, click the " Add Current User " button to set the current user as admin of Analysis Services. Select the default value for other configuration items and click the "Next" button . It returns the following integrated service configuration dialog:
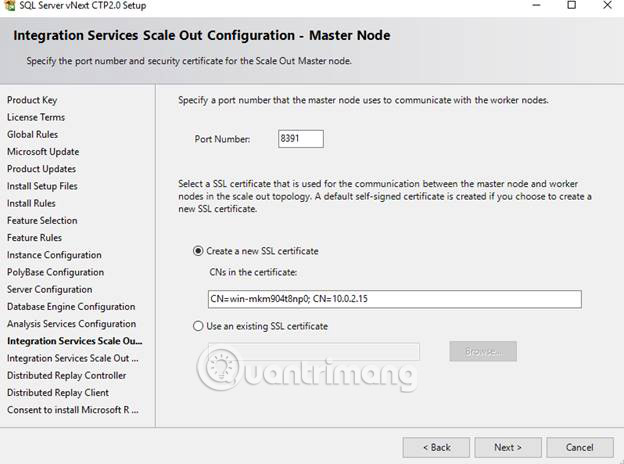
Select the default values for Master Node and click the 'Next' button . It returns the 'Integration Services Scale Out Configuration' option for the 'Worker-Node' dialog box :
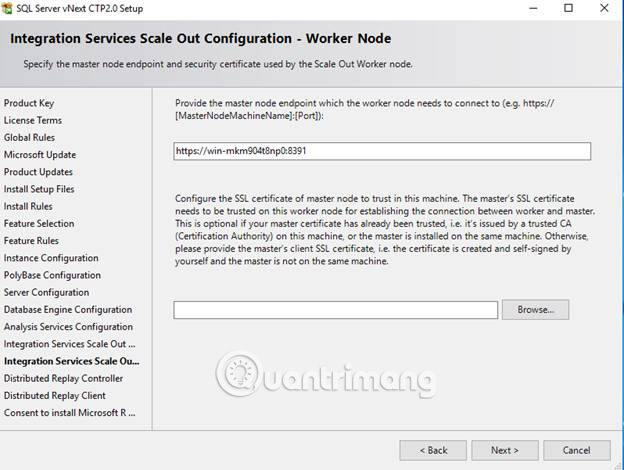
Again, select the default values and then click the 'Next' button to continue. The 'Distributed Replay Controller' dialog box will display:

Click the "Add Current User" button to make sure your account has unlimited access to Distributed replay controls , in case you need access to it and then click the "Next" button . The "Distributed Replay Client" dialog box will display:
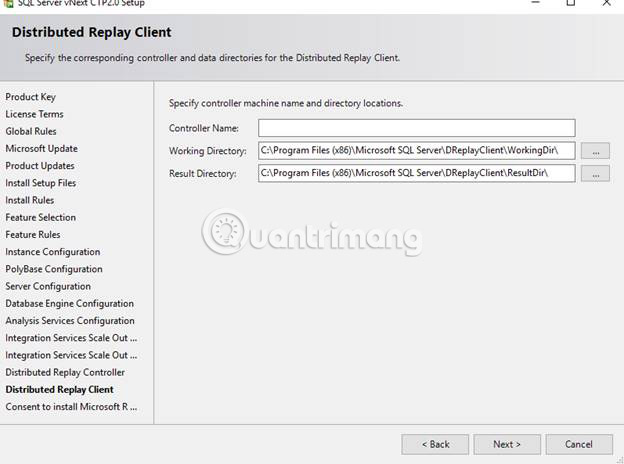
Please review the default values for Repributed Replay Client and then accept the default values by clicking the 'Next' button . The 'Consent to install Microsoft R Open' dialog box will appear:

Click the Accept button and then, click the "Next" button (note when clicking the "Accept" button the "Next" button will be activated), and go to " Consent to Install Python ".

Once again, agree to accept Python installation and then click the 'Next' button (again note the Next button is activated after clicking the 'Accept' button ). The ' Ready To Install ' dialog box will appear:
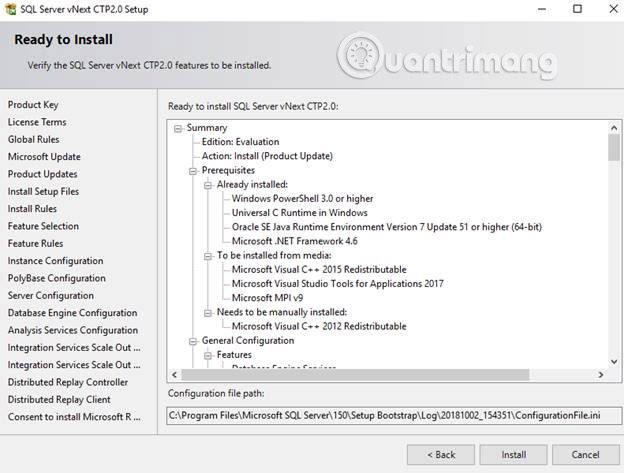
Finally, you have completed configuring the SQL Server 2019 installation. As you can see, this dialog box will display a summary of the selected configuration. In this dialog box, move the slider to the right up and down to review the summary configuration for your first CTP2.0 SQL Server 2019 version. Remember to note the path for the location of the ini configuration file . You can use this file later to check for unattended installation. After reviewing the summary, click the "Install" button . This will help start the installation process:
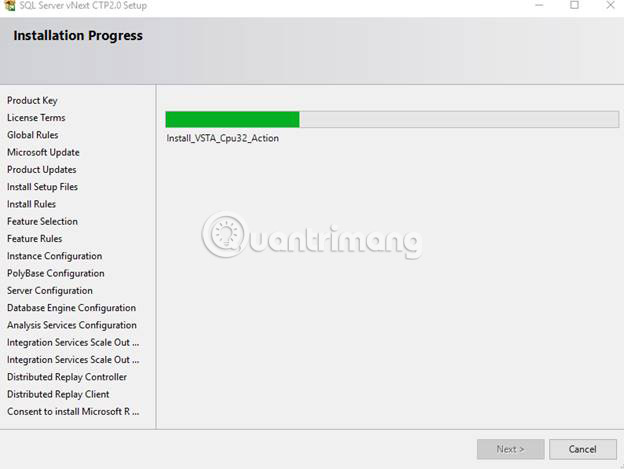
The installation process will take a while to complete. When the installation is completed, the following confirmation process dialog box is displayed:

Please review the status of each installed feature by moving the slider on the right up and down. Do this to verify that all features have a 'Succeeded' status . All are successful. At this point, SQL Server 2019 CTP 2.0 and all its features on the virtual machine have successfully installed.
To manage and test the new SQL Server 2019 CTP 2.0 version, you will also need to install SQL Server Management Studio (SSMS) . Please install the new and greatest SSMS version on your computer. To get the latest version of SSMS, use the ' Install SQL Server Management Tools ' link on the ' SQL Server Installation Center ' dialog box as shown below:

When clicking on this link https://docs.microsoft.com/en-us/sql/ssms/download-sql-server-management-studio-ssms?view=sql-server-2017, the following website will be displayed market:

As you can see the link appears only a Books Online document page. You will see there is a link to download preview 4 for SQL Server Managmenet Studio 18.0.(https://go.microsoft.com/fwlink/?linkid=2014662). The article will use this preview version of SSMS for testing CTP 2.0 SQL Server 2019. Use this link to download the SSMS exe setup file (SSMS-Setup-ENU.exe) and save it to the virtual machine . When executing this SSMS exe file, the following dialog box will be displayed:

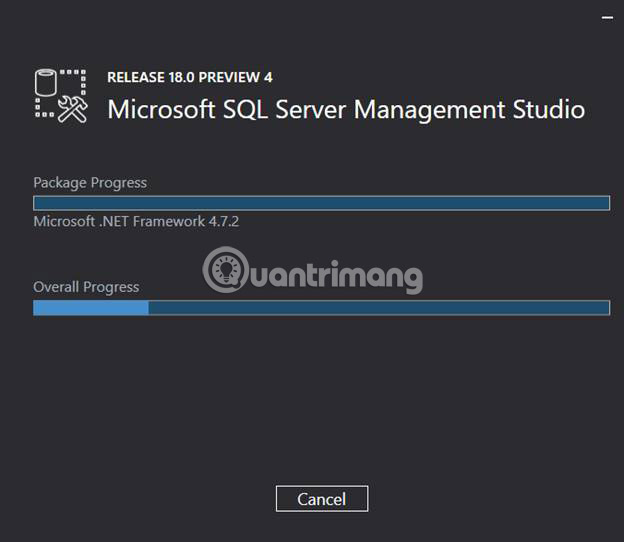
To start SSMS 18.0 installation, click the 'Install' button . When doing this, the following progress dialog will appear while the SSMS installation is running:
After the installation is completed, the following screen is displayed:
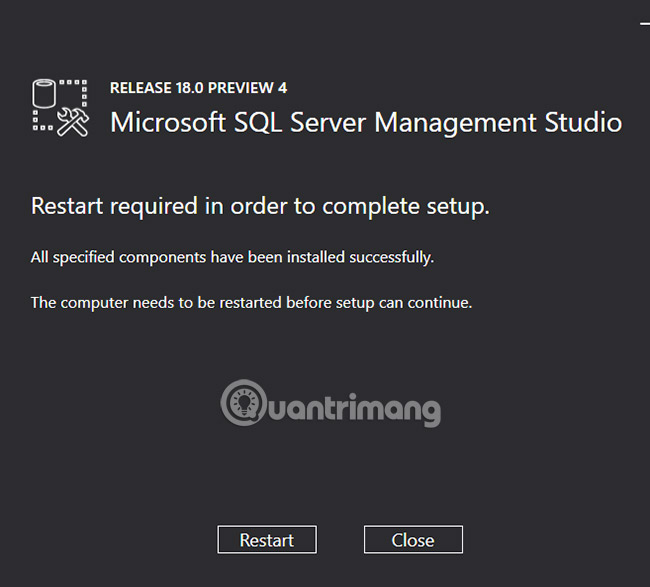
As you can see, restarting the computer is a must. Click the 'Restart' button to finish installing the 18.0 version of SSMS.
Step 3: Verify the settings
At this point, SQL Server 2019 CTP 2.0 and SQL Server Management Studio (SSMS) have been installed. Start your verification process using SSMS. When SSMS starts for the first time, you will see the following screen:

This window is displayed for a few seconds, but then SSMS starts, the following screen is displayed:
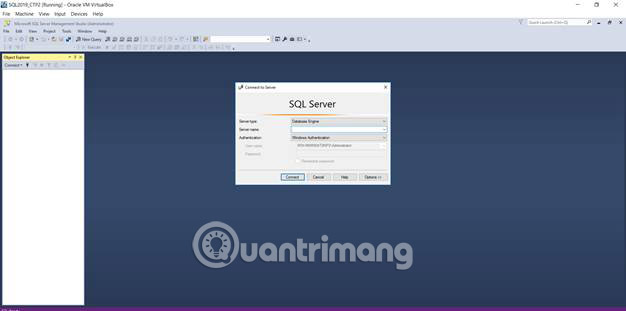
Connect to the Default instance by placing a dot (' . ') In the 'Server name' field and clicking the 'Connect' button . After SSMS connects, this is what you will see in the "Object Explorer" window :
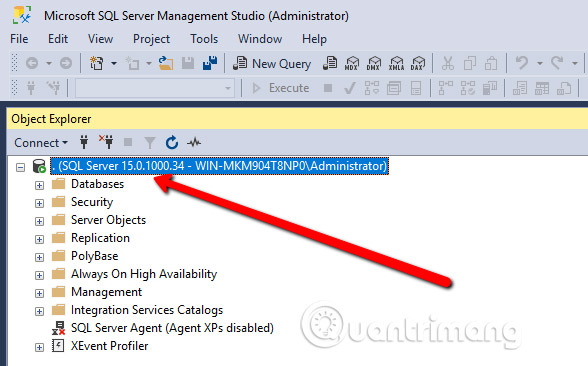
As you can see, the author is running SQL Server build version 15.0.1000.34, (build number for SQL Server 2019 CTP 2.0).
If you expand the Database section in Object Explorer, you'll see the following:
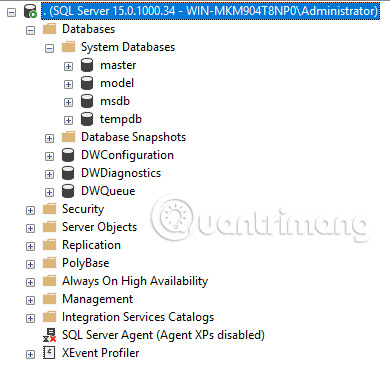
As you can see, here are the usual System Databases (such as master model, msdb and tempdb), but there are also three DW databases . (DWConfiguration, DWDiagnostics, DWQueue). If you have not seen these databases before, they are databases used to support PolyBase.
For the next test, the author will present the following query for his new SQL Server 2019 CTP 2.0 database:
SELECT SERVERPROPERTY('Edition') AS Edition, SERVERPROPERTY('ProductVersion') AS ProductVersion, SERVERPROPERTY('ProductLevel') AS ProductLevel; GO
When running this code, the following result is returned:

Here, you know that you are running the ' Enterprise Evaluation Edition ' version of the SQL Server 2019 CTP2.0.
You can see how easy it is to install SQL Server 2019 and all the features by just clicking through the various dialog boxes during the installation process. All DBAs should start exploring SQL Server 2019 as an initial step to completely conquer it. Quantrimang encourages all of you to consider SQL Server 2019's CTP 2.0 test. Are you ready to install SQL Server 2019 CTP 2.0 in the environment? Let us know in the comments section below!
Good luck!
See more:
- Instructions for installing SQL Server 2017 step by step
- How to completely uninstall SQL Server
- Data types in SQL Server
Was this article helpful?
Your feedback helps us improve.
Related Articles
 Instructions for installing MS SQL Server4 minutes read
 Instructions for installing and configuring DNS Server on Windows Server 201612 minutes read
 Install SQL server 2016 from the Installation Wizard (Setup)13 minutes read
 Instructions for installing SQL Server 2017 step by step12 minutes read
 Instructions for installing MDaemon Mail Server6 minutes read
 Instructions for installing and configuring Microsoft Security Essentials9 minutes read
Reader Comments 0
Sign in with email or Google to join the discussion.