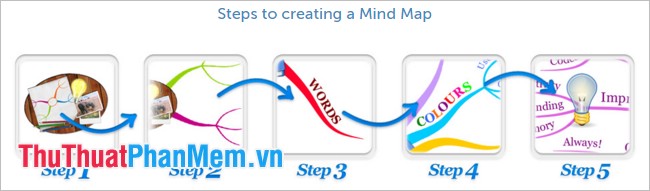
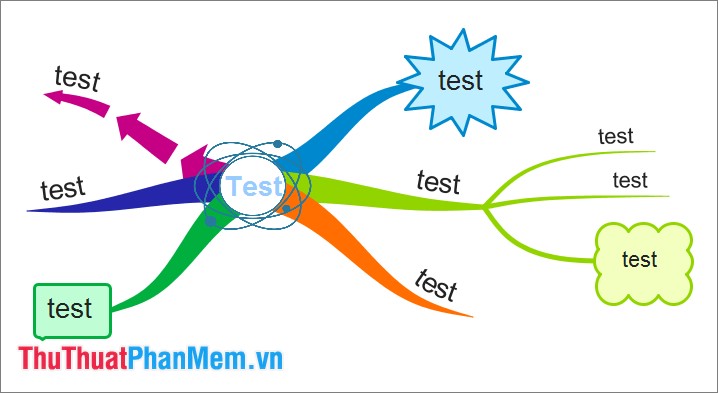
Instructions for drawing the mind map with Imindmap
Currently there are many software that help you draw mind maps, one of them is Imindmap software. With Imindmap, you will quickly create a vivid and creative mind map..
Currently there are many software that help you draw mind maps, one of them is Imindmap software. With Imindmap, you will quickly create a vivid and creative mind map.
If you do not know how to use Imindmap software to draw mind maps, you can refer to the following article. The article details how to draw a mind map with Imindmap .
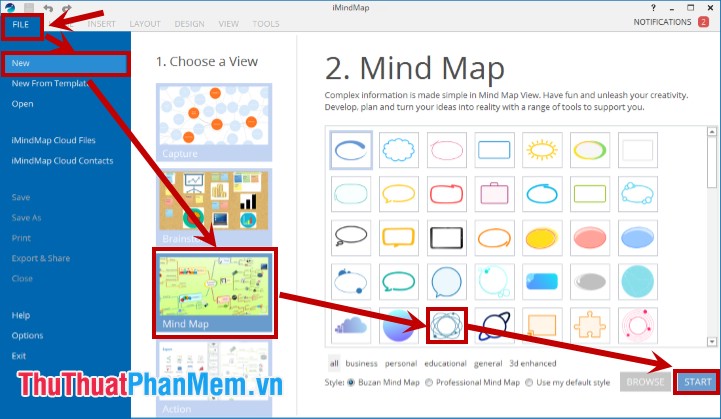
First, you need to download and install Imindmap on the system, after the installation is complete, launch the program and make a mind map with the steps below:

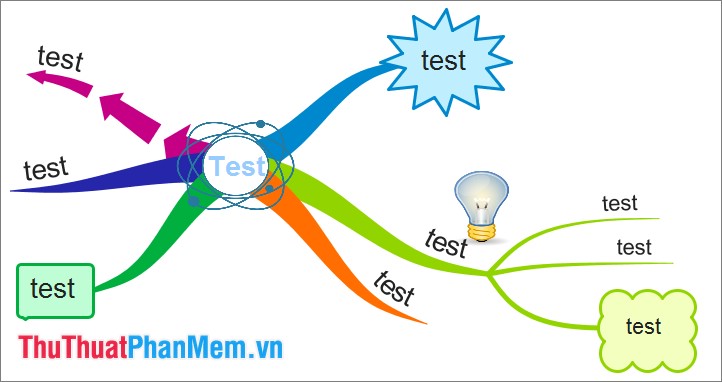
Step 1: Create a Central idea .
On the main interface of Imindmap you select File -> New -> Mindmap -> select the icon for central idea -> Start .
After selecting a central idea, the central idea appears on the interface you have just selected, next, double-click on the left and change the content, font, font size, font style as you like.
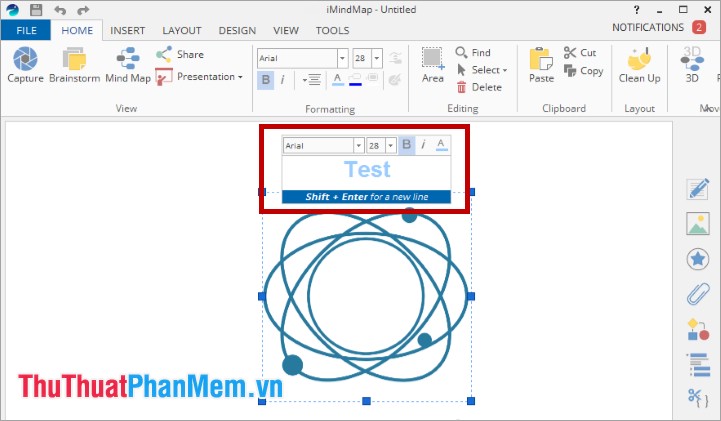
You can enlarge, reduce central idea by clicking on the central idea icon, there are 8 green knobs around. Hold down the left mouse button on any button and drag in to zoom out or drag out to enlarge central idea as you like.
Step 2: Add the branches.
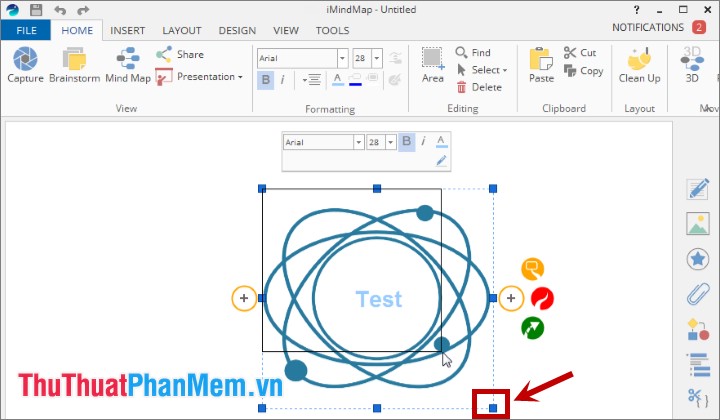
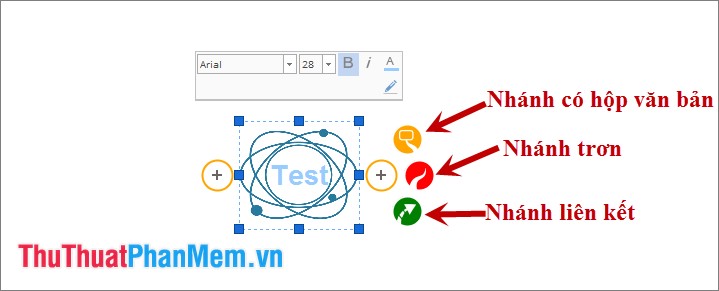
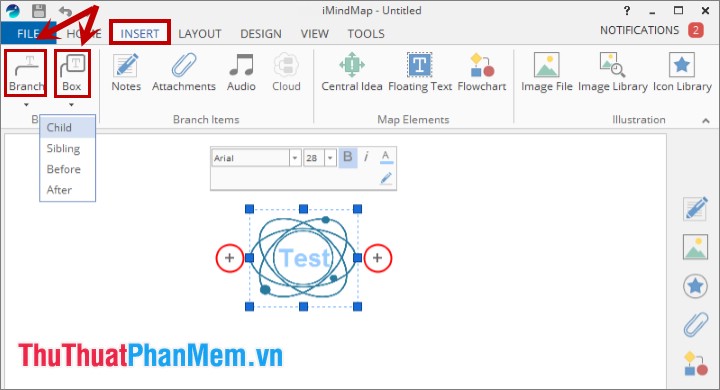
Imindmap has two types of branches: Branch (smooth branch) and Box Branch (branch with text box attached). You can add a branch by clicking the central idea that appears two + symbols, you select the plus sign and select the type of branch you want to add.
Or you choose central idea and choose Insert -> Branch -> Child (if you want to add a smooth branch). Select Insert -> Box -> Child (if you want to add a branch containing the text box).
To move the branch, click the branch you want to move, there appears a four-way arrow icon as shown below, hold down the left mouse button on the icon and drag the branch to the necessary position, then release the mouse cursor.

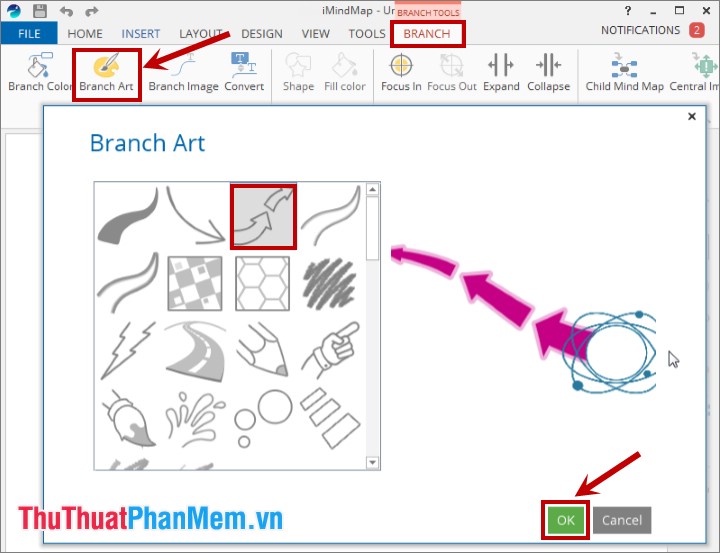
To change the type of branch you choose branch -> Branch -> Branch Art , the Branch Art dialog box appears, select the type of branch and click OK to change.
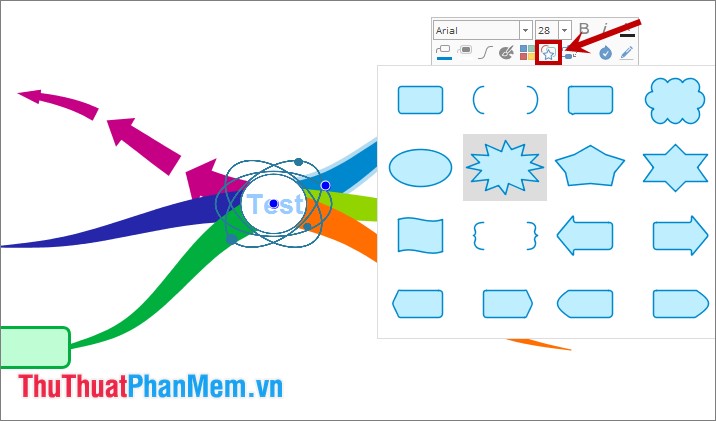
If you want to change the text box image of the branch containing the text box, select the text box and select the Shape icon . Then select the image you want.
Add a branch for the main branch: select the main branch to add and then select the icon to add plain or branch containing the text box. You can add multiple sub-branches to a main branch with the same actions.

Step 3: Add keywords.
For a branch with a text box, click the text box and enter keywords, edit the font, font style and font size for the branch. As for the smooth branch, click the branch and enter the keyword, edit the font, font style and font size for the branch.
Note: One keyword should be used for a branch.
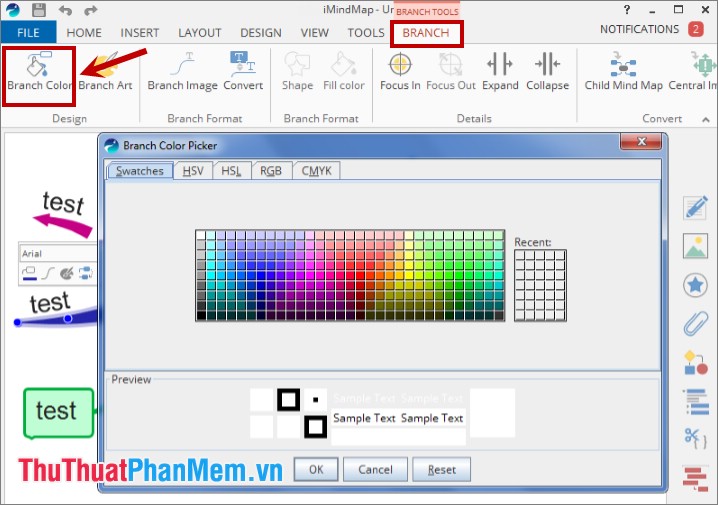
Step 4: Choose a color code for the branches.
Change the color for the branch you choose branch -> Branch -> Branch Color , the Branch Color Picker dialog box appears, select the color for the branch and click OK to change.
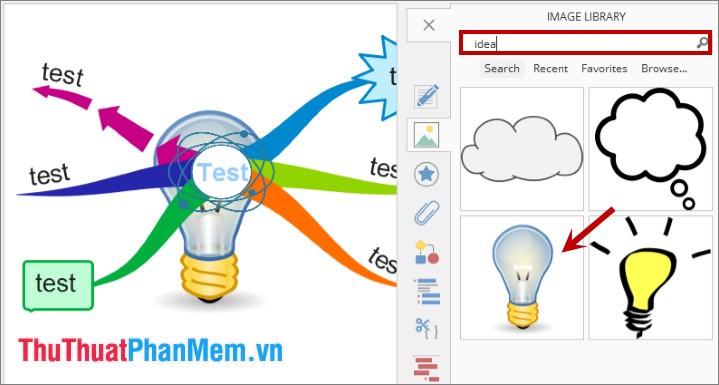
Step 5: Add the image.
To make the diagram more vivid, easier to think, you can add images describing the idea of the branch by clicking the Images icon in the menu on the right or select Insert -> Image Library to open the Image dialog box Library .

Here you can find images in the library of Imindmap by entering keyword image to search in the Search the image library box and press Enter to search. Then select the image you need to add to the diagram.
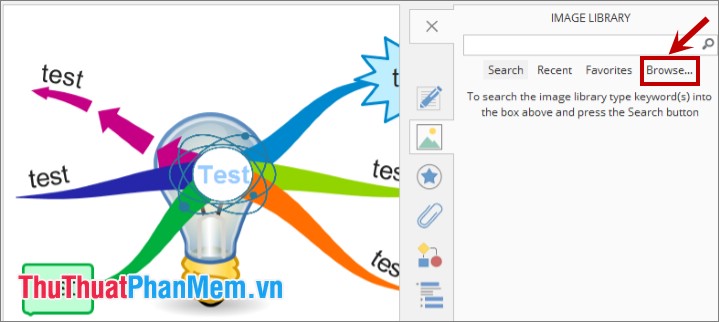
If you want to add images on your computer, select Browse and select the image file you want to insert.
To move an image, hold the left mouse button and drag the image to the position to place. To enlarge, reduce the image you make as enlarge, shrink the central idea.
Finally, after completing the mind map you can export the diagram to image files, documents, share via the web . by selecting File -> Export & Share . Export dialog box appears, you can choose the export type and follow the instructions to quickly export files or share files.

Thus, the article has guided you how to draw a mind map with Imindmap in detail. You just need to draw according to your ideas and arrange the editing of branches and images reasonably, you have a complete mind map. Good luck!