Table of Contents
This guide provides a practical overview of Instructions for Creating a Group on Messenger, including its main features, benefits, limitations, and important considerations.
1. Create Messenger group iPhone, Android
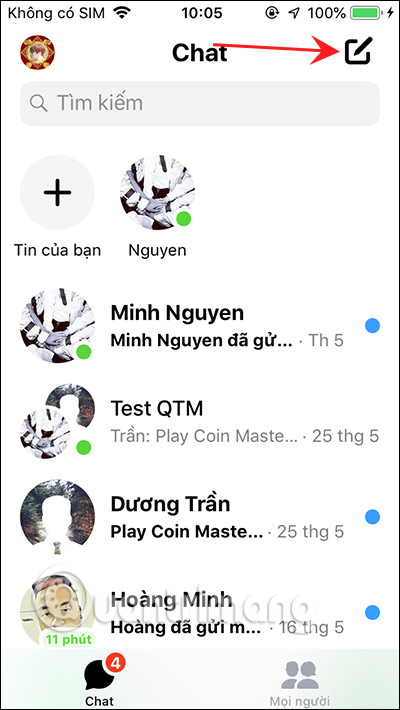
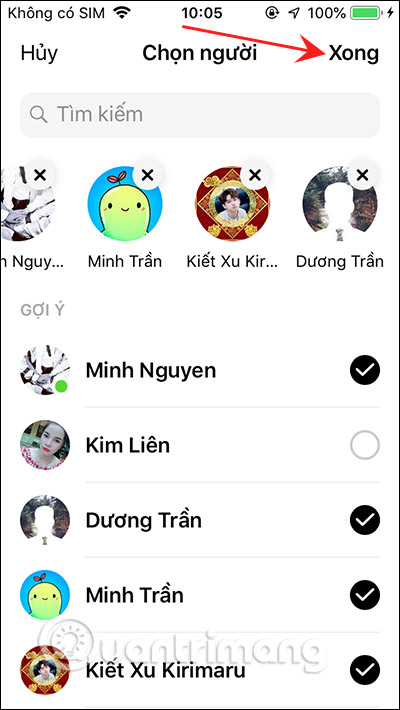
At Messenger interface we click on the pen icon at the top right corner of the screen. Then we choose the person who wants to create the Messenger chat group and then click Done in the top right corner. So you've created the chat group on Messenger.
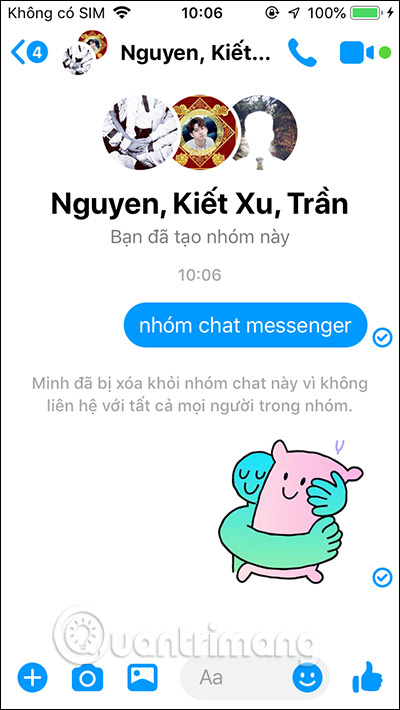
In the chat group interface, click the Edit button to change the look of the Messenger group. We will rename the chat or change the avatar of the Messenger group .
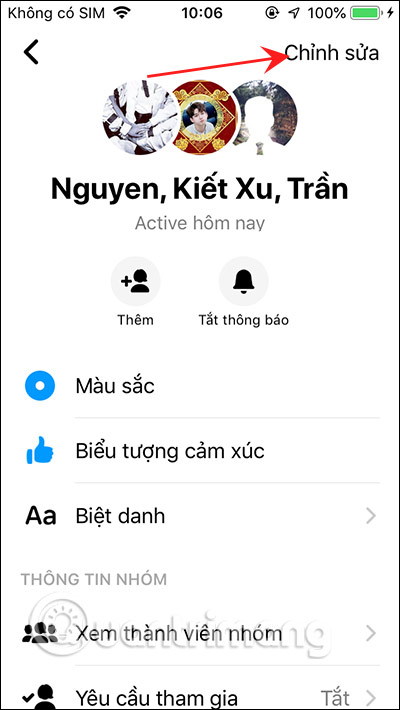
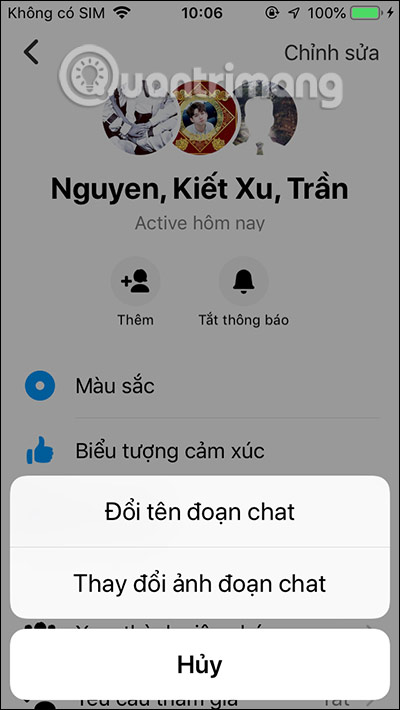
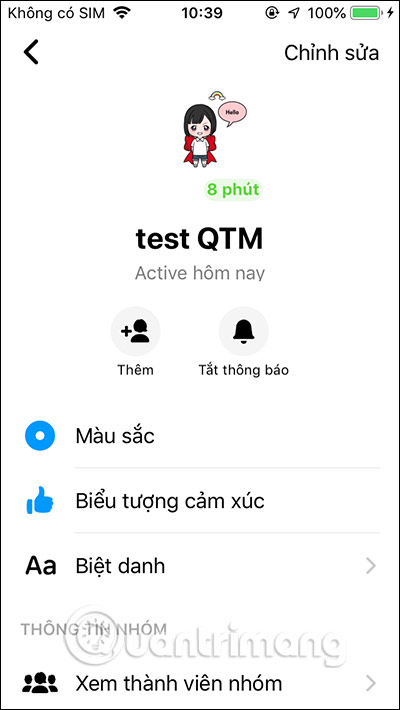
Manage iPhone, Android Messenger groups
Once you have created the Messenger chat group, as an administrator of the group we can assign someone as an administrator or block or delete someone from the group.
Scroll down to the Group Information section and click View group membership . When pressing and holding on a member name will display the option as below.
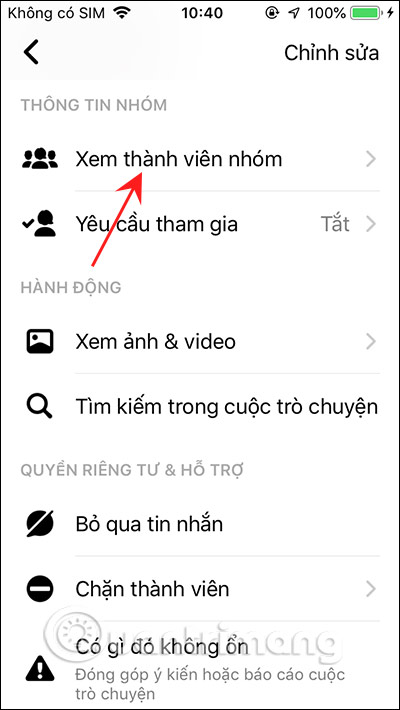
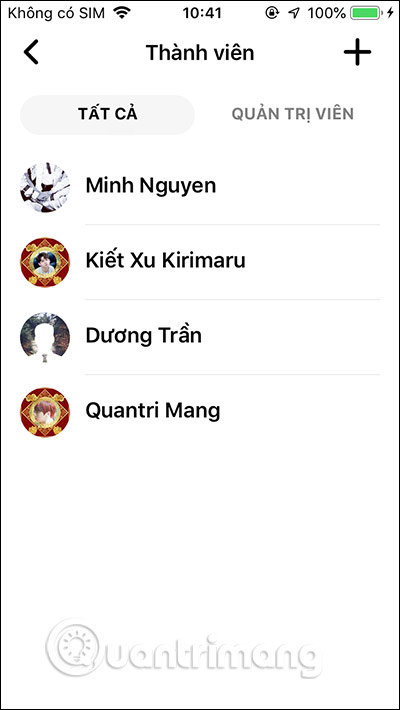
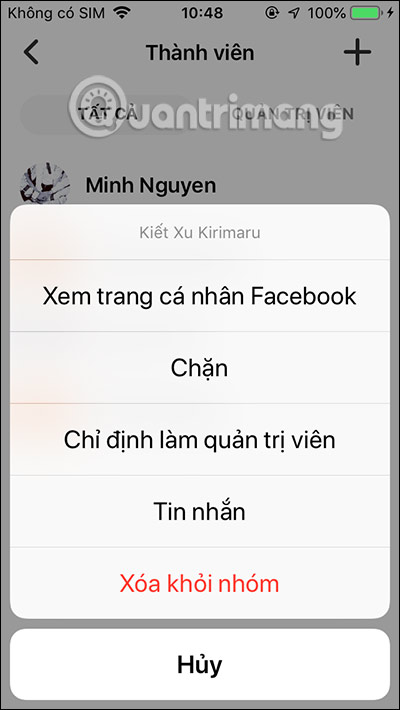
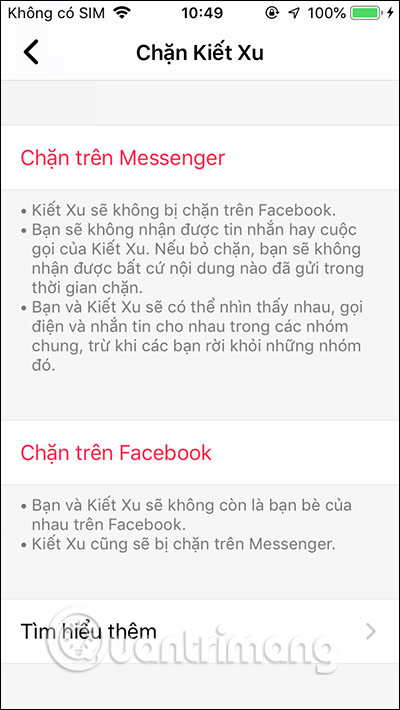
In addition we also have separate Block members to add Block option on Facebook.
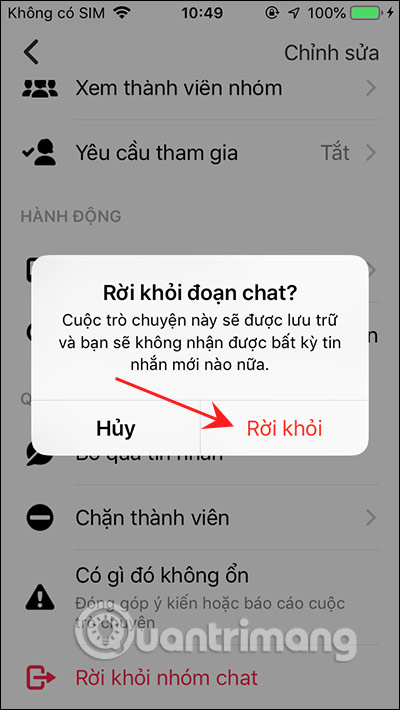
If the user wants to leave the Messenger group then we click Leave group chat then click Leave.
2. Create a group on Messenger PC
At the Messenger interface on the computer, we click the pen icon to create a new conversation. Then we enter the member name in the group .
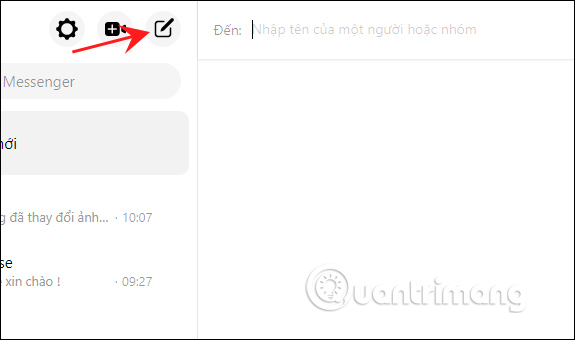
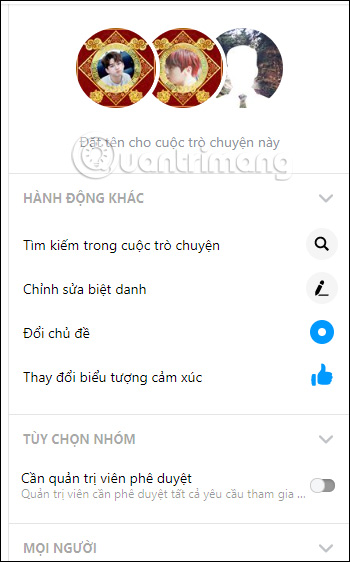
The chat group settings will be displayed on the right side of the interface. Here you can also rename the group, change the picture representing the Messenger group.
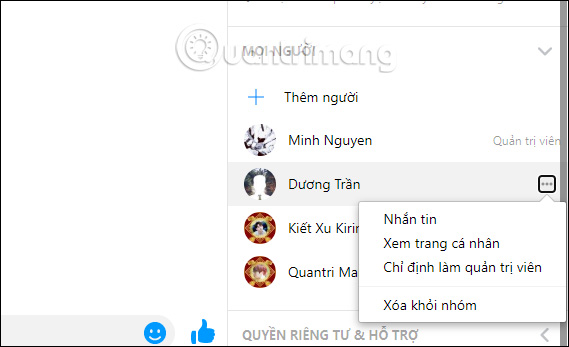
Scrolling down when clicking on the 3 dots icon next to each member's name will display a list of options as below.
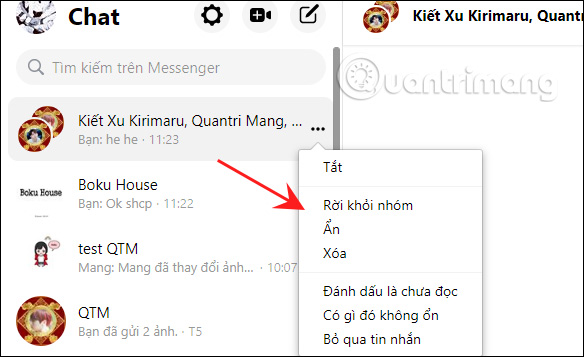
To delete a group, we click on the icon 3 dots next to the group name and also display the list as below.
FAQ
What should I know about Instructions for Creating a Group on Messenger?
Focus on the key features, requirements, limitations, and practical use cases explained in this guide.
How do I get the best results with Instructions for Creating a Group on Messenger?
Follow the recommended steps, use current software or information, confirm compatibility, and review settings before major changes.
Are there any risks or limitations?
Potential limitations depend on compatibility, data quality, cost, privacy, support, and how the product or method is used.
Related Articles
 How to Create a Poll on Messenger3 minutes read
 Group Video Call on Messenger, Video Call on Facebook Messenger: Explained6 minutes read
 Instructions for Free Group Calling on Facebook Messenger4 minutes read
 How to Stop Receiving Messenger Chat Groups Without Deleting the2 minutes read
 How to Call Group Videos on Facebook Messenger6 minutes read
 Guide to Calling Groups on Facebook Messenger Computers4 minutes read
Reader Comments 0
Sign in with email or Google to join the discussion.