Installing and Using a USB Drive
Installing and Using a USB Drive
Table of Contents
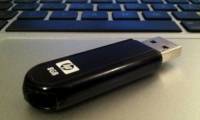
USB drives are the most common data storage and exchange devices today. Although the use of USB is very common, not everyone knows how to use them safely and effectively to avoid damaging the USB or losing the data contained inside.
Here's a way to install and use a USB drive
Install USB drive
- Like most other computer devices, the USB drive also needs to be installed with a driver program (Driver) before it can be used. However, nowadays most USB drives are recognized by the operating system and automatically install drivers for them the first time they are attached to the computer, so users often do not care and pay attention to the problem. This.
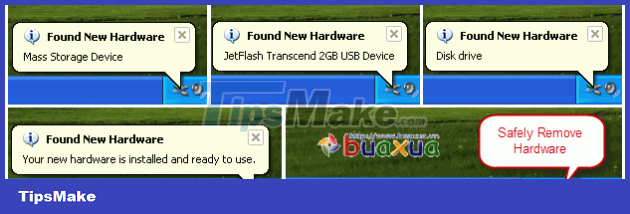 The operating system recognizes and automatically installs the driver program for USB
- If the installation goes well, an icon will appear in the system tray (lower, right corner of the screen) and when opening My Computer or Windows Explorer (Windows) will appear an additional drive, this drive is usually named Removeable Disk or the name of the USB.
Format and name the USB drive
- Newly purchased USB drives should be formatted to check and avoid read/write errors later.
- Plug the USB drive into the computer. Open My Computer or Windows Explorer (Windows). Right-click the USB drive's icon and select Format .
 usb_format
- Name the USB in the Volume Label box, if you don't want to name it, skip it. Keeping the parameters available, press the Start button .
 Name the USB in the Volume Label box
- A warning box appears that formatting will erase all data in the USB, click Ok to agree.
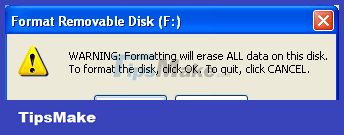 A warning box appears that formatting will erase all data in the USB
- The program will do the formatting of the USB drive.
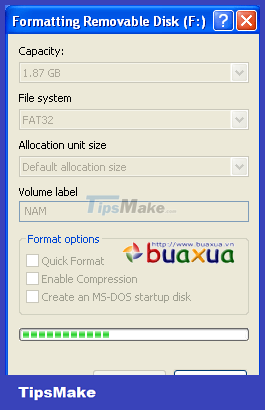 The USB drive is being formatted
- If there are no errors, a message will appear that the formatting is complete. Click Ok to close this bulletin board.
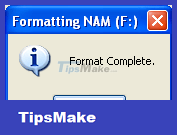 Formatted USB drive
- Then continue to click Close to close the reformatting program.
Set or rename the USB drive
- Name each USB to make it easier to use and manage them, for example, to help distinguish when two USBs are plugged into the computer.
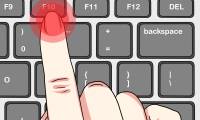
- In My Computer , right-click the USB drive's icon and select Rename , enter a name and press Enter . The drives can also be named or renamed by selecting them and pressing the F2 key .
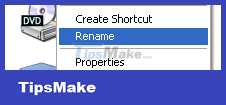 Set or rename the USB drive
Check the capacity of the USB drive
- Right-click the USB drive's icon and select Properties . The information sheet about the USB drive appears, the parameters to pay attention to: Used space, Free space , Capacity (Total capacity of the USB drive).
 Check the capacity of the USB drive
The capacity of USB drives is often converted by manufacturers from bytes to GB, so the actual capacity will not match the number of GB written on the USB body.
Although the USB drive doesn't have any data yet, in the spec sheet it can be seen that it also takes a little space to hold its own information.
Notes on using USB drives
- Once plugged into the computer, the USB drive is used just like any other hard drive on the computer.
- On the USB body there is an indicator light, normally the light will be on when plugged into the computer and in the standby state, the light will flash continuously when there is a data write/erase operation, and the light will turn off after using the safe remove function. and unplug the USB from the computer.
- Before removing (unplugging) the USB from the computer, it is recommended to use the Safely remove hardware function, this function helps to turn off the USB to ensure that the data will not be damaged before it is fully written to the USB or avoid An electric shock occurs which may damage the USB. (See instructions on how to use external devices).
- Be careful to hold the USB body firmly when unplugging it from the computer, to prevent the USB from slipping out of the case.
- Should use a strap to avoid dropping or losing the USB.
- Do not let the USB fall into the water. Some USBs can be waterproof, but only to a normal extent such as wet due to rain, spilled water, etc.
Was this article helpful?
Your feedback helps us improve.
Related Articles
 Instructions for installing and using Google Drive on phones and computers4 minutes read
 4 tools to create USB boot install Windows 104 minutes read
 How to convert a GPT hard drive format to an MBR while installing Win with the CMD command3 minutes read
 How to Format a PC15 minutes read
 The simplest way to create a virtual drive using Virtual Drive3 minutes read
 How to create a virtual drive (Virtual Hard Disk) on Windows 10 without installing any additional software4 minutes read
Reader Comments 0
Sign in with email or Google to join the discussion.