Part II: Installing the hard drive into the system
In Part I, I became familiar with the hard drive connection standards and selected for myself the appropriate type of hard drive to install. This section will work right on the system to install the hard drive to use.
See Part I: Hard drive connection standards
In Part I, I became familiar with the hard drive connection standards and selected for myself the appropriate type of hard drive to install. This section will work right on the system to install the hard drive to use.
To ensure safety before performing the installation, you need to remove all of the computer's power plugs from the power outlet, wearing the device to prevent static electricity. Next, you need a screwdriver to open the lid of the computer case, and find the 3.5-inch tray, if there is no floppy drive, the tray will be just below the CD-Rom drive, however, depending on The type of case you're using is different.
As a note, if you install the second additional hard drive for the system, you have to leave a space between the two hard drives, since the hard drives generate quite a bit of heat when operating, especially the hard drive lines with 7200 rpm, temperature will greatly affect hard drive life. Installing the hard drive into the tray and screwing on the two sides will keep the hard drive fixed when operating.

IDE (left) and SATA hard drives (right) on the same tray.

Both sides of the hard drive body always have screw holes to attach to the tray.

Molex source cable and IDE cable for ATA hard drive (IDE).
PATA hard drive (EIDE)
We need to set up jumpers before attaching cables to the hard drive. Jumpers will be Master if the hard drive you are about to install will install the operating system and be the main or only hard drive. Slave if the hard drive is an additional hard drive and Cable Select is dependent on the cable plugged into the 'Primary' slot on the motherboard.
The power supply will power the working hard drive, Molex 4-pin cable will do this job. Molex cable identification feature is that they have 4 wires (1 red, 2 black, 1 gold) which are led from the power supply in the computer case and matched with the power slot behind the hard drive. The other cable is an 80-pin IDE cable attached to the back of the hard drive.
An important point to note when plugging the Molex power cable and IDE cable into IDE hard drives, it is imperative to do this correctly. On the IDE (80-pin) body, there will be one outer edge branch with a distinctly different color to the entire cable body, attach the IDE and Molex cables so that the other edge branch color on the IDE cable and red wire on the power cable Molex and her husband (face) together (see picture).
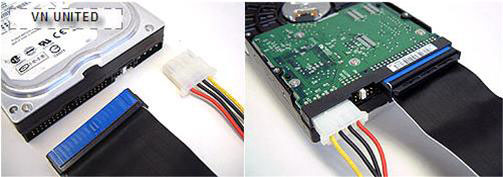
Attach the cable so that the red color of the power cable is directed to the colored branch of the IDE data cable.
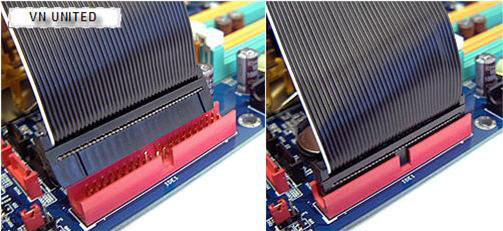
Attach the other end of the IDE data cable to the slot on the motherboard.
The other end of the IDE cable will attach to the IDE connector on the motherboard. If the hard drive that you attach to the system is unique, the IDE cable part attached to the motherboard must be connected to the primary 'Primary' IDE slot on the motherboard, please refer to the accompanying tutorial. motherboard.
SATA hard drive
Similar to IDE hard drives, SATA drives also need SATA power cables and data cables. Installing cables for SATA hard drives is somewhat simpler because the connector will fit when you plug it properly. (See picture).
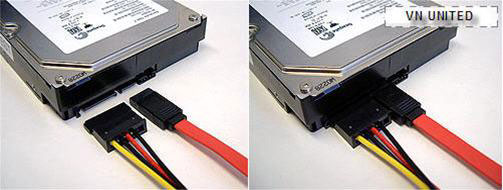
Attach the cable to a simpler SATA hard drive.
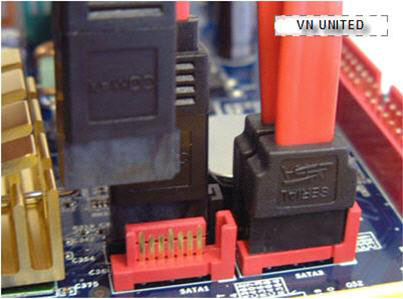
Attach the other end of the SATA data cable to the slot on the motherboard.
Next, plug the other end of the SATA data cable into the SATA connection slot on the motherboard. There is no need to set jumpers at Master, Slave or Cable Select because each SATA hard drive has its own single cable.
The installation of the hard drive is complete, the next step is to verify that the installation is correct and whether the hard drive is working properly with the system. Part III will help you understand how to test the installation .
ONLINE
Was this article helpful?
Your feedback helps us improve.
Related Articles
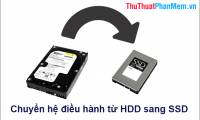 How to transfer Windows operating system to a new hard drive (from HDD to SSD)3 minutes read
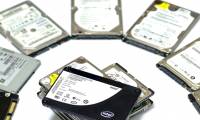 What is a hard drive? There are several types?6 minutes read
 25 interesting things about hard drives you may not know11 minutes read
 Speed test to 'check' the health of the hard drive5 minutes read
 5 hard drives with the best reliability6 minutes read
 How to Create a Partition7 minutes read
Reader Comments 0
Sign in with email or Google to join the discussion.