Install Windows 8 on USB to carry and use as needed
Install Windows on USB to be able to use it anytime, boot into Windows from USB and use as usual, all thanks to the portable Windows version installed on USB using Windows To Go..
TipsMake.com - For a long time Linux users have been able to install OS on a portable USB drive, but with Windows this function has just been supported. This article will guide you how to install Windows 8 on a USB drive so you can take it with you anywhere.
To perform the installation, you need a PC running Windows 8, a Windows 8 installer and a USB or external hard drive.
Windows To Go
Press Win + X and select Control Panel from the context menu.
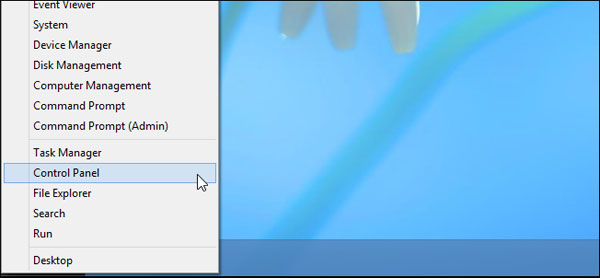
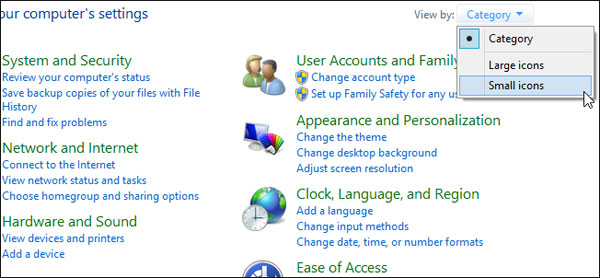
Change the Control Panel to Small Icons view.
We will see Windows To Go at the bottom of the Control Panel, click on the Windows To Go icon.

Now, select the USB drive you want to use as a pocket Windows folder, then click Next .

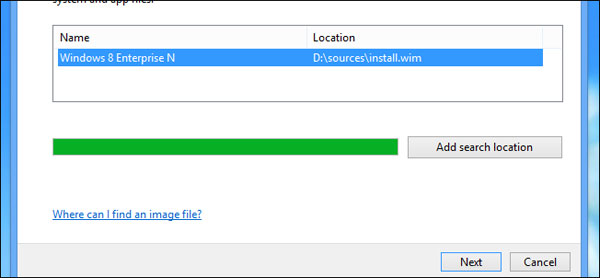
The installation window will automatically scan the CD / DVD drive and the external drives for a valid Windows installation file. Once you've chosen the Windows version, select Next .
Note : If you save the installation file to another location, you will need to use the Add search location function.
The user can then set the BitLocker password if desired.

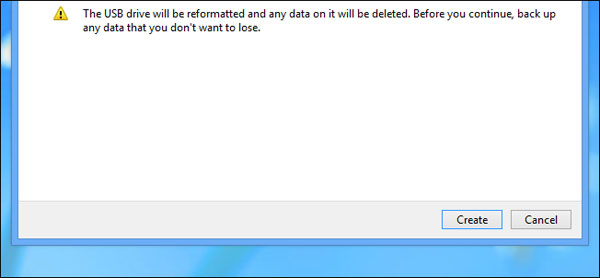
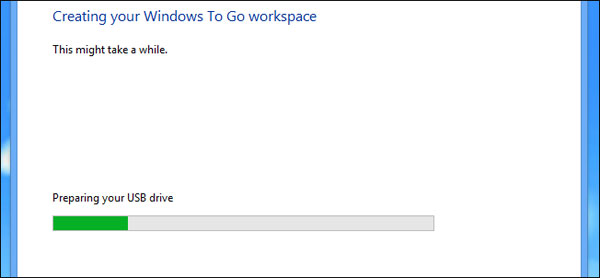
At the final setup screen, a warning will appear informing you that the USB drive will be reformatted. Click Create to continue.
Now we have a bootable USB drive with the Windows operating system on it.
Reformat the USB drive using Windows To Go
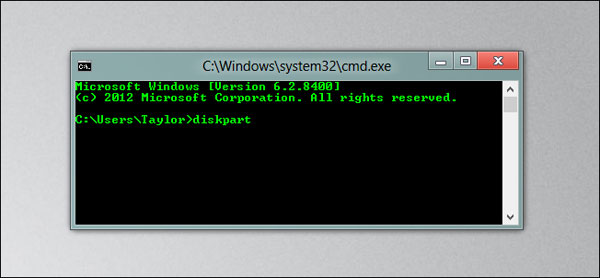
If you're done and want to reformat the drive, you'll need to open a command prompt, type diskpart and press Enter .
After entering the Diskpart command, we need to find out which drive is the drive that needs to be reformatted. Use the list disk command to display all the drives currently connected to the computer. Keep in mind the drive number as we will need it in the next step.
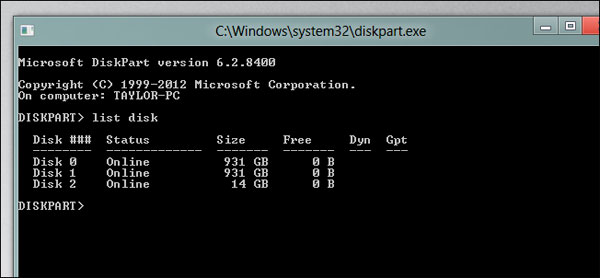
Use the select disk command to select the drive with the known serial number.

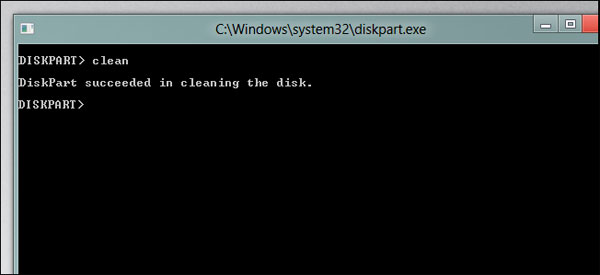
The drive has been selected and we can clean it up using the clean command.
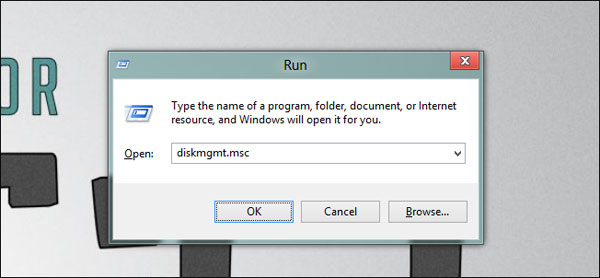
Now, press Win + R key combination to display the Run box and open Disk Management.
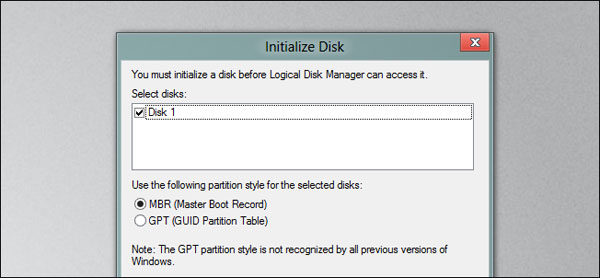
After the Management console driver opens, perform a drive initialization.
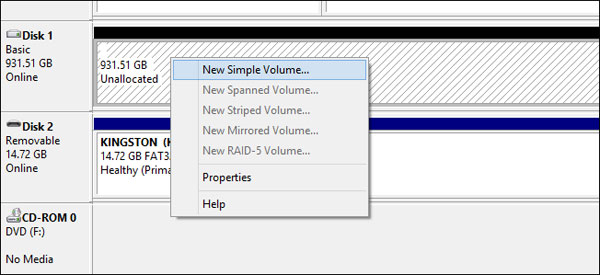
Perform drive partition creation.
That is all to be done. Good luck!