How to Format Windows
This wikiHow teaches you how to format any hard drive connected to your Windows 10 PC. If you just want to format one drive connected to the PC, you can do so using the Disk Management tool. If you want to completely erase all data,...
Table of Contents
Method 1 of 2:
Deleting All Data and Reinstalling Windows
-
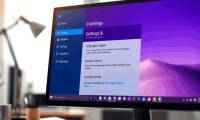
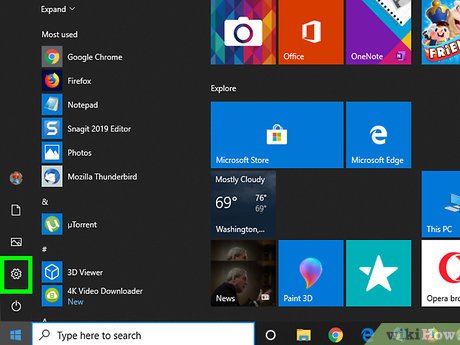 Open your Windows Settings. You'll find its gear icon in the Start menu near the bottom-left corner.[1]
- Formatting can take while (sometimes hours) depending on your hard drive(s). Make sure your computer is plugged into a reliable power source so the formatting process is not interrupted.
- If you can't sign in to the PC, boot to the sign-in screen and press ⇧ Shift as you select Power > Restart. When the PC comes back up, select Troubleshoot, then Reset this PC, and then skip to step 5.
-
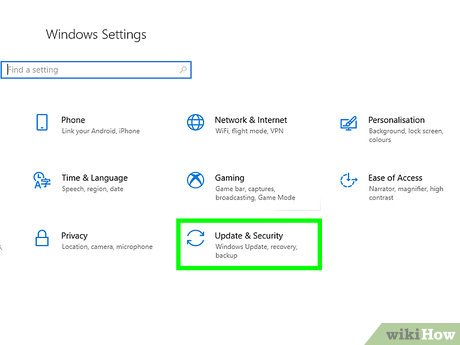 Click Update & Security. It's the option with two curved arrows.
 -
 Click Recovery in the left panel. Your recovery options will appear in the right panel.
 -
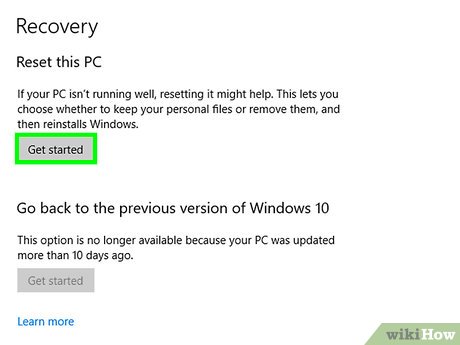 Click Get Started under "Reset This PC." It's the first button in the right panel.
 -
 Select Remove everything. This option will completely wipe the hard drive before reinstalling Windows. All of your data will be deleted and you'll have to reinstall any third-party apps after the process completes.
 -
 Click Change settttings. Two new options will appear.
 -
 Slide the switch to the Onposition. Your hard drive will not be formatted unless you toggle on this switch.
-
 Click Confirm. This begins the process of wiping the data from your computer and reinstalling Windows 10. When the PC is finished reinstalling, you'll be prompted to set it up as new.
Method 2 of 2:
Formatting a New or Non-Primary Hard Drive
-
 Open the Disk Management tool in Windows. If you want to format a hard drive connected to your PC that isn't the primary (Windows) hard drive, use this method. Here's how to open the tool:[2]
- Press ⊞ Win+S to open the search bar.
- Type disk management.
- Click Disk Management in the search results.
- A list of partitions appears in the top-half of the window, while a list of physical hard drives appears at the bottom.
-
 Create a partition if the drive is brand new. You'll only need to do this if you see Unknown or Not initialized next to the disk number in the bottom half of tool. Here's how to prepare a new drive for formatting:[3]
- Right-click the drive and select Initialize Disk.
- Check the box next to the hard drive.
- Select MBR (Master Boot Record) if the drive is smaller than 2TB, or GPT (GUID Partition Table if it's 2TB or larger.
- Click OK.
- Right-click the "Unallocated" box to the right of the disk and select New Simple Volume.
- Click Next.
- Specify a partition size (optional) and click Next.
- Select a letter for the new drive and click Next.
- Skip to Step 5.
-
 Right-click the drive or partition you want to format. A context menu will expand.
 -
 Click Format on the menu.
 -
 Type a name for the hard drive into the "Volume label" field. This is how the drive will be identified on your computer (e.g., Games, Music, New Drive).
 -
 Select NTFS from the "File system" drop-down menu. This is the file system typically used with Windows 10. If you don't have specific instructions to choose another file system, this option is what you need.
 -
 Select Default from the "Allocation unit size" menu. If you have specific instructions to specify an amount here, you can do so. Otherwise, the default option works for most.
 -
 Check the box next to "Perform a quick format" (optional). A full format can take several hours because it also checks the drive for damage.[4] A quick format just formats the drive without doing an in-depth check.
 -
 Click OK to format the drive. A confirmation window will appear.
- Formatting can take while (sometimes hours) depending on your hard drive(s). If you're using a laptop and it isn't plugged in to a power source, plug it in now.
-
 Click OK to confirm. The drive will now be formatted with the selected parameters.
Was this article helpful?
Your feedback helps us improve.
Related Articles
 Instructions to format USB Pendrives with Command Prompt3 minutes read
 How to change the date and time format on Windows, change the slash to a dot.8 minutes read
 How to change number format in Windows 112 minutes read
 4 ways to fix USB errors without formatting: 'Windows was unable to complete the format'5 minutes read
 How to change the date and time format on Windows?6 minutes read
 How to format a drive with ReFS in Windows 103 minutes read
Reader Comments 0
Sign in with email or Google to join the discussion.