Table of Contents
Follow the instructions below to share sticky notes between computers efficiently and safely. Each section focuses on the actions, settings, and troubleshooting details that matter most.
You don't need to depend on Google Drive or use a simple but manual way of copying and pasting to transfer notes in Sticky Notes from one computer to another. You can now do this with Sticky Notes 3.0+.
How Share Sticky Notes Between Computers Works
Last year, Microsoft released Sticky Notes (3.0) with updated October 2018 Update. This new Sticky Notes version has some interesting features such as Dark Mode, format and search function. Not only that, it also provides the ability to sync notes between computers, Android phones, and other iPhones. This guide explains how to share notes between computers running different operating systems.
Note : This method only works with Windows 10 computers because previous Windows and macOS versions do not support updating Sticky Notes.

To share and sync Sticky Notes with another Windows 10 computer, you need to sign in with Microsoft account to Sticky Notes 3.0+ on both computers so that Sticky Notes automatically appears on the new device.
However, Note that the changes you make on a computer also affect other computers because the synchronization process is still in progress.
How to login to Sticky Notes
Step 1 . Launch the Sticky Notes application on a Windows 10 computer. If not updated, update it.
Step 2 . If Sticky Notes appears on the desktop, follow the steps below. If you only see a list of Sticky Notes notes, go to Step 3.
Touch the three dots icon at the top of the note and select NotesList From the menu.
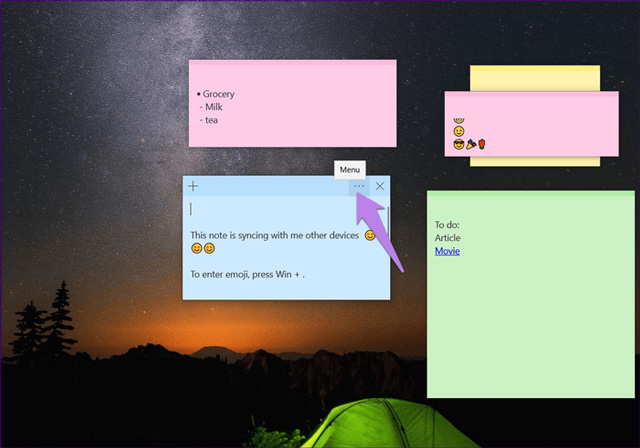
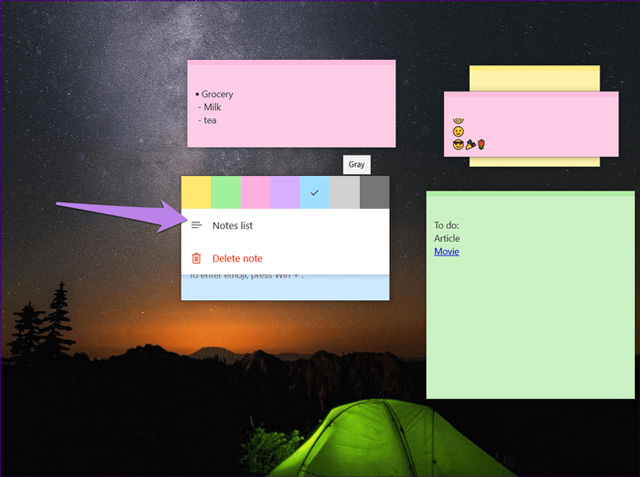
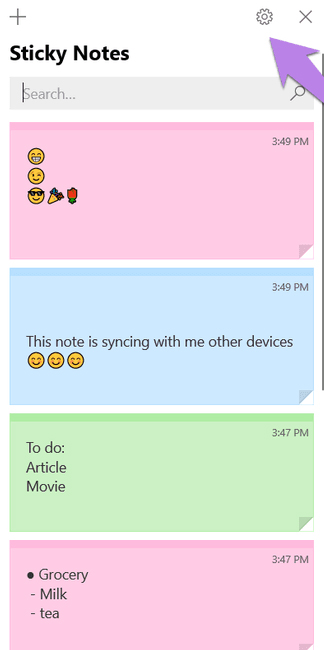
Step 3 . On the Sticky Notes list screen, touch the gear icon at the top.
Step 4 . On the next screen, click Sign in And sign in to your Microsoft account.
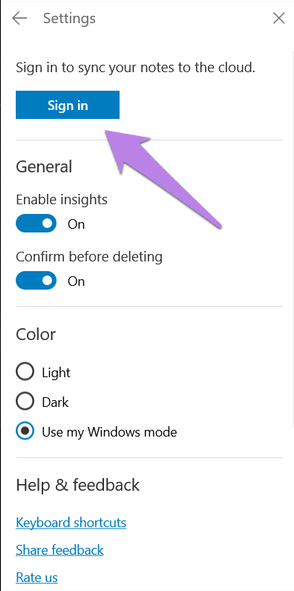
Step 5 . Repeat the above step for another Windows 10 computer. Notes will automatically appear in both applications on two computers.
Another way to share Sticky Notes is to use the Outlook application for Windows and macOS computers.
Step 1 . Update Sticky Notes and sign in to your Microsoft account as above.
Step 2 . Open the Outlook application on your computer and sign in to the same account as on Sticky Notes.
Step 3 . In the Outlook application, click the Notes Icon at the end. If you don't see it, click the first three dots icon, then click the Notes icon. You will see Sticky Notes here.
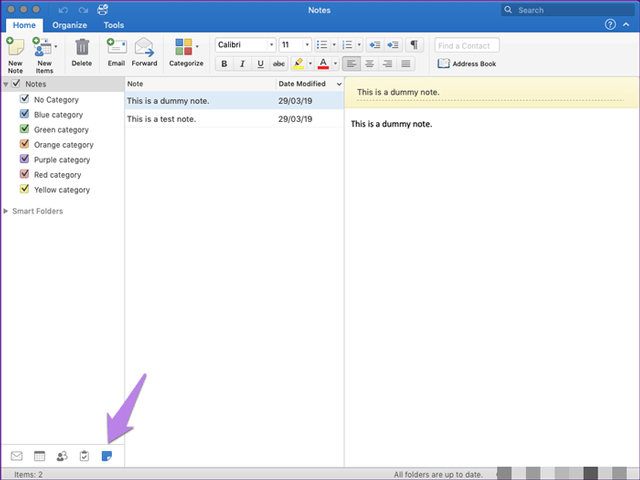

This can be done on any device running different operating systems like Windows, macOS, Linux. etc.
Sticky Notes has a web version, you can view online notes at https://www. onenote. com/stickynotes. Open the URL and sign in to the same Microsoft account that you use for Sticky Notes on a Windows 10 computer. Similarly, any changes you make above an application will affect the other side note.
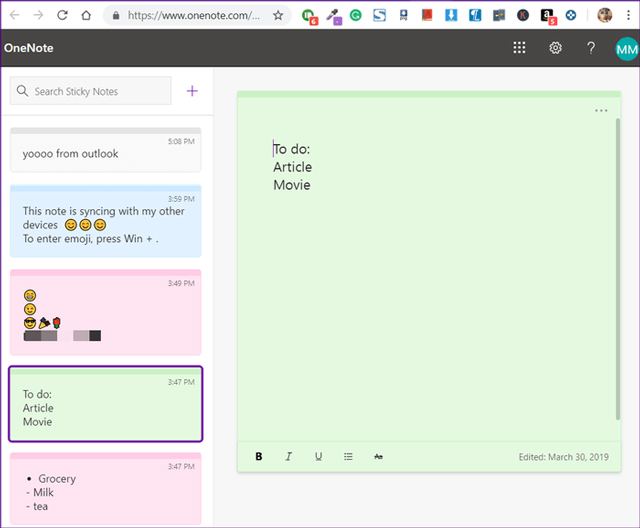
However this method has a drawback that you need to access the website whenever you want to use it. To avoid this, you can create your Sticky Notes application using Chrome. This way, you'll add a shortcut icon on the desktop, click directly on it to see notes on Sticky Notes in a separate window.
How to create Sticky Notes application with Chrome
Step 1 . Launch Google Chrome browser and go to https://www. onenote. com/stickynotes.
Step 2 . click the three dots icon on top of Chrome and select More tools> Create shortcut .
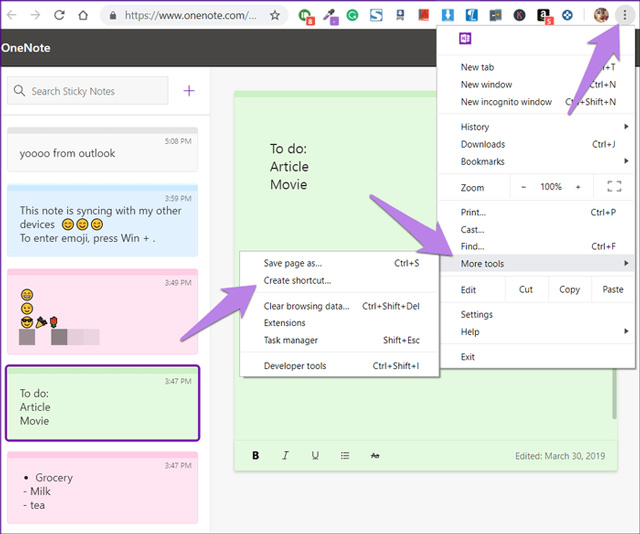
Step 3 . A dialog box appears, click Create .

You will see Sticky Notes icon on your computer screen, launch the app to view Sticky Notes right on your desktop.
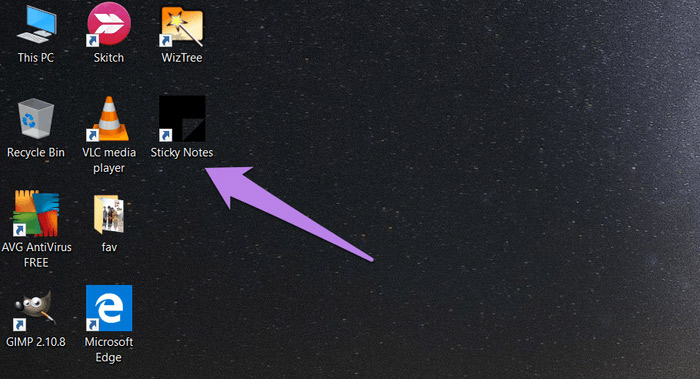
You can also access notes on your phone (Android and iPhone) using the OneNote app.
If it is not possible to share the note with any of the three methods above, try some of the following measures to fix the problem.
1. Update Sticky Notes application
As mentioned earlier, the sync utility is only available on Sticky 3.0+ and above. So update the app from Microsoft store.
2. Log out of the app
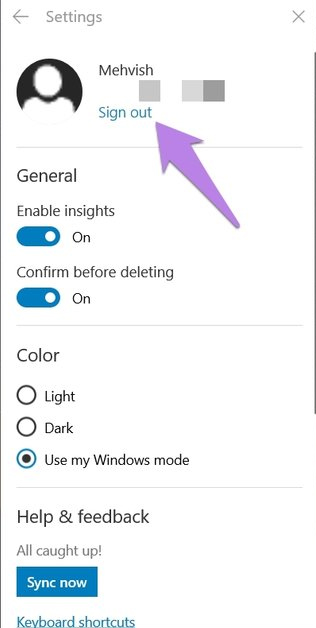
If the app is updated, but the notes are not synced, sign out of Sticky Notes on both sides. Then login again. To log out, go to Settings And click Sign out .
3. Manual synchronization
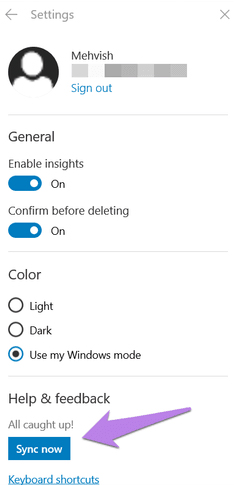
Sometimes because the Internet is slow, it is not possible to synchronize automatically, you need to synchronize notes manually, go to Settings And then click the Sync now Option.
These are three ways to sync Sticky Notes to computers running different operating systems.
I wish you all success!
FAQ
What should I prepare before I share sticky notes between computers?
Review the requirements in the guide, confirm that your device or software is compatible, and save important work before changing settings related to share sticky notes between computers.
Why might share sticky notes between computers not work as expected?
The most common causes are incompatible versions, missing permissions, incorrect settings, or an interrupted internet connection. Recheck each step and restart the app or device when appropriate.
Can beginners follow these share sticky notes between computers steps?
Yes. Follow the steps in order, avoid skipping confirmation screens, and compare your interface with the screenshots because labels may differ slightly between versions.
Related Articles
 How to Use Windows Sticky Notes as the Ultimate Productivity Tool6 minutes read
 Instructions on How to Type Vietnamese on Sticky Notes4 minutes read
 Tips for Using Sticky Notes in Windows13 minutes read
 How to Create a Sticky Note on a Mac's Dashboard6 minutes read
 How to Use Windows 11 Sticky Notes on All Devices: Practical Guide10 minutes read
 Invite to Download Vov Sticky Notes, the Note Creation App for $4 minutes read
Reader Comments 0
Sign in with email or Google to join the discussion.