How to use the DirectX Diagnostic Tool to troubleshoot problems.
Although the DirectX Diagnostic Tool (dxdiag.exe) is built into modern versions of Windows, very few users are aware of its existence. In this article, TipsMake will guide you on how to use the DirectX Diagnostic Tool to troubleshoot problems on your Windows computer.
Table of Contents
With the DirectX Diagnostic Tool, we can easily identify the causes of hardware problems used by multimedia applications, such as video players or music players.
Continue reading this article from TipsMake to learn how to use the DirectX Diagnostic Tool to fix problems on your Windows computer.

What is DirectX?
According to Wikipedia, "Microsoft DirectX is a set of application programming interfaces (APIs) for handling multimedia-related tasks, especially game and video programming on Microsoft platforms."
DirectX is commonly used to develop Windows and Xbox games. Therefore, if video games are experiencing stability and performance issues, the DirectX Diagnostic Tool can help diagnose the problem. Game developers and companies often recommend that players use the DirectX Diagnostic Tool for assistance when encountering issues during gameplay. Download DirectX
How to use the DirectX Diagnostic Tool to troubleshoot problems.
Launch the DirectX Diagnostic Tool.
Launching the DirectX Diagnostic Tool can only be done by using the executable file found at the path C:WindowsSystem32dxdiag.exe .
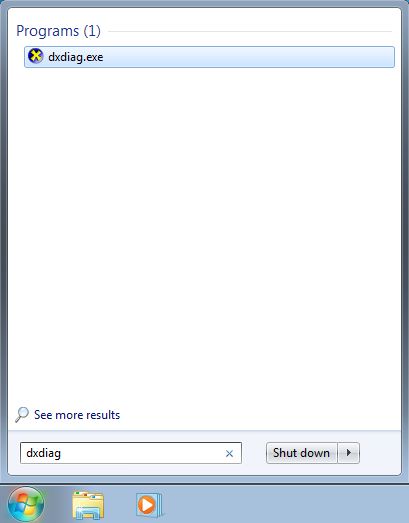
On Windows 7, type dxdiag into the Search box on the Start Menu, then in the search results list, click on dxdiag.exe.
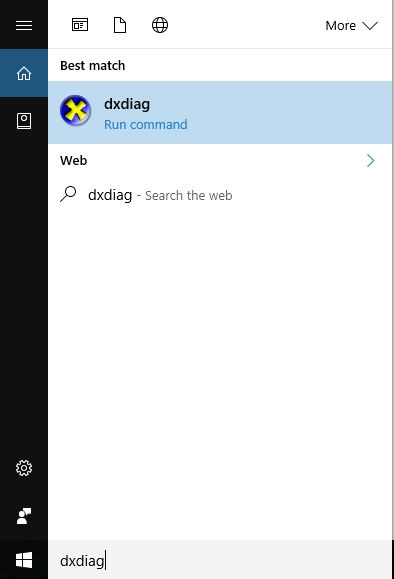
On Windows 10, type dxdiag into the Search box on the Start menu or Cortana, then in the search results list, click dxdiag.
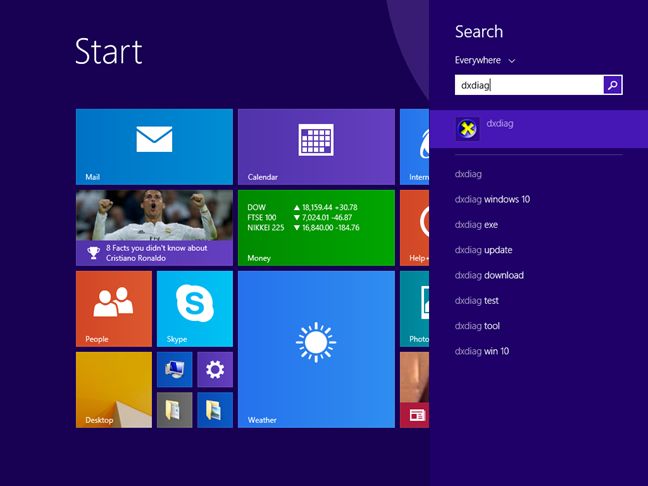
If you're using Windows 8.1, the steps are slightly different. First, access the Start Screen, then type dxdiag into the Search box and click on dxdiag in the search results.
Additionally, all Windows operating systems allow users to launch the DirectX Diagnostic Tool through the Run command window by typing the command ` dxdiag` and pressing Enter or clicking OK.
Check if the driver has been signed.
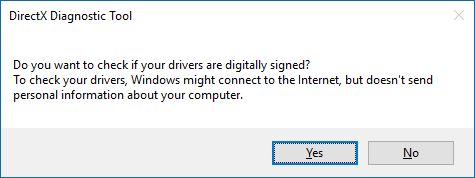
The first time you open the DirectX Diagnostic Tool, a small pop-up window will appear asking you to check if the driver has been digitally signed by Microsoft and approved by Windows Hardware Quality Labs. All you need to do is click Yes .
The DirectX Diagnostic Tool window will display at least four tabs, including the System, Display, Sound, and Input tabs.
Some tabs may appear multiple times, accompanied by sequential numbers. This means the DirectX Diagnostic Tool found multiple drivers for devices with similar functions.
For example, let's say a computer is equipped with two monitors; we'll see two tabs named Display 1 and Display 2. Additionally, there are several audio output devices such as a Creative Sound Blaster external sound card, Acer monitors with built-in speakers, onboard audio chips, and AMD graphics cards that can transmit audio via HDMI. Therefore, we'll have four tabs related to audio, one for each device.

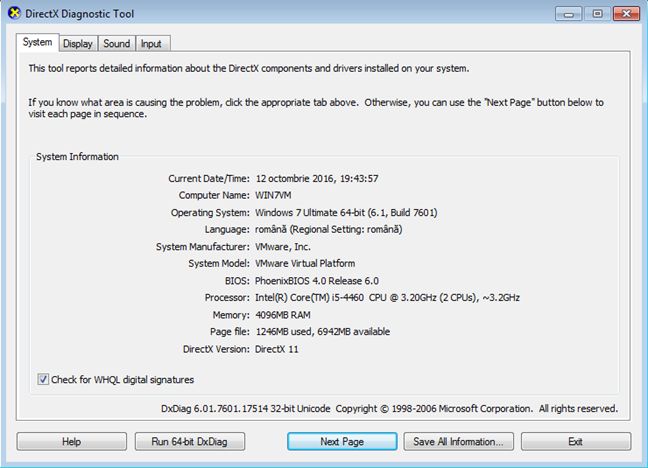
In the System tab , check the box labeled "Check for WHQL digital signatures" in the bottom corner of the window if it's not already selected. Click " Yes" when the tool asks for permission to assess whether all drivers have been signed. You can also deselect this option at any time if you wish.
On older versions of Windows, such as Windows 7, if you're using the 64-bit version, the DirectX Diagnostic Tool will check for 32-bit drivers you have installed on your computer the first time you launch it.
Therefore, the tool will not display enough information if your system has 64-bit drivers installed. Click the " Run 64-bit DxDiag" button if it appears. The 64-bit version of the tool will launch to re-evaluate your drivers and hardware configuration.
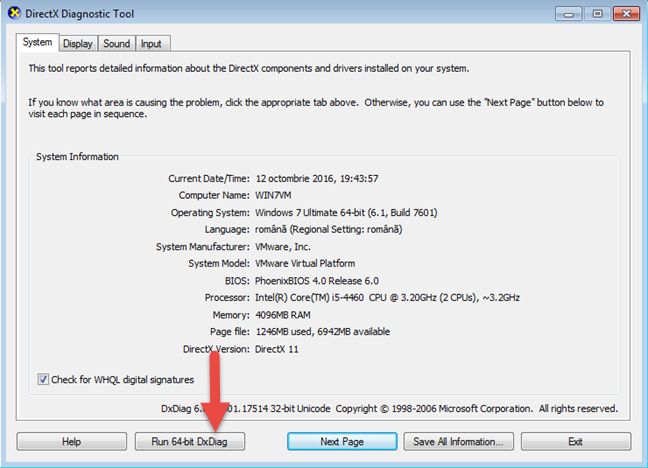
On Windows 10, you won't see this button because the DirectX Diagnostic Tool automatically checks for 64-bit drivers installed on the device every time the user launches the tool.
Obtain system information from DxDiag
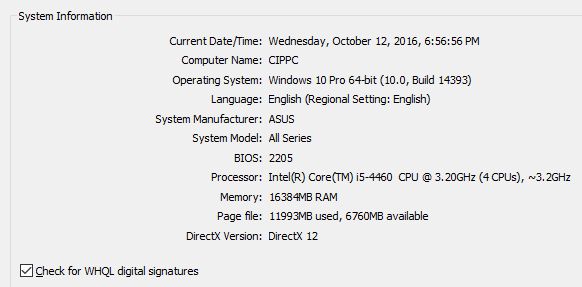
The System tab will display basic information about your computer or device, including the computer name, the operating system version being used, the motherboard (shown in System Manufacturer and System Model), the BIOS type and version, RAM capacity, and information related to the page file and the installed DirectX version.
Retrieve system screen information
Information related to the video card and monitor is displayed in the Display tab. Here you can find the name of the video card being used, manufacturer, chip type, total memory capacity, current resolution, connected monitor, the resolution of the monitor you are using, and details about driver settings (such as version, date, etc.).
The DirectX Features section will display a list of the most important DirectX features that have been enabled.
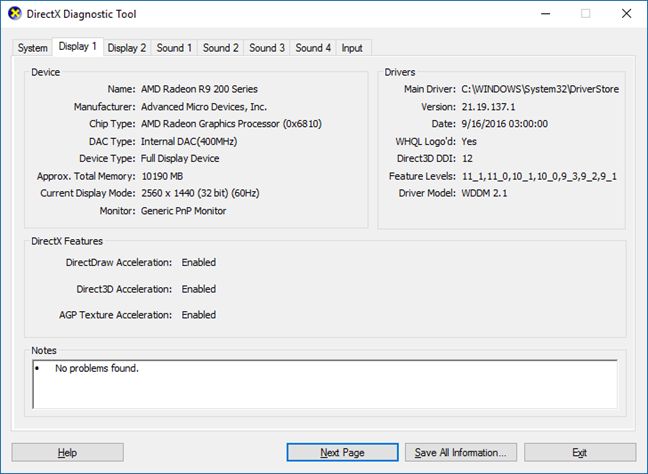
The Notes section displays the last identified problems. This information can be used to troubleshoot issues on your Windows system.
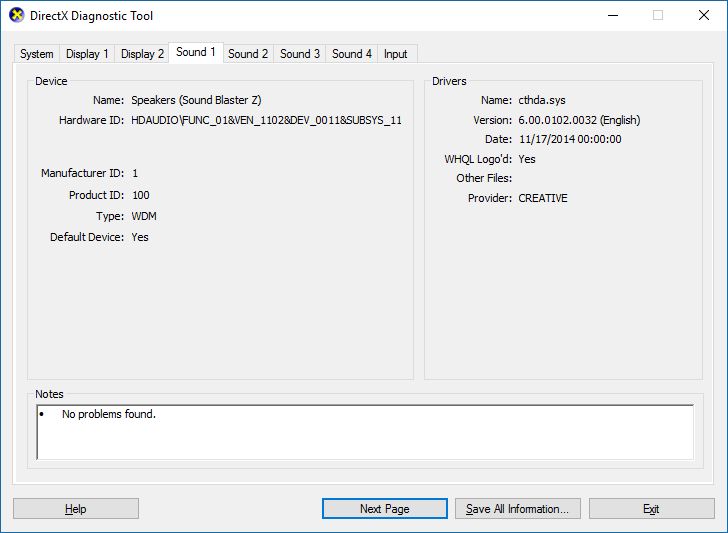
Retrieve system audio information
Information about the audio output options available on your Windows computer or other devices can be found in the Sound tab, including details such as the name and manufacturer of each device, and driver-related information such as the date and version. The last device issue is listed in the Notes section.
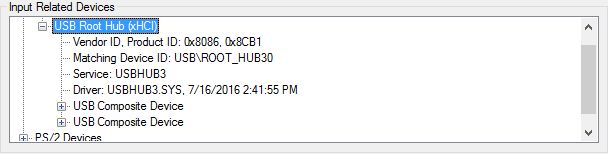
Obtain system input information.
The Input tab displays information related to connected input devices, such as keyboards, mice, gaming keyboards, or microphones.

You can view detailed information for each device (such as the driver file being used, version, etc.) by expanding each input device type in the Input Related Devices section .
The article above from TipsMake has just guided you on how to use the DirectX Diagnostic Tool to fix problems on your Windows computer. Additionally, you can easily check your computer's configuration using the dxdiag command here. If you have any questions or need clarification, please leave your comments in the comment section below the article.
Was this article helpful?
Your feedback helps us improve.
Related Articles
 Download the Indexer Diagnostic Tool for Windows 103 minutes read
 DirectX 11 - Download DirectX 11 here2 minutes read
 Effective network diagnostics with Windows Network Diagnostic3 minutes read
 15 diagnostic tools to check Windows PC health12 minutes read
 What is DirectX 12? How important?6 minutes read
 What is Microsoft DirectX?8 minutes read
Reader Comments 0
Sign in with email or Google to join the discussion.