Table of Contents
The process for use brill to create notes via voice on iPhone is straightforward once you know where to find the right controls. The steps below explain what to do and what to check.
The note maker is available on the iPhone, direct entry of note content and additional features like creating passwords for iPhone notes. And if users wants to add a method to create notes on the iPhone, the Brill application can be used. This application has the main feature of voice notes, support for up to 60 different languages including Vietnamese. So the process of importing notes is much faster.
The notes created on Brill are managed through folders, tags and classification. The notes also have text sharing, email or AirDrop. The voices recorded on Brill are not stored so ensure more privacy for the notes created. The steps below explain how to create voice notes on Brill.
- 6 best note apps for iOS
- Instructions on how to share notes on iPhone
- How to arrange notes by name or date on iPhone and iPad
- How to create a note on the iPhone lock screen
How to write voice notes on iPhone
Step 1:
Users download the Brill app for iOS according to the link below.
- Download the Brill iOS app
Step 2:
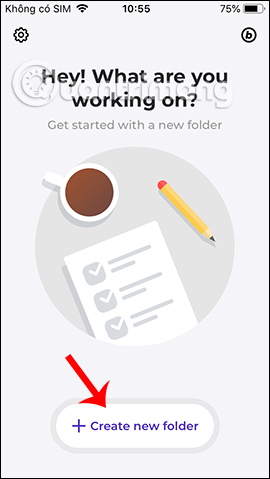
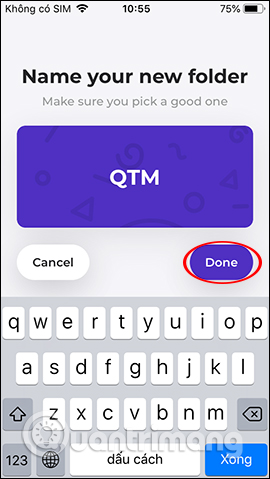
In the app interface we click Create New Folder To create a note management folder, more convenient to access. Enter The folder name And Press Done To create.
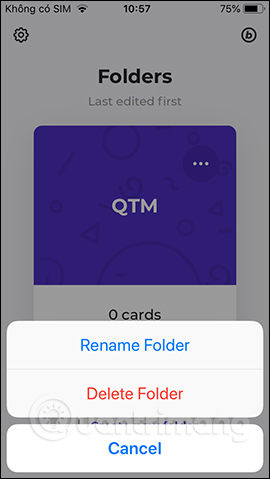
The new folder result has been created and there is no note in it. click Create New Folder to create a new folder. click The 3 dots icon To choose the folder name, or delete the created folder.

Step 3:
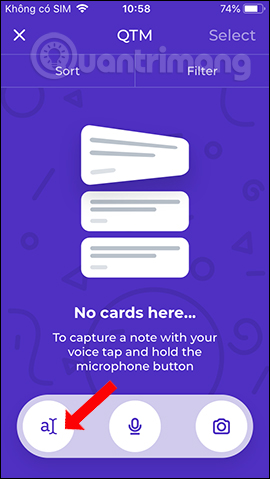
Click the folder to create a note. Here users have 2 options to create notes With 2 different icons, including ManualInput And Voice input .
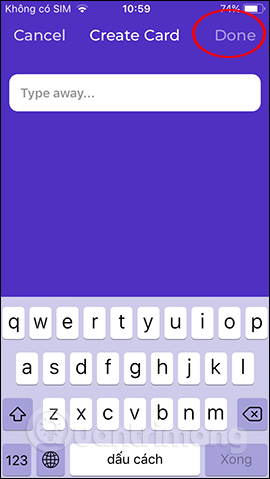
To enter manually by hand, click The letter icon a to Write a note As usual. Click Done To save the newly created note.
Step 4:
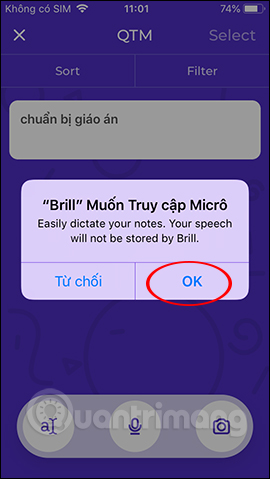
To Enter a note by voice , click The microphone icon , then agree to The speech recognition application , press OK. then agree to Brill Use the microphone on the device , press Ok. Note that in Order to perform this function, the iPhone needs to have a network connection to use.

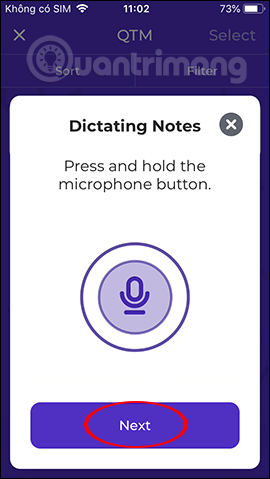
Next, the app will guide readers to the voice recording operation, click Next to continue. Finally click Done to close the interface.
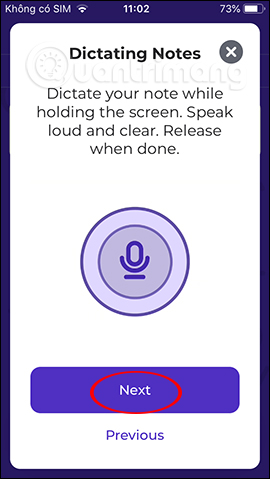
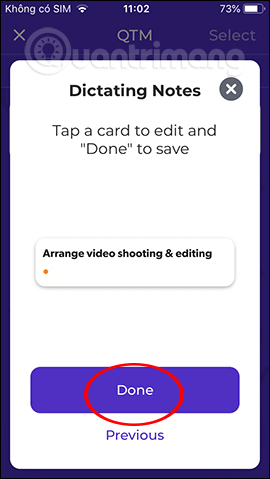
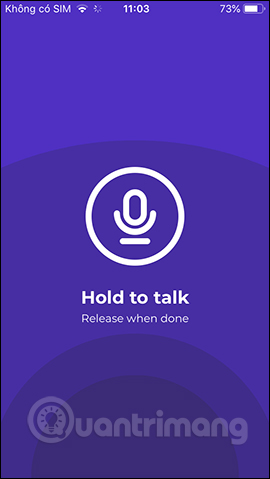
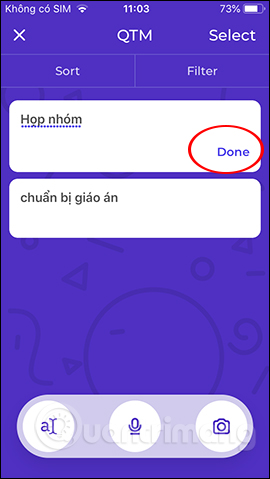
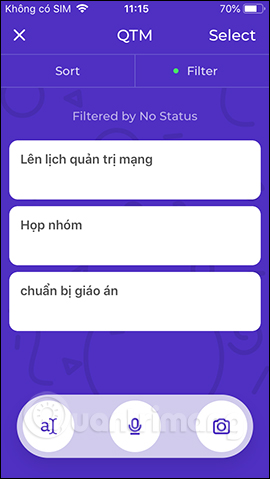
Users Press and hold the microphone icon While speaking. The voice must be loud, clear and slow word by word so that Brill can easily identify the word. When the content is over, release your hand and will see the notes on the Brill interface, Click Done To save. We then write voice notes.
Step 5:
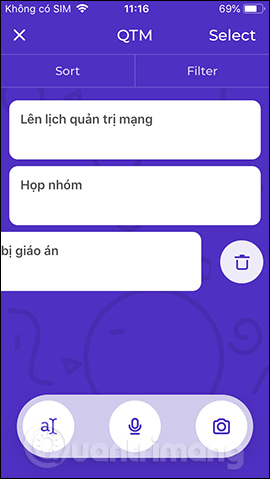
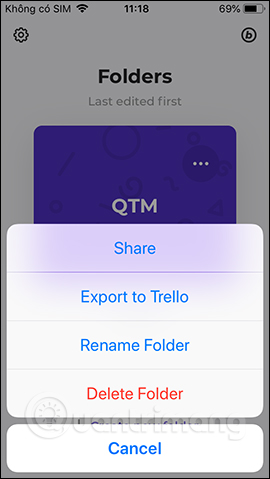
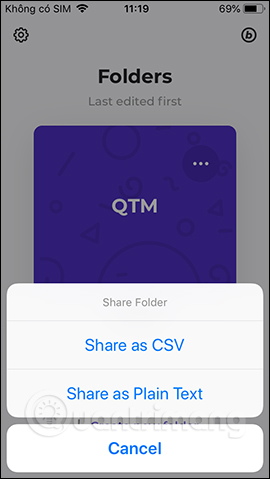
In the display interface, Swipe the left to delete the Created Note . Click The x sign icon To return to The main Brill application interface . click The 3 Dots Icon At the folder name with additional sharing options, export notes to Trello. Can Share notes Into CSC or txt files.
Step 6:
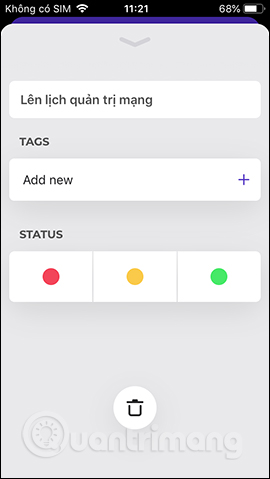
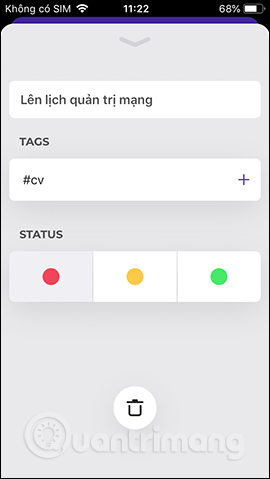
Click the note content again to edit the content and add the tag. In The Tags section Click Add new and then enter the tag. The Status section Can choose to add a color section to categorize created notes.
Can create different tags for each note, or create the same depending on the content of the note.
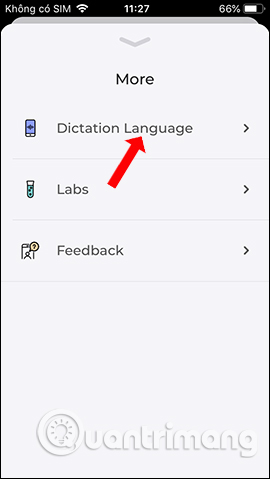
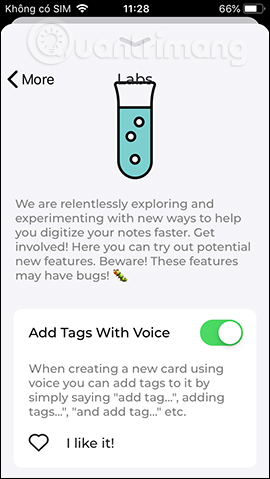
In addition, the app also supports Creating voice tags . Click The gear icon And select Labs . Activate Add Tags with voice mode And then read add tag, add tags or and add tag,. to add classification tags.
Step 7:
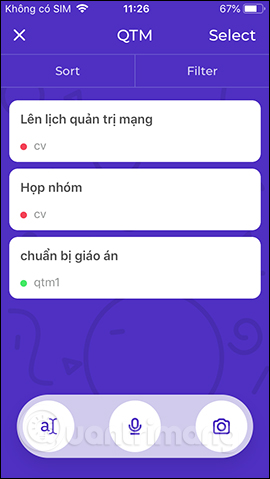
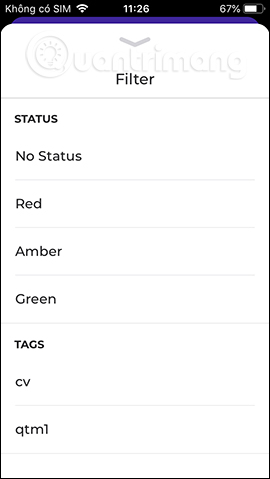
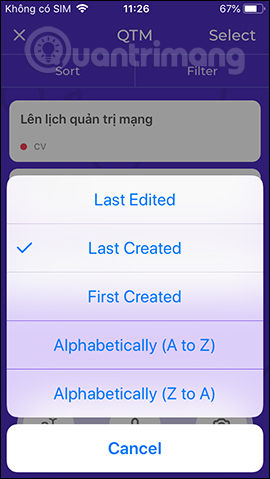
If multiple notes sort by color or tag name at the Filter , or through the display type in the Sort Section.
Step 8:
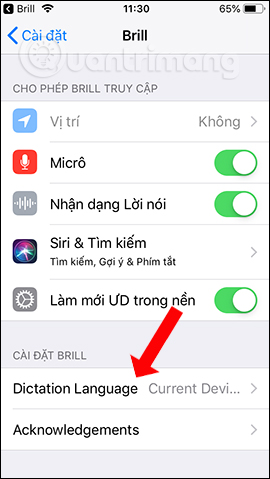
Brill voice recognition application through the language installed on the device. To Change the voice language Click Dictation language In the Settings interface. click Go to Settings To switch to the installation interface.
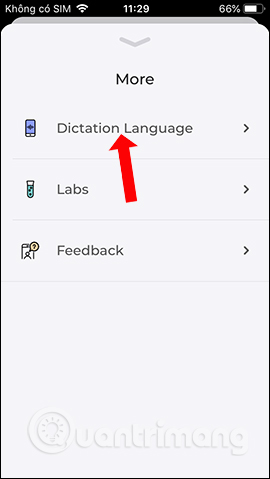

Click Dictation language And select another language, instead of selecting the Current Device Language.

Brill application has a very simple user interface, does not advertise on the interface. You are given the choice to use notes manually or via voice. Sorting options by tag or color also make it easier to manage notes on Brill.
I wish you all success!
FAQ
What should I prepare before I use brill to create notes via voice on iPhone?
Review the requirements in the guide, confirm that your device or software is compatible, and save important work before changing settings related to use brill to create notes via voice on iPhone.
Why might use brill to create notes via voice on iPhone not work as expected?
The most common causes are incompatible versions, missing permissions, incorrect settings, or an interrupted internet connection. Recheck each step and restart the app or device when appropriate.
Can beginners follow these use brill to create notes via voice on iPhone steps?
Yes. Follow the steps in order, avoid skipping confirmation screens, and compare your interface with the screenshots because labels may differ slightly between versions.
Related Articles
 How to Set Notes Notes Password on iPhone6 minutes read
 Instructions for Retrieving Deleted Notes on iPhone / iPad7 minutes read
 How to Create Notice to Delete Notes on iPhone5 minutes read
 How to Share Notes on iPhone4 minutes read
 How to Create a Personal Voice on iPhone3 minutes read
 How to Pin Notes on Apple Notes - Mark Important Notes4 minutes read
Reader Comments 0
Sign in with email or Google to join the discussion.