How to Record Voice on iPhone
iPhone has the Voice Memos application that allows us to record and edit voice recordings. You can use this app to record your own voice, record lecture content, and more. After recording the memo, you can trim it to remove silent passages or irrelevant information
Table of Contents
Send audio messages on Messages
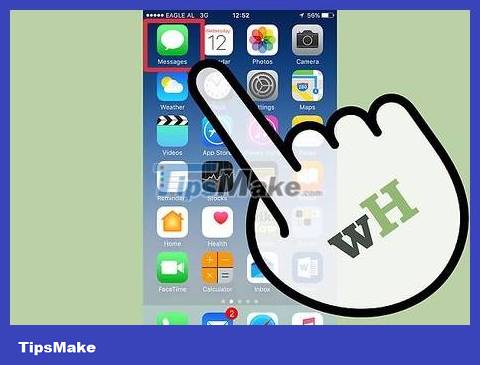
Open the Messages messaging app. You can quickly send voice messages to iMessage contacts using the Messages app.

Open a chat. You need to talk to an iMessage user to be able to send a voice message. Check the messages in the chat and the title bar, if they are green it means you two cannot chat via iMessage. If you see blue, you can start sending voice messages.
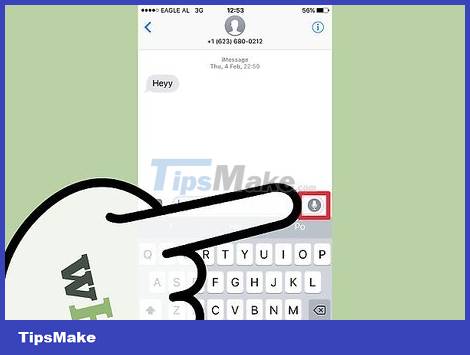
Press and hold on the microphone-shaped button next to the iMessage field. This button only appears when you're chatting with an iMessage user.
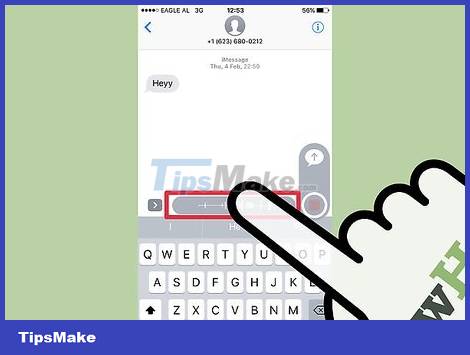
Record a voice message while holding down the microphone button. Just hold down this button, you can record for as long as you like.
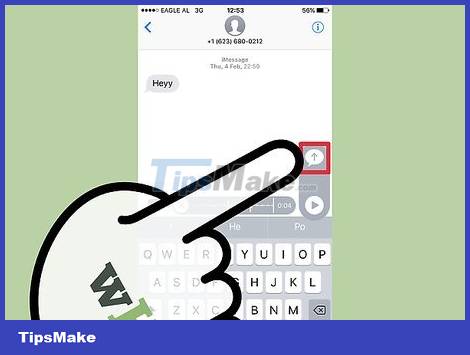
Swipe your finger to the Send button to send. The voice message will be sent immediately to the other person. If you want to cancel, release your finger and tap the "X" next to the recording.
Record a voice memo
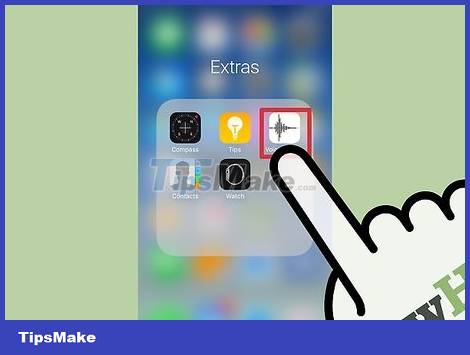
Open the Voice Memos app, usually located in the "Extras" folder on your home screen. The app has an audio graph icon on a white background.
You can also hold down the Home key to launch Siri and say "Record a voice memo" to start the app.
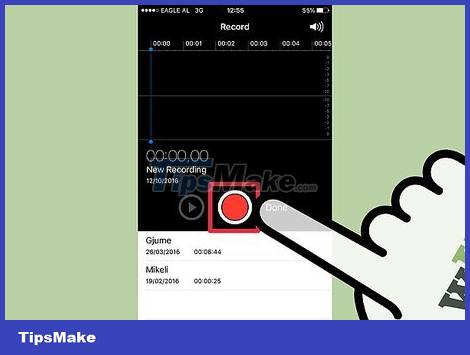
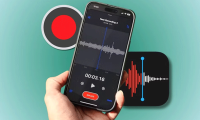
Click the Record button to start recording. Sound will be captured immediately using the iPhone's microphone. The closer you place your phone to the source of the sound, the clearer the sound quality will be.
You'll get better quality recordings if you use Apple earbuds with a built-in microphone. When recording on the iPod Touch, you need to use headphones because the iPod Touch does not have a microphone.
Phone cases can obstruct the microphone. You should remove your iPhone from the case to get the best recording.
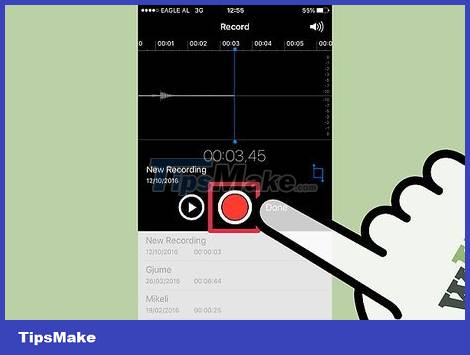
Click the Record button again to pause recording. You can pause and resume as many times as you want.
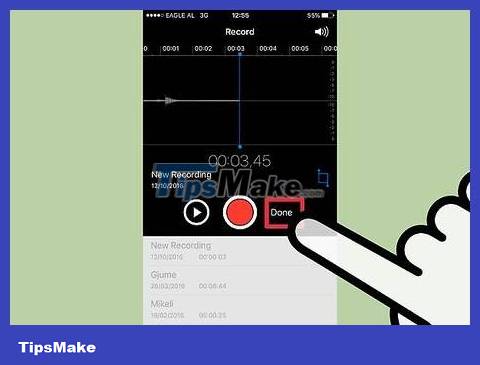
Click "Done" after recording to save. You will be prompted to name the recording. After entering the name, tap "Save" to save the file to the voice memos list.
While there's no real limit on length, the iPhone can run out of memory if the recording is too long. Essentially, each minute of recording is 480 KB, meaning an hour-long recording would be about 30 MB.
Cut a voice memo
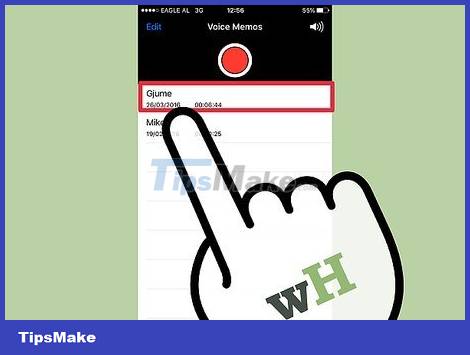
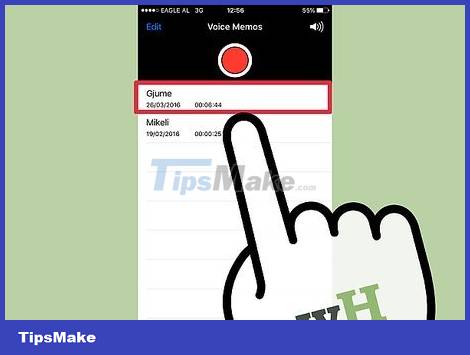
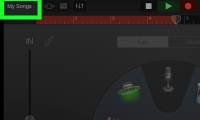
Click to open a recording in the Voice Memos list. You'll see this list when you start the Voice Memos app. You can trim recordings to remove unnecessary segments or divide a long file into multiple parts.
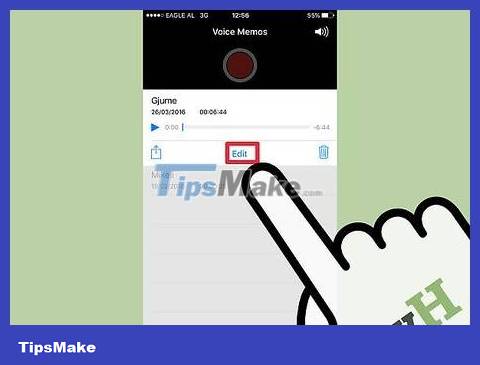
Tap the "Edit" button below the voice memo. This button appears only after you select a recording.
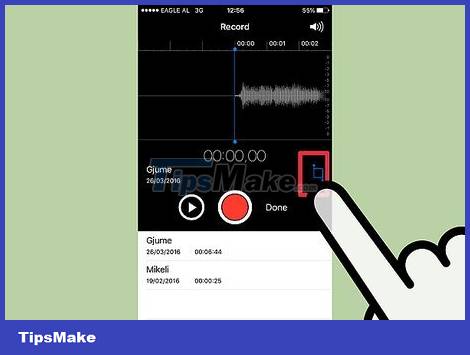
Click the blue frame to open Trim mode. Red bars will appear at the end of each recording.
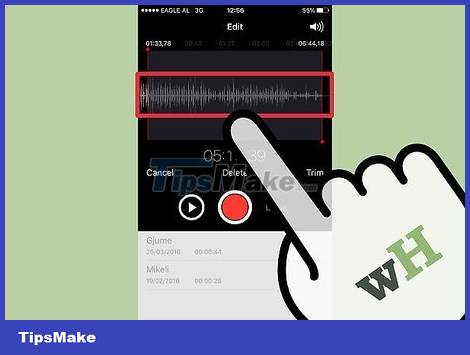
Drag the red bars to set new start and end points for the recording. You can click and drag each bar to change the starting and ending positions. Use this action to remove silent passages at the beginning or end of a recording, or to select audio that you want to create into a new file.
You can cut multiple times to get the desired results. For example, you cut once to remove the silent part at the beginning, then cut again to remove the silent part at the end of the recording. You can then trim part of the recording to create a new file.
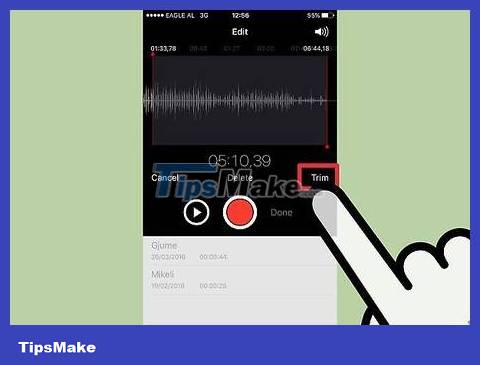
Click "Trim" once you're done setting up the new start and end points. You will be prompted to create a new recording from the cut section, or save over the original.
If you choose to save new, the audio you selected with the Trim tool will become the new file, while the original remains unchanged.
If you choose to overwrite the original file, only what you set with the Trim tool will be retained.
Share recording files
Open the voice memo you want to share in the Voice Memos app. You will see a list of recordings after opening the Voice Memos application. From here, you can send audio memo files to others. The voice memo will be sent in M4A format and you can play it on most modern devices that support audio files.
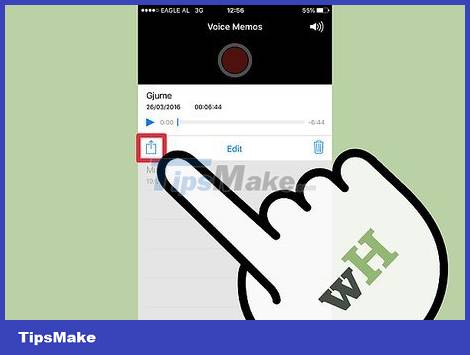
After selecting the file, click the Share button below the recording. This option looks like a square with an arrow pointing up.
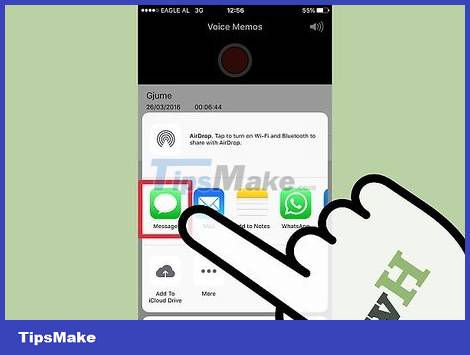
Choose how to share files. You can send via Mail, Messages or pre-installed messaging applications on the device. If you don't see the messaging app you want, tap the "." button and turn it on.
Transfer recordings to computer. You can save audio memos to your computer through iTunes.
Connect iPhone to computer and open iTunes.
Select the phone icon at the top of the screen, then click "Music" on the left side of the menu.
Make sure that the "Sync Music" and "Include voice memos" options are checked.
Click the "Sync" button and your voice memos will be copied to your iTunes library.
Was this article helpful?
Your feedback helps us improve.
Related Articles
 How to Improve the Sound Quality of Voice Recordings on iPhone5 minutes read
 How to Record Voice on iPad5 minutes read
 How to use Voice Memos on iPhone and iPad4 minutes read
 How to record, record Skype calls and record Skype videos in Windows 102 minutes read
 How to Record Voice on Phone7 minutes read
 Top 15 applications to 'transform' your voice on iPhone6 minutes read
Reader Comments 0
Sign in with email or Google to join the discussion.