How to use a virtual machine to test Windows 10 Insider builds does not worry about system failure
The Windows Insider Preview program allows any user to install the latest builds of Windows 10 to test and experience the new features built into the operating system.
You can easily register and install the latest builds of Windows. However, it is recommended that you do not use these versions to make the operating system on your Windows computer because the preview builds may be corrupted and unstable so it may cause errors during use. on your system.
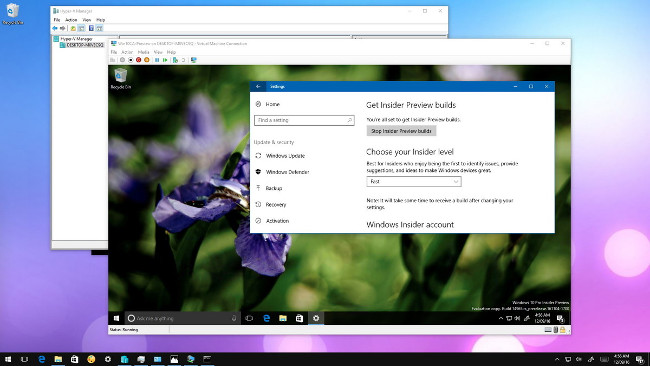
However, if you still want to test the latest version of Windows 10 Insider builds, the safest and easiest method is to install a virtual machine on your Windows computer.
If you're using Windows 10 Pro, you can install Hyper-V on your computer to create a virtual machine, check the operating system without fear of system errors or data errors.
1. Prepare
- Computers with hardware can run Hyper-V.
- An ISO file has the latest version of Insider Preview build of Windows 10.
- Copyright product key to activate Windows 10 .
2. How to install Hyper-V on Windows 10?
Hyper-V is Microsoft's virtual technology, you can install on Windows 10 to create and manage multiple virtual machines running different operating systems on a physical computer. This feature is an important part of the operating system, but you must install it manually and the easiest way to add Hyper-V to your system is by using the Control Panel.
2.1. How do I know if my computer supports Hyper-V?
Important note:
Hyper-V is only available on Windows 10 Pro, Enterprise, and Education.
In addition, your computer must meet the hardware parameters below:
- 64-bit CPU and supports Second Level Address Translation (SLAT).
- The processor must support VM Monitor Mode Extension (VT-c on Intel chips).
- Minimum RAM 4 GB.
In addition, make sure that Virtualization Technology and Hardware Enforced Data Execution Prevention options are enabled on the BIOS system (usually these settings are enabled by default).
To check if your computer supports Hyper-V by using Systeminfo.exe:
1. Open Command Prompt .
2. On the Command prompt window, enter the command below and press Enter:
systeminfo.exe
3. Find the Hyper-V Requirements section , and if yes , you can run Hyper-V.
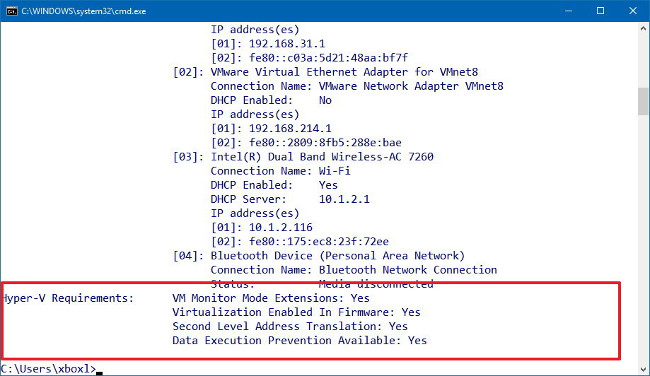
If the display command No at the Hyper-V Requirements section means that your computer does not support the Hyper-V feature or you must enable the correct settings.
2.2. How to install Hyper-V?
Follow the steps below to install Hyper-V:
1. Open Control Panel .
2. On the Control Panel window, find and click Programs .
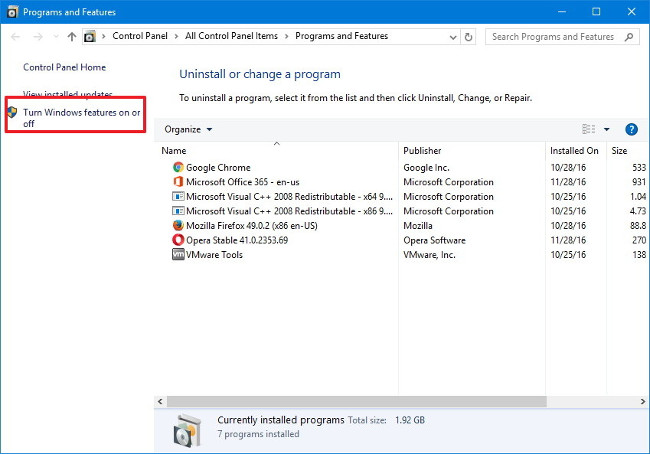
3. Click Turn Windows features on or off .
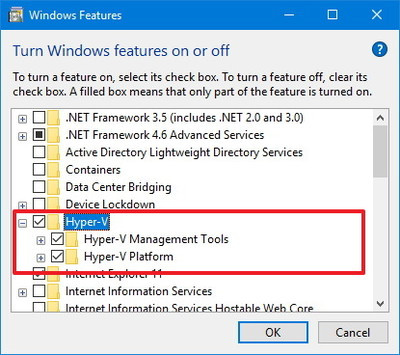
4. Check the Hyper-V option and make sure that the Hyper-V Management Tools and Hyper-V Platform options are also selected.
5. Click OK to start the process.
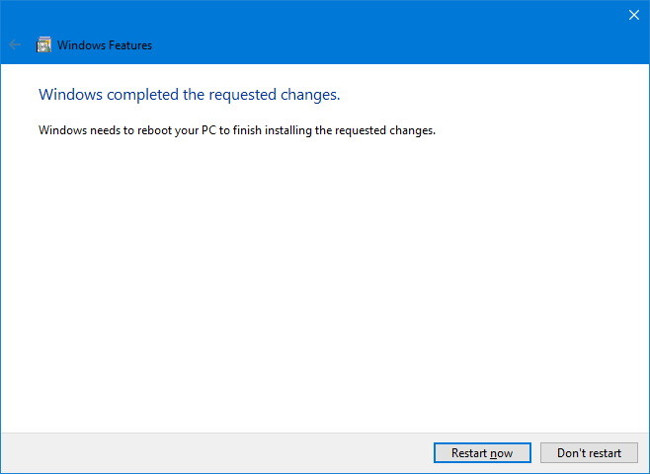
6. After the installation process is complete, click Restart Now to apply the change.
3. Use Hyper-V to create a virtual machine
After you have finished installing Hyper-V, the next step you need to do is to create a Windows 10 virtual machine.
Before performing the steps you must create a virtual switch to activate the device connected to the Internet:
1. Open Start , then enter Hyper-V Manager in the Search frame and press Enter to open the Hyper-V Manager window.
2. Click the Action menu.
3. Select New and then click Virtual Switch Manager .
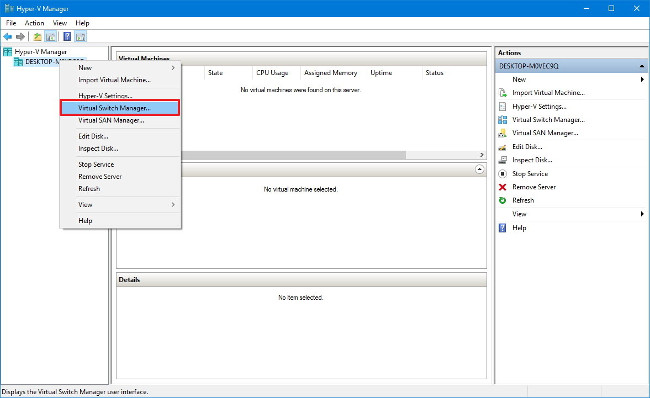
4. In the left pane, select New virtual network switch .
5. In the right pane, select External .
6. Click the Create Virtual Switch button.

7. Put any name you want (eg MyVirtualSwitch).
8. At the connection type, make sure the network adapter (network adapter) is selected as External network .
9. Click Apply .
10. Click OK to complete the process.

After you have created the virtual switch, follow the steps below to create a new virtual machine:
1. Open Start, then enter Hyper-V Manager in the Search frame and press Enter to open the Hyper-V Manager window.
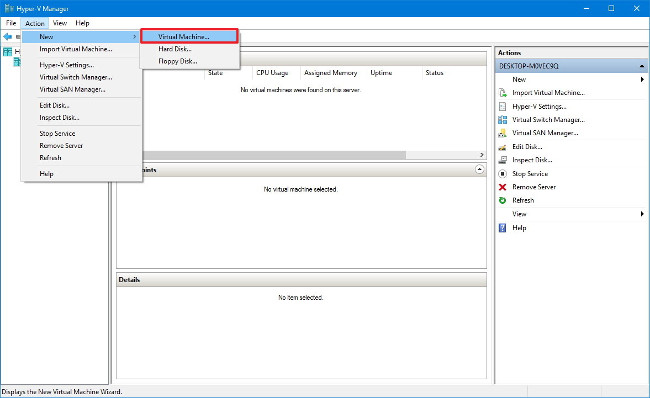
2. Click the Action menu.
3. Select New and then click Virtual Machine .
4. Click Next to start the process.
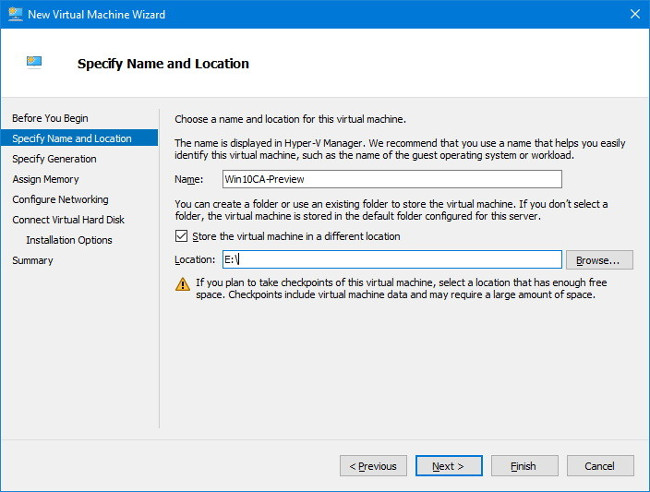
5. Enter any name you want to set for the virtual machine (such as Win10CA-Preview).
6. Use the default location to store virtual machines or select Store the virtual machine in a different location to enter a new path.
7. Click Next to continue.
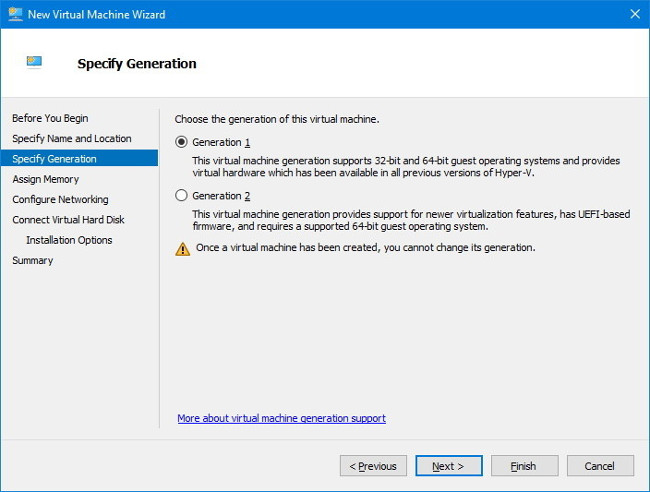
8. You will create a test machine, so you can leave the default option selected as Generation 1.
9. Click Next .
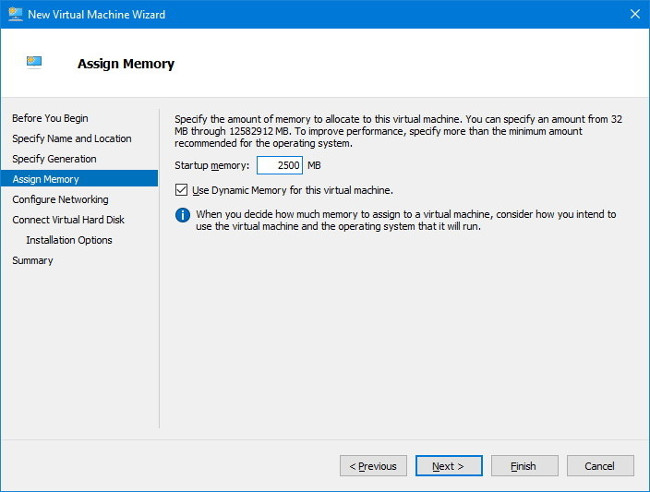
10. Enter the amount of RAM you want to allocate to the virtual machine. For example, enter 2048 to allocate 2 GB of memory to the virtual machine.
11. Click Next .
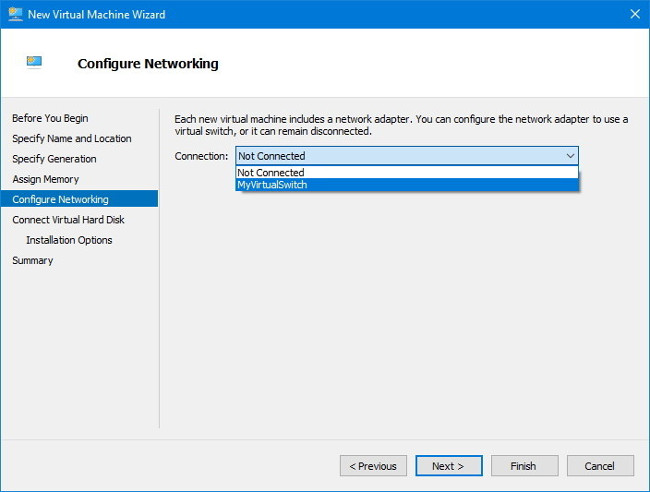
12. On the Configure Networking window, select the virtual switch you created earlier from the dropdown menu.
13. Click Next .
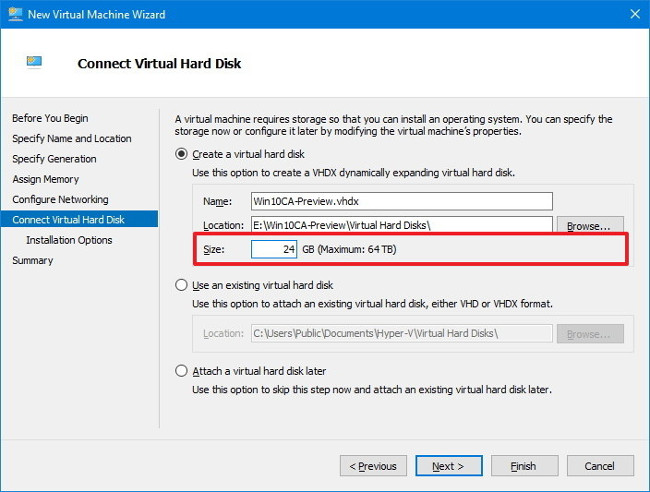
14. You can keep the default settings to create a virtual hard drive, but in Size please make sure you have set up a more suitable hard drive size, such as 30 GB to 40 GB .
15. Click Next to continue.
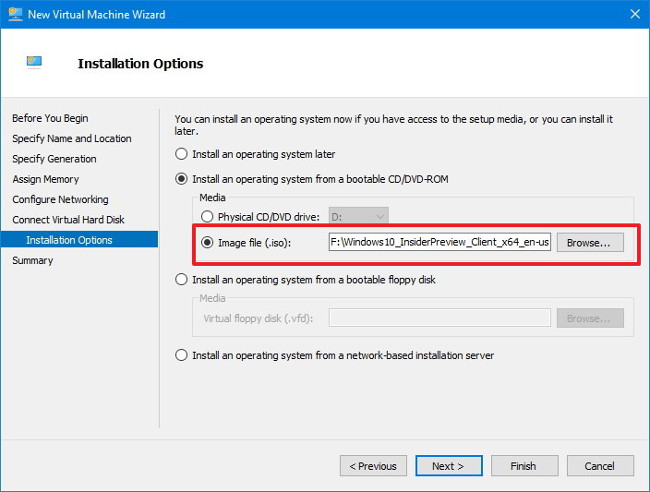
16. On the Installation options window, select the option Install an operating system from a bootable CD / DVD-ROM .
17. Select Image file option (.iso).
18. Enter the path of the ISO file included with the Windows 10 installation file.
19. Click Next .
20. Click Finish to complete the process.
4. How to install Windows 10 on a virtual machine?
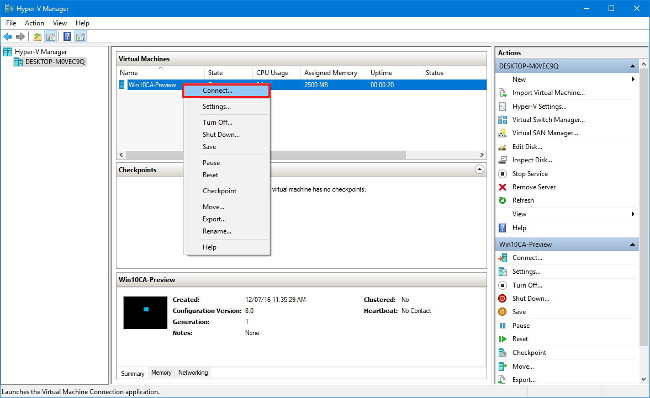
1. Open Hyper-V Manager, in the Virtual Machine section, right-click the new device you just created and select Connect .
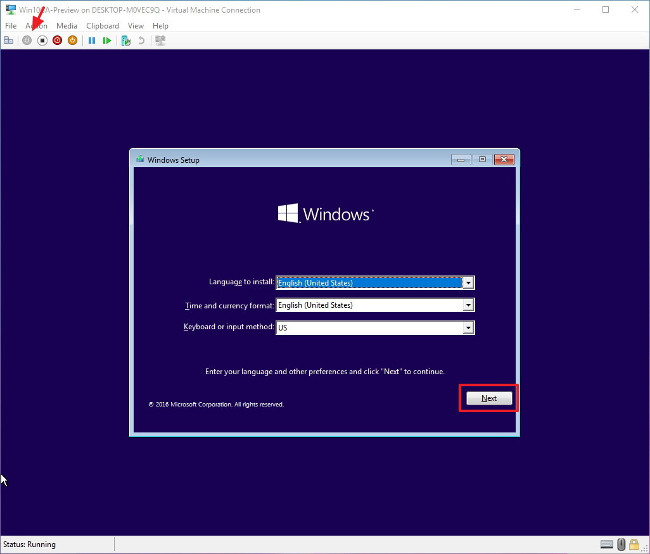
2. Click the Power button to start opening the virtual machine.
3. Click Next on the Windows 10 setup window.
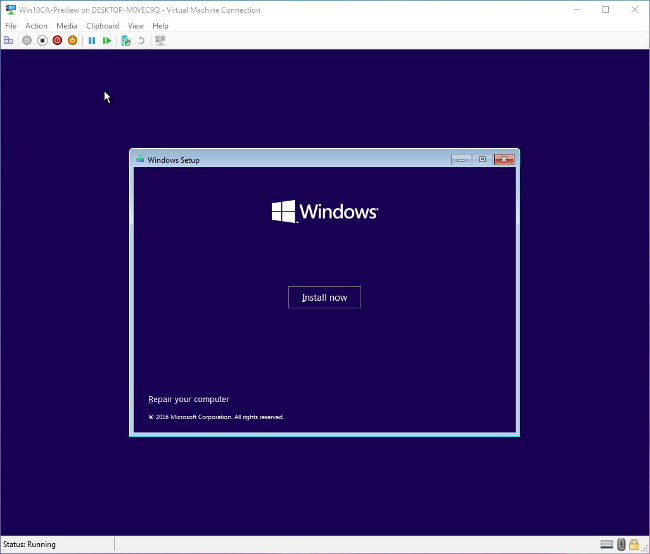
4. Click Install .
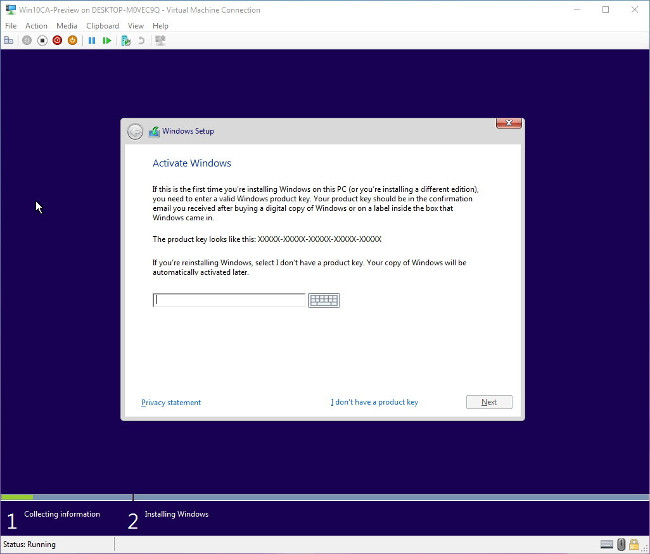
5. Enter the product key if notified (or you can select the option I don't have a product key to skip this step without entering the product key).
6. Click Next .
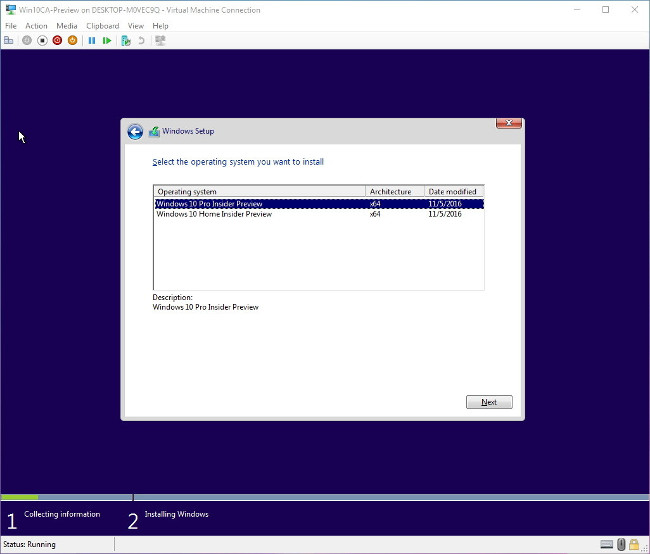
7. Select the Windows 10 version that you have the product key for.
8. Click Next .
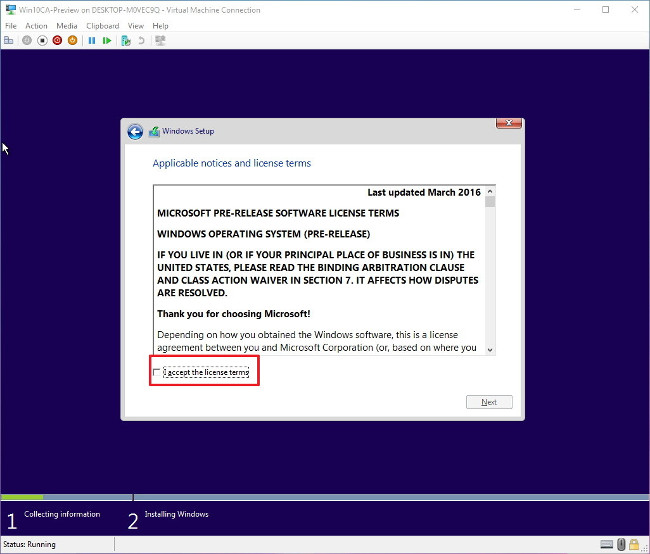
9. Accept the terms.
10. Click Next .
11. Click the Custom option : Install Windows Only (advanced).
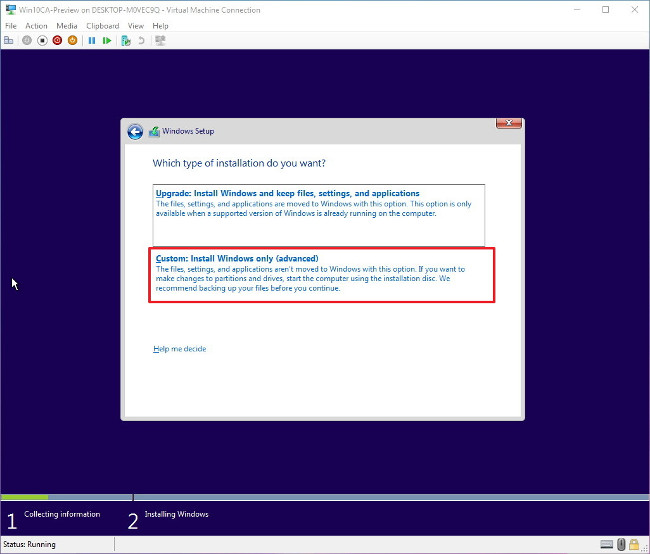
12. Click Next to begin the installation process.
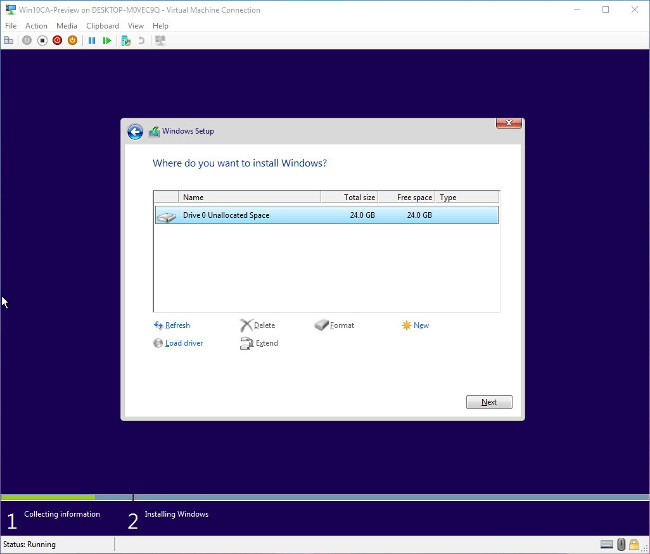
After the installation process finishes, follow the on-screen instructions to complete and note that using a Microsoft account to create a local profile on the computer.
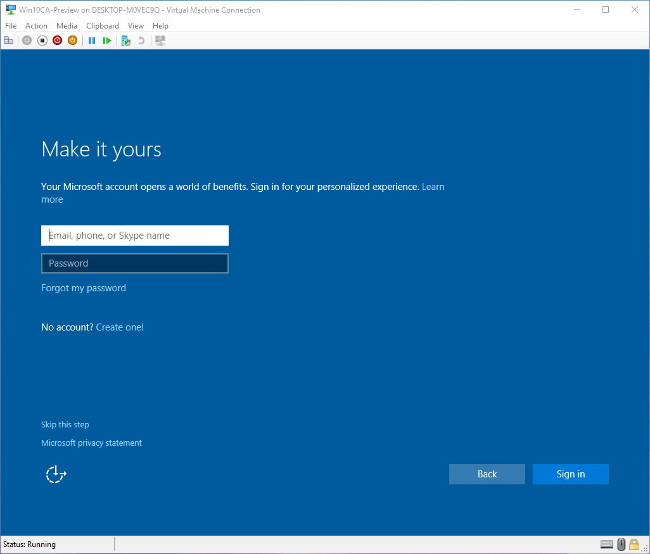
5. Activate and register virtual machine
The final step is to make sure that your virtual machine has been activated properly and registered on the Fast Ring.
1. Open Settings .
2. Find and click Update & security .
3. Click on Activation .
4. If you enter the correct product key during the installation process, your computer has been activated, or else click the Change product key to enter a new product key. Or you can click the link Go to Store to buy a new copyrighted Product key.
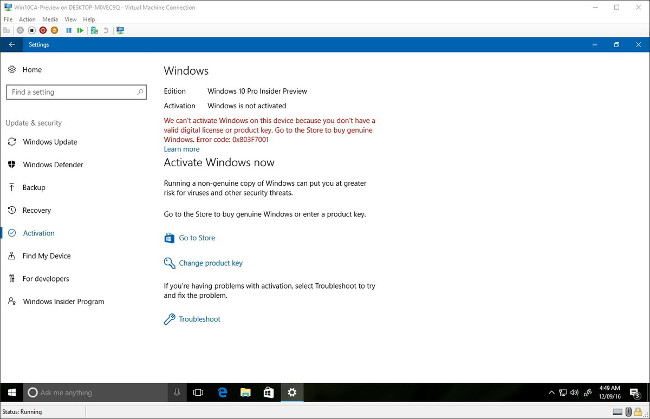
Follow the steps above to install the latest version of Windows 10 available and use your Microsoft account during the installation process, then your virtual machine will automatically be 'listed' in Slow Ring by Windows Insider Preview program.
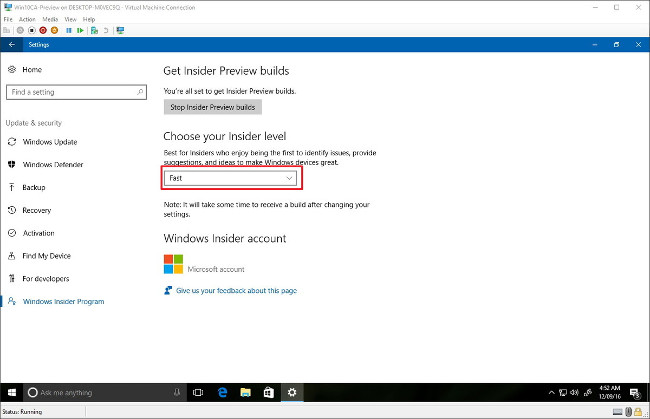
In case if you are looking to check for the latest preview, then you have to change the PC Ring to Fast:
1. Open Settings .
2. Find and click Update & security .
3. Click the Windows Insider Program .
4. In Choose your Insider level, select Fast from the dropdown menu.
Refer to some of the following articles:
- How to check if your computer is running Windows 10 Hyper-V?
- Fix the error of not adjusting screen brightness on Windows 10
- 3 ways to set up different background images on each Windows 10 screen
Good luck!
You should read it
- ★ How to get Windows 11 Dev builds in case your PC doesn't meet the minimum hardware requirements
- ★ How to Complete Quests As a Windows Insider
- ★ How to switch from Insider builds to Stable of Windows 11
- ★ Virtual machines without TPM 2.0 are prohibited from installing Windows 11 Insider Preview
- ★ The latest versions of Windows 10 will bring significant improvements to PC and mobile devices