Instructions for uninstalling Windows Insider Program
The Windows Insider Program allows you to experience new features early, but it comes with the risk of system errors and instability. If you no longer want to use this test build, exiting the program is necessary to ensure performance and stability of your computer..
Microsoft created the Windows Insider Program so that developers and enthusiasts can try out new updates early. The program helps gather feedback, detect bugs, and improve the system before the official release.
Instructions for removing Windows Insider Program
Step 1 : Press the Windows + R key combination to open the Run window

Step 2 : Enter regedit in the blank box to open the Registry Editor window

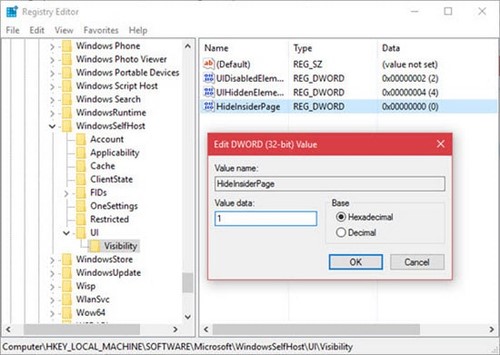
Step 3: In the Registry Editor window, find the key with the path
HKEY_LOCAL_MACHINESOFTWAREMicrosoftWindowsSelfHostUIVisibility

Step 4 : In the right panel, right-click and select New => DWORD (32-bit) Value

Step 5: Enter the new key name as HideInsiderPage

Step 6: Double-click thenewly created HideInsiderPage key, change the Value data from0to1, then click OK .
Step 7 : Go to Settings > Update & Security to check. The Windows Insider Program item is now hidden.
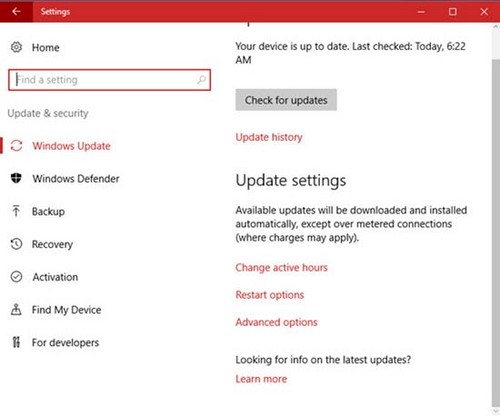
If you want to show the program again, follow the steps above but change the Value data from 1to0.
Here are detailed instructions to remove Windows Insider Program. You can follow and share the results. If you want, you can still install Win 10 Insider at any time. However, you cannot upgrade directly to Insider from Windows 7 or 8. With these versions, you need to completely reinstall to use Windows 10 Insider.