How to Unzip a File
This wikiHow teaches you how to extract (or 'unzip') a ZIP folder's contents. Extracting files from a ZIP folder will decompress the files, allowing you to open and run them properly. You can easily unzip ZIP folders by using the built-in...
Table of Contents
Method 1 of 3:
On Windows
-
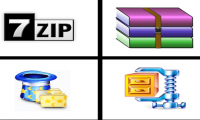
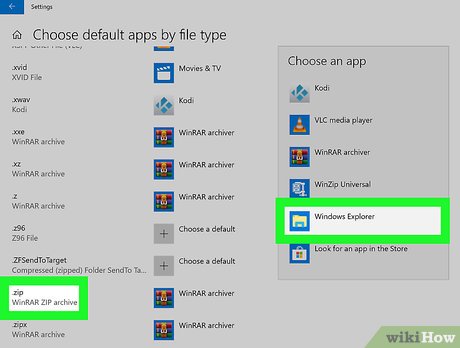 Make sure your computer is set to use default software for ZIP folders. If you've installed a third-party program like WinZip, WinRAR, or 7-Zip, you won't be able to unzip files according to the steps in this method. You can ensure that your computer uses the default software instead by doing the following:
- Open Start .

- Type in choose a default app, then click Choose a default app for each file type in the Start menu.
- Scroll down to the .zip heading, then click the program to the right of it. If you can't find the .zip option, your computer is set up to use the default software to open ZIP folders.
- Click Windows Explorer in the pop-up menu.
- Open Start
-
 Find the ZIP folder. Go to the folder in which the ZIP folder is stored.
- Skip this step if the ZIP folder is on the Desktop.
-
 Double-click the ZIP folder. Doing so opens the ZIP folder in File Explorer.
 -
 Click Extract. It's a tab at the top of the window. Doing so opens the Extract toolbar near the top of the window.
 -
 Click Extract all. This is in the Extract toolbar. A new window will open.
 -
 Select a different extraction location if necessary. If you want to place the unzipped folder in a location other than the current folder in which the ZIP folder is stored, do the following:
- Click Browse... on the right side of the window.
- Click the name of the folder in which you want to store the unzipped folder.
- Click Select Folder.
-
 Click Extract. It's at the bottom of the window. Your ZIP folder's contents will begin extracting to an unzipped folder in your selected location.
- If the "Show extracted files when complete" box isn't checked, check it before you click Extract to ensure that the extracted folder will open upon completion.
-
 Wait for the unzipped folder to open. Once the extraction completes, the unzipped folder will open to reveal the ZIP folder's extracted contents.
- If the extraction completes and the unzipped folder doesn't open, go to the location in which the unzipped folder is stored and double-click the unzipped folder to open it.
Method 2 of 3:
On Mac
-
 Find the ZIP folder. Go to the location in which the ZIP folder you want to extract is stored.
 -
 Copy the ZIP folder to a different location if necessary. Since extracting a ZIP folder on a Mac causes the unzipped version of the folder to be created in the same folder in which the ZIP folder is stored, you may want to move your ZIP folder to a different folder:
- Click once the ZIP folder to select it.
- Click Edit in the upper-left side of the screen.
- Click Copy in the drop-down menu.
- Go to the folder in which you want to store the ZIP folder.
- Click Edit again, then click Paste.
-
 Double-click the ZIP folder. Doing so prompts the ZIP folder to begin extracting immediately.
 -
 Wait for the unzipped folder to open. Once the ZIP folder is done extracting, the unzipped version of the folder will open to display the extracted contents.
Method 3 of 3:
On Linux
-
 Open Terminal. Click the Terminal app icon, which resembles a black box with a white ">_" on most versions of Linux.
- You can also press Alt+Ctrl+T to open the Terminal window.
-
 Switch to the ZIP folder's directory. Type cd and a space, type the path to the folder in which the ZIP folder is located, and press ↵ Enter.
- For example, if the ZIP folder is in the "Downloads" directory, you would enter cd Downloads into Terminal.
- If the ZIP folder is in a folder called "ZIP" inside the "Downloads" folder, you would need to enter cd /home/name/Downloads/ZIP (where name is your username) instead.
-
 Enter the "unzip" command. Type in unzip file.zip where file is the folder's name, then press ↵ Enter.
- If the file's name has spaces in it, you'll place quotation marks on either side of "file.zip" (e.g., unzip "this is a zipped folder.zip").
-
 View the unzipped folder's files. Go to the folder in which you unzipped the ZIP folder to do so. You should see a list of files and folder which were previously in the ZIP folder here.
- Unlike Windows and Mac operating systems, Linux's "unzip" command doesn't create a new, unzipped folder for the extracted files.
Was this article helpful?
Your feedback helps us improve.
Related Articles
 How to Extract ZIP Files7 minutes read
 The best RAR file extraction application on Android5 minutes read
 How to Unzip Files in Linux3 minutes read
 Top software to extract files and compress files today11 minutes read
 How to Unzip Files on Linux3 minutes read
 How to extract multiple files on Windows 105 minutes read
Reader Comments 0
Sign in with email or Google to join the discussion.